Easily Configure Workplace Sensors
Administrators can now configure the sensors in use for their site using the new Configure Sensors screen in the Admin module. This new screen allows administrators to add and maintain sensor information, including the sensor ID number, location, and vendor.
The Configure Sensors screen is accessed by selecting Admin → Space → Sensors from the sidebar menu. When the screen displays, select a building from the Building drop-down list to view existing sensors associated with the selected building. To add a new sensor, simply click the Add Sensor button in the upper-right corner of the screen.
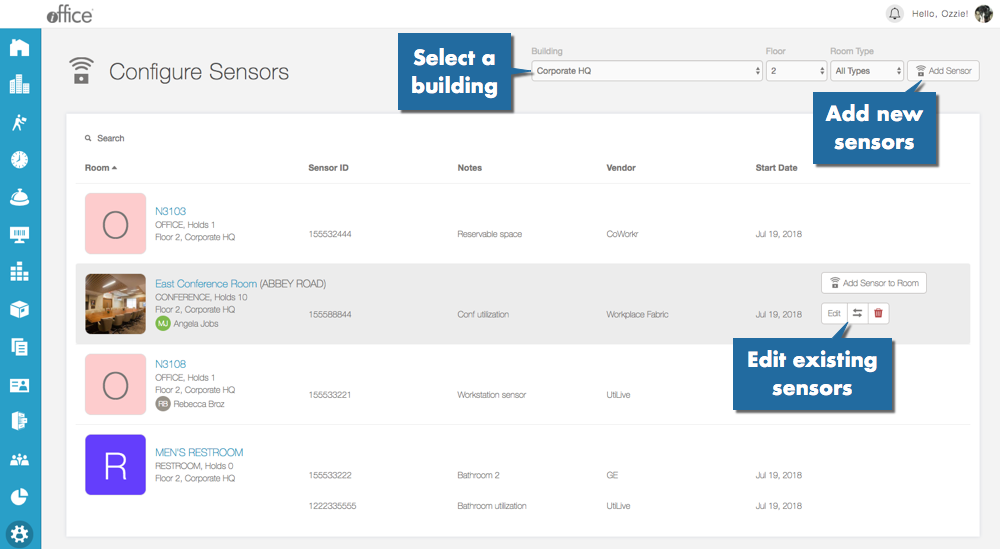
You can also make changes to existing sensors by hovering the mouse cursor to the right of the sensor to display three buttons. For example, to move a sensor to a new location, click the  (Move Sensor) button associated with the sensor. The Choose New Room window displays, where you can select a new location for the sensor.
Once the location is selected, click the Save button. The sensor is assigned to the new location. If a sensor was added incorrectly, such as with an incorrect sensor ID or vendor, you can easily remove the sensor by clicking the  (Remove) button associated with the sensor. A confirmation message displays, allowing you to confirm the sensor should be removed.
Using the new Sensor Configuration screen, administrators can now easily manage utilization sensors, providing them with complete control over sensor assignments at their facility. If you have any questions, please call 713-526-1029, or send an email to support@iofficecorp.com.