Stagger arrival times
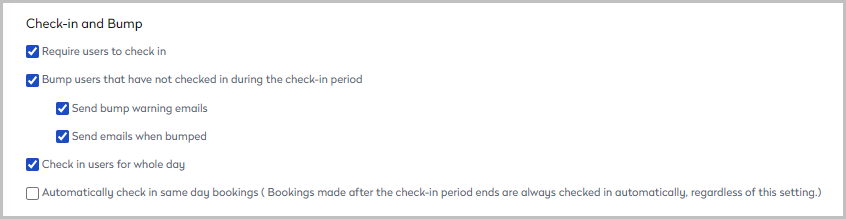
Stagger when employees arrive on-site by applying different check-in windows to groups. Together with the optional bump feature, those who arrive after the check-in period may have their bookings canceled.
No location information from mobile devices is shared with the Condeco cloud. Only the check-in time is stored.
Set arrival and check-in times for a group
- Navigate to Application Setup > Groups.
- Select Country and Group
- Click Resource Type > Personal spaces.
- Select the Application Setup action.
- In the Check-in period section enter the start time for the check-in period(s) and enter the total number of minutes that check-in is open for.
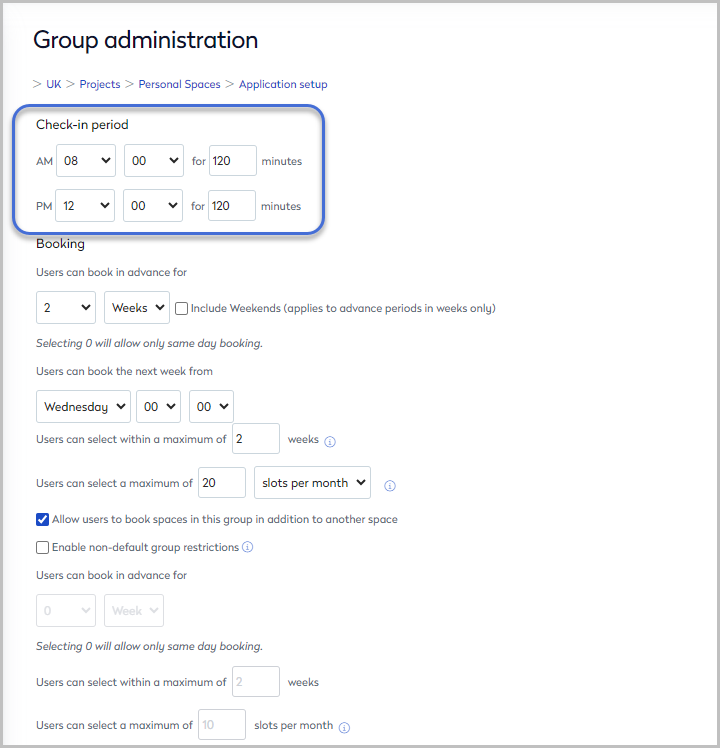
- Scroll down the Group Administration form to select your Check-in and Bump settings.
Report on users’ check-in and release times
Add check-in and release times to a Personal space Booking report to gain insight into your users’ movements and assist with your occupancy planning. The report can be displayed and filtered in Condeco, or exported to Excel or PDF format.
Edit an existing report
- Navigate to Reports and under Desk Reports click View Reports / Create New.
- Find the report you wish to edit on the list and click Run / Edit on the right.
- Click Show Field Selection Window.
- Tick Check-in time and/or Release time fields.
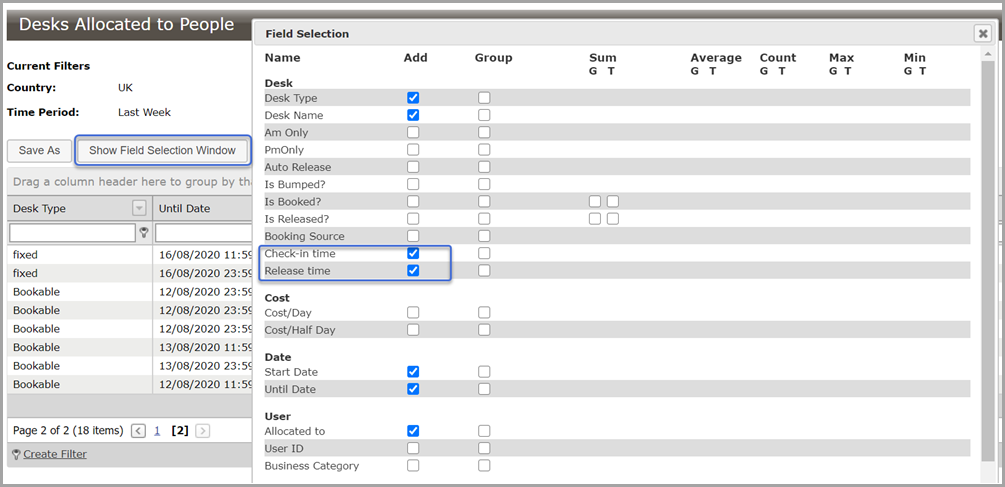
- Click Modify to save the ticked fields and run the report.
To save the modified report for future use, click Save As and enter a new name and description. Modified reports are listed under the Modified Standard Reports tab.
Create a new report
- Navigate to Reports and under Desk Reports click View Reports / Create New.
- Click Create New Report to open the New Report Wizard.
- Tick the required fields (and groupings and calculation type where appropriate).

- Click Next.
- Enter a name and description for the new report and click Finish.
New reports are listed under the Custom Reports tab.