Create and edit Vendors
Create a vendor company and apply services, and then create the vendor contacts to receive the tasks created by the service (vendor workflow).
How to create or edit a vendor
- Navigate to Application Setup > Vendors.
- Select the Country to display a list of existing vendors for the location.
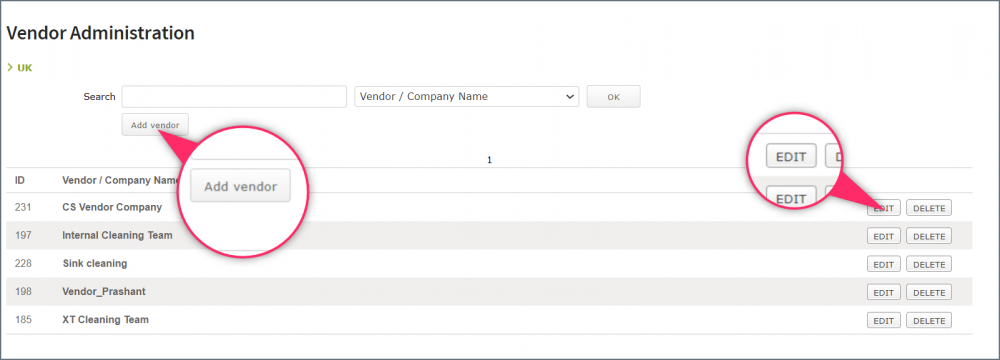
- Click Edit to edit an existing vendor or click Add vendor to create a new vendor.
- Enter or edit the vendor’s Company name and contact details. Note that the email address used here IS NOT used in the Vendor workflow.
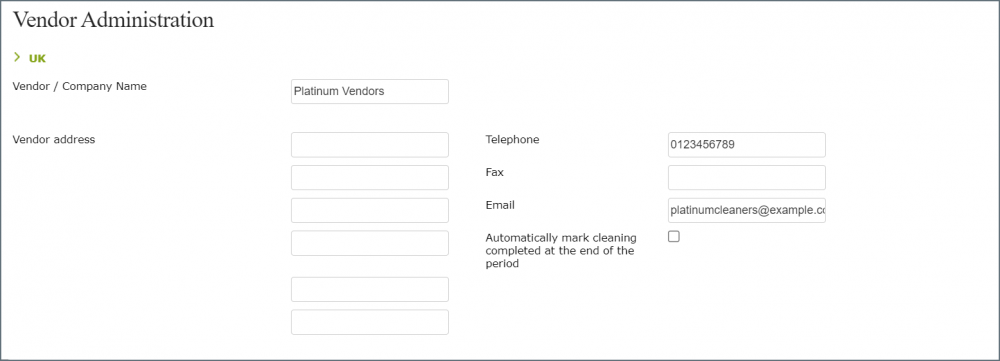
Cleaning vendors: If your cleaning vendors are not managing tasks on the Vendor Dashboard and you wish personal spaces to move to a Clean state automatically, tick Automatically mark cleaning completed at the end of the period. Learn more about workflow options.
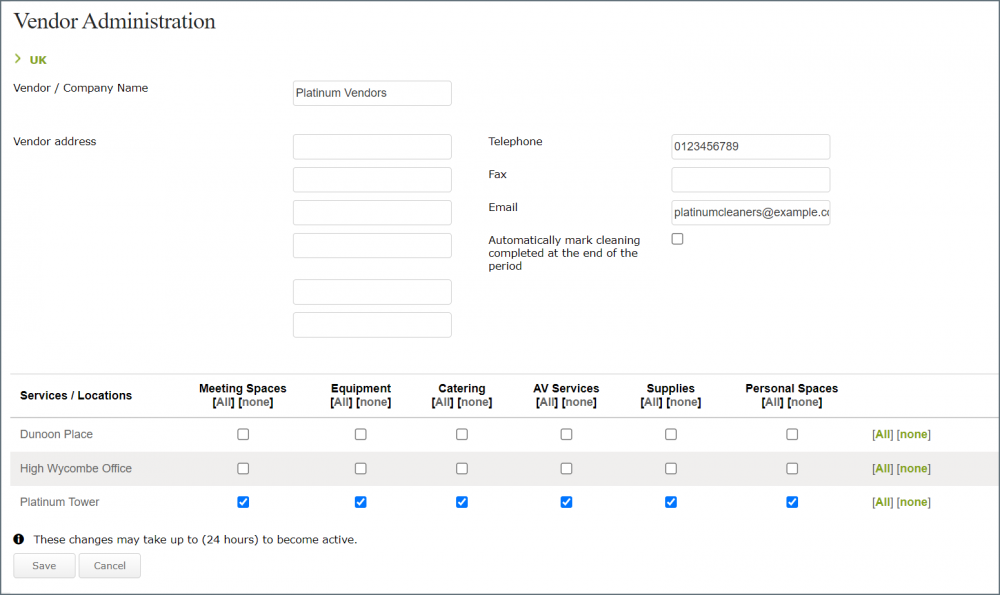
- Tick the services that the vendor will provide at the listed location(s) and click Save. Service types are described in the table below.
| Service | Description |
|---|---|
| Meeting spaces | Changing the layout/seating style of meeting spaces. |
| Equipment | Provision of equipment for meeting spaces such as training laptops, flip charts, and whiteboards. |
| Catering | Provision of food and drink services for meeting spaces. |
| AV Services | Audio/visual services. |
| Supplies | Provision of general supplies for meeting spaces such as stationery requirements. |
| Personal spaces | Cleaning services for personal spaces. |
- Now follow the steps below to create a vendor contact.
How to create a vendor contact
When you have created a vendor, you must create at least one vendor contact. The vendor contact receives the tasks from the vendor workflow and accesses a dashboard to view assigned tasks.
- Navigate to Application Setup > Vendors.
- Select the Country to display a list of existing vendors for the location.
- Click the Vendor / Company Name from the list on the Vendor Admin page (NOT the edit button to the right).
- Click Add vendor contact.
- Complete the contact details as required.
- Username: Used to sign in to the Vendor Dashboard.
- Email: Enter the email address for the inbox that will receive the task notifications.
- Tick Notify by email if required and for personal space cleaning vendors leave only send emails within # mins of the booking start time blank.
- Tick Vendor Administration to enable the vendor contact to update their tasks on the Vendor Dashboard and assign tasks to other vendor contacts. If unticked the Vendor Dashboard is read-only for the vendor contact.
- Move the Services / Locations the vendor contact will manage to the right-hand box. Only the services and locations that are selected for the Vendor company are listed.
- Click Save. An email is sent to the vendor contact with a link to activate the account and set a password.