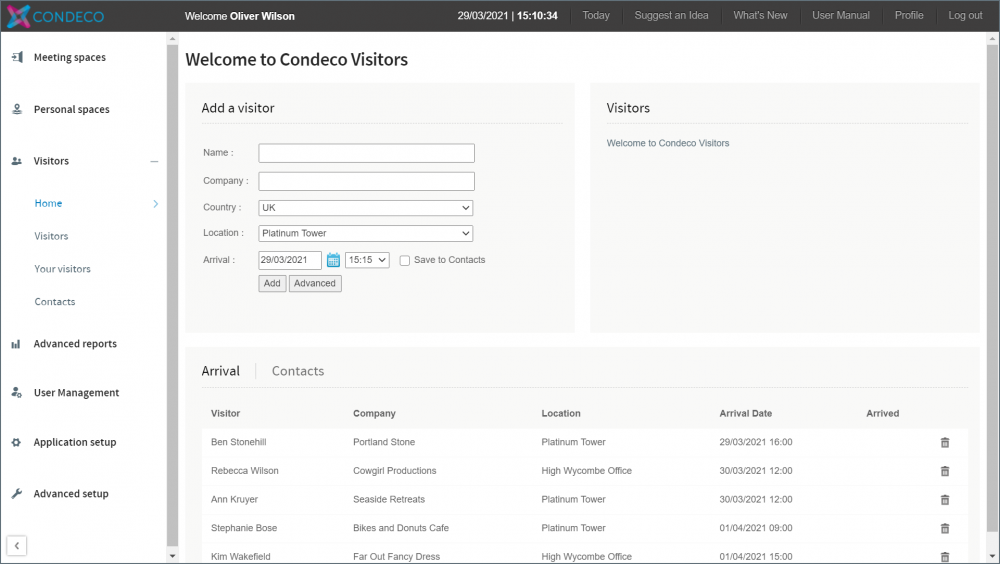
Visitors home page
Does your visitor need a personal space booked? Learn how to book a personal space for someone else
All external attendees added to a meeting space booking are listed on the Visitors home page. Walk-in visitors without a booking can also be added.
External guests with personal space bookings are not listed on the Visitors home page. Personal space bookings made for visitors can only be viewed by administrators on the Visitor Dashboard. Learn more about the Visitor Dashboard
Arrival
All visitors attending a meeting in the current week are listed in the Arrival section on the home page. From here you can:
- Click a visitor’s name to open the visitor details page and mark them as arrived.
- Delete the visitor by clicking the Bin Icon
Contacts
Display a list of all external visitors added to your meeting space bookings. Click a name of a contact to edit their details or click the bin icon to delete the contact.
Add a visitor (walk-in visitor)
Visitors can be manually added from the Visitors home page. This is useful for visitors not attending a meeting but entering the building for ad hoc visits. You can also add visitors who are attending a meeting but were not added to the attendees’ list when the booking was made.
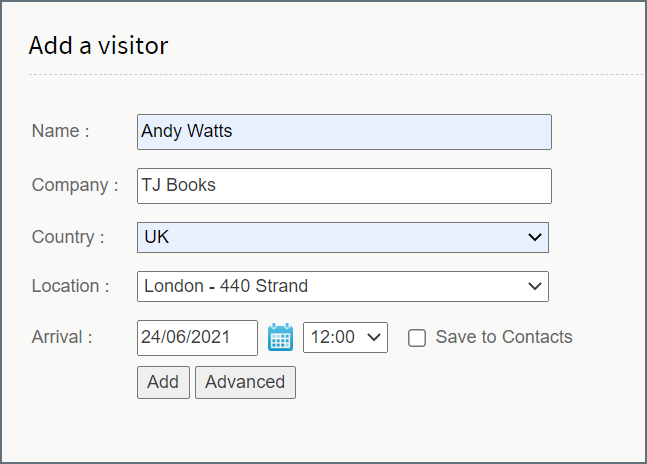
- Enter the visitor’s details and select the location they are visiting.
- Enter the arrival date and time.
- Tick Save to Contacts to
- Click Add to inform the front-of-house team about the visitor.
- Click Advanced to open the Visitor Details page.
Visitor Details
Click Advanced in the Add a visitor box on the Visitors Home page or click New visitor from the Your visitors page, to open the Visitor Details page.
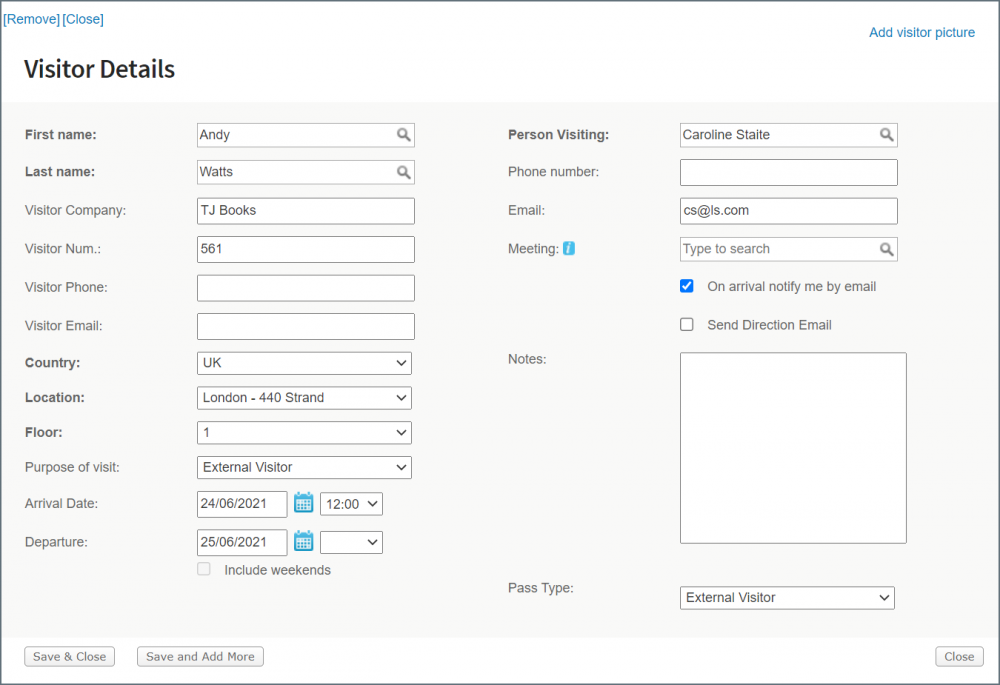
- Enter more details about the visitor.
- Change the person the visitor is meeting.
- Select the purpose for the visit – either Internal or External visitor.
- Set a departure date if the visitor is visiting for multiple days. You can set a maximum of 30 consecutive days for the visitor and tick to include weekends if relevant.
- To add the visitor to an existing meeting, type the meeting title or host in the Meeting field, then select the meeting from the list.
- Request to be notified by email when the visitor arrives.
- Request a directions email is sent to the visitor.
- Issue a Pass Type.
- Add a picture of the visitor. You must grant access to your camera to use this function.
- Add notes.