Enable OAuth for the calendar service
Before you start
If you have existing meeting room screens installed, check they are prepared for OAuth first. Learn more: How to prepare existing meeting room screens for OAuth
How to enable OAuth for your calendar service
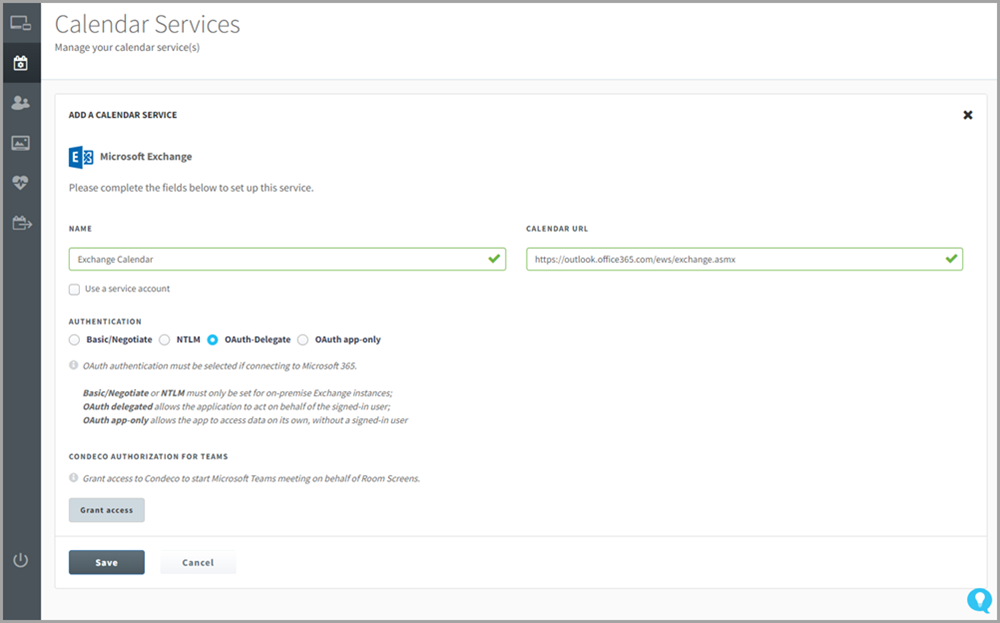
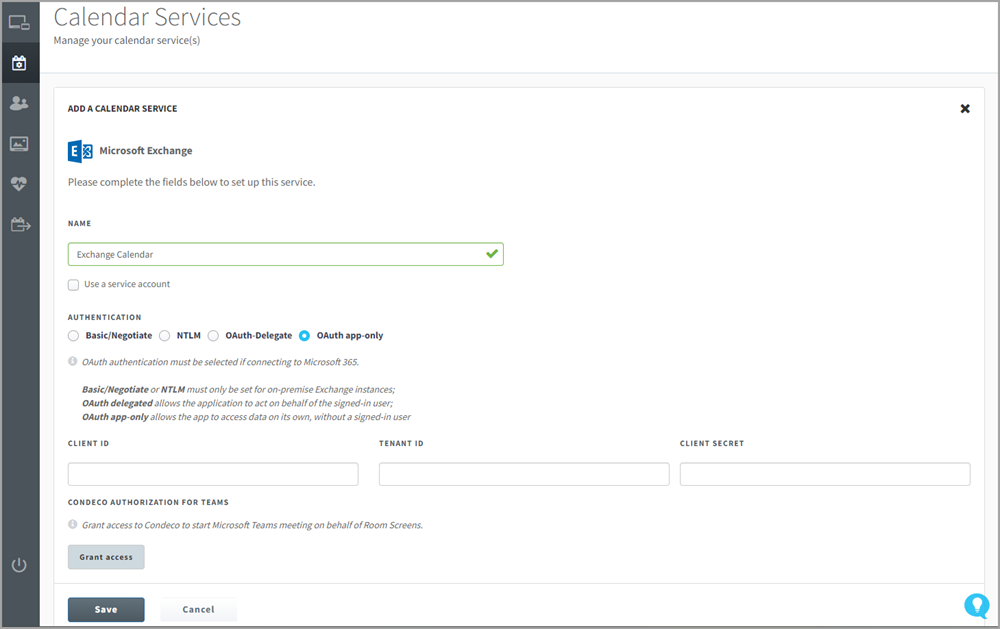
- Sign in to the Device Hub.
- Click the Calendar Settings icon in the left icon bar.
- Click the Exchange calendar service to display the settings.
- Use a service account: Do not enable. The service account is used to run applications, automated services, virtual machine instances, and various background processes.
- Authentication:
- OAuth-Delegate: Select to allow the application to act on behalf of the signed-in user. Enter the URL for the Exchange calendar.
- OAuth app-only: Select to allow the app access to the data without requiring a signed-in user. Enter your Client ID, Tenant ID, and Client secret.
Learn more: Azure AD App registrations
- OAuth-Delegate: Select to allow the application to act on behalf of the signed-in user. Enter the URL for the Exchange calendar.
- Click Save.
Azure AD App Registrations
To find the Client ID, Tenant ID, and Client secret for the OAuth App, check the registered app in Azure AD or follow the steps below to register a new one.
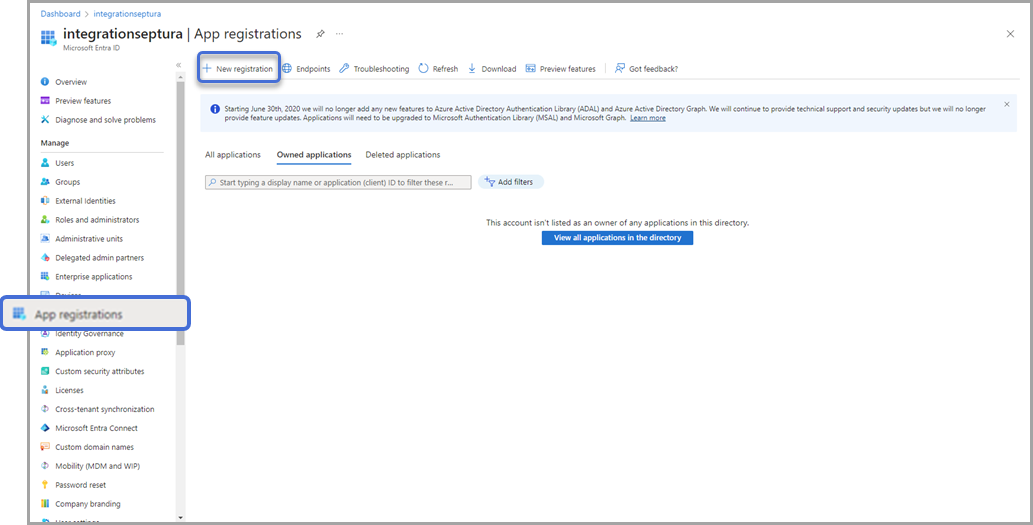
- Sign in to Microsoft Azure and select Azure Active Directory from the left menu pane.
- Select App registrations from the left menu and then click New registration.
- Complete the details on the Register an application screen:
- Name: Enter a name for the app.
- Supported account types: Select who will use this application or access the API.
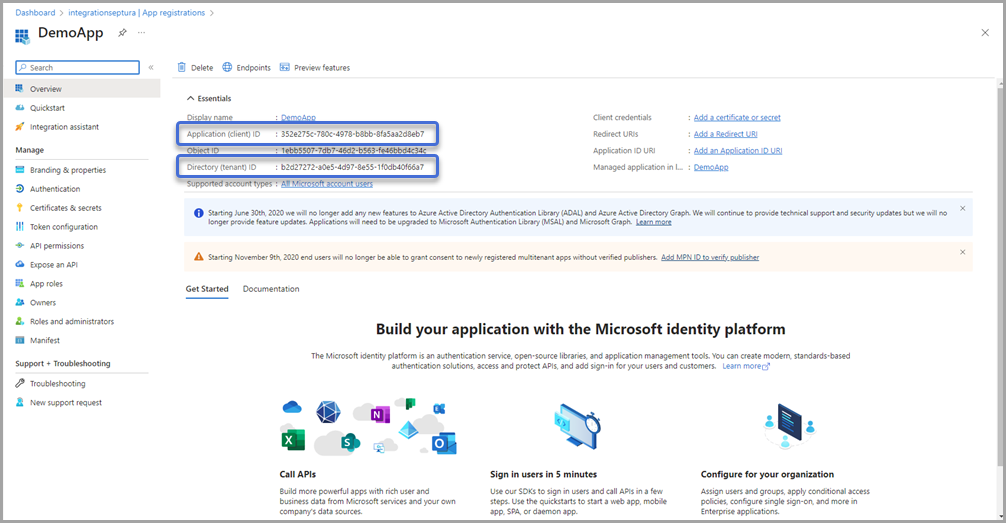
- Click Register to save the new registration and display the Overview page.

- ✏️ Make a note of the Application (client) ID and Directory (tenant) ID as you will need them when enabling OAuth App-only in the Device Hub.
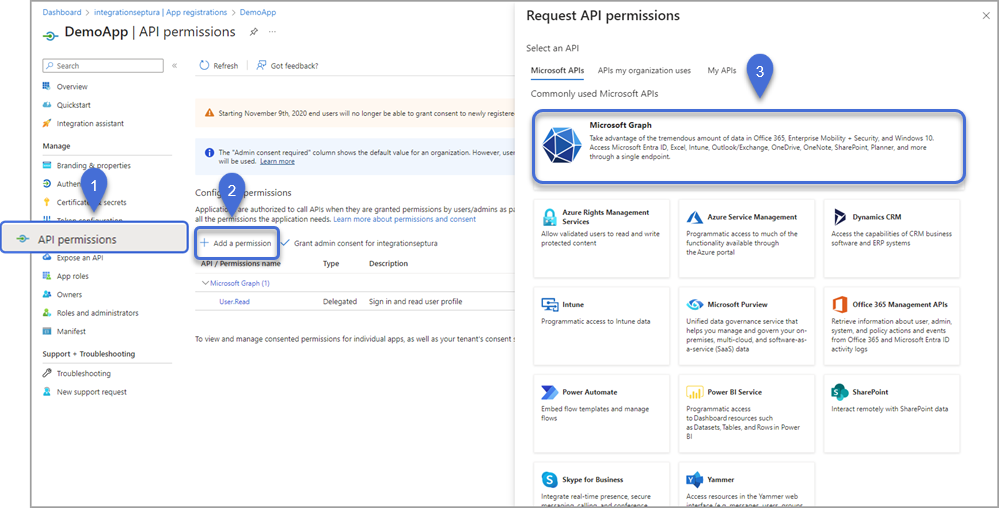
- Select API Permissions from the left menu. Click Add a permission to open the 'Request API permissions' window on the right of the screen and select Microsoft Graph.
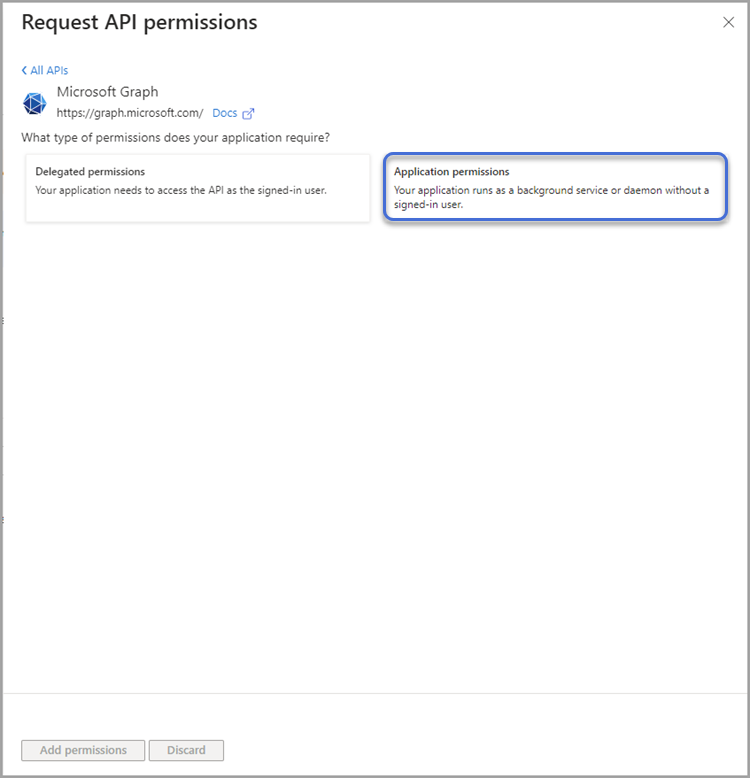
- Select Application permissions.
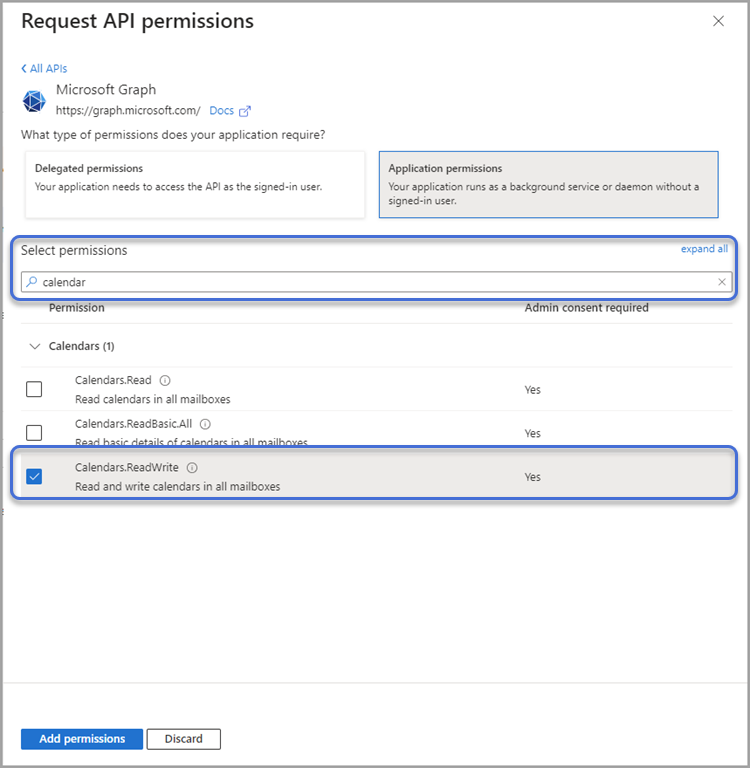
- Enter 'calendar' in the search box to display the list of calendar permissions and tick Calendars.ReadWrite. Click Add permissions to add the permissions and return to the API Permissions screen.
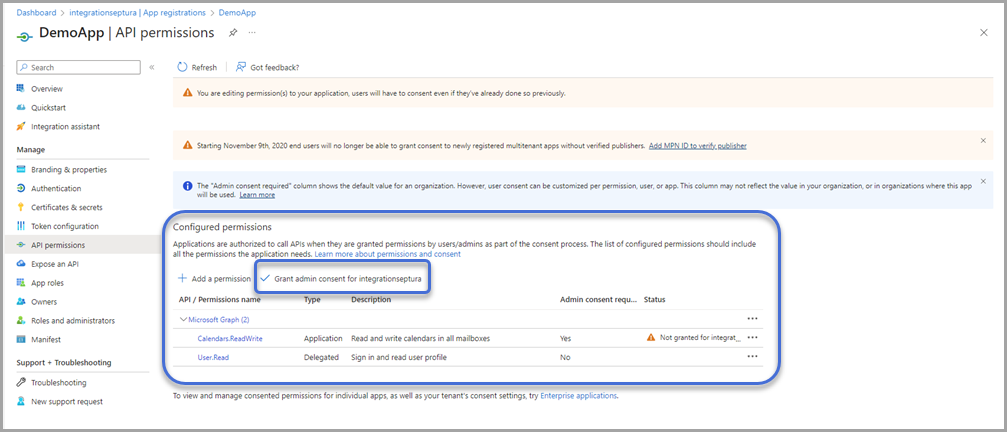
- Microsoft Graph and the selected permissions are displayed under Configured permissions. Click Grant admin consent for [app name].
- Select Certificates & secrets from the left menu and click New client secret.
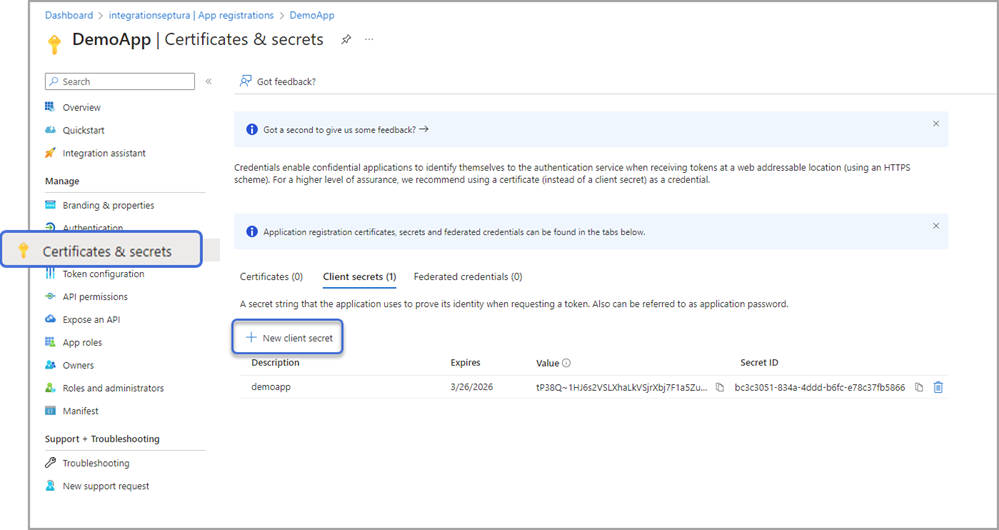
- Enter a name for the new client secret and set an expiry date.
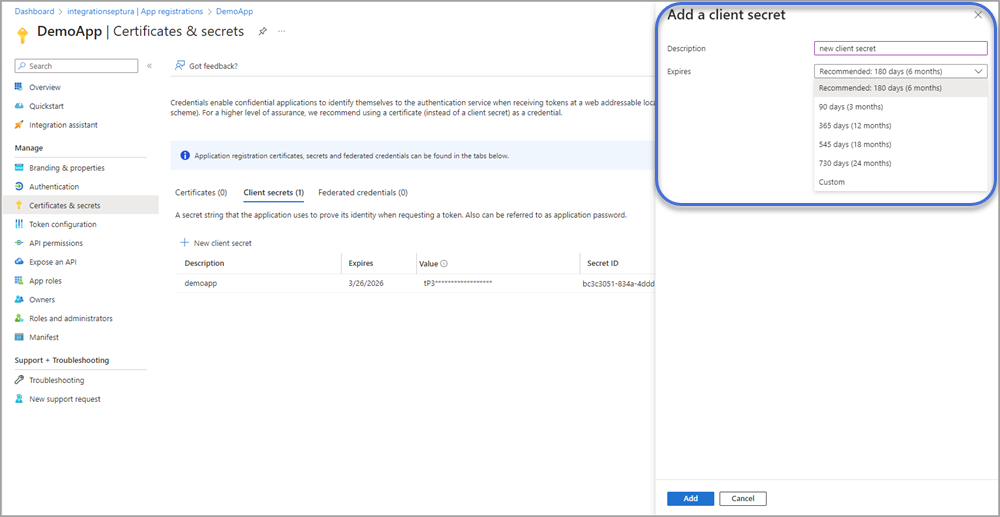
- ✏️ Before closing the screen, copy the secret value as it is only visible at the time of creation.

The Client ID, Tenant ID, and Client secret are required when enabling OAuth App-only for your calendar service in the Device Hub. Learn more: Enable OAuth for the calendar service
Next step for new meeting room screens
When OAuth authentication is enabled for your calendar service, new meeting room screens will inherit the same setting. All that is needed is for each new screen to be authenticated. Learn more: How to authenticate a meeting room screen for OAuth