Users and administrators
Good to know
- Only organizations using MS Exchange or Google calendar services manage users from the Device Hub.
- Users can self-register on the meeting room screens. Learn how
- Admin accounts must be created or upgraded to an admin role manually.
User management
How to find a user’s account
- Sign in to the Condeco Device Hub.
- Click the Users icon in the left icon bar.
- Type name or email address into the search box.
Create a new user
- Sign in to the Condeco Device Hub.
- Click the Users icon in the left icon bar.
- Click Add user.
- Enter First Name, Last Name, Email, Mobile Phone Number (optional for non-Admin roles).
- Select the role for the user. Either select an admin role or select User for normal user access.
- Click Save. The new user is sent an email containing their PIN.
Edit an existing user
- Sign in to the Condeco Device Hub.
- Click the Users icon in the left icon bar.
- Click the user to open the Add/Edit user page.
- Edit the details and click Save.
Disable a user
You can disable users temporarily, to prevent access to the system.
- Sign in to the Condeco Device Hub.
- Click the Users icon in the left icon bar.
- Click the user to open the Add/Edit user page.
- Under Status select Disabled.
- Click Save and the user’s access is disabled.
Bulk user upload
Follow the steps to download a CSV template file from the Bulk Upload page, enter your users’ details in the columns, and upload the CSV file to the Device Hub.
Up to 400,000 users in a 16MB (max) CSV (comma separated variable) file can be uploaded to the system in bulk.
- Sign in to the Condeco Device Hub.
- Click the Users icon in the left icon bar.
- Click Bulk upload.
- Click Download sample CSV file.
- Open the downloaded sample CSV file and add user details in the relevant columns.
Phone number (no spaces), PIN, and RFID are optional and should only be entered if moving from another Condeco system. PIN length should be 6 characters (For more information on PIN and RFID, contact support).
- Save the CSV file. File size must not exceed 16MB or contain more than 400,000 users.
- On the Bulk upload page in the Device Hub, click Browse to locate and upload the file.
- Choose if you want to send the users their PIN by email and click Upload.

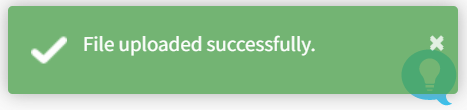
- When the upload is complete, a green confirmation box is displayed at the bottom-right of the page.
The Australian data center may see a longer upload time compared to the West Europe region.
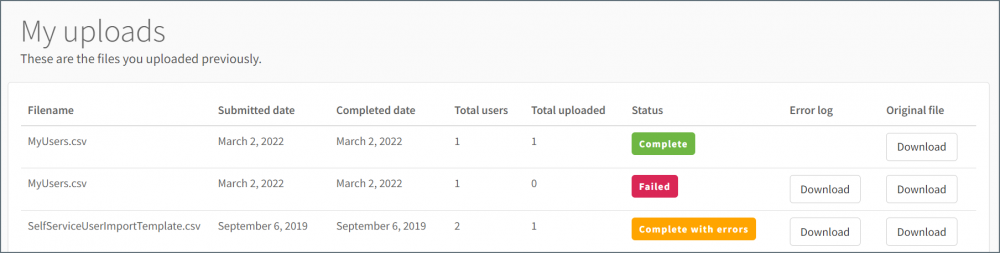
At the bottom of the Bulk upload page is a list of your uploaded files and the upload status. You can download an error log for failed uploads and download the original uploaded files.
Export users
- Sign in to the Condeco Device Hub.
- Click the Users icon in the left icon bar.
- Click Download User Data.
- The download is processed and a link to the download is sent by email. The link is valid for 24 hours. If the download fails for any reason, a notification of the failure is sent by email.

Multiple downloads can be run simultaneously by different user accounts. If a user is already running a download, that user cannot start another and will see a message advising their request is still in progress.
Administrator accounts
Administrators have full access to the Device Hub and can manage settings, create screen themes and distribute themes to devices, manage device activation and updates, and receive device health emails, etc. (See the table below for full details).
Administrators are assigned to a specific role that controls which Countries and Locations they can manage. There are three administrator roles:
- Global admin: Full control of all themes and settings for all Countries and Locations.
- Country admin: Full control of all themes and settings for specific Countries and the Locations belonging to the Countries.
- Location admin: Full control of all themes and settings for specific Location(s).
Read more about the admin roles and view the role comparison table, below.
Global admin
- Global admins have the highest permission level and have full control of all users, settings, and themes for all Countries and Locations, and can create new Countries and Locations.
- Global administrators can assign any user as a Global, Country, or Location admin.
Country admin
- Country admins have full control of all settings and themes for the specific Countries selected for the role in the user’s settings, and the Locations belonging to those Countries.
- Country admins can create new Locations in the Countries selected, but cannot create new Countries, or access Countries not assigned to them (or their Locations).
- Country admins can create Country-level and Location-level screen themes, and apply them to devices (in the Countries/Locations they manage).
- Country admins can apply Global-level screen themes to devices in the Locations belonging to their Countries, but cannot edit or delete them.
Location admin
- Location admins have full control of all settings and themes for the specific Locations selected for the role in the user’s settings.
- Location admins cannot create new Locations or access Locations not assigned to them.
- Location admins can create Location-level screen themes, and apply them to devices in the Locations they manage.
- Location admins can apply Global-level and Country-level screen themes to devices in the Locations they manage, but cannot edit or delete them.
Admin role comparison table
| Global admin | Country admin | Location admin | |
|---|---|---|---|
| User management | Full control. | Create users (regardless of location). Can assign Location Admin role to users for assigned countries only. | Create users (regardless of location). Cannot assign admin roles. |
| View screen health and receive device health notifications | Full control. | For devices in assigned countries only. | For devices in assigned locations only. |
| Add/update/remove screens | Full control. | For devices in assigned countries only. | For devices in assigned locations only. |
| Add/edit screen themes | Full control. | In assigned countries only. | In assigned locations only. |
| Apply global themes | Full control. | To assigned countries only. | To assigned locations only. |
| Set default theme | Full control. | No, the default theme for all countries and locations is the global default theme. | |
| Edit screen settings | Full control. | In assigned countries only. | In assigned locations only. |
Assigning admin roles
Only Global and Country admins can assign admin roles to users:
- Global administrators can assign users as administrators and assign any admin role.
- Country administrators can assign users as Location administrators for locations in the countries they manage.
- Location administrators cannot elevate a user to an administrator.
How to assign administrator roles
- Sign in to the Condeco Device Hub.
- Click the Users icon in the left icon bar.
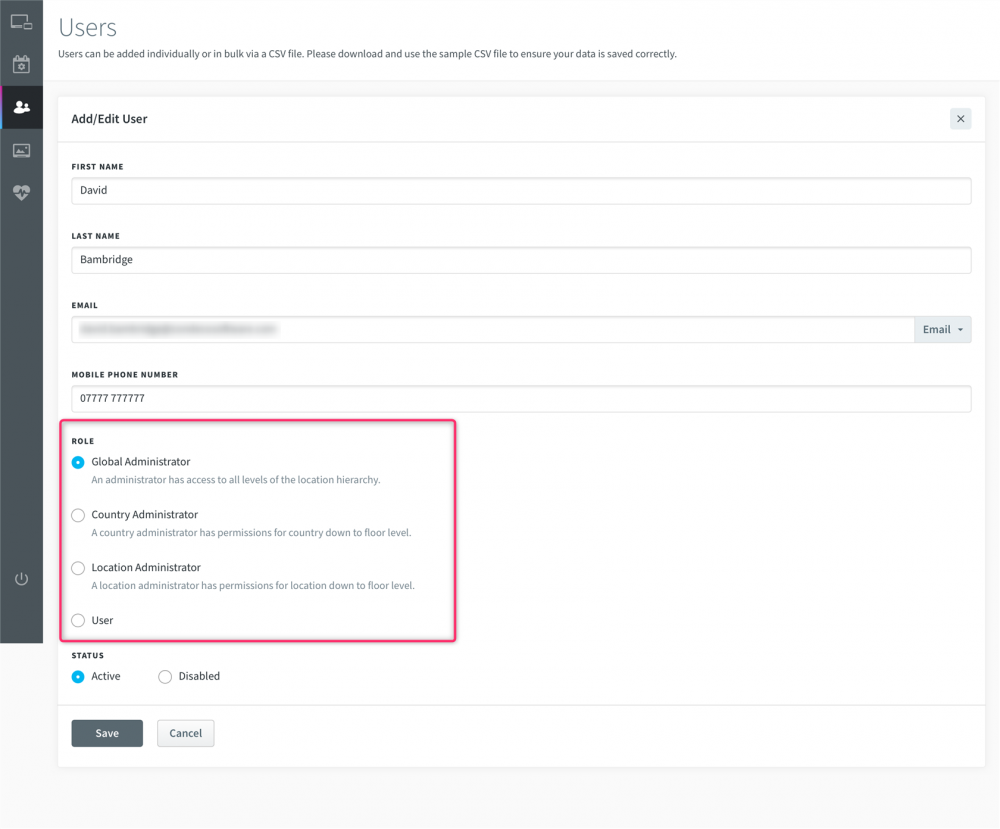
- Enter the user’s name in the search box and click their name from the results list to open the Add/Edit user page.
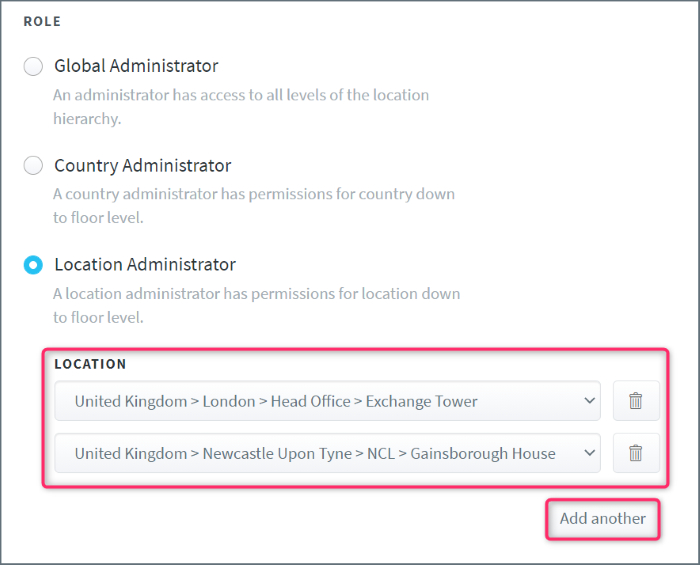
- Scroll down to Role and select the admin level to assign.
- When assigning the Country admin role you must also click the drop-down list and select the country the user will manage. Click Add another to assign additional countries to the administrator.
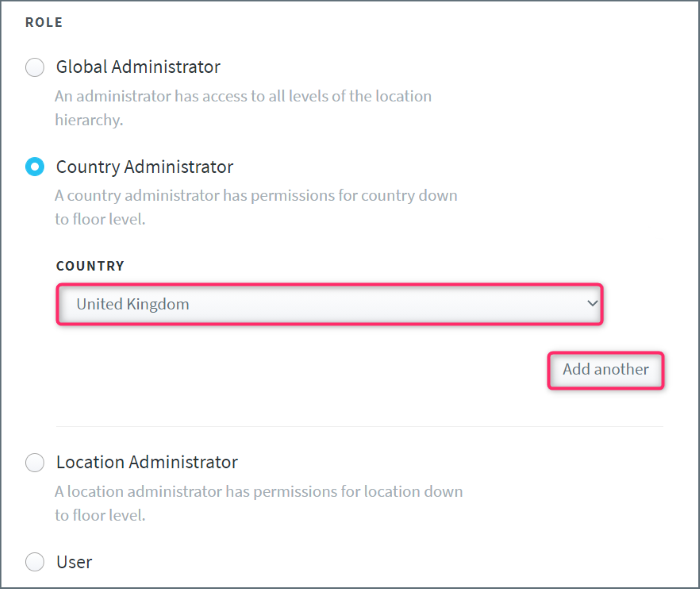
- When assigning the Location admin role you must also click the drop-down list and select the location the user will manage. Click Add another to assign additional locations to the administrator.
- When assigning the Country admin role you must also click the drop-down list and select the country the user will manage. Click Add another to assign additional countries to the administrator.
- Click Save when done. Existing users elevated to an admin role must log off/on for the change to take effect.