Custom NTP server
By default, the desk booking screens are pre-configured to use the default NTP servers specified in the allowlist. Learn more about the domain allowlist
Only desk booking screens on version 8.1.38 or later can be configured with an NTP server. Any NTP server settings entered here will be ignored by versions earlier than 8.1.38.
Set a custom NTP server
- To open the admin menu tap and hold the clock on the device for over a second to display the PIN pad. Enter the PIN to continue.
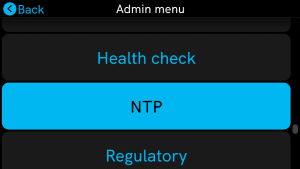
- From the admin menu tap NTP.
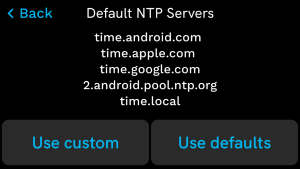
- The default NTP servers are displayed. Tap Use custom NTP Server.
- Enter the fully qualified hostname of your NTP Server, or the IP address, then tap Return (blue circle).

- The device validates the server name or IP address.
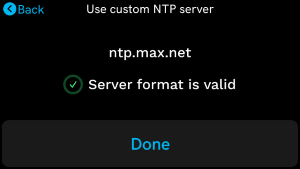
- Tap Done to return to the admin menu.
Revert back to default NTP servers
You can revert to the default NTP servers specified in the allowlist. Learn more about the domain allowlist
- To open the admin menu tap and hold the clock on the device for over a second to display the PIN pad. Enter the PIN to continue.
- From the admin menu tap NTP.
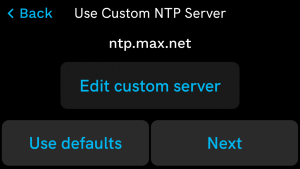
- The custom NTP server is displayed. Tap Use defaults.
- Tap Done to return to the admin menu.