Network settings
The meeting room screens can connect to either a Wi-Fi network or LAN via an ethernet cable.
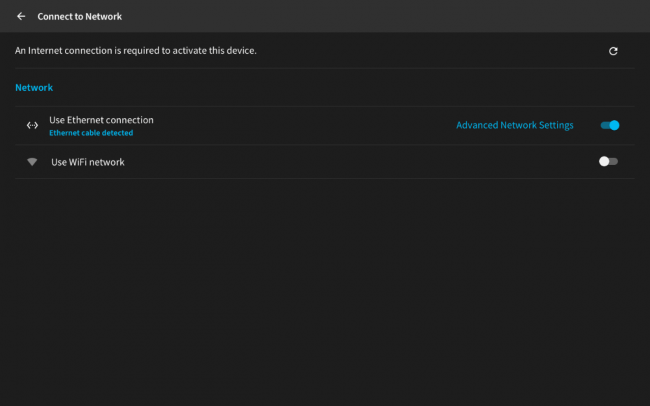
Ethernet connection
Connect a meeting room screen to a LAN via a shielded Ethernet cable, and set a static IP and/or proxy server if required.
Connect to a LAN
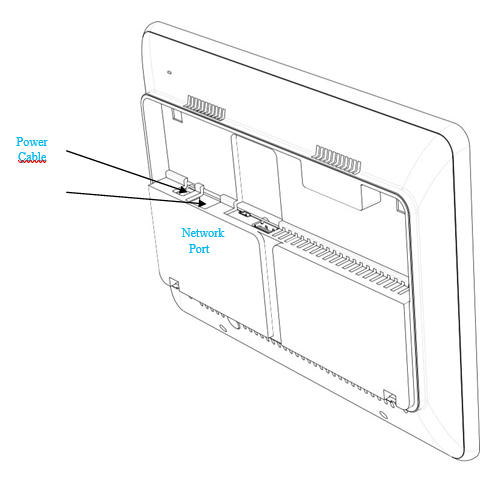
- Connect an active shielded Ethernet cable to the desk booking screens network port. The RJ45 port is located at the rear of the meeting room screen.
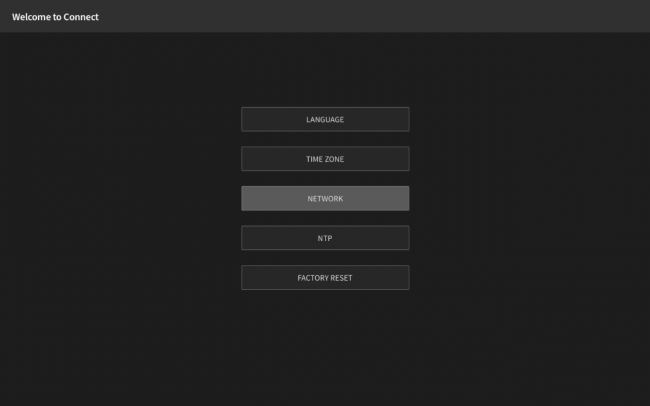
- To open the Admin menu, hold your finger on the clock in the top right part of the screen until you are prompted for the screen security PIN. Alternatively, swipe down from the top of the screen to reveal the screen security PIN entry page. Enter the PIN to continue.
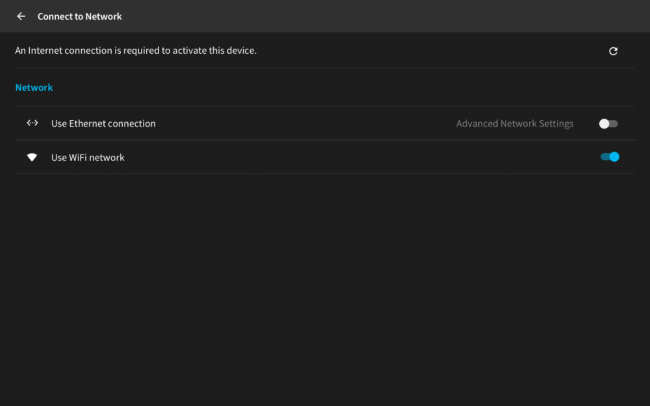
- Tap Network from the list of admin options.
- Tap Use Ethernet connection to enable.
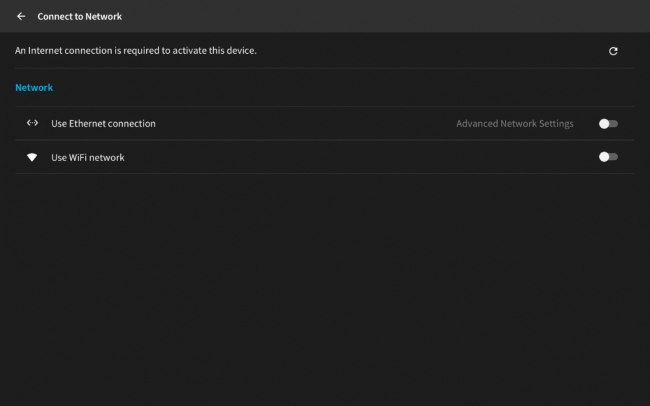
- The device validates the network connection.
- Tap the back arrow to return to the Admin menu.
Set a static IP for an Ethernet connection
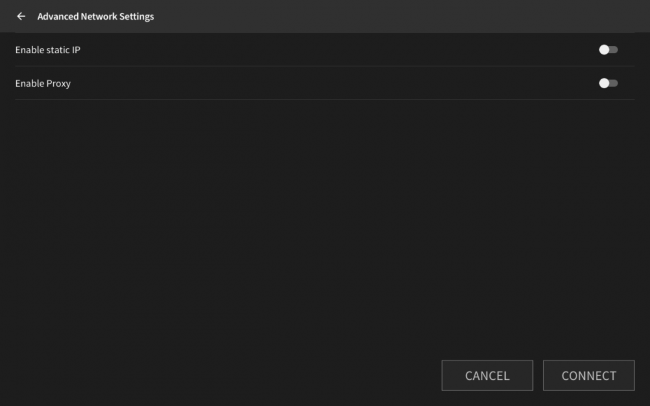
- From the Network setup screen, tap Advanced Network Settings.
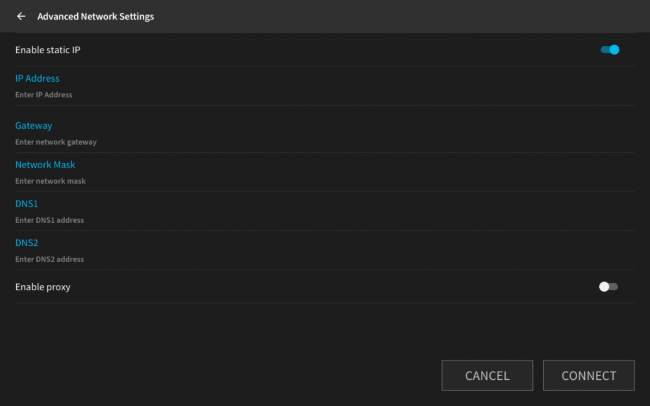
- Tap Enable static IP.
- Tap each option to enter the details for the static IP then tap Connect.
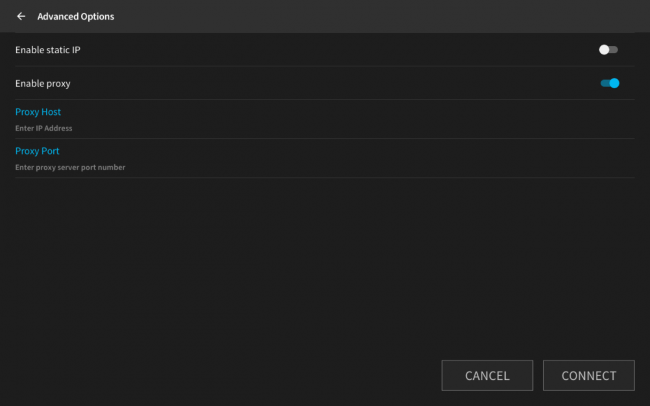
Enable a proxy server for Ethernet connection
Not supported:
Proxy is currently only supported over Ethernet connections.
Proxy is not supported with Google and EMS calendar services.
Configure the v2 meeting room screens to use a simple unauthenticated HTTP/S proxy server for internet access.
- From the Network setup screen, tap Advanced Network Settings.
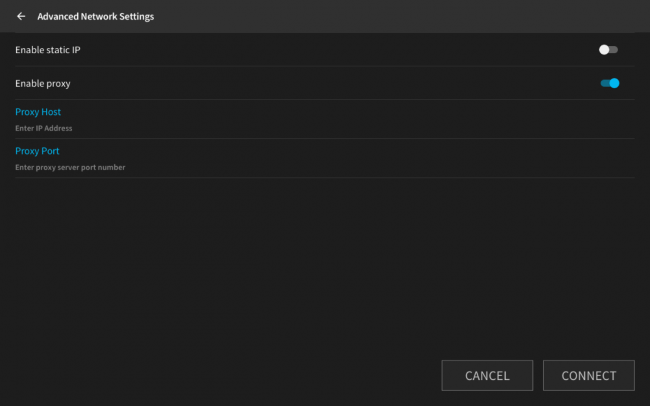
- Tap Enable proxy. Tap each option to enter the details for the proxy server, then tap Connect.
Wi-Fi connection
Connect a meeting room screen to a Wi-Fi network, and set a static IP and/or proxy server if required.
Connect to a Wi-Fi network
- To open the Admin menu, hold your finger on the clock in the top right part of the screen until you are prompted for the screen security PIN. Alternatively, swipe down from the top of the screen to reveal the screen security PIN entry page. Enter the PIN to continue.
- Tap Network from the list of admin options.
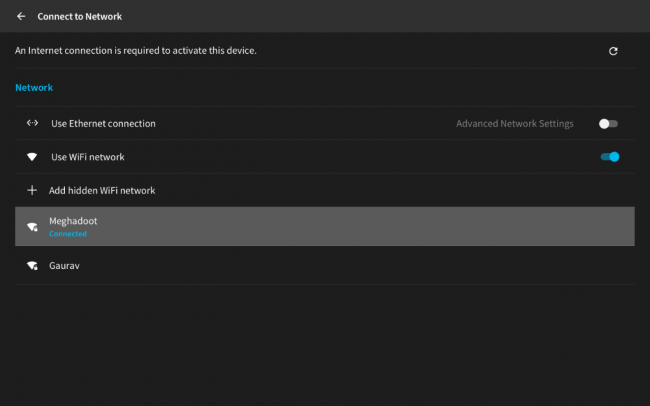
- Tap Use Wi-Fi network to enable.
- From the list, tap the Wi-Fi network you wish to connect to.
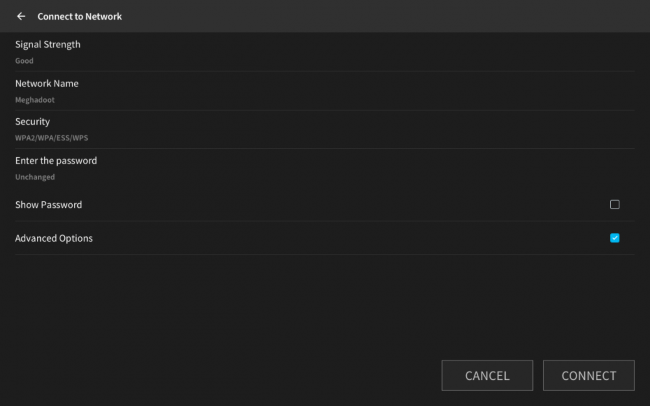
- Tap Enter the password and enter the password for the Wi-Fi network. Tap Connect.

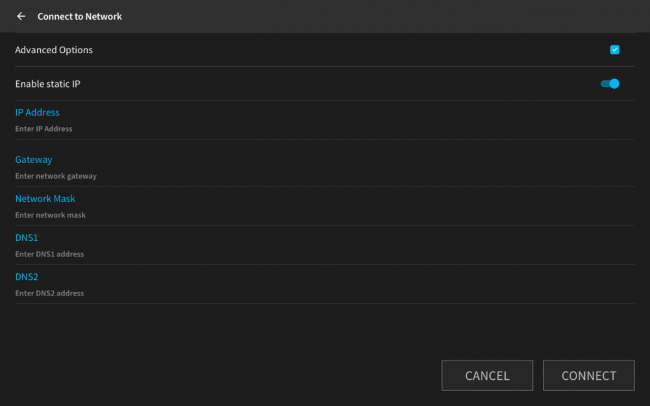
Enable a static IP for Wi-Fi
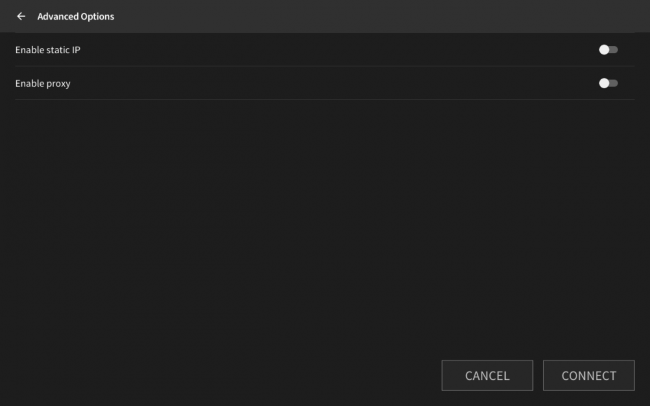
- From the Wi-Fi setup screen, tap Advanced Options
- Tap Enable static IP to set a static IP address.
- Tap each option to enter the details for the static IP, then tap Connect.
Enable a proxy server for Wi-Fi
You can configure the v2 meeting room screens to use a simple unauthenticated HTTP/S proxy server for internet access.
- From the Wi-Fi setup screen, tap Advanced Options.
- Tap Enable proxy.
- Tap each option to enter the details for the proxy server, then tap Connect.