Edit a Move Request
After a move request is submitted, then details can be updated and additional move items or service requests can be added.
- Navigate to Move > Request Queue.
- Click the move item that needs to be edited.
- Complete your edits and the field will automatically save.
Update Overview Details
- In the Request field, enter the requester's name.
- In the Description field, enter a short description.
- From the Move Date calendar, select the date.
- If there is an approval needed, then click the Approved check-box.
Only certain employees can approve Move requests.
Add a Comment
You can add a comment.
- In the comment field, enter a short comment.
- Click the Add Comment button.
Add Move Attachments
Attachments can also be added to each move scenario; to add an attachment do the following.
- Click the Attachments tab.
- Either drag and drop the attachments to the area OR click the click here to upload attachments link to browse to the attachment and then you can upload it.
The attachment will automatically save.
Attachments can be removed by clicking the X icon next to the attachment.
Create and Send Notifications
You can send notifications to the requester or others.
- Click the + Create & Send Notifications link. The Send Notification dialog.
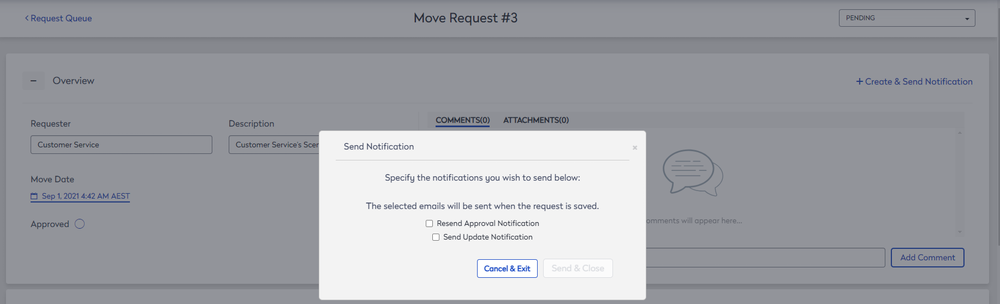
Resend the Approval Notification
- Check the Resend Approval Notification check box.
- Click the Send & Close button.
Send Update Notification
- Check the Send Update Notification check box.
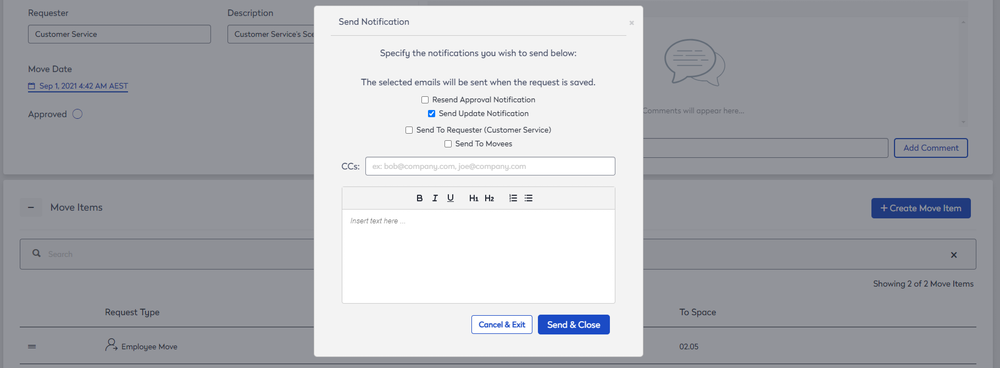
- Check the Send to Requester (Customer Service) check box.
- Check the Send to Movees check box.
- You can copy in other employees; enter in their email addresses.
- In the Body field, enter in the email's content.
- Click the Send & Close button.
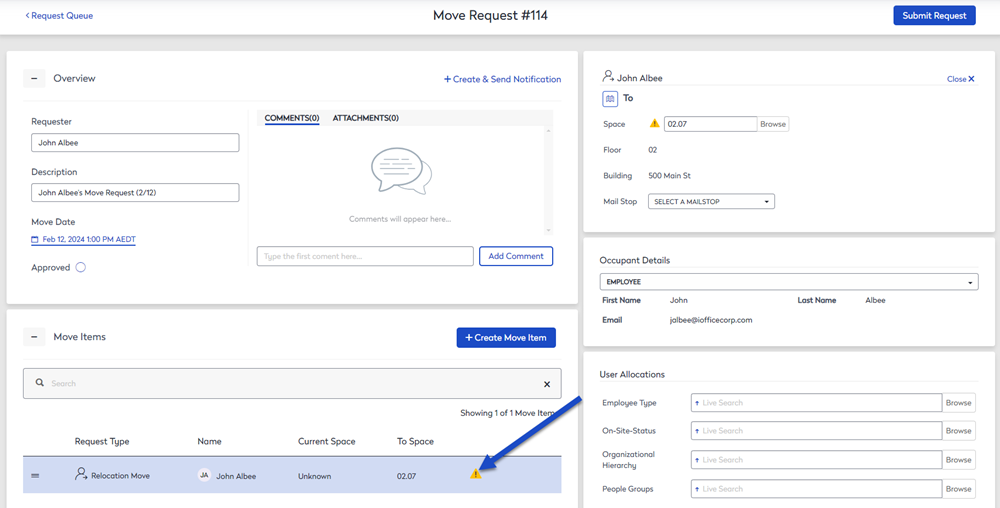
Update Move Items
Remember when you add or edit a move item, it automatically checks to see if the space you want to move the person into is available. If there is a conflict:
- Warning icon
 will appear next to the move item if the space is already in use. The warning icon will also appear next to the To space.
 - Error icon
 will appear if a required field needs information.
Update Cost
If there is a cost involved with the move, then complete this area.
- From the Move Cost Type, drop-down, select the type of cost.
- In the Additional Move Cost field, enter any additional cost.
Update Service Request
If you need to link or create a service request to action the move then complete this area.
Create a Ticket
- Click the Create Ticket button. The Create a New Request screen displays.
- Compete the service request details.
Link Ticket
- Click the Link Ticket button. The Link Ticket dialog displays.
- In the Request ID field, enter the service request number.
- Click the Save Link button.