Edit Reservation Preferences
Level: Administrator
Your Administrator can set up the preferences for the Reservation Module.
1. Navigate to Admin > Reservations > Preferences.
The Preferences screen displays and the following can be set up:
- Enable Alerts
- Auto-Cancel Reservations
- Split Multi-day Reservations
- Show or Hide the Host Name on a Reservation
- Sync to Google Calendar
- Exchange Integration (with Microsoft Graph)
- Enable Exchange Integration
- Enable Exchange OAuth Integration
If you need to reset the settings, then however over the settings and the Reset button will display.
Enable Alerts
You can enable the alerts and notifications to be sent out.
- Select the Enable Alert checkbox.

Complete the fields:
| Field | Description |
|---|---|
| From Label |
Enter the label, which will be the name shown in the From field in the email. This does not have to be an email address. |
| Include Invite | Select the check box to include the calendar invite within the email. |
| Reply To Address | Enter the email address so that replies can be sent to this email address. |
Cancel Message

Complete the fields:
| Field | Description |
|---|---|
|
Cancel Message |
Select the check box to enable the cancel message. Then the recipients will receive an email when a reservation is canceled. |
|
Message Body |
Edit the body content of the canceled email. |
|
CCs |
Enter the recipient's email address; commas must separate your recipient names. |
|
Subject |
Enter the Subject of the email, such as Canceled Reservation. |
Check-in Message
When this preference is enabled, you will receive notifications to check in by email, push notifications on your Hummingbird App, and on the Hummingbird Space Panel of the reserved space. Sometimes, you will be automatically checked into the space you reserve.
Email notifications are sent in 15-minute increments. They are sent on the hour and every 15 minutes. For example, if I have a reservation starting at 9:40 am, I will receive the email notification at 8:45 am (not 8:40 am.)
| Notification Type | Minutes Before Start of Reservation |
|---|---|
| None - Automatic Check-in | 15 minutes or less |
| 30 minutes | |
| None - Automatic Check-in* | Reserved by QR Code in Hummingbird App |
| Hummingbird App Check-in Button | 60 minutes |
| Push Notification Hummingbird App* | 15 minutes |
| Hummingbird Space Panel Button* | 10 minutes |
*Available when using the Reservation module with the Hummingbird app.

Complete the fields:
| Fields | Description |
|---|---|
|
Check-in Message |
Select the check box to enable. When enabled, an email notification is sent to your specified recipients to check in for their reservation. |
|
Message Body |
Edit the body content of the check-in. |
| CCs |
Enter the recipient's email address; commas must separate your recipient names. |
|
Subject |
Enter the Subject of the email, such as Time to Check-in! |
New Reservation

Complete the fields:
| Field | Description |
|---|---|
|
New Reservation |
Select the check to enable. When enabled, an email notification is sent on the creation of a new reservation. |
|
Message Body |
Edit the body content of the new reservation. |
| CCs |
Enter the recipient's email address; commas must separate your recipient names. |
|
Subject |
Enter the Subject of the email, such as Reservation Created. |
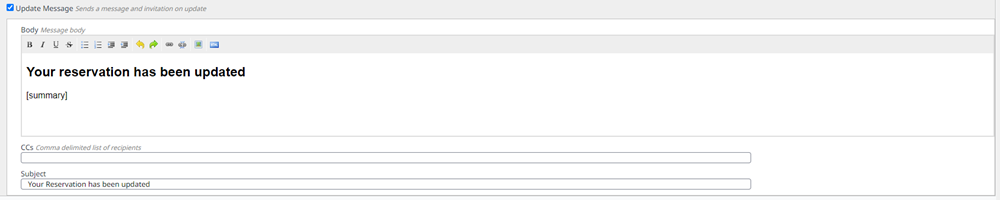
Update Message
Complete the fields:
| Field | Description |
|---|---|
|
Update Message |
Select the check to enable. When enabled, an email notification is sent when a reservation has been updated. |
|
Message Body |
Edit the body content of the updated reservation. |
| CCs |
Enter the recipient's email address; commas must separate your recipient names. |
|
Subject |
Enter the Subject of the email, such as Your Reservation has been updated. |
Auto-Cancel Reservations
This allows any reservations created to be automatically canceled if the reservation is not checked in by the reservation creator or any of the specified attendees.
For example, create a reservation for a room at 10:00 A.M., and the auto-cancelation is enabled for 15 minutes. You or your designated guests will have until 10:15 A.M. to check in to the reservation before the reservation is automatically canceled.
Enable auto-cancel reservations, complete the following:
1. Click the Auto-Cancel Reservations checkbox.
2. In the Check-In Timeout field, enter the time the system will wait for a user to check in before it cancels the reservation.

3. Click the Save button.
Split Multi-Day Reservations
Create a separate reservation for each day when space is reserved for multiple days.
- Select the Split Multi-Day Reservations check box.
Show or Hide the Host Name on a Reservation
When your employees have made reservations then the host name will display on the reservation.
This setting is ON by default to show the host name, if you want to hide the host name then uncheck the Show Host Name Reservations check box. When this is set to OFF then this will hide the host’s name on the reservation card.
Sync To Google Calendar
- Select the Sync To Google Calendar check box.
Exchange Integration (With Microsoft Graph)
- Select the Exchange Integration check box.
Enable Exchange Integration
- Select the Enable Exchange Integration check box.
Enable Exchange OAuth Integration
- Select the Enable Exchange OAuth Integration check box.