How to Schedule Hourly PMs
Learn about How to Schedule Hourly PMs.
This article will guide you on how to schedule PMs on an hourly basis.
Steps:
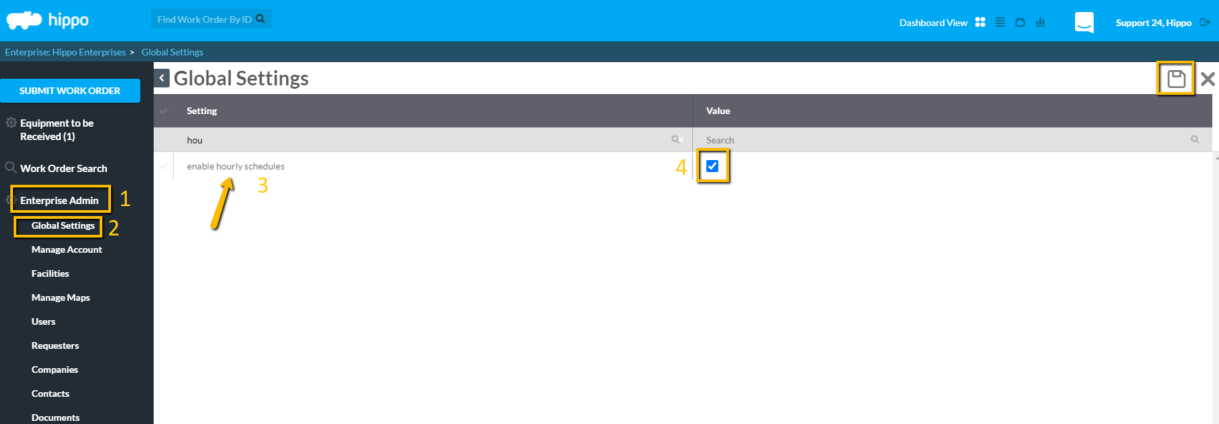
Note: This feature must first be enabled on the Global Settings grid, enterprise level, by a System Admin user.
- From the Scheduled Work Order grid, facility level, either select the + (Add) button in the top right or the "Edit" icon next to the PM name to open the "Scheduled Work Order" form.
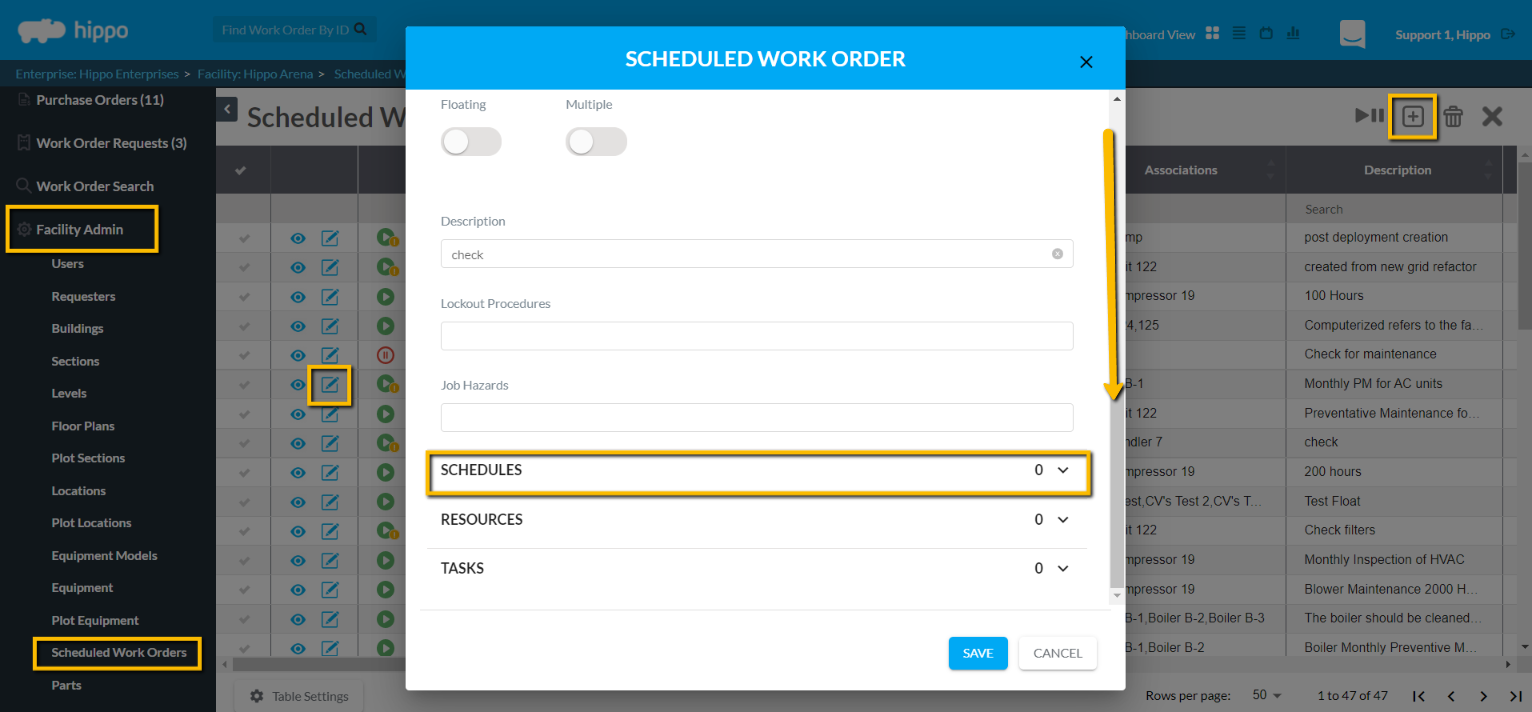
- From the Schedules field click on Add + and the "Add Schedule" window appears.
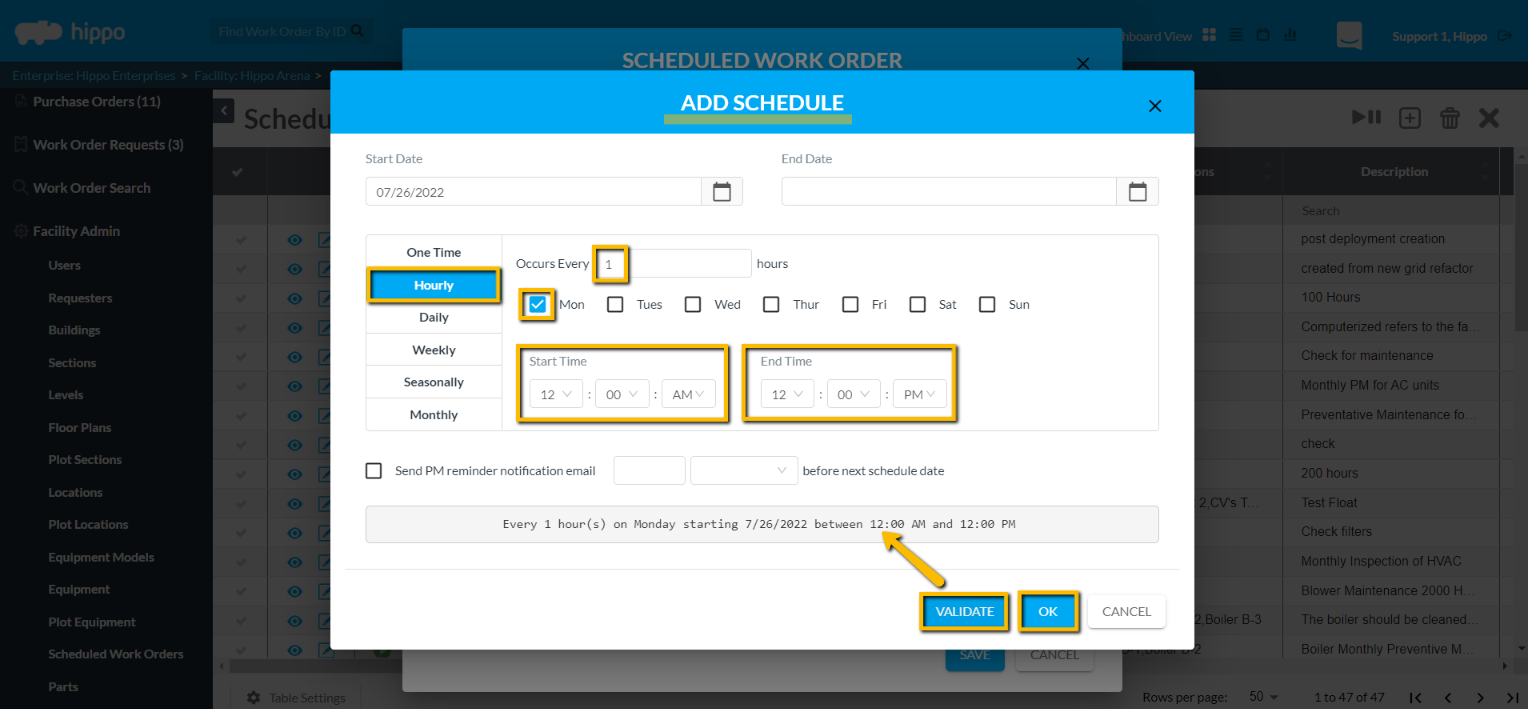
- Click on Hourly then fill in the details. Click in the Occurs Every Hours field to add how often the ticket should generate. Select which days of the week. Determine the Start Time and End Time or time period in which the tickets occur on your selected days.
- Hit Validate to confirm the schedule.
- Hit OK.
Tip: You can always go to the Calendar Dashboard to view exactly when the ticket will generate.
Notes:
- PMs can have multiple schedules, hourly included.
- The maximum schedule for hourly PMs is every 23 hours. For a frequency above that, you will need to use the daily option.
- Hourly PMs cannot generate early with the Generate Now feature nor moved ahead of time on the Calendar Dashboard.
- Floating option is available with Hourly schedules meaning the next work order will not generate till the last is completed. The next expected ticket will generate rather than skip time frames.
Watch our How to Schedule an Hourly PM gif here: