How to Edit the Schedule Date to a PM
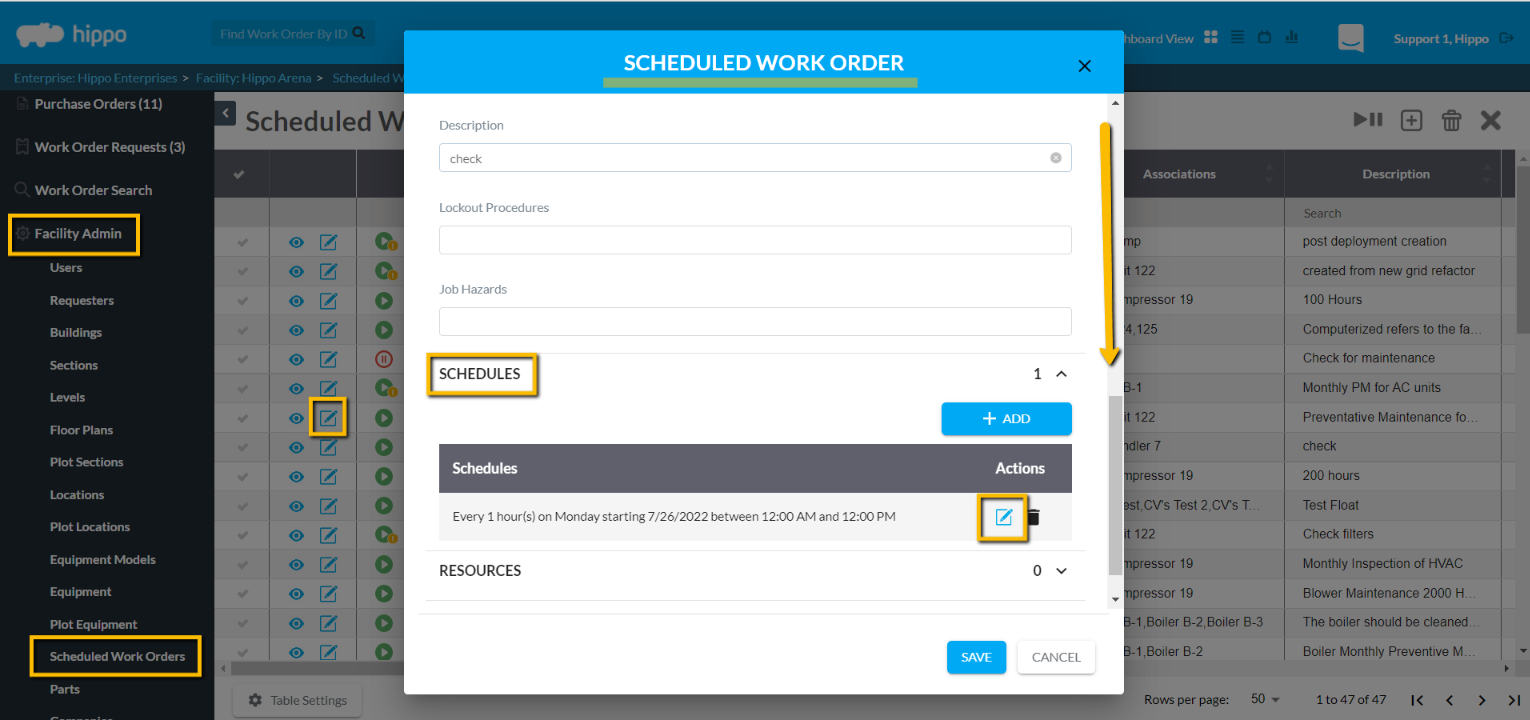
- From the Scheduled Work Order grid, Facility Admin, click on the "Edit" icon next to the PM name.
- Click in the "Schedules" field.
- Click the "Edit" icon in the existing schedule row that you would like to edit.
4. The “Add Schedule” window appears with the current schedule date to this PM.
Modify as needed. Select a One Time, Daily, Weekly, Seasonally, or Monthly or some may have an Hourly calendar schedule.
For example, click on Monthly. A User can select a specific day of the month for the PM to generate. Then, select the months the PM will generate. When scheduling an annual PM, select only one month.
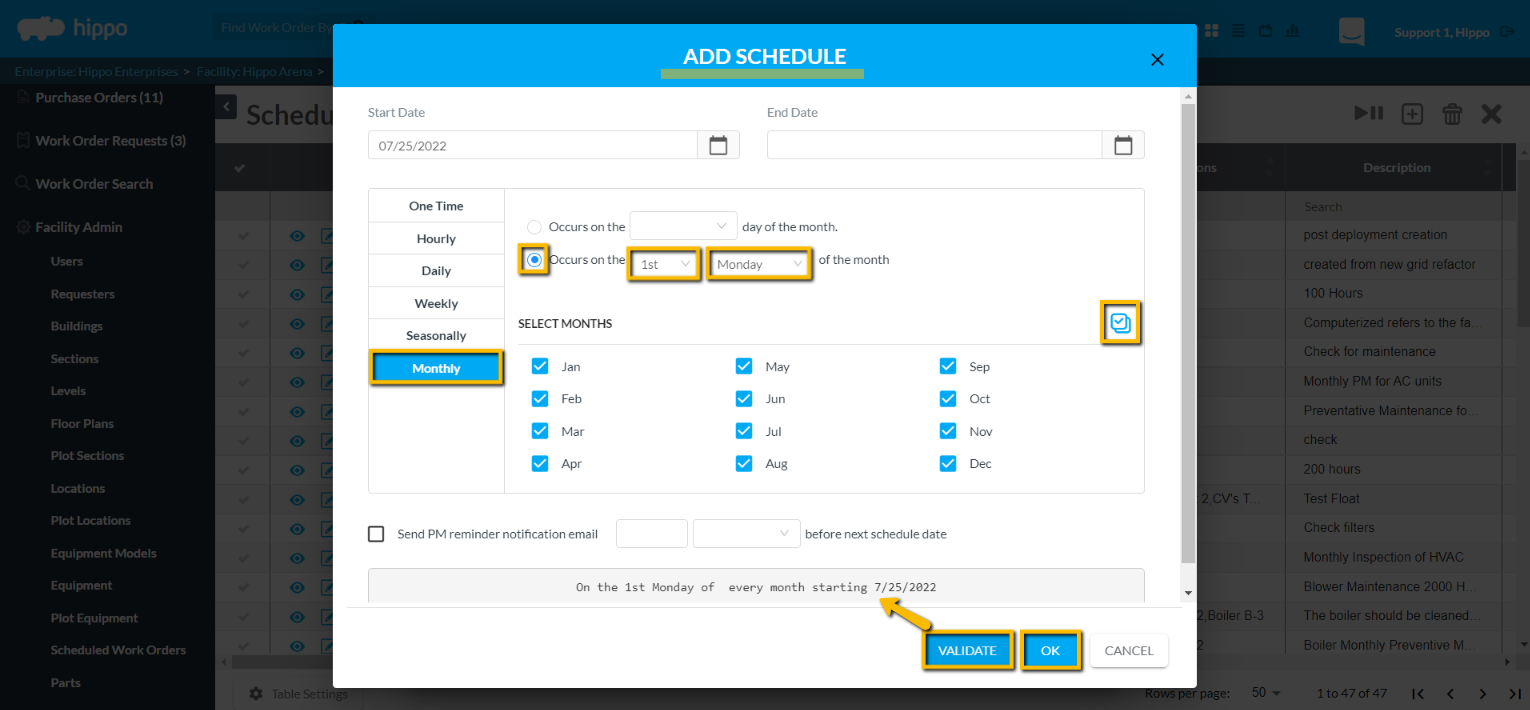
Note: Do not include an "End Date" if you want your PMs to generate continually. Adding an end date puts a stop to the tickets from generating on your customized calendar date.
Note: optional to create a reminder email notification is desired by completing the “Send PM reminder notification email” field. Put a check in the box, then type in the value of how many Days or Hours to be reminded about before the next scheduled date of the PM. Any User that is receiving an email notification for PMs will additionally receive the reminder email.
5. After all modifications have been completed click on “Validate” at the bottom of the window. It shows a summary of the new schedule date for this PM.
6. Click OK to return to the main "Scheduled Work Order" form and hit "Save" at the bottom of the form to keep your changes.
Watch our how-to GIF here: