Equipment Depreciation
Introduction
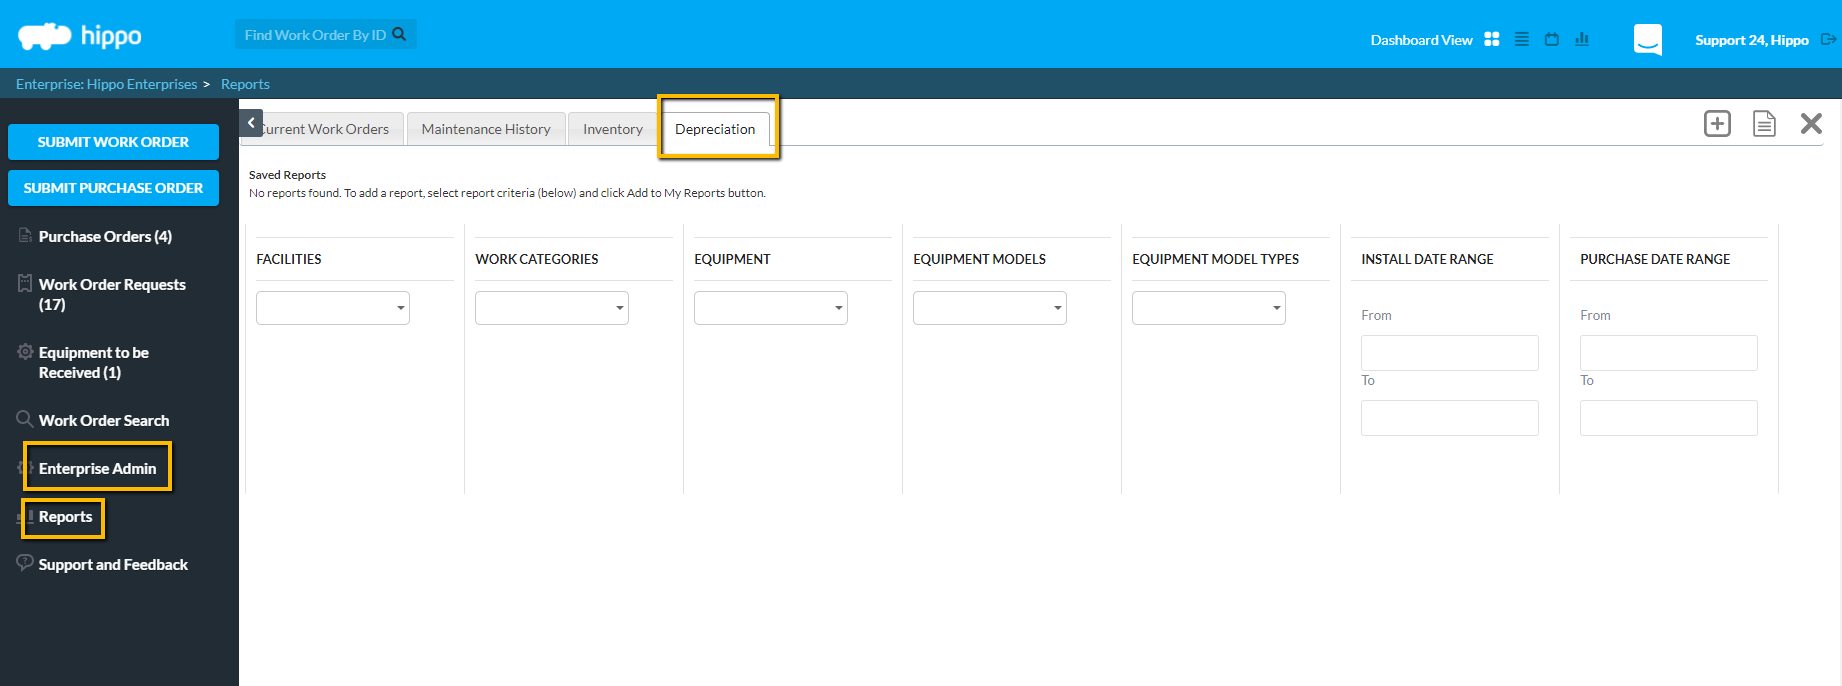
By enabling the depreciation analysis module, it allows a user to create Depreciation Reports in the Hippo program. These reports calculate the current book value of assets based on the Straight Line Method. On this grid, a user must also determine the “depreciation module calculation type”.
Note: There are a few steps needed to use this feature, once the Global Settings grid is enabled.
Definitions
Depreciation Module: a calculated method to determine the decrease in value of an asset over several years or a lifetime
Instructions
- On the Global Settings grid, in the “Setting” column, look for “enable depreciation analysis module” and click on the box next to it. This box is found under the “Value” column.
- Make sure there is a check in the box.
- Click the “Save” button found in the top right corner.
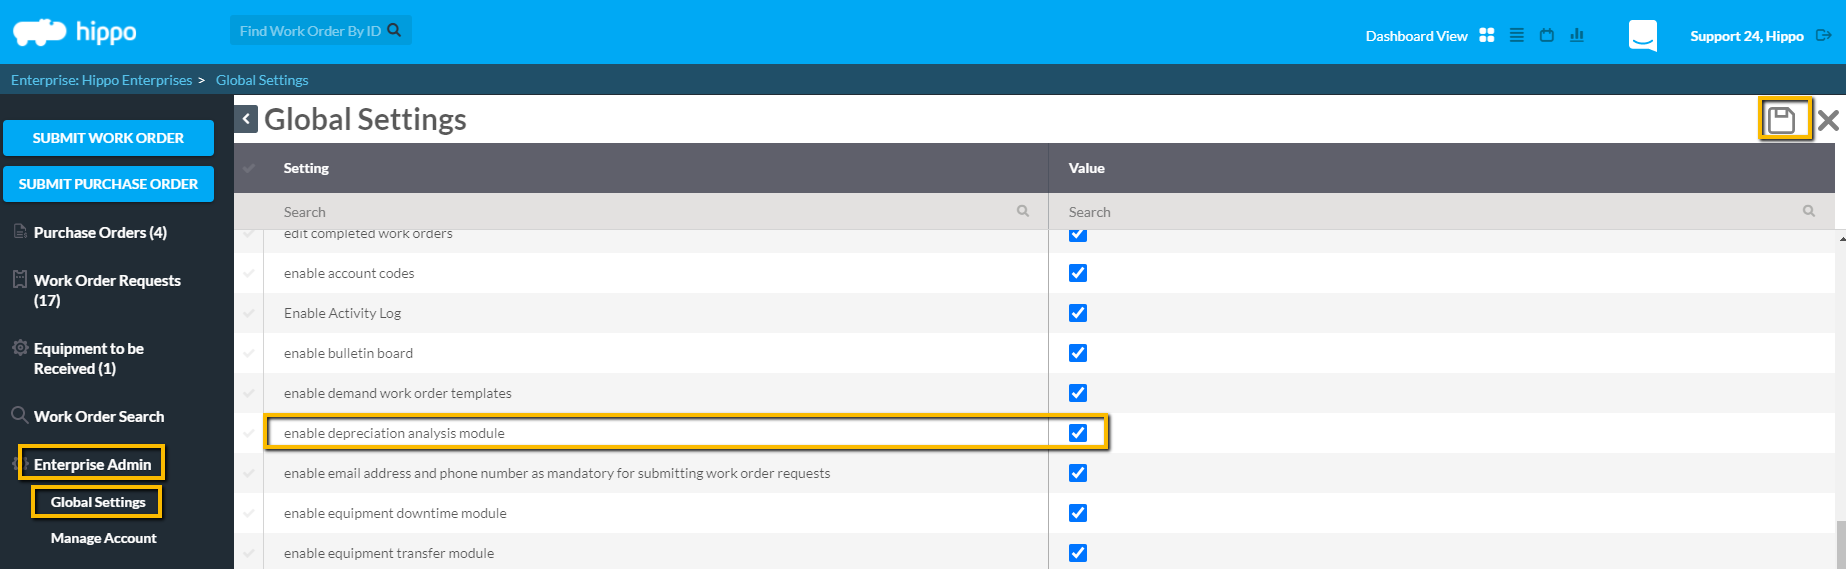
- Log out of the Hippo system, then log back into it, or click on the “Refresh” icon. This will add a new module.
**Now that this feature has been enabled, there are a few other steps needed to use this module. Note: Users must have permission to run Depreciation Reports. - Click on the “User” panel, under Enterprise Admin.
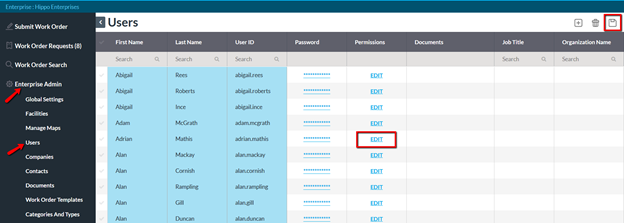
- Once on the User grid, click on the word “Edit” icon, next to the User First Name. The Edit Permissions form will open.
- Click on the Facility (General) page near the top of the Edit Permissions form.
- Find the “Reports” subcategory on this page and click in the box next to the “Depreciation Reports” permission. Make sure there is a checkmark in this box.
- Click “OK” at the very bottom of the Edit Permissions form.

**When the module (Global Settings grid) has been enabled and Depreciation Report permissions given to Users (Users grid), the asset information must be added. Note: Asset information must be entered into the software to calculate the Depreciation Reports. - Click on the “Close” icon located at the top of the grid, to exit the User grid. The Enterprise screen will open.
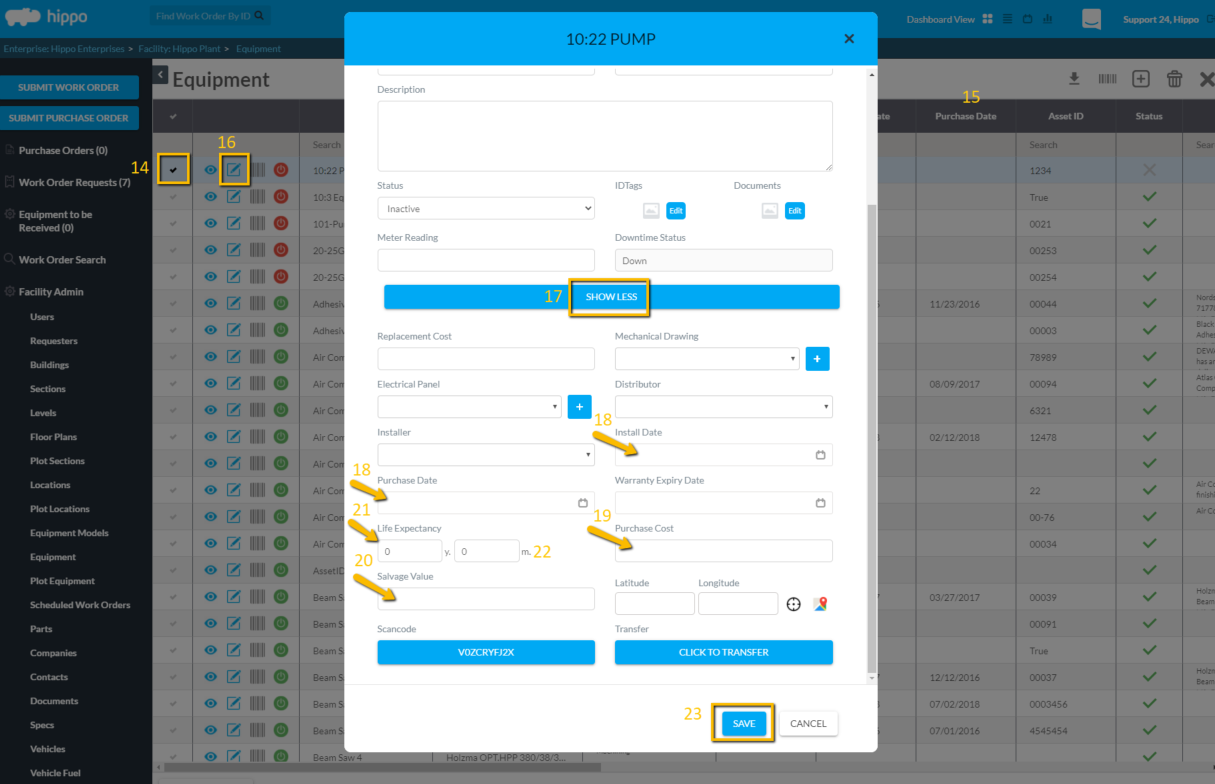
- Click on the “Facility Name” where equipment or asset information will be added.
- Click on the “Facility Admin” panel located on the left side of the screen.
- Click on the “Equipment panel” under Facility Admin.
Note: On this grid, a user must add four columns of information per equipment name: either Purchase Date or Install Date (this was determined on the Global Setting grid which date that will be used), Purchase Cost, Salvage Value, and Life Expectancy.
- Click next to the Equipmenname to highlight that row.
- Click and drag or scroll to the right of this grid and locate the “Purchase Date” or “Install Date” column header. Again, use the column selected as the “depreciation calculation model type” on the Global Settings grid.
- Click on the "Edit" icon on the left side of the grid.
- Click on "Show More" and it will open more options and "Show Less" once it is opened.
- Click on "Purchase Date" or "Install Date". Once the date is selected, it can be seen in the field.
- Click on "Purchase Cost". Once the cost is typed, it can be seen in the field.
- Click in the “Salvage Value” field type in the amount the equipment or asset will be worth once it is inactive.
- Locate and click in the “Life Expectancy” field. A pop-up window will appear.
- Simply click in the “Years” and or “Months” field to add the expected lifespan of the equipment or asset.
Note: A user can include an amount in the “Replacement Cost” field, but it plays no role in the report results. The Replacement Cost amount would indicate what it would cost to replace this equipment or asset.
- Click the “Save” button.
Depreciation Reports are now available. These reports are accessible from either the Enterprise Admin level or Facility Admin level.