Customize the Asset View
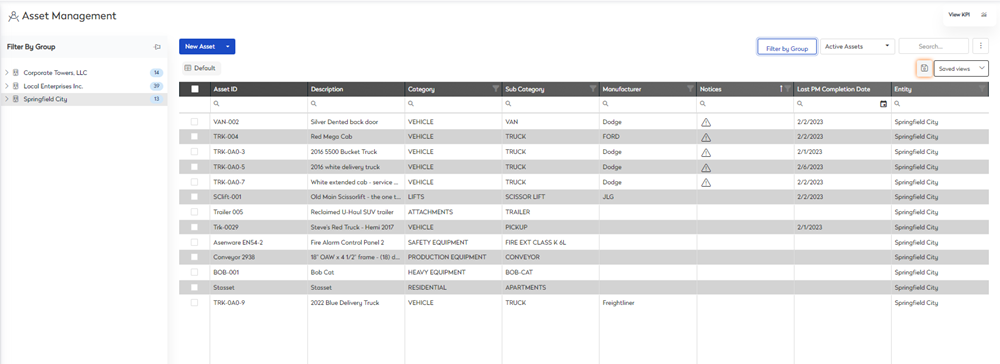
The asset list view is where you can see the full list of your assets, where they are located, and identify any outstanding issues. Each user can arrange the layout of the screen according to their own preferences and liking.
Watch the Video
Audio: Sound Video Length: 1:31 minutes
Learn more
The asset view is where you can find your assets and you can alter your view to suit your needs.
- Search
- Column Search
- Filters
- Filter by Group
- Saved View - Filter a Column Example
- Saved View - Toggle List Grouping Example
- Display your Saved View
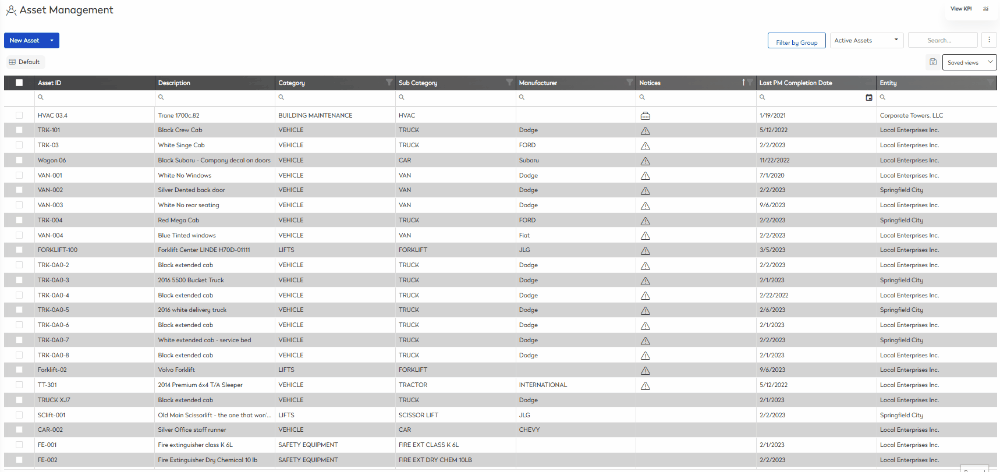
Search
Search allows you to find any field within the Assets list. The example below shows results populated for forklift.
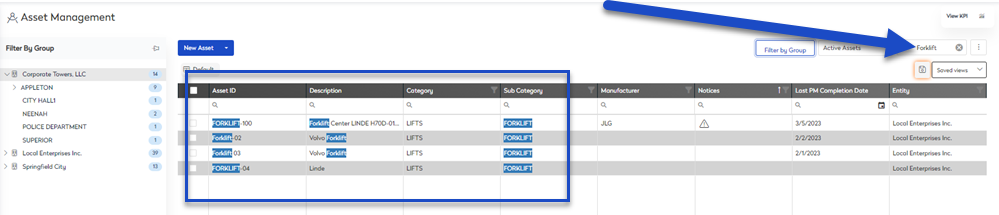
- In the Search field, enter the search term.
- Search results automatically populate.
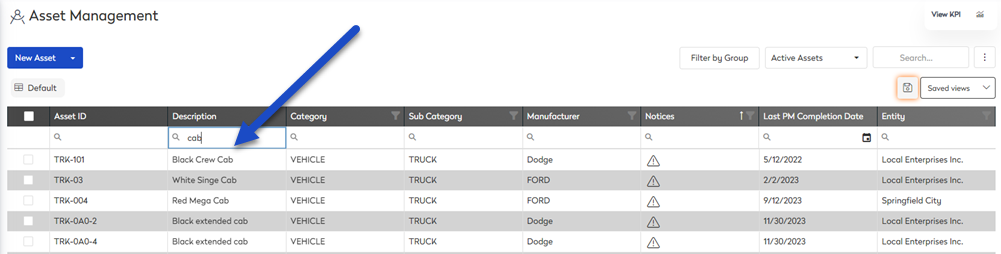
Column Search
When you search for an asset, it will display only those assets for the search criteria. Each column contains the search, and this will let you focus on the assets you want to work on.
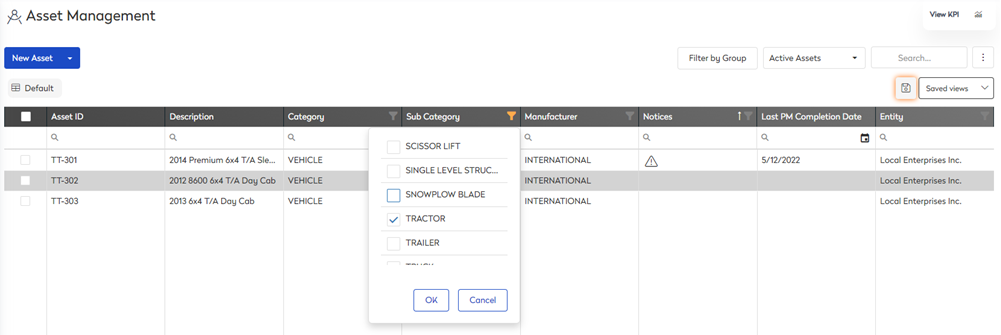
Filters
When you click the Filter  icon, a menu will appear showing you the items you can select.
Filter by Group
Filter by group helps you view assets by group organization. These filter groups can be:
- single address
- floor plan
- group of assets
These groups have been set up by your admin, see set up a site's location for more information.
- Click the Filter by Group button. The filter by group panel displays.
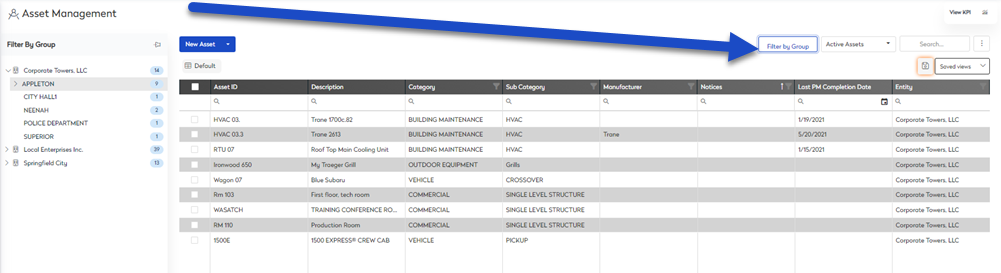
- Select a group to filter by. The asset list is filtered.
Saved View - Filter a Column Example
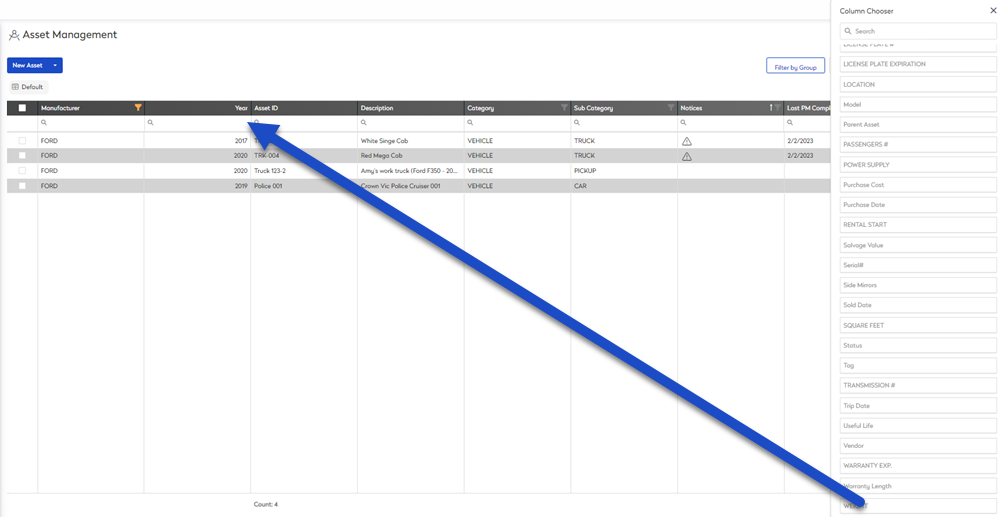
When viewing the assets list, you may want to change the asset columns and sort order. The Save View lets you set up the assets listing and then save it for next time.
This is best explained using an example. I want to create a saved list view for Ford and add the Year column to the list view.
Step 1. Reorder Columns
- Drag and drop the Manufacturer column to the front of the list.
Step 2. Filter the Column
- Click on the filter
 icon within the Manufacturer column. The list of manufacturers display.
 - Select FORD.
- Click the OK button. The Manufacturer column is filtered to display FORD.
Step 3. Add a column from the Column Chooser
- Click the more actions
 icon.
icon. - Select Column Chooser. The column chooser displays.
- Drag and drop the Year column to the Asset column headings. The year column displays on the asset list.
Step 4. Save your View
- Click the save
 icon. The create new view dialog displays.
 - In the View Name field, enter the name of the saved view.
- Select a who can access this view option, either:
- Private- Don't share this view with anyone.
- Everyone - Share this view with everyone.
- Security Roles - Share this view with specific roles in your organization.
- Teams - Share this view with specific teams in your organization.
- Click the Save View button.
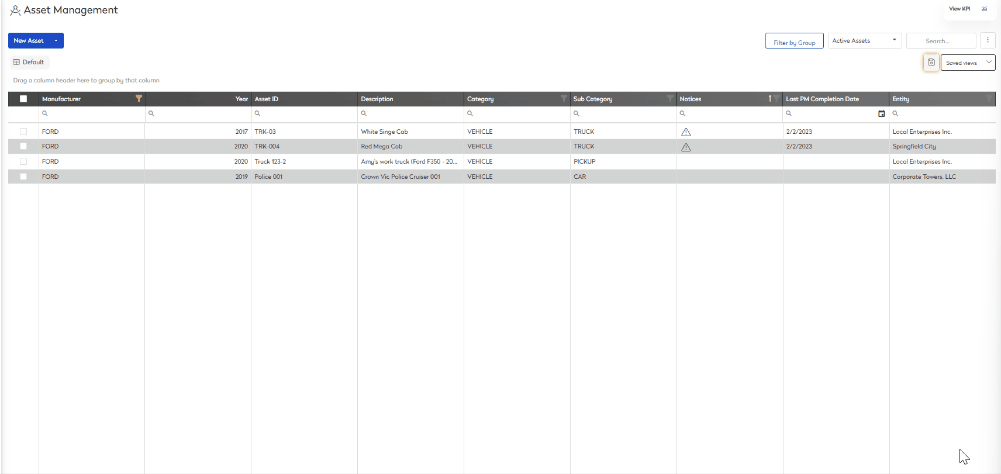
Saved View - Toggle List Grouping Example
When you view the asset list, you may want to group the list view by a column. This lets you see the asset listing in a different way. Let's look at the example where we group by year.
Step 1. Add Column
- Click the more actions icon.
- Select Column Chooser and the column chooser displays.
- Drag and drop the Year to the Asset columns.
Step 2. Group by a Column
- Click the more actions icon.
- Select Toggle List Grouping.
- Drag and drop a column header to the group by. The Asset list is toggled by group.
Step 3. Save your View
- Click the Save icon. The create new view dialog displays.
- In the View Name field, enter the name of the saved view.
- Select who can access this view options, either:
- Private- Don't share this view with anyone.
- Everyone - Share this view with everyone.
- Security Roles - Share this view with specific roles in your organization.
- Teams - Share this view with specific teams in your organization.
- Click the Save View button.
Display your Saved View
The next time you want to use the saved view you can display it.
- Click the Saved views drop-down. The saved views pop-up displays.

From this you can see a list of saved views, and the default view.
- Select a saved view.
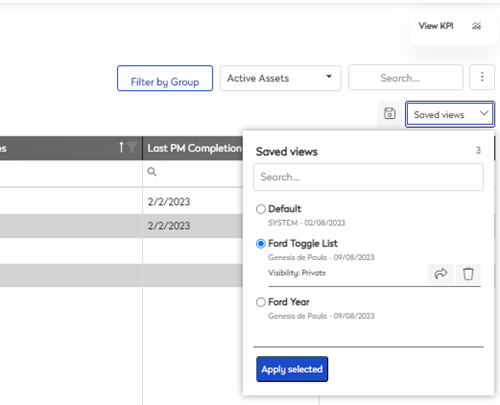
Remember, you can share a view that is private to you. Click the share  icon
icon
- Click on apply selected. The saved view displays.