How to Manually Add a Part to an Asset

Eptura Knowledge Center

How to Manually Add a Part to an Asset

This page explains how to manage parts related to an Asset using the Request Management Console.
Introduction:

One of the major advantages of ManagerPlus is the flexibility it gives you in defining and maintaining almost anything that needs scheduled maintenance.  The Assets Module allows you to define and track Assets by the Entity they are assigned to.  Managing Parts to an Asset using the Request Management Console:

Instructions:

How to Manually Add a Part to an Asset.gif

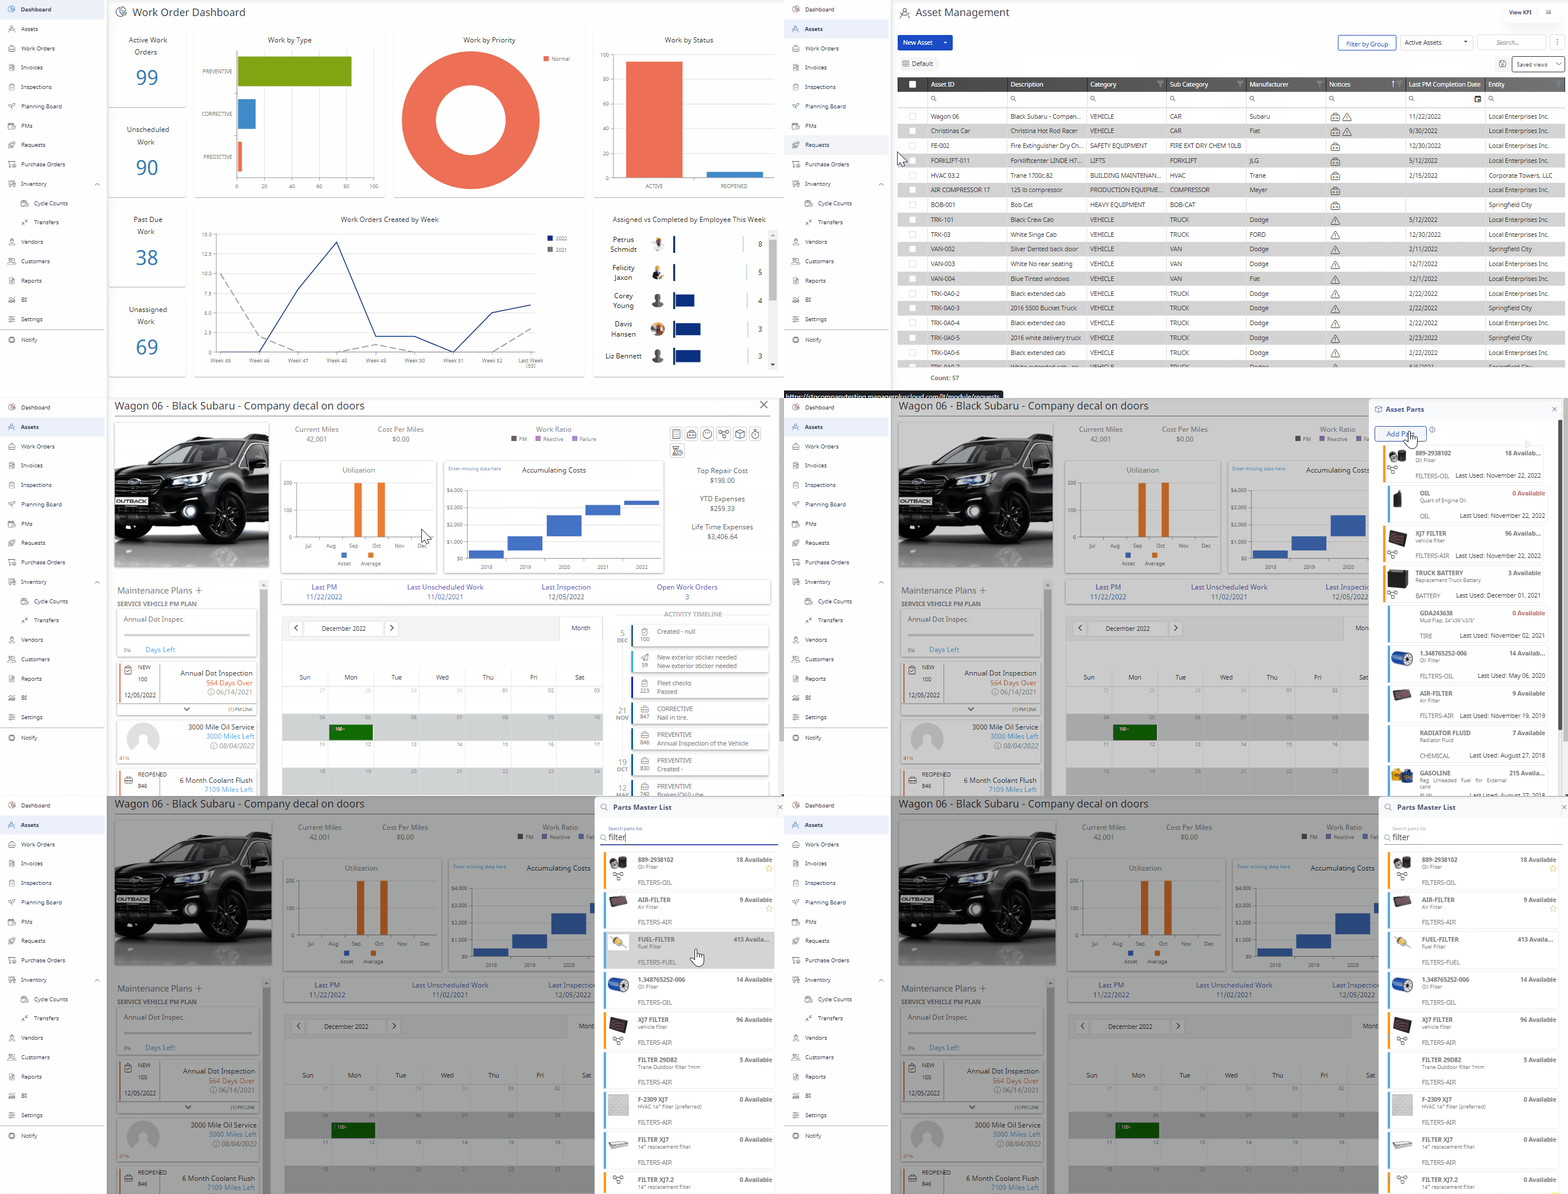
1.  Log into your ManagerPlus account and click on the Assets icon on the side ribbon.

2.  Create a new Asset or open an already existing Asset from your Asset list.  

If creating a new Asset, all required fields must be filled in and then saved before you can proceed to Step 3. 

3.  On the top right section of the Asset screen, click on the Asset Parts icon.

4.  Click on the Add Part icon and enter in the Part you wish to add.  Once you have added the Part to the Asset, you have successfully added a Part to an Asset.

5.  To Delete a Part on an Asset, click on the Delete icon.


  • Was this article helpful?