Create a new Invoice
Say you need to create an invoice, that is not connected to a work order for a customer.
Invoice creation is easy as:
Step 1. Quickly fill in the Invoice Fields
- who your customer is
- which Asset was worked on (if applicable)
- why the invoice is needed (Purpose)
Step 2. Complete the Line Items List
- services provided
- parts used
Step 3. Send it out to your customer
- The invoice be sent out digitally to your customer, for a faster response.
While possible to create Invoices on-the-go, it is strongly recommended you set up a connection between your Work Orders and your Invoices, so the Invoices will be auto-generated when the work order is completed.
Instructions
Let's create a new Invoice.
- Navigate to Invoices.
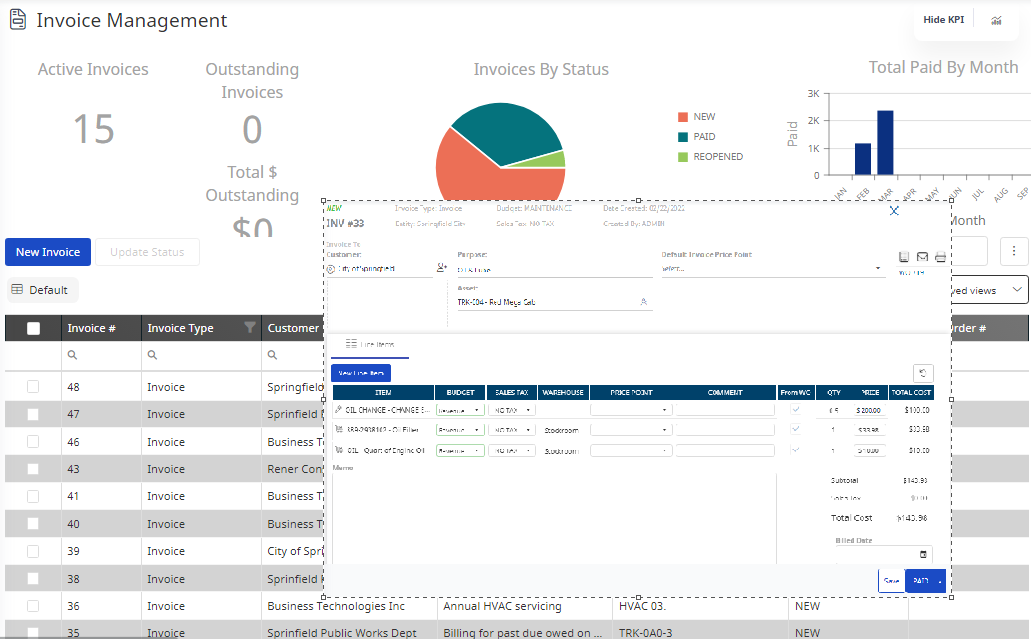
- Click the New Invoice button.
The New Invoice tab displays.

- Complete the following:
| Field | Description |
|---|---|
|
Entity drop-down |
List the site responsible for the work being performed (This is auto-generated if you only have one Site/Entity). |
|
Customer drop-down |
Client name, for whom the Invoice is being generated. |
|
Budget drop-down |
This is an account that was specifically created to track invoices. It is NOT one of your maintenance budgets. |
|
Price Point drop-down |
The markup percentage on parts & labor, that was established by a system administrator. |
|
Sales Tax drop-down |
Can be applied to services, parts, or both. |
| Purpose field |
Reason for the invoice being generated. |
|
Asset field |
The equipment that was serviced (list pulls from the Asset module). We recommend you list the assets when you create the invoice. This will save you time as it will auto-generate the majority of the required fields.
|
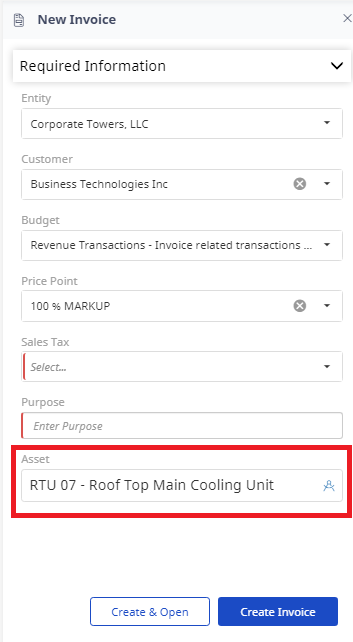
- Click the Create & Open button.
If you click the Create Invoice button this will save the invoice and you can add the line items later.
The Invoice has been created, now you can complete the details and submitted it to the client.
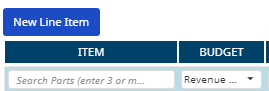
- Add a new line to the invoice, click the New Line button.
- You can either add a line item for:
- Parts
- Labor
- Other Costs
Add Part
- Click the Add Part item. The new line item is added.
- Search for the part(s) and then select the part.
- When you have completed adding the parts, then click the New Line item button.
Add Labor
- Click the Add Labor button. Add Service Tasks displays.
- Select the service task.
- Click the Add to Invoice button.
- After all items items are in the invoice, then Save button.
Your invoice can now be printed or sent to your customer electronically.