Set up a Site
Sites is the top level of organizing your assets in the application. Sites allow you to group together assets, people, and work orders that belong to a specific entity, in order to streamline which information is seen, and by whom.
Each Site can have multiple groups below it.
- SITE 1
- Group
- Group
- SITE 2
- Group
- Group
When managing teams in separate departments or buildings, it is important to differentiate what work belongs to them in a simple manner to avoid confusion and clutter. Sites can help you achieve this.
After you have set up the sites your company needs, you will need to grant your users access.
Create a Site
- Navigate to Settings.
- Under the Administration heading, click Sites. The Site Settings screen displays.
Typically there is only a single region. If more than one region displays, then select the region first.
- If there is only a single region, then hover over the region and click the + icon. A popup menu displays.
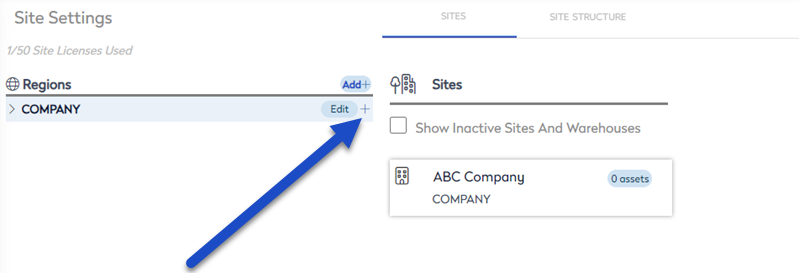
- Click the Add Site. The Create a New Site dialog displays.
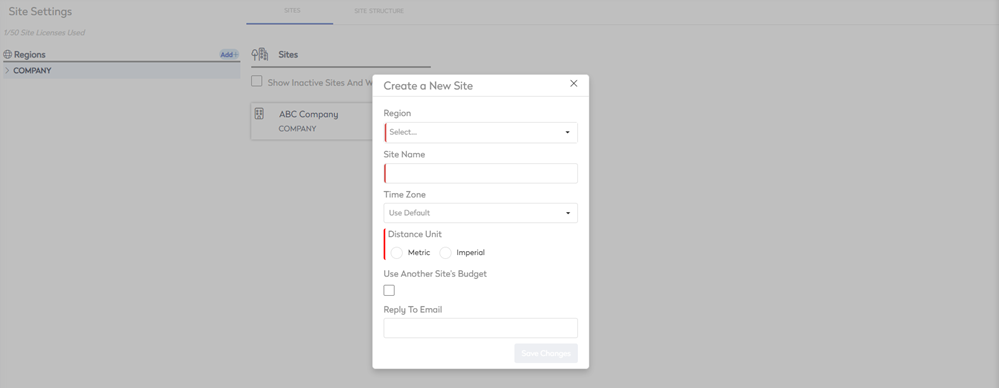
- From the Region drop-down, select the region.
- In the Site Name field, enter the name of the site.
- From the Time Zone drop-down, select the time zone.
- From the Distance Unit options, select either Metric or Imperial.
- Check the Use Another Site's Budget check box if you want to use a different site's budget.
- In the Reply To Email field, enter the reply to email address.
- Click the Save Changes button. The site is saved.
Edit the Site
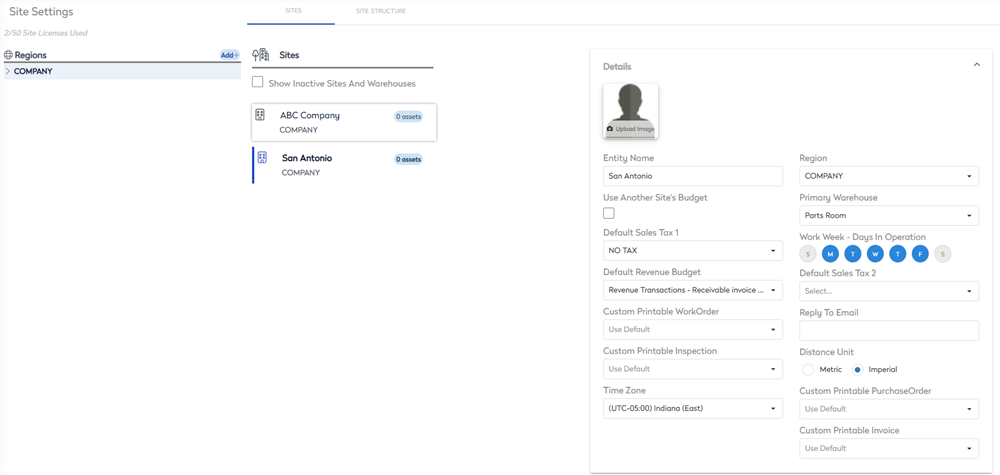
- Click the new site. The site's details form displays.
Site Details
- Complete the site details:
| Field | Description |
|---|---|
| Upload Image | For the image, if this division of your organization has its own logo it you can click the upload image and select an image to upload. |
| Entity Name | Enter the name of the site. |
| Use Another Site's Budget | Check the Use Another Site's Budget check box if you want to use a different site's budget. |
| Default Sales Tax 1 |
Select the sales tax. By default, uses the default sales tax established in your Company settings found in Settings> Administration > Company. |
| Default Revenue Budget |
Select the revenue budget. By default, uses the default sales tax established in your Company settings found in Settings> Administration > Company. |
| Custom Printable Work Order | Overrides the default report and uses a custom report you can build in BI. |
| Custom Printable Inspection | Overrides the default report and uses a custom report you can build in BI. |
| Time Zone | Select the time zone. |
| Region | Select the region. |
| Primary Warehouse | Select the default warehouse for this site’s Inventory (see Warehouses below) |
| Work | Work Week – Days In Operation: Select which days of the week calendar-based PMs come due |
| Default Sales Tax 2 |
Select the sales tax. By default, uses the default sales tax established in your Company settings found in Settings> Administration > Company. |
| Reply To Email | Enter the reply to email address. |
| Distance Unit | Select either Metric or Imperial. |
| Custom Printable Purchase Order | Overrides the default report and uses a custom report you can build in BI. |
| Custom Printable Invoice | Overrides the default report and uses a custom report you can build in BI. |
Payable Address
- Click the Payable Address expand
 icon.
icon.
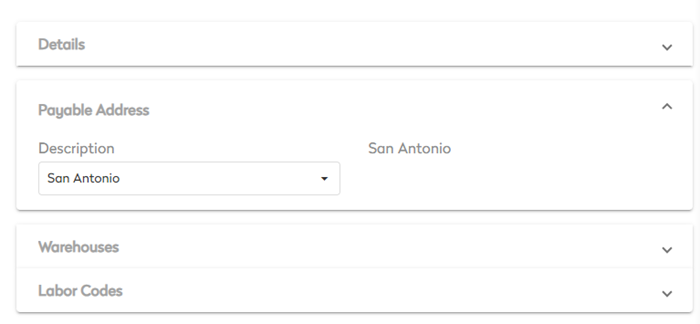
- In the Description drop-down, select [+] Manage address.
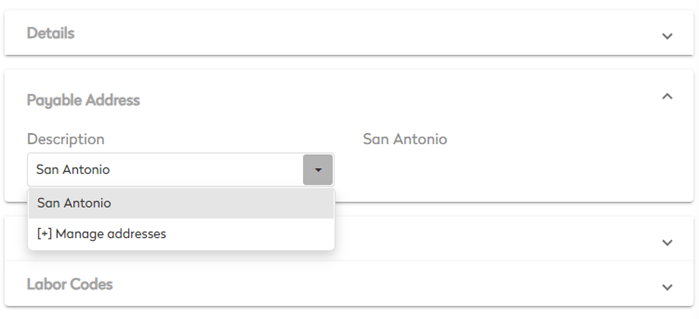
The Address Manager dialog displays.
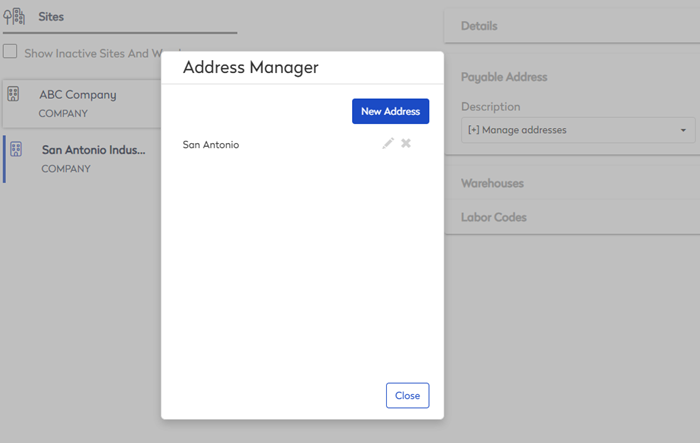
- Click the New Address button. The New Address dialog displays.

- In the Deliver To field, enter the name.
- In the Address 1 and Address 2 fields, enter the address.
- In the City field, enter the city.
- In the Postal Code field, enter the post or zip code.
- From the Country drop-down, select the country.
- From the State drop-down, select the state.
- In the Description field, enter a description.
Warehouses
- Click the Payable Address expand icon. The Parts Room displays by default.
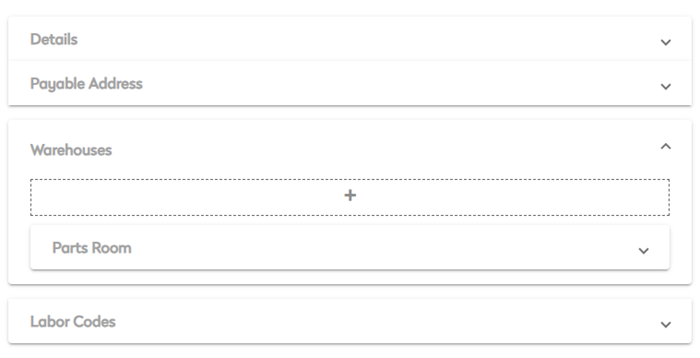
- Click the + icon. The New Warehouse dialog displays.
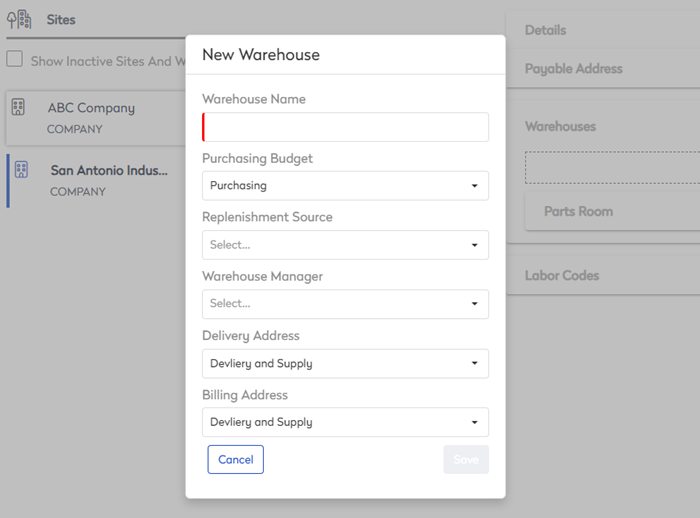
- In the Warehouse Name field, enter the name.
- From the Purchasing Budget drop-down, select the budget for purchasing inventory.
- From the Replenishment Source drop-down, select the source. Determined if you restock these shelves through Inventory Transfers from Another Warehouse or order as needed through Purchase Orders.
- From the Warehouse Manager drop-down, select the manager. This is the primary contact.
- From the Delivery Address drop-down, select the address if it is different from the billing address.
- From the Billing Address Address drop-down, select the address.
- Click the Save button.