Set up your Invoices
Level: Administrator
To set the Invoices module, the following settings will need completed:
- Step 1. Invoices settings - establish your defaults.
- Step 2. Price Points Settings - establish markup amounts.
- Step 3. Work Orders Settings - enable auto-invoice generation.
Step 1. Invoice Settings
Navigate to Settings > Module Settings > Invoices > General.
General tab
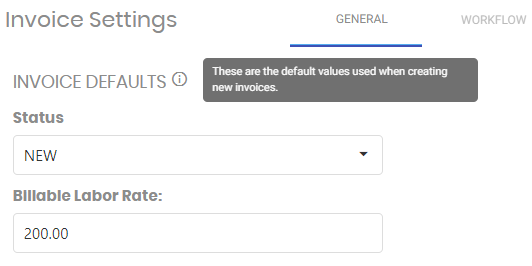
Invoice Defaults
These are the default values used when creating new invoices.
- Status: The starting status for the invoice, when it is created.
- Billable Labor Rate: Set the default labor rate that should be used on customer invoices, unless otherwise specified on particular tasks.
Estimate Defaults
- Status: The starting status of the estimate.
List Setup
These are the default values used when creating new invoices.
- Other Cost Types: These cost types are all shared between Work Order, Purchase Order, and Invoices modules. Add a new type here, and it will be added to all three modules as well
- Sales Tax: These tax rate options are all shared between Work Order, Purchase Order, and Invoices modules. Add a new tax rate here, and it will be added to all three modules as well
Custom Fields
These are the fields unique to this module. Data entered here will only appear in the invoice module, and no where else.
Work Flow tab
Set up a workflow for the invoice and the estimate.
Navigate to Settings > Module Settings > Invoices > Workflow.

Invoice Statuses
These are all the existing statuses in the module. Each can be renamed if needed, but cannot be deleted after it has been used in an invoice.
Click Create New Status to establish a new one. 4 options are available:

Security Options
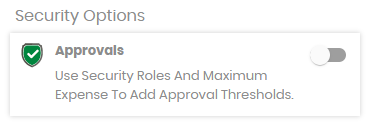
- Approvals: Use Security Roles And Maximum Expense To Add Approval Thresholds. These work the same as Work Orders or Purchase Orders security settings
- If desired, turn on the feature
- Select one of the security roles
- Name the maximum expense allowed before the user level is blocked from selecting the status
Paths
Select a status from the list, and its Pathway will be displayed.
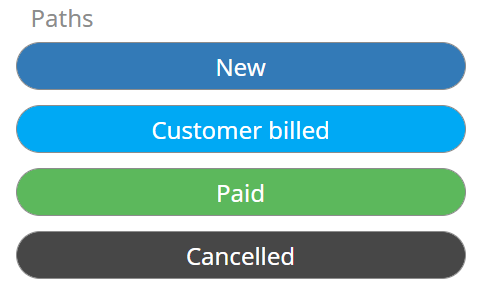
The highlighted ones show the status options you can navigate to, from the current status.
- In the above image example, Nes has been selected.
- From there, you can go to Customer Billed, Paid, and Cancelled.
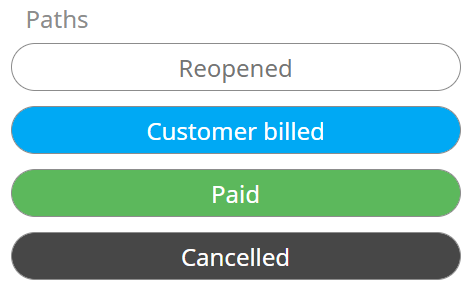
- Reopened is not an option. To make it an option, click on it.
- Changes are automatically saved
Service Tasks tab
Navigate to Settings > Module Settings > Invoices and then click the Service Task tab.
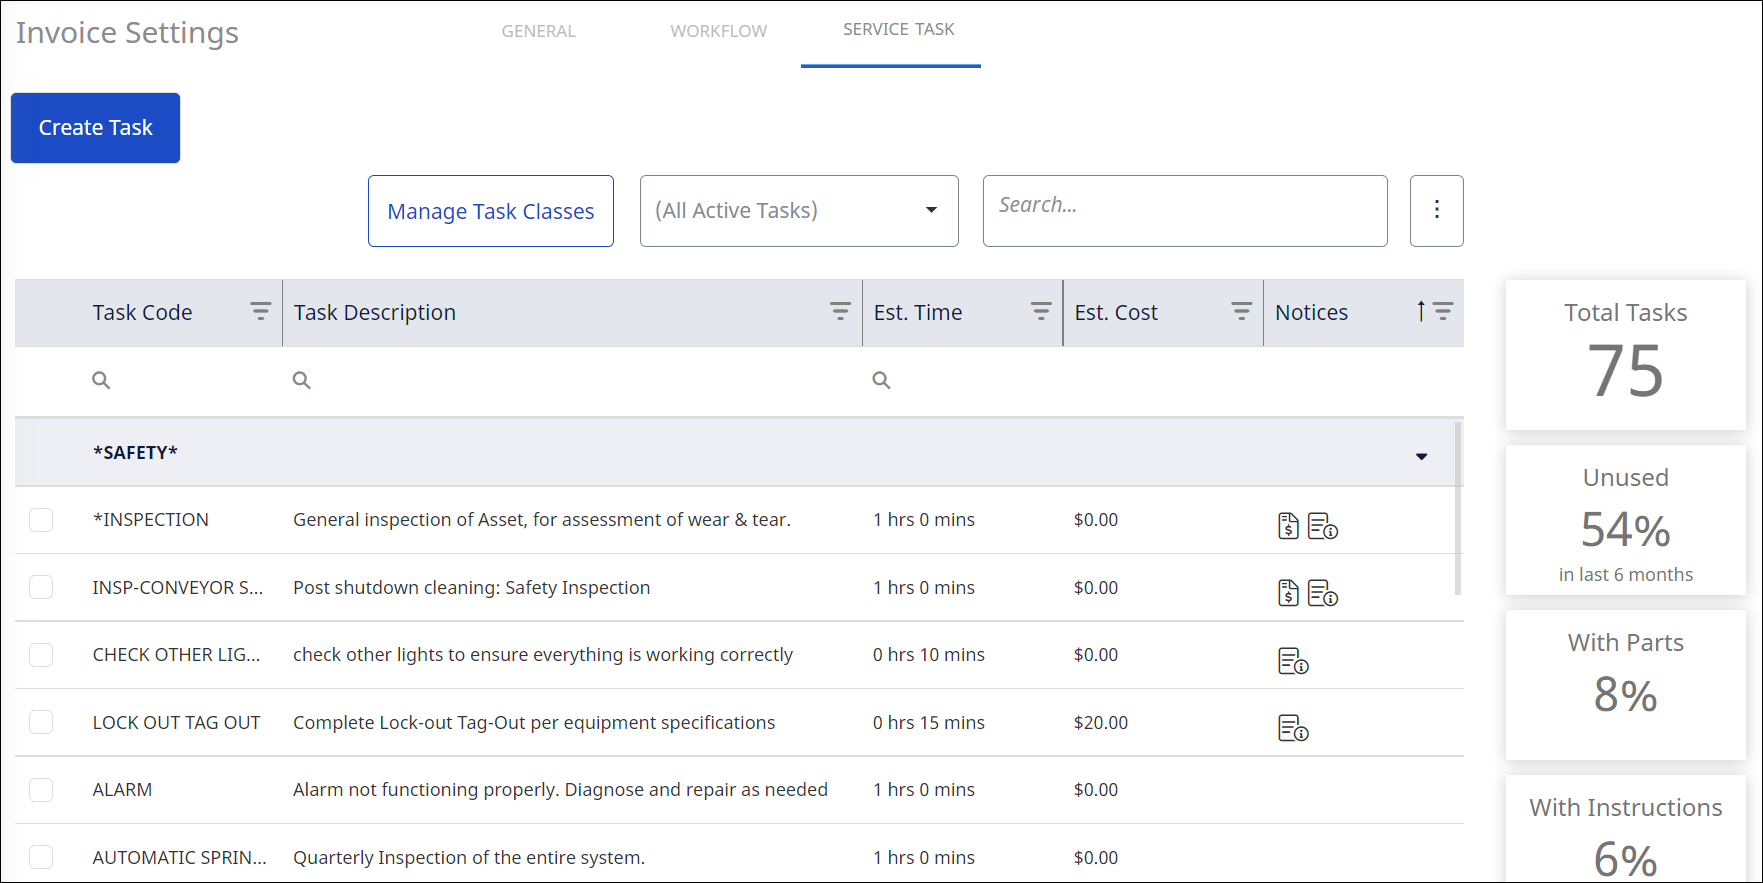
This is the same Service Task library as seen in the Work Order Settings. As it is a shared library, editing in either location, will be visible in the other.
As service tasks are required for invoices, you'll need to visit this library often.
Select the desired Service Task to view and updated any existing information
To create a new task:
- Click the Create Task button.
- Complete the following fields:
Details Tab
| Field | Description |
|---|---|
| Code | Enter the name of the task. |
| Description | Enter a detailed description of the task. |
| Class | From the drop-down, select a class. |
| Estimate Time | Enter the estimated time. |
| Estimate Cost | Enter the estimated cost. |
| Invoice Labor Rate | Enter the invoice labor rate. |
Bill of Materials Tab
When you add a part here then Eptura Asset will suggest what type of part needs be used when performing the service. It can be a different part each time you provide the service, depending on what asset you worked on. The actual part number will be named on the work order. Then the next time you perform the service on that Asset, the application will remember what part was used, and make that the suggested part.
- Click the Add + icon to display the inline form.
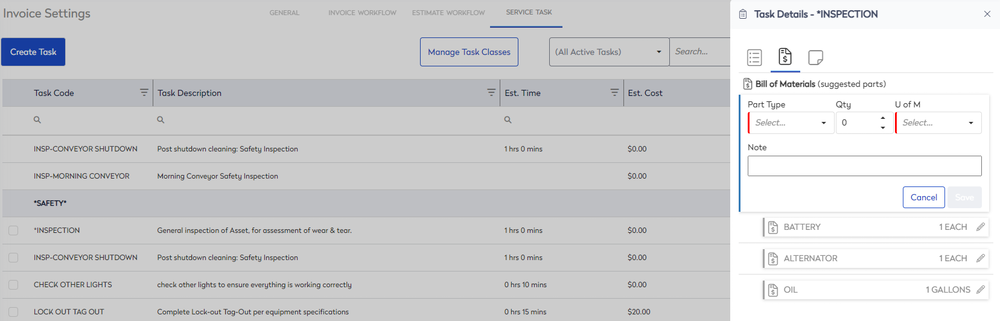
- From the Part Type drop-down, select the part type.
- In the Qty field, enter the quantity to be used.
- From U of M drop-down, select the unit of measurement.
- In the Note field, enter a short note.
- Click the Save button.
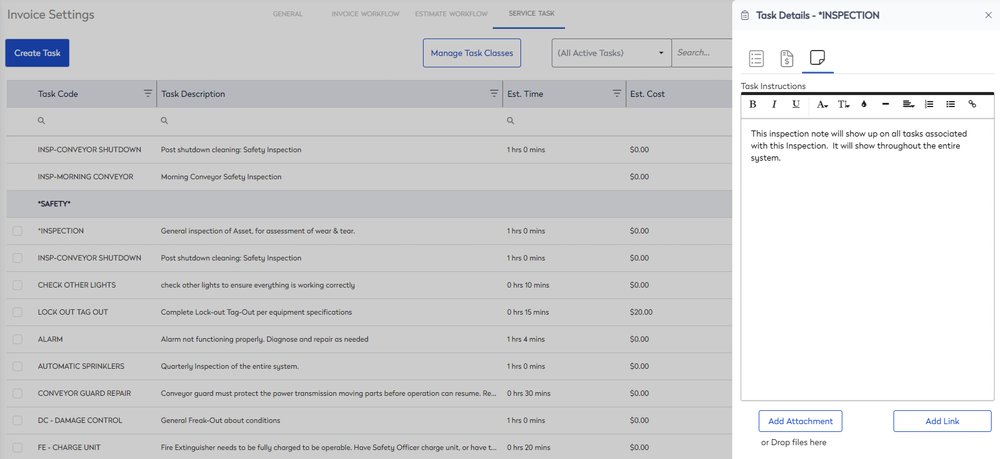
Notes Tab
In the Notes tab you can enter the task instructions, add an attachment, such as images, or a URL link.
Step 2. Price Points Settings
Price Points are the most critical aspect of the Invoices. It sets the difference between your expenses, and what your customer is asked to pay. See Set up your Price Points.
Step 3. Work Order Settings
- Navigate to Settings > Module Settings > Work Orders.
- Select the Work Type tab.
The Work Order Settings displays.
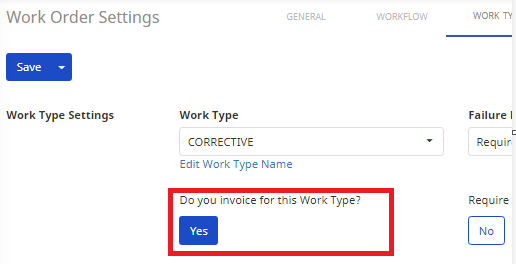
Look at the list of Work Types, and decide which ones need to be eligible to generate Invoices.
- From the Work Type drop-down, select the work type.
- For the Do you invoice for this Work Type? toggle, switch the setting to Yes.
- Click the Save button.
When you enable this it will create an invoice when the work order is completed.
When this is enabled then this does NOT mean every work order under this work type will create an invoice. For it to generate an invoice, a completed work order must have two things:
- Work Type that is set for Invoices
- Have a Customer attached
If it doesn't have both, the work order will simply close without generating an invoice.
Now you are ready
Now you can start closing work orders with work types authorized to generate invoices.