Access Work Order Settings
Level: Administrator
All changes to your Work Order Settings will impact ALL users.
Access Work Order Settings
- Navigate to Settings.
- Under the Module Settings heading, click Work Orders. The Work Order Settings screen displays.
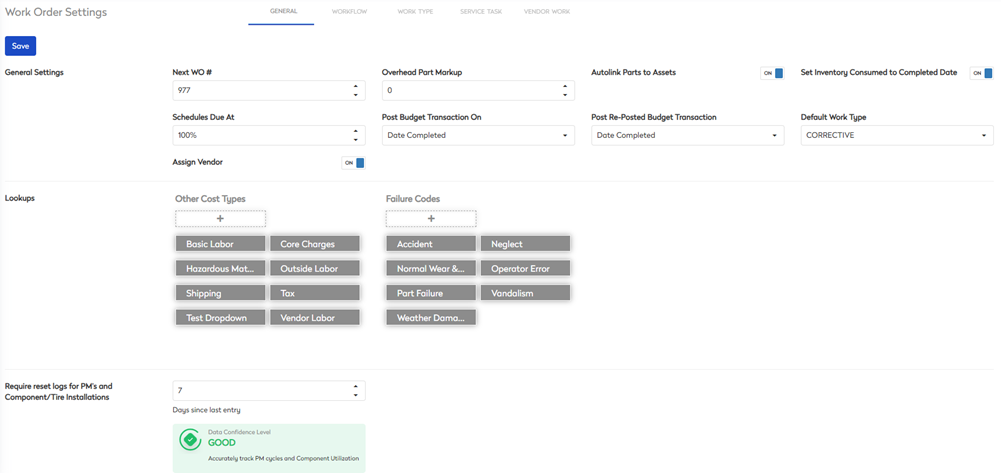
This screen contains the tabs:
- General - set up the general settings, lookups, and require reset logs for PM's and component/tire installations.
- Workflow - set up the workflow of the work orders.
- Work Type - set up the default settings for the work type.
- Service Task - set up the tasks and task groups.
- Vendor Work - set up the fields that are included on a work order that a vendor sees in the Vendor Portal.