Set up Workflow for Work Orders
Level: Administrator
All changes to your Work Order Settings will impact ALL users.
Your Administrator can set up a workflow that a work order will follow from creation to completion.
- Select the Settings icon located in the menu.
- Select Module Settings then Work Orders.
- Click the Workflow tab. The Workflow tab displays.
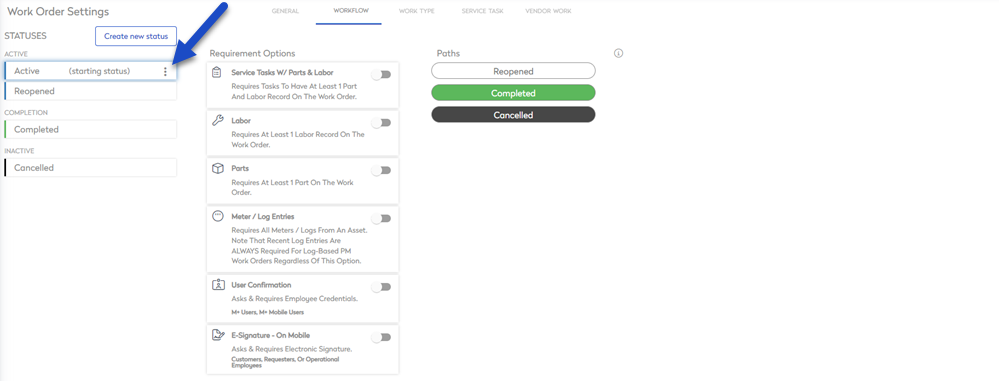
The default workflow contains the following:
Active
- Active
- Reopened
Completion
- Completed
Inactive
- Cancelled

Set up a simple Workflow
The workflow is easier to explain with an example, so let's set up this simple workflow. Below is an example of a simple workflow that includes Open, In Progress, Completed, Reopen, and Canceled.

Rename a Status
You can rename a status, in this example, the Active status will be renamed to Open.
- Click on the status.
- Hover on the status to see the More Actions icon.
- Click the More Actions
 icon. A popup menu displays.
- Click the Rename menu item. The Rename status dialog displays.
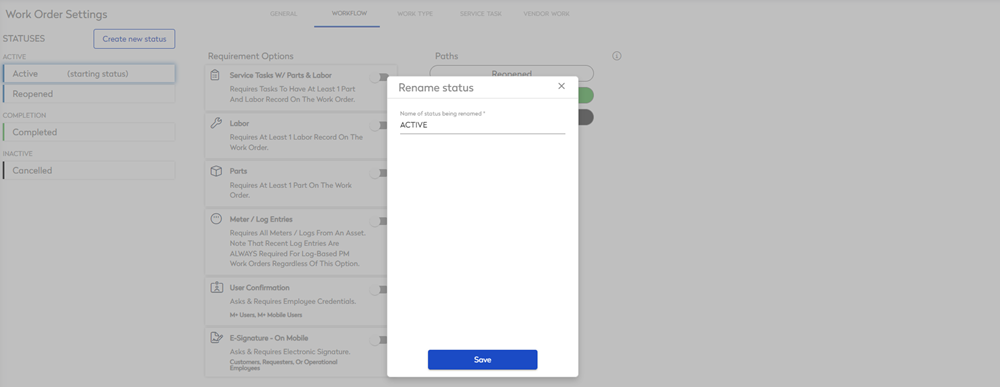
- In the Name of status being renamed field, enter the name.
- Click the Save button.
The status name is saved.
Create a New Status
You can create a new status, in this example, the In Progress status is created.
- Click the Create new status button. The Choose a status type dialog displays.
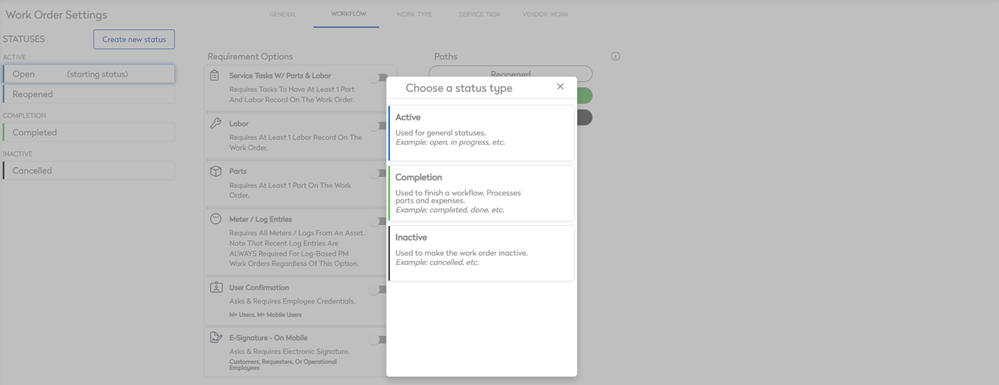
- Select the status type, either:
- Active - used for general statuses.
- Completion - used to finish a workflow.
- Inactive - used to make the work order inactive.
The Name your new status displays.
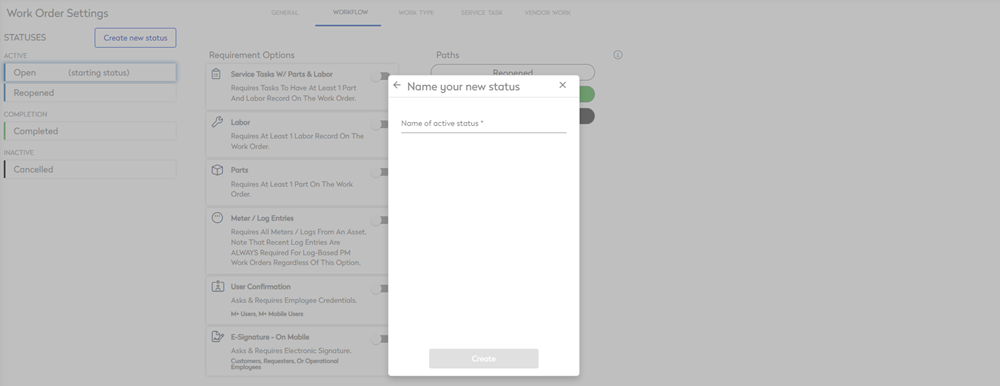
- In the Name your new status field, enter in the status name.
- Click the Create button.
The status is created.
Define the Workflow for each Status
You need to define where the status will flow to the next status.
For example:
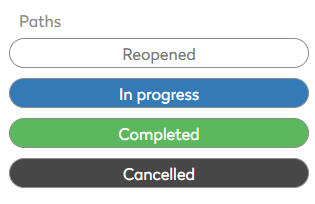
| Status | Path | |
|---|---|---|
| ACTIVE |
OPEN |
IN PROGRESS CANCELLED |
| ACTIVE |
REOPENED |
IN PROGRESS CANCELLED |
| ACTIVE |
IN PROGRESS |
COMPLETED |
| COMPLETION |
COMPLETED |
REOPENED |
| INACTIVE |
CANCELLED |
- Click the status and requirement options and paths displays.
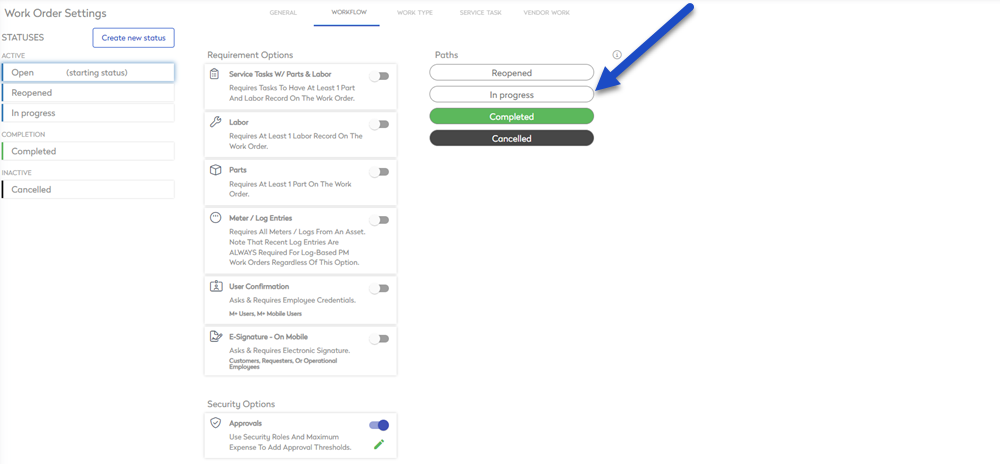
- Click the path you want this status to flow to.
The path will highlight and save.
- Repeat steps 1 to 2 to complete the flow for each status.
Define the Workflow Requirement Options
You will see that each status has requirement options. In this example, the IN PROGRESS status's requirements will be defined.
- Click the status and requirement options and paths displays.
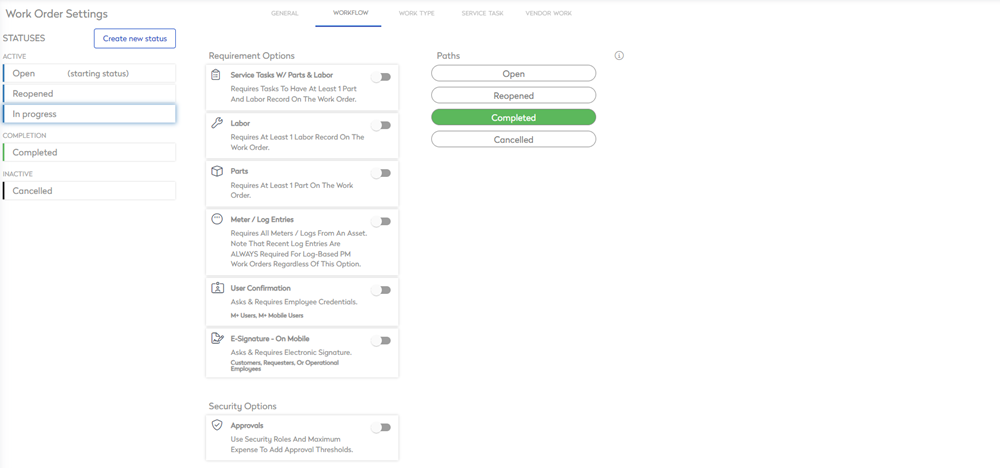
The following requirements can be toggled on:
- Service Tasks W/ Parts & Labor - Requires tasks to have at least 1 part and labor record on the work order.
- Labor - Requires at least 1 labor record on the work order.
- Parts - Requires at least 1 part on the work order.
- Meter / Log Entries - Requires all Meters / Logs from an asset. Note that recent log entries are ALWAYS required for log-based PM work orders regardless of this option.
- User Confirmation - Asks & requires employee credentials. (M+ Users, M+ Mobile Users)
- E-Signature - On Mobile - Asks & requires electronic signature. (Customers, Requesters, or Operational Employees)
- Approvals - Use security roles and maximum expense to add Approval Thresholds.
Let's turn on the approvals.
- Click the Approval toggle to ON.
- Click the Edit
 icon. The Thresholds Per Role dialog.
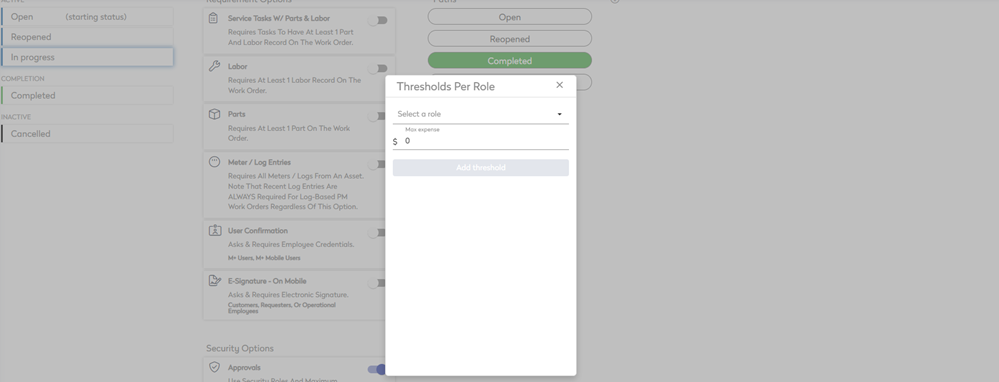
- From the Select a role drop-down, select either Administrator, Full User, or Read Only.
- In the Max expense field, enter the amount. This is the threshold amount that will trigger the approval, for example, when the work order for $5,001 then the approval will be triggered and if the work order is $5,000 then the approval is not triggered.
- Click the Add threshold button. The threshold is saved.
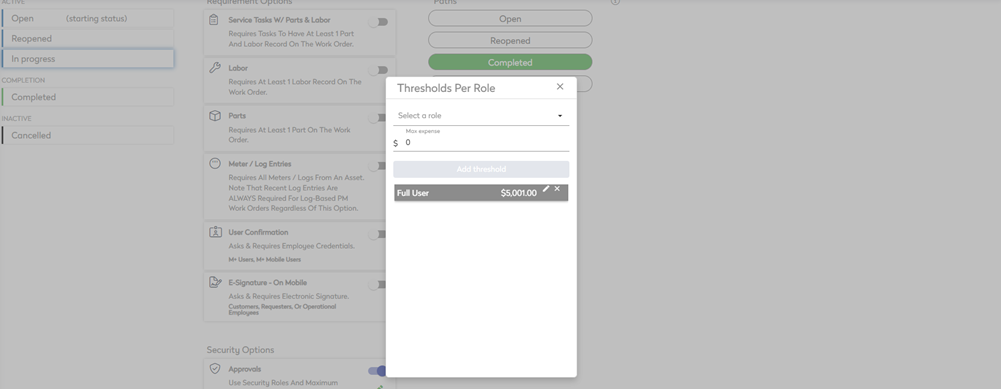
- Repeat steps 4 to 6 to add another approval threshold.
- When you are finished click the X icon to close the dialog.