
Imports 101

Eptura Knowledge Center

Imports 101

Say you have a large amount of new Assets or Parts to add to your inventory, manually entering them into the platform one by one would certainly be a time consuming task. Imports can help you cut down on the manual entry by using a template that has already been generated for you. 

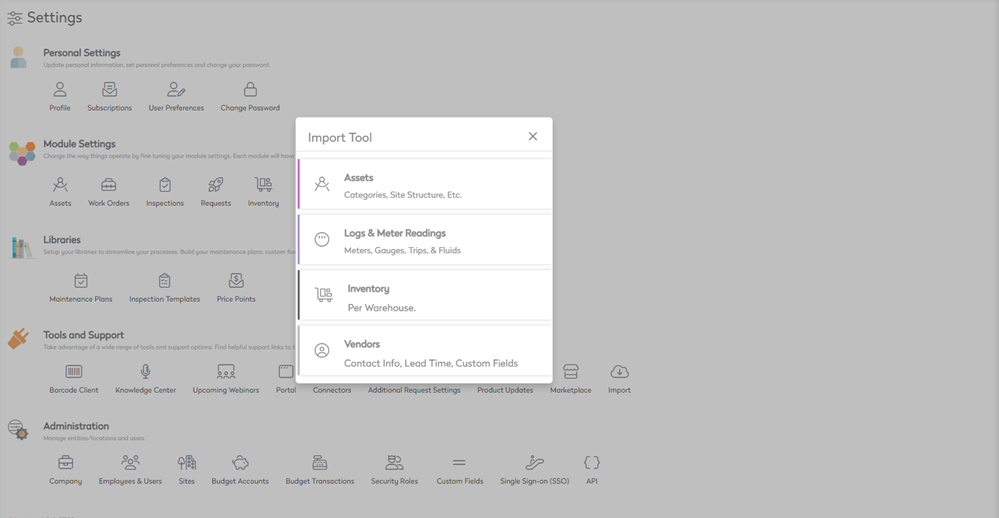
The following can be imported using the Import Tool:

  1. Assets
  2. Logs & Meter Readings
  3. Inventory
  4. Vendors

clipboard_e50b51869a2454cb9fdbd0685f41eeae2.png


Navigating to the Import Tool

To find the Import Tool, navigate to SETTINGS > TOOLS AND SUPPORT > IMPORT

IMPORTTOOL.gif


Downloading the sample file

Upon navigating to the Import Tool, you are prompted with the following  options:

clipboard_e50b51869a2454cb9fdbd0685f41eeae2.png
Select the type of data are importing, then you are brought to the next screen where you are presented with instructions on how to import the data.

To download the sample file, select the CSV file using the hyperlink as pictured below:

clipboard_e82545c57438e2e748245c9d6c0512992.png

The file is then saved to your computer which can be opened in any spreadsheet editing tool.


Editing the file

To edit the file, locate the sample file that was previously downloaded and open it in a spreadsheet editor. Pay attention to Row 1, as this is the header for each column, dictating what type of information must be entered into the corresponding cells below. This is important for mapping the data as the headers are used to identify what information belongs in each column.

The example below is for an Asset import template.  From here we can see there are two assets being uploaded.
clipboard_e8e1f4d54fa1b13bf81141652de41e557.png
 

Complete the import template by entering all the information for the asset that is being imported. A new row must be used for each entry.  For example, to add another vehicle to import, begin by filling in Row 4 Column A with the Asset ID, and continue with the rest of the columns from left to right.


Once the file is complete, save the file in a location that can be easily accessed for uploading.

Uploading the file

Upon completing the import file, follow the steps below to upload the file to the import tool.

Uploading the file

  1. Select a site to import to

    Selecta Site.gif

     
  2. Select  clipboard_e5bd4fcbda1ebe9449fbae0ae0f4c1fda.png and locate the file saved previously

    Selecta file.gif

     
  3. Select clipboard_e21359bb8f450bf026d05ec5abf004483.png

Upon successful upload, the data is now ready to be mapped and validated.


Mapping and Validating the Data


Mapping the Data

After uploading the file, the next page presented is the Map Data page:

clipboard_e8300952166bcd5e95d8f553ee4e15267.png


The left side of the table displays the fields from the application, the right side displays all fields from the uploaded file. All mandatory fields are indicated with an asterisk. If there are any columns that did not map correctly from the file, click on the field that needs to be corrected and select the correct field from the file to map to the application.

MAPPINGOFFIELDS.gif


Once the mapping has been confirmed, select  clipboard_ec5721b3e6cac5bf5895169def7ea71a8.png to validate the data.


Validating the Data

Upon previewing your data, any errors are highlighted in the import error tabs. To know more about the error, hover over the highlighted value to view the tooltip.

clipboard_e513c7d5f8495c3f8b296d4fed005cef3.png

The errors can be corrected directly from this screen by clicking on the highlighted errors and updating the values to reflect accurate information.

Once you have corrected the errors, select clipboard_eb46223cad73cb0f120848fbb0efa5094.png.

clipboard_e48ccea2f0f89a895b55b5eeb20bef743.png


You have now completed an import.


Use this feature to
  • Quickly add Assets, Inventory, Vendors, Logs & Meter readings to the application
  • Eliminate manual data entry
  • Enter multiple meter readings at once


  • Was this article helpful?