Set up the Visitor App
Various preferences are available in the Visitor app to allow you to tailor each device running the app to your environment. To access the Settings screen where these preferences are located, tap the upper-left corner 5 times the menu will then display.
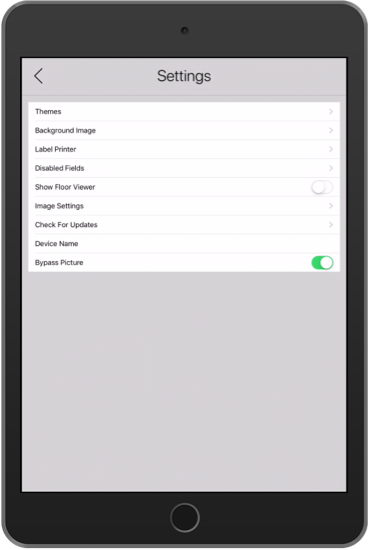
The following options are available on the Settings screen.
- Themes. Tap this option to define the color scheme the Visitor app.
- Background Image. Tap this option to define a background image to display on the Check In screen.
- Label Printer. Tap this option to define settings for the badge label printer used at your facility.
- Disabled Fields. Tap this option to access the screen where custom fields can be hidden from the end user in the Visitor app.
- Show Floor Viewer. Activate this toggle switch to display the host location on a floor plan when a visitor completes the check-in process.
- Image Settings. Use this option to adjust the brightness of images printed on badge printers.
- Check For Updates. Tap this option to check for updates to the app and download the most recent version.
- Device Name. Tap this option and enter a name for the device. This option is particularly useful when multiple devices are used in the same lobby.
- Bypass Picture. Activate this toggle switch to remove the requirement to take a picture when checking in using the Visitor app.
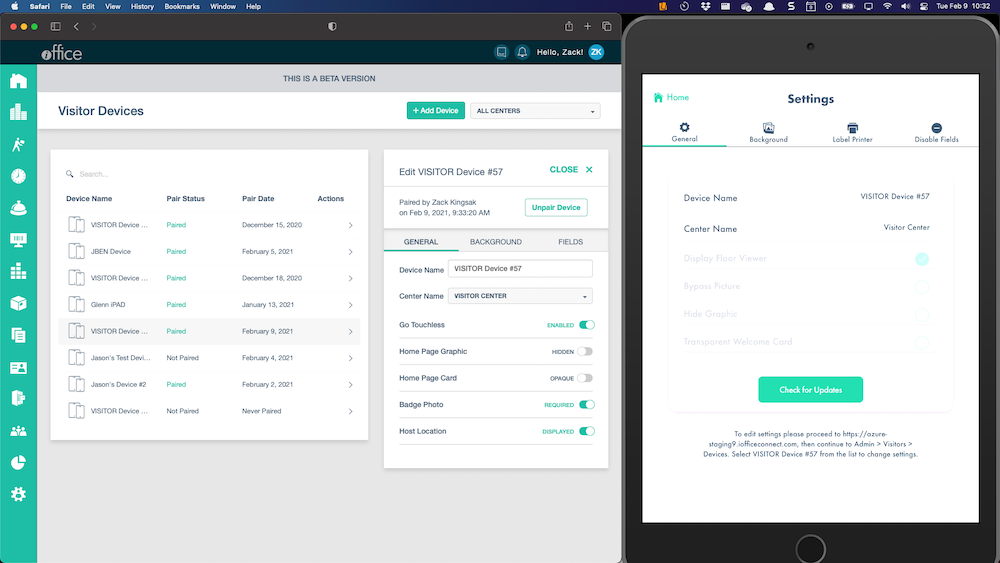
Note: in February 2021, we released an update to the Visitor Module that requires Admins manage Visitor device settings from a new desktop Devices page rather than from the local iPad. We also changed the name and order of settings. Read more information about this update here. Below is a summary of changes to Settings.
| Old Setting | New Setting | Description |
|---|---|---|
| Hide Graphic | Home Page Graphic | Toggle: Displayed / Hidden |
| Transparent Welcome Card | Home Page Card | Toggle: Transparent / Opaque |
| Bypass Photo | Badge Photo | Toggle: Required / Not Required |
| Floor Viewer | Host Location | Toggle: Displayed / Hidden |
Guided Access Mode
Using the Guided Access mode on the iPad, you can secure the iPad using a passcode and prevent users from accessing different apps. This mode increases security by preventing unauthorized access to your network through the device. Additionally, if the Visitor app experiences an issue and crashes while this mode is activated, the app will reboot itself automatically.
Before you activate Guided Access mode, you should open the Visitor app and walk through the Check-In process. This will allow you to grant access to the necessary permissions, such as access rights to the camera, prior to locking down the device.
Use the following procedure to activate Guided Access mode on your iPad.
- On your iPad, tap the Settings button. The settings menu displays.
- In the Settings menu, select the General option. The General submenu displays.
- In the General submenu, select the Accessibility option. The Accessibility submenu displays.
- In the Accessibility submenu, select the Guided Access option in the Learning section. The Guided Access submenu displays.
- In the Guided Access submenu, activate the Guided Access toggle switch. Additional options display in the submenu.
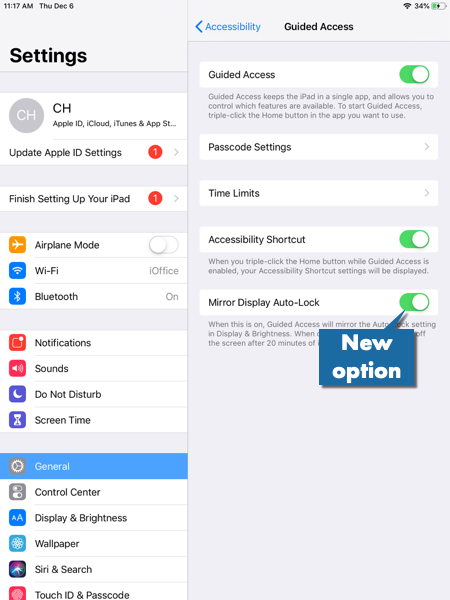
- Activate the Mirror Display Auto-Lock toggle switch.
This setting is required to prevent the display from automatically locking after 20 minutes for devices running iOS 12 or later.
- Select the Passcode Settings option to define a passcode for the Guided Access mode. The Passcode Settings submenu displays.
- Select the Set Guided Access Passcode option and enter a unique passcode. This passcode is used to unlock the Guided Access option and should be managed by the administrator responsible for the iPad.
Activate Guided Access Mode
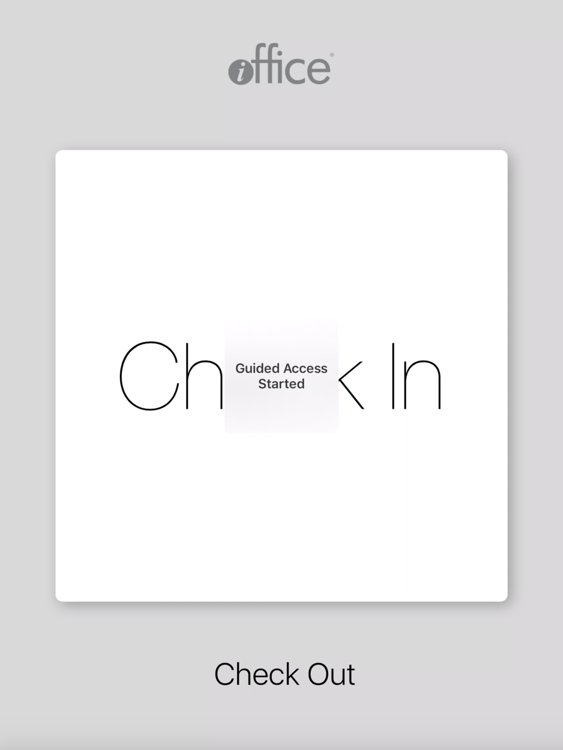
After the settings have been defined to allow for Guided Access mode, the administrator can activate and deactivate this mode using the passcode. To lock the iPad on the Visitor app open the Visitor app and sign in to your site. Once the Home screen is displayed, press the Home button on the iPad three times. A message window displays confirming Guided Access mode has been activated and the iPad is locked on the Visitor App.
Deactivate Guided Access Mode
If you need to turn off the Guided Access mode to access additional features on the iPad, press the Home button on the iPad three times. The Passcode window displays. Enter the passcode defined for the Guided Access option. The Guided Access menu displays. To deactivate the Guided Access mode, tap End in the upper-left corner.
If you need additional information on Guided Access mode, https://support.apple.com/en-us/HT202612.
iPad Performance - Tips & Tricks
For optimal performance, we recommend that you configure your iPad device with the following additional settings.
-
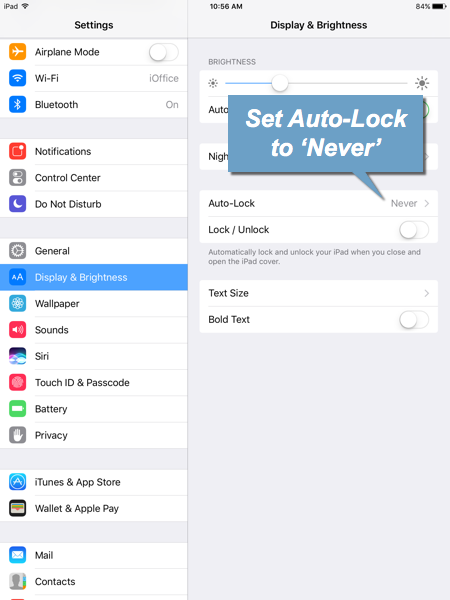
Display Locking. In the Display & Brightness submenu of the Settings menu, set the Auto-Lock option to Never. This setting will prevent the display from turning off and locking your visitors out.
-
iCloud, Messages, and FaceTime. If you are using iCloud, disable the following services: iCloud Drive, Photos, Mail, Reminders, Safari, Backup, and Find My iPad. If you are not using these iCloud assets, sign out of iCloud. You should also disable the Messages app and the FaceTime app.
Disabling these apps and services will reduce the potential for unwanted notifications on the iPad, which could interrupt visitors during check-in. -
iOS Version. Before dedicating an iPad to the Visitor App, verify your iPad is running the latest version of iOS software. Since the Visitor app is optimized for the latest iOS version, devices should be checked periodically and updated as needed.
-
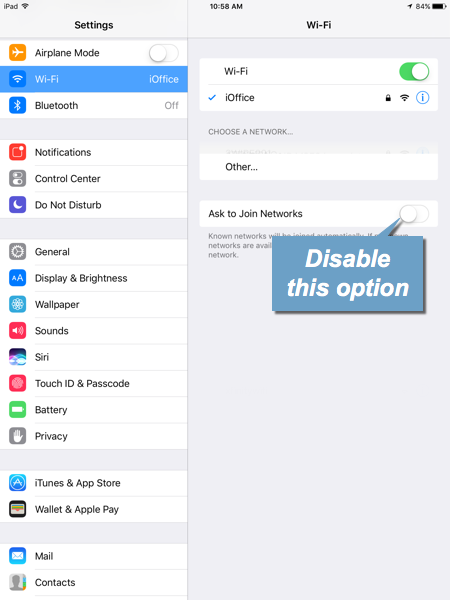
Wi-Fi. In the Wi-Fi submenu of the Settings menu, disable the Ask to Join Networks option. Once the iPad is set up on the intended WiFi network, this option is not necessary and should be deactivated to conserve battery and resources.