Customize your visitor Welcome email
What is the Welcome email?
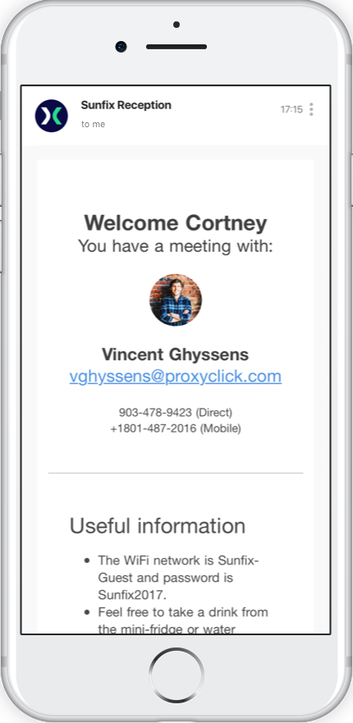
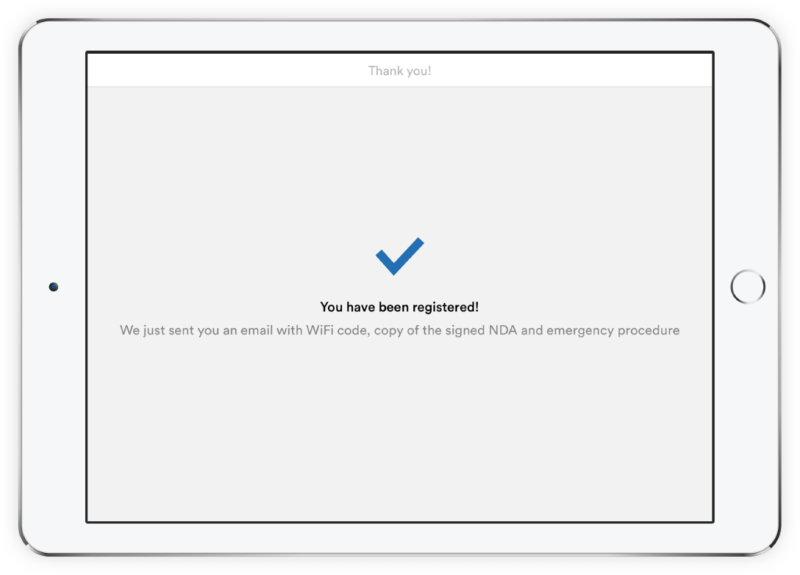
The welcome email is an automatic email sent to the visitor upon check-in from the kiosk. The email contains host information, maps, special instructions, and QR codes.
You can add details you feel are needed by visitors to get them to the location and have a great start to their visit.
Why is it useful?
With this email, your visitors feel truly welcome and are equipped with all the info they need during their visit.
You can add relevant information such as:
- Wi-Fi code, so they stay connected throughout the visit.
- Contact details of the host are particularly useful for busy or unmanned receptions.
- Recap of Health and Safety instructions that they can browse through while waiting on their host.
- Reception phone number if they forget anything valuable while on your premises.
- A copy of the Agreement/NDA they just signed for safekeeping.
How to set up the Welcome email?
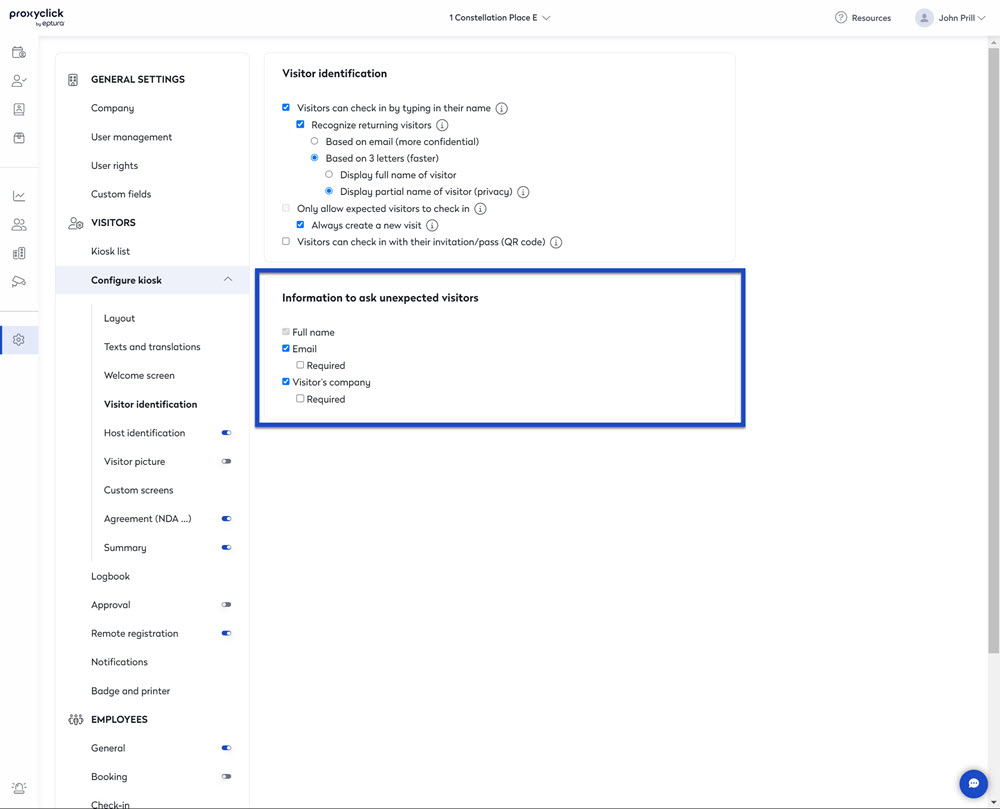
Step 1: Collect email from the visitor
First, make sure you collect the visitor email on the kiosk. Go to Settings > Visitors > Configure Kiosk > Visitor Identification and check the box “Email.” Check the box below to make it a required action during the process.
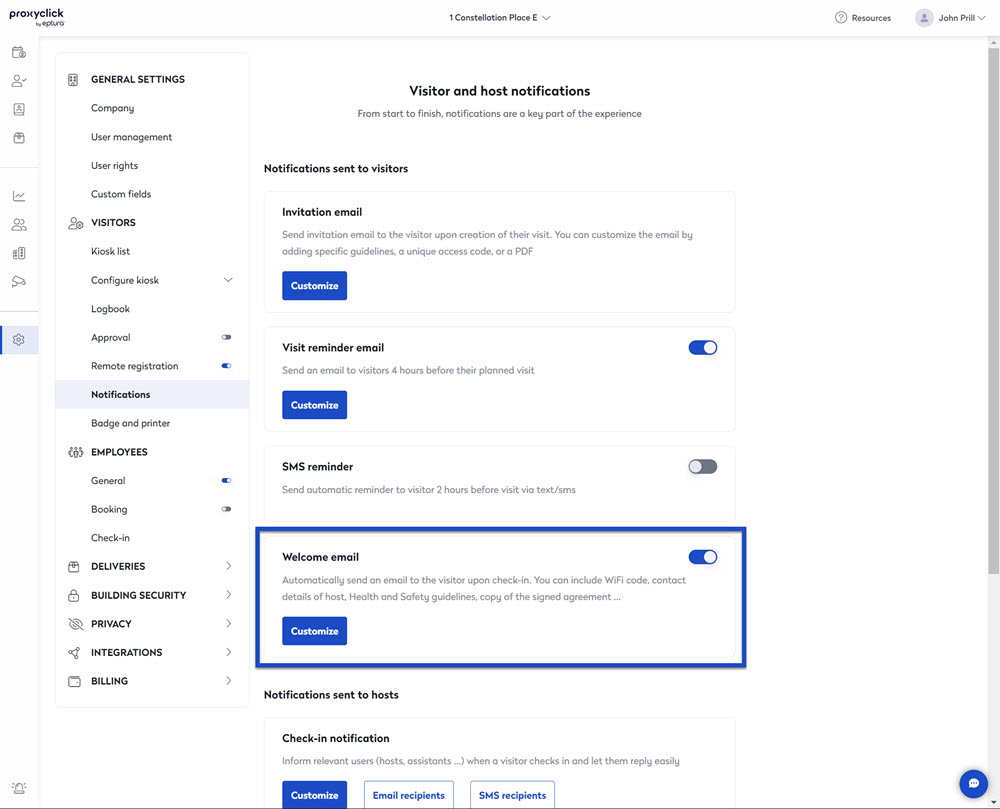
Step 2: Configure the Welcome email
Go to Settings > Visitors > Notifications and turn the feature on. Customize the email to include any information you want to send to the visitor.
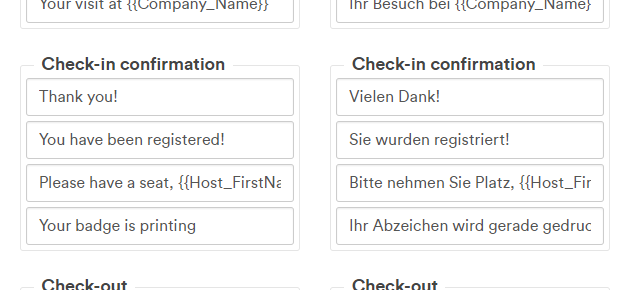
Step 3: Inform the visitor they received an email (Recommended)
We recommend you use the kiosk to inform the visitor he received an email. The easiest way is to adapt the text displayed on the confirmation screen.
For this, go to Settings > Configure kiosk > Text and Translations.