Implement SSO and User Provisioning through Azure Active Directory
This article details how to configure Proxyclick as a Non-Gallery application, for customers who prefer to set up from scratch or whose Azure AD plans do not include access to Gallery Apps.
If you prefer to use the Gallery App, then see the following articles from Microsoft Support:
- https://learn.microsoft.com/en-us/azure/active-directory/saas-apps/proxyclick-provisioning-tutorial
- https://learn.microsoft.com/en-us/azure/active-directory/saas-apps/proxyclick-tutorial
Set up Azure AD in a single location
Step 1 - Add an application
- Log into the Azure Portal. Go to Azure Active Directory > Enterprise Applications.
- Click on New application.
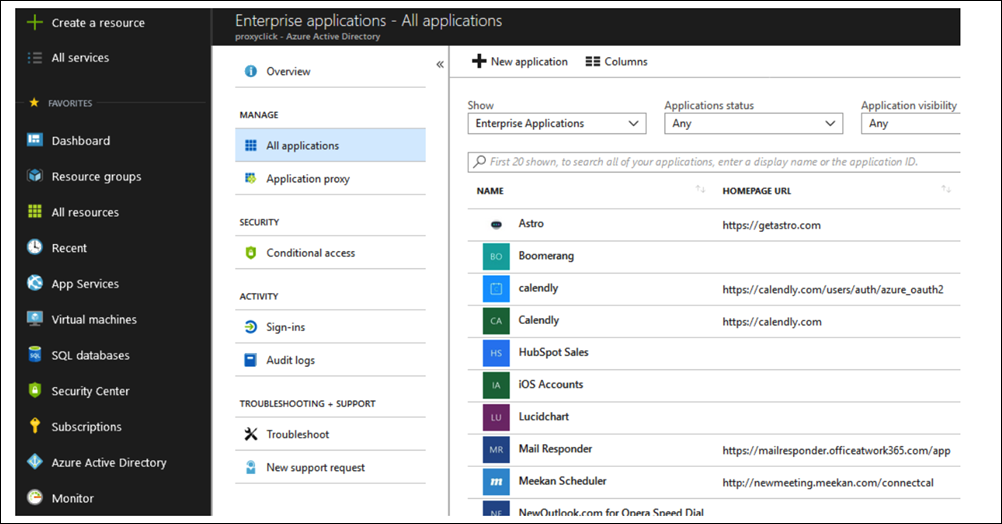
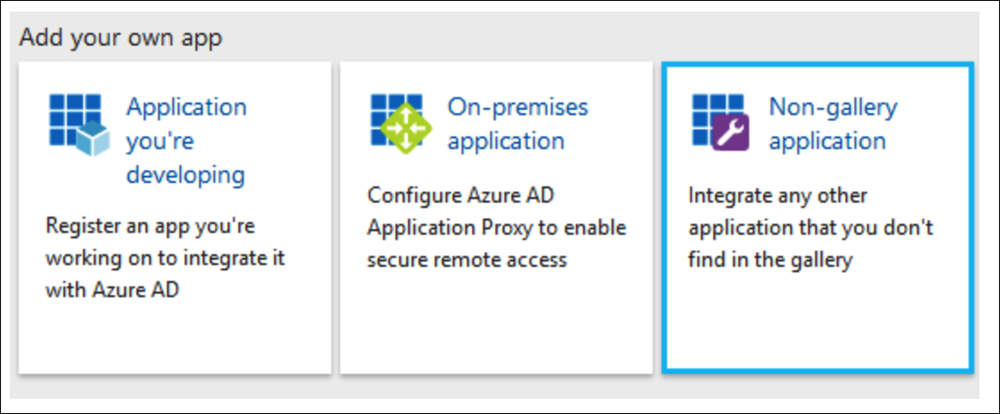
- Click the Non-gallery application. (You might need to check if this possibility is included in your Azure subscription).
- Enter a name.
- Click Add.
Step 2 - Configure single sign-on (SSO)
- Open the Proxyclick app in Azure Active Directory > Enterprise Applications and go to the Single sign-on section.
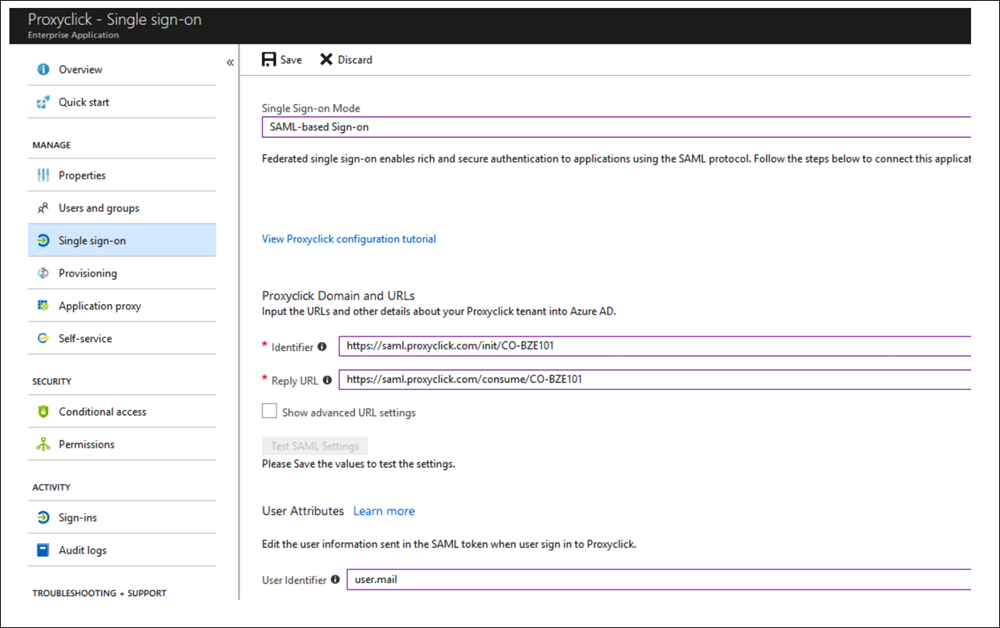
- Select SAML-based Sign-on for Single Sign-on Mode.
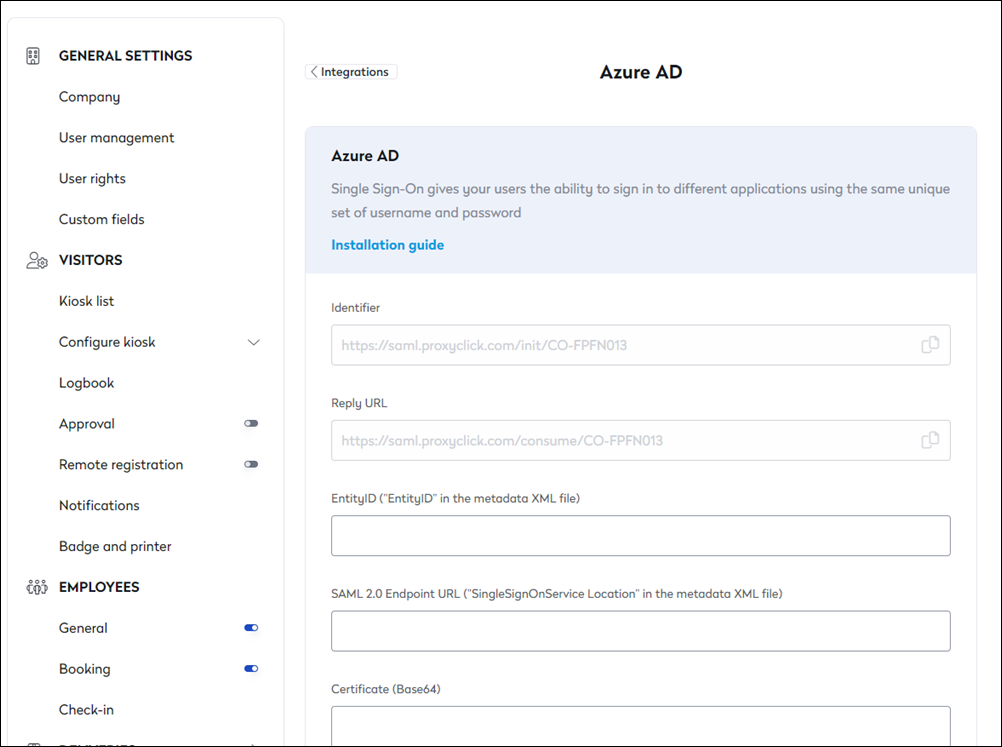
- Go to the Proxyclick Marketplace and install Azure AD.
- Copy the Identifier and the Reply URL from the Azure AD configuration page and paste them into the corresponding fields in Azure AD.
- Select user.mail for User Identifier.
- Click on Save.
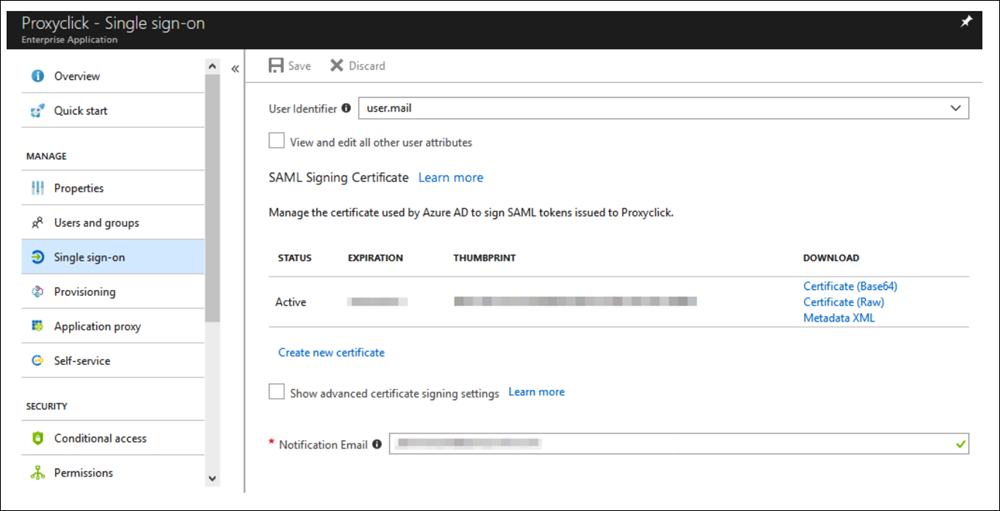
- Download the file Certificate (Base64) and open the Metadata XML to extract the EntityID and SingleSignOnService Location.
- Go back to the Azure AD configuration page (https://app.proxyclick.com/default/settings/integrations/sso/azuread) and paste them into the corresponding fields from Azure AD. Everything in the certificate file (including the BEGIN and END header and footer) needs to be copied into the Certificate (Base64) field in Proxyclick.
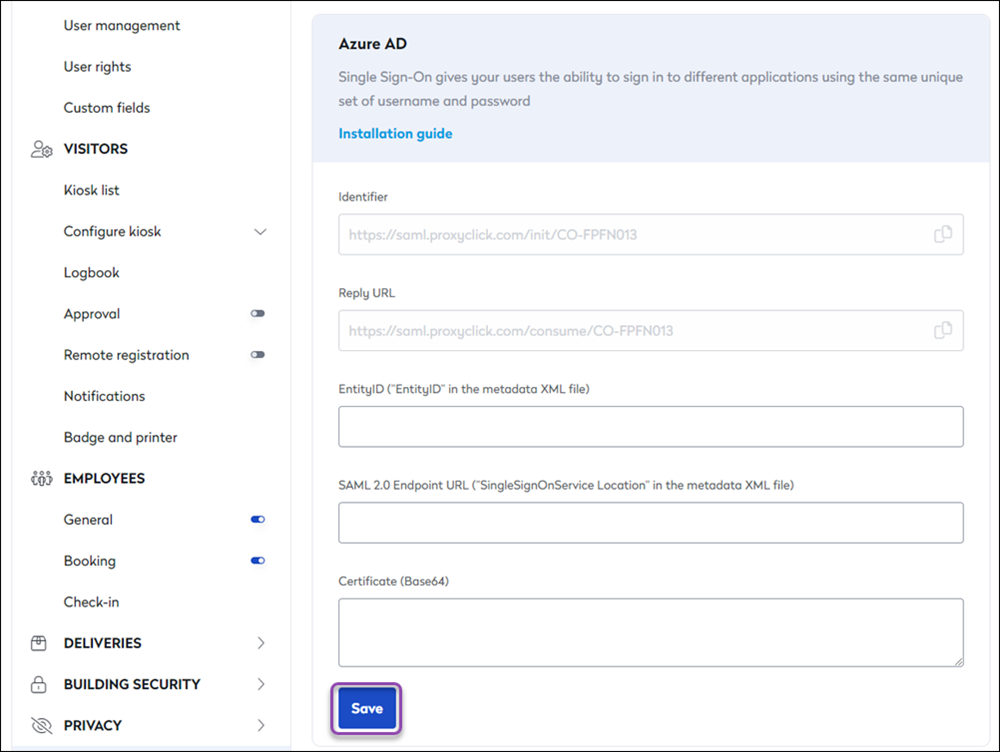
- Click on Save Changes.
Your Azure AD connection is ready. You can now use the URL in the Identifier field to log into Proxyclick using Azure AD SSO or log into Azure AD as a user and choose the Proxyclick app. But you will still need to add users in Proxyclick before you try to log in with SSO (you can do it manually, in bulk, or via User Provisioning. See next steps to configure User Provisioning with Azure AD).
Step 3 - Configure user provisioning
- Open the Proxyclick app in Azure Active Directory > Enterprise Applications and go to the Provisioning section.
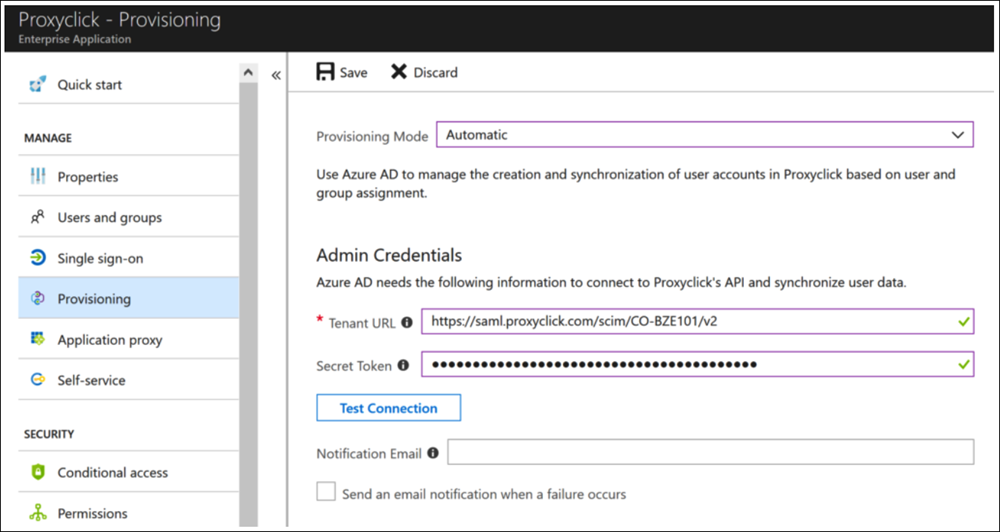
- Select Automatic for Provisioning Mode.
- If not done already, go to the Proxyclick Marketplace and install Azure AD (https://integrations.proxyclick.com/integrations?id=54&alias=azure-ad).
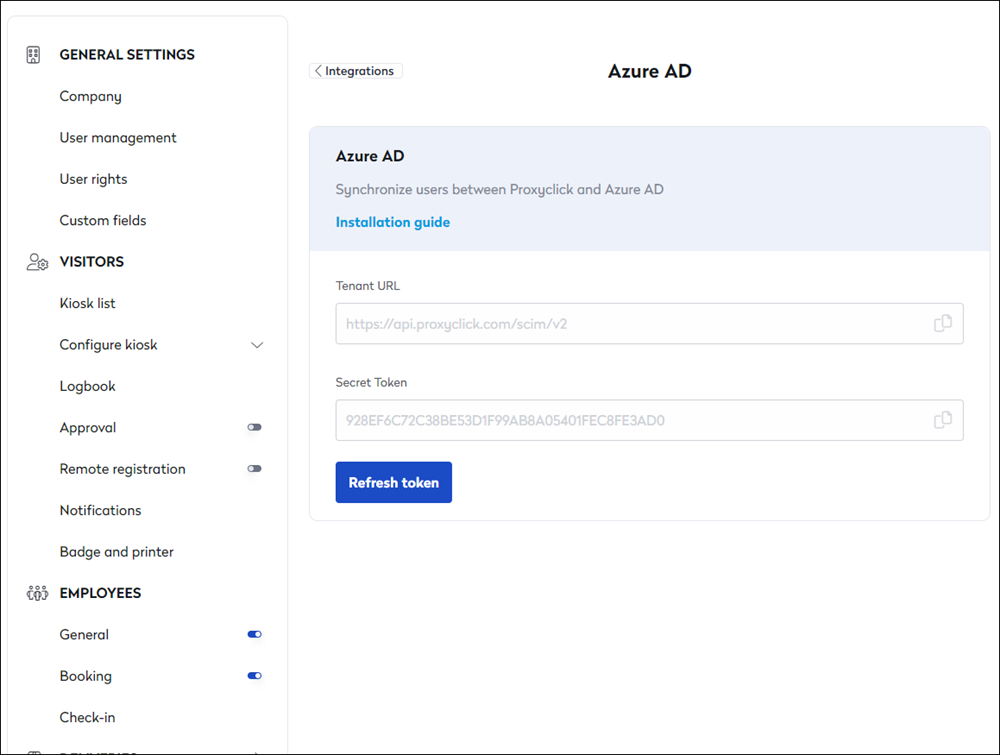
- Copy the Tenant URL and the Secret Token from the Azure AD configuration page (https://app.proxyclick.com/default/settings/integrations/up/azuread) and paste them into the corresponding fields in Azure AD.
- Click on Save.
- After the settings are saved, go to the Mappings section.
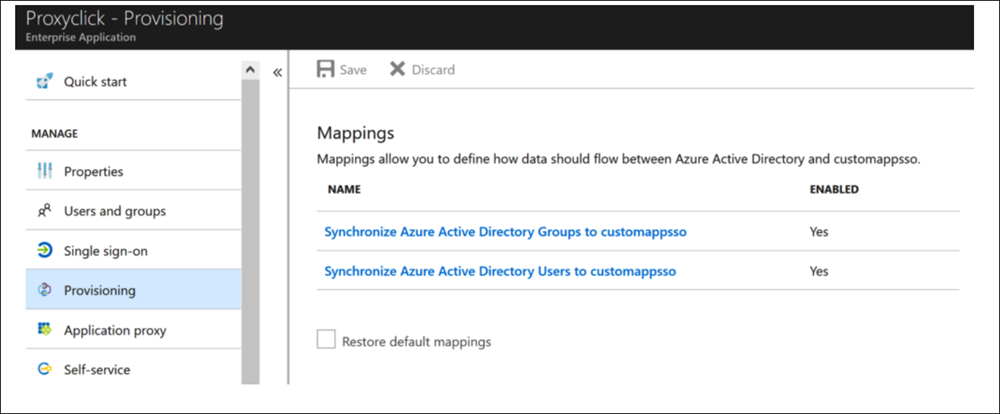
- Click on Synchronize Azure Active Directory Groups to customappsso.
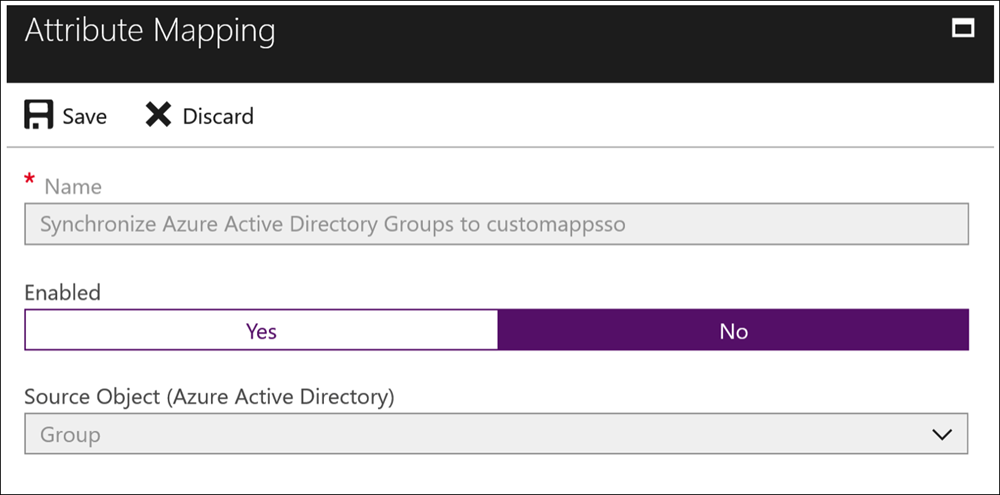
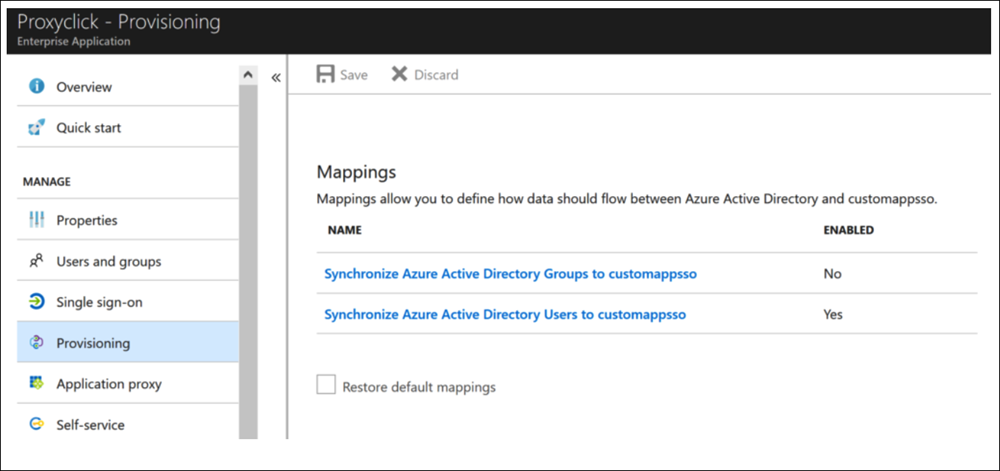
- Disable group synchronization by selecting No and then click on Save.
- Close the window to return to the provisioning configuration page.
- Click on Synchronize Azure Active Directory Users to customappsso.
- Adapt the attribute mappings:
Azure Active Directory Attributes
|
Azure Active Directory Attribute |
customappsso Attribute |
Matching Precedence |
Mapping Type |
|
|
userName |
1 |
Direct |
|
Switch([IsSoftDeleted], , "False", "True", "True", "False") |
active |
|
Expression |
|
givenName |
name.givenName |
|
Direct |
|
surname |
name.familyName |
|
Direct |
|
|
emails[type eq "work"].value |
|
Direct |
- Click on Save.
- Close the window to return to the provisioning configuration page and go to the Settings section.
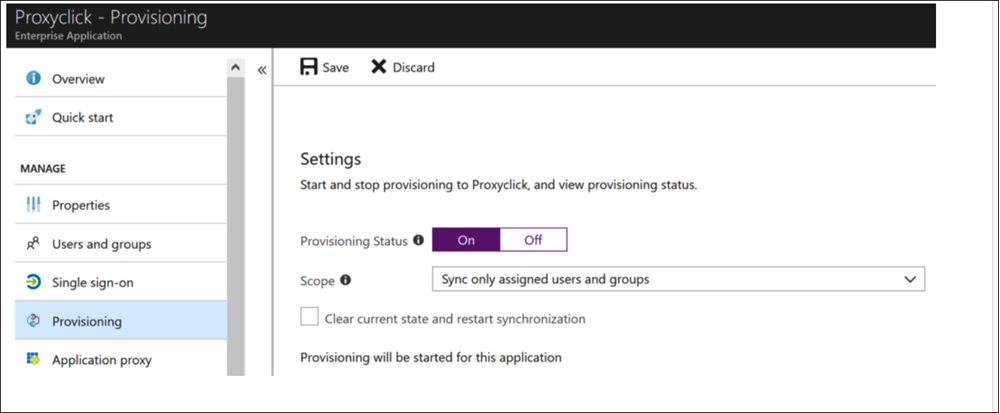
- Set Provisioning status to On and click Save.
Optional Supported Attributes
The below attributes can additionally be configured to pass more user data to Proxyclick.
- Telephone and Mobile numbers must be in E.164 format
- City can be substituted for any other string-based attribute to use in conjunction with the below settings for multi-location provisioning
|
Azure Active Directory Attribute |
customappsso Attribute |
Matching Precedence |
Mapping Type |
|
telephoneNumber |
phoneNumbers[type eq "work"].value |
|
Direct |
|
mobile |
phoneNumbers[type eq "mobile"].value |
|
Direct |
|
city |
addresses[type eq "work"].locality |
|
Direct |
|
title |
title |
|
Direct |
|
preferredLanguage |
preferredLanguage |
|
Direct |
Set up for multiple locations
User Provisioning
You can configure Azure AD and manage users across multiple locations from a single Proxyclick account.
-
Connect Azure AD in your main location (follow the steps above)
-
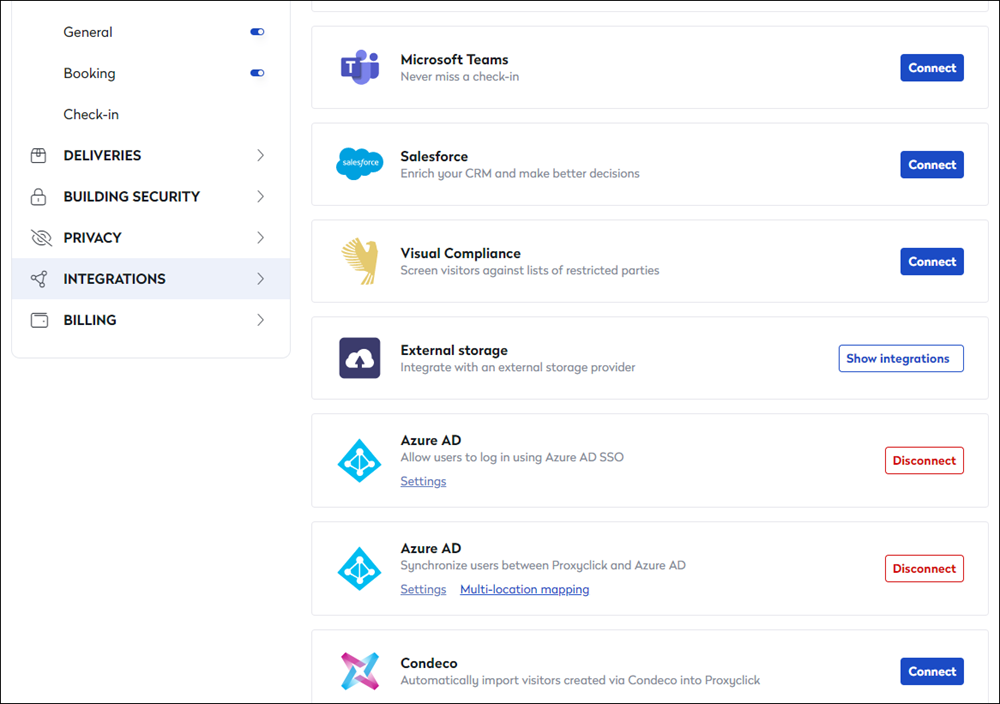
Click on Multi-location mapping on the Azure AD integration in your Integration List
Important to note: If you do not see the Multi-location mapping button, you are running on an older version of our Azure AD integration. All you have to do is disconnect the integration and then reconnect it before continuing with the remaining steps.
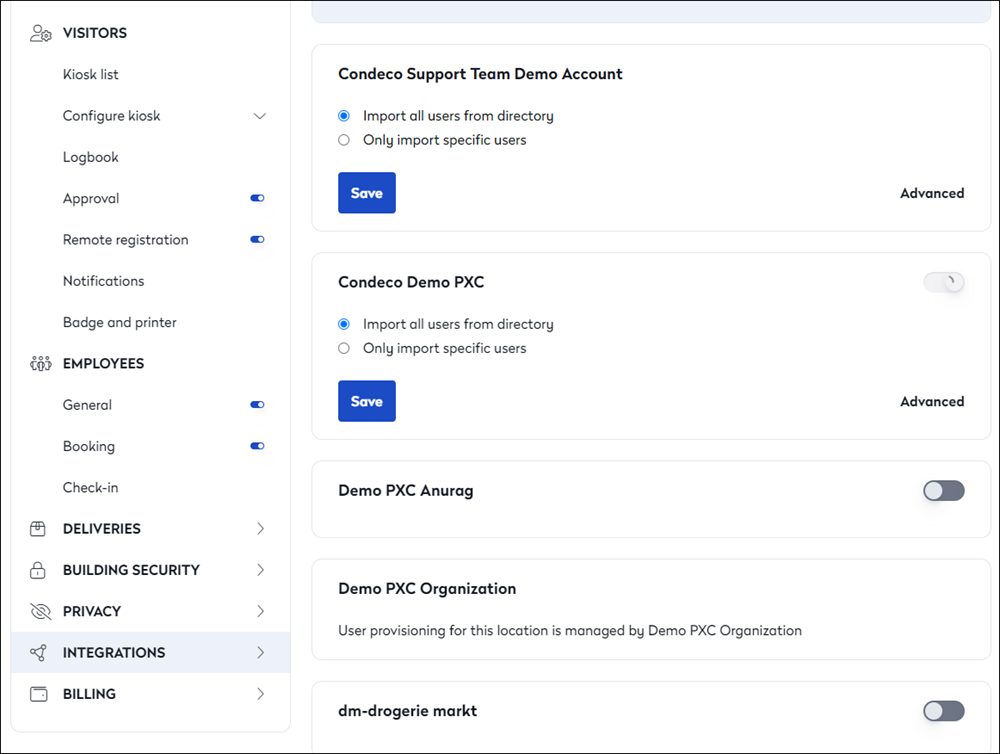
You will then see the list of all the locations for which you are an Admin. You can enable/disable User Provisioning for each location from this list using the toggle button.
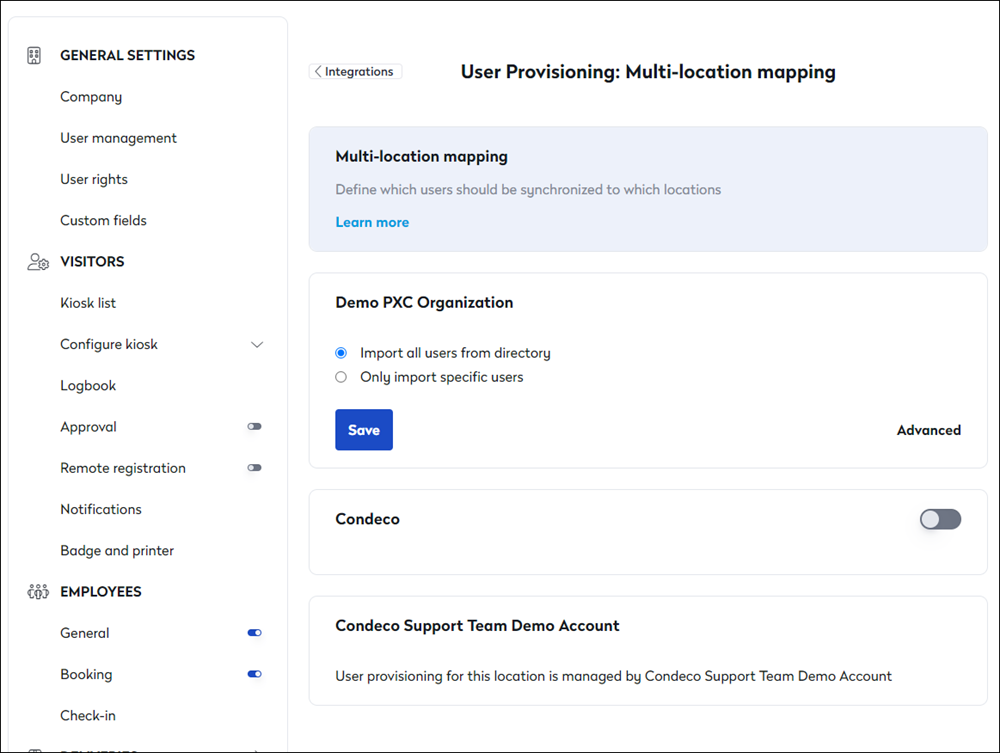
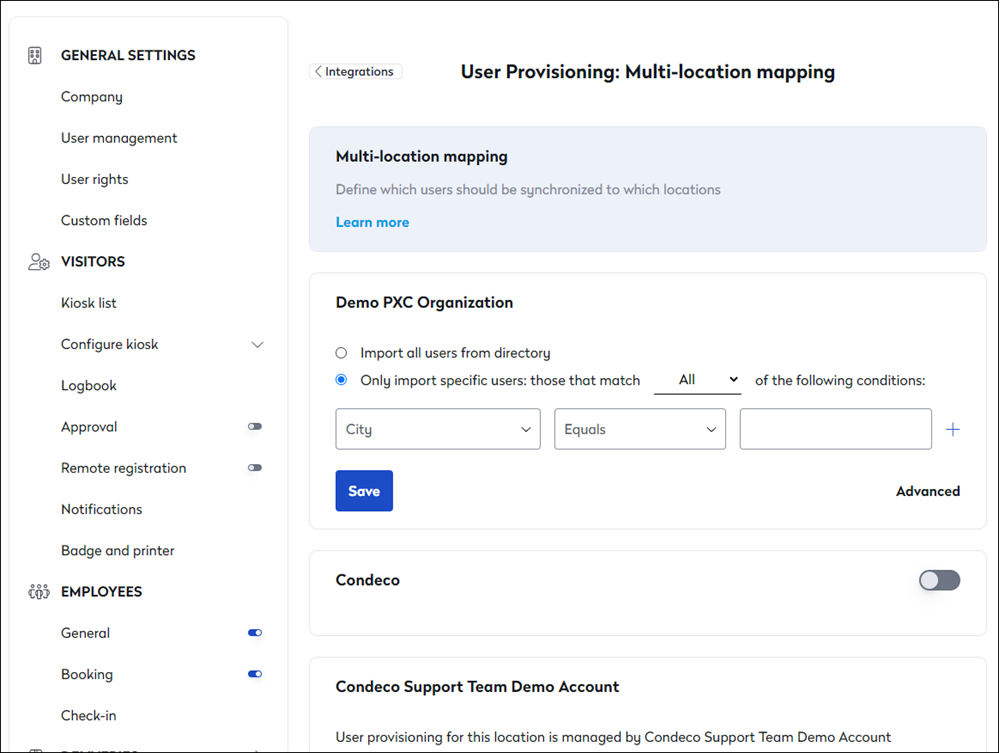
When enabled, you can import all users for provisioning in that location or define your filters for specific users.
You can filter users based on their city and language using the appropriate conditions.
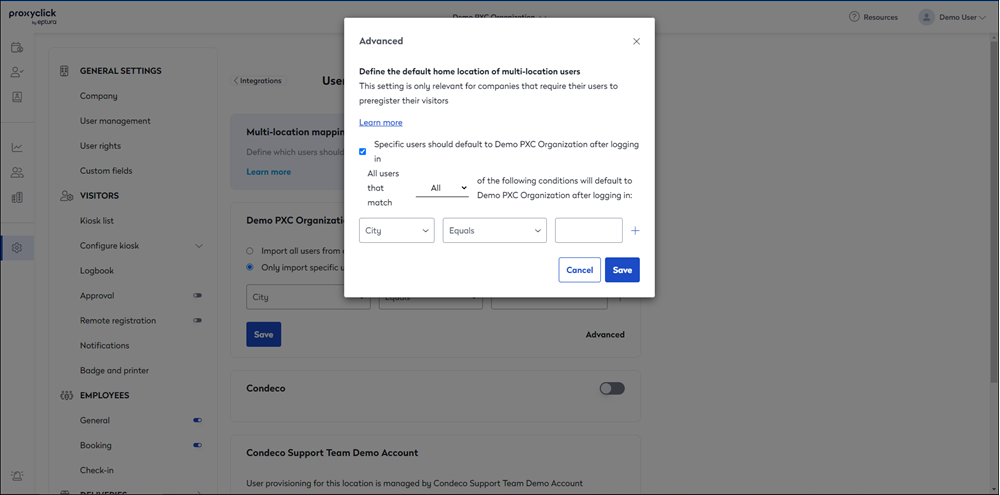
Advanced
If you provision the same users in multiple locations, you can use the Advanced menu to force their “home location.” Proxyclick would then use this as the default location for new visits created (e.g. when using the Generic Calendar Integration).
Azure User Provisioning and Single Sign-on require both add-ons.