Troubleshooting when printing from the iPad via Proxy
Please follow these steps to identify the problem.
This article provides troubleshooting steps when the Proxyclick iPad app fails to print and communicate between with the printer via the proxy (not via AirPrint – this is the case if your printer is not AirPrint-enabled).
Requirements:
-
Administrator access to Proxyclick.
Recap of the configuration
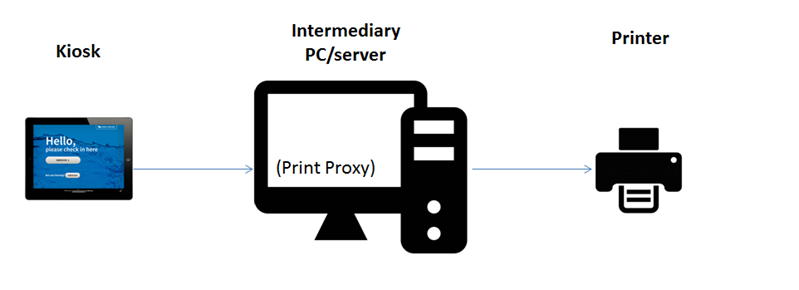
As a reminder, the configuration is as follows:
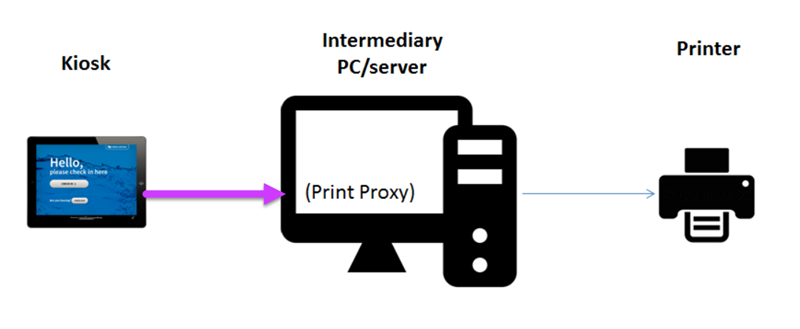
- The iPad communicates to a proxy installed on a PC (typically the Reception PC).
- In turn, the proxy communicates to the printer.
First step: see what's not working
When printing fails, the first thing to do is to know if the issue is:
-
Between the iPad and the proxy.
-
Or between the proxy and the printer.

In order to check this, please follow these steps:
-
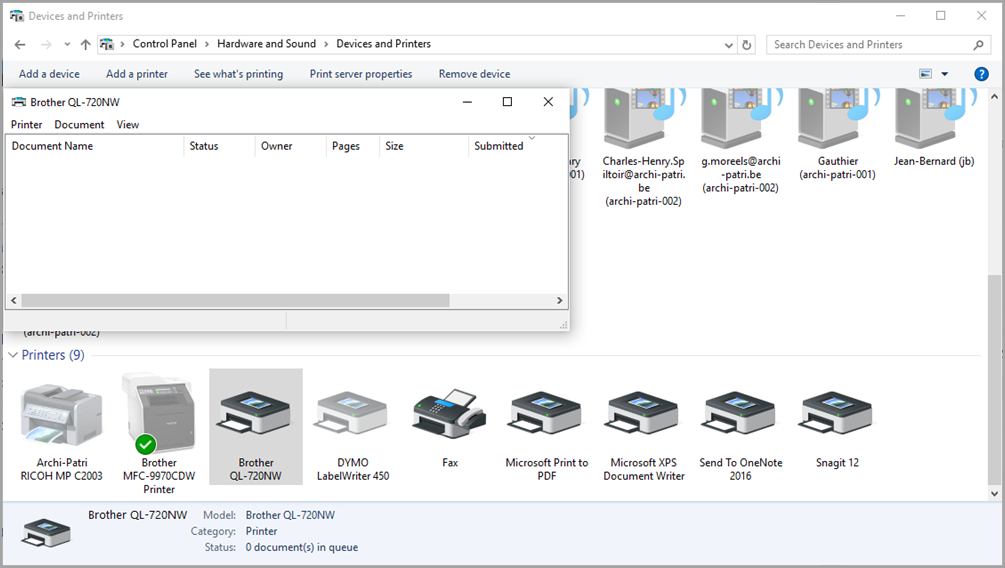
Go to the computer connected to the printer and where the proxy is installed.
-
Navigate to your devices and printers.
-
Then right-click on the printer that you wish to print on and click “See what’s printing”.
-
Perform a check-in on the iPad and see if anything is added to the print queue.
-
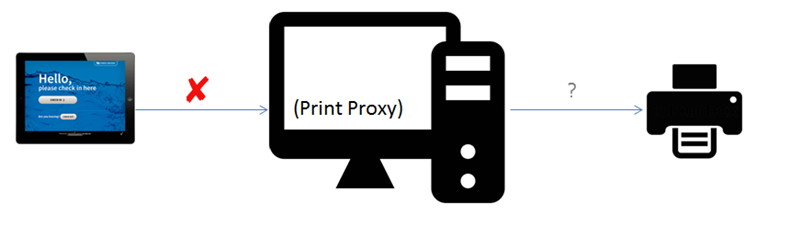
If you do not see a print job, we first need to make the connection between the iPad and the proxy. Please go to section 1 “Troubleshoot the connection between the iPad and the proxy.”
-
If you see a print job, it means the iPad can communicate with the proxy (which is good news) and that the issue occurs “after that”. Please go to section 2 “Troubleshoot the connection between the proxy and the printer.”
The graph below shows the different checks you’ll need to perform depending on whether you saw a print job or not. You can print this graph and take it with you at the reception. All steps are detailed in the sections below.

1. Troubleshoot the connection between the iPad and the proxy
Here are the troubleshooting steps:
1.1. Please make sure that the computer and the iPad are on the same network.
Please ensure that the computer and the iPad are on the same network (most often the WiFi).
1.2. Ensure you are using a Windows PC which is Windows 7 or higher.
This setup does not work through any other Operating System.
1.3. Check if the proxy (Proxyclick Universal Print Proxy) is installed.
Look for the proxy Application icon in the Notification area (normally on the bottom right of your screen).
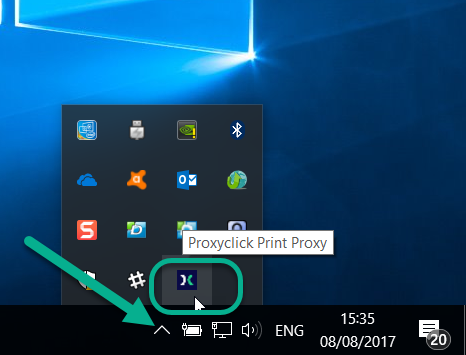
If you cannot locate the Proxyclick Print Proxy Icon you may not have it installed. In that case, please download it here first.
1.4. Check the print settings in the Dashboard.
In the Proxyclick Dashboard, navigate to Settings > Badge and printer.
Make sure that:
-
the “IP address of PC” is correct. Then tap the save button.
-
The correct printer is selected as shown below:
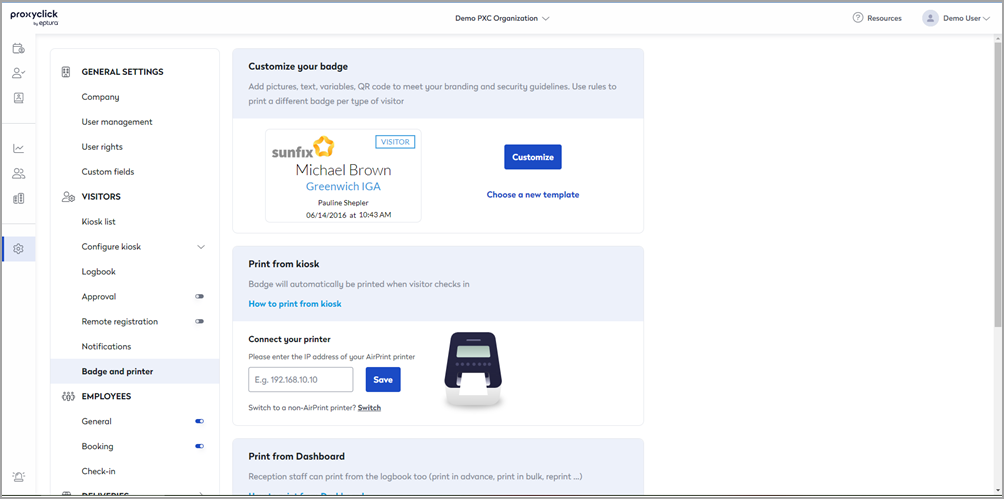
If your page looks different than the one shown above please get in touch with us to change it for you.
If you see some printers but not the one you’re looking for, it may be because your printer is a network printer. It then needs to be set as a local printer.
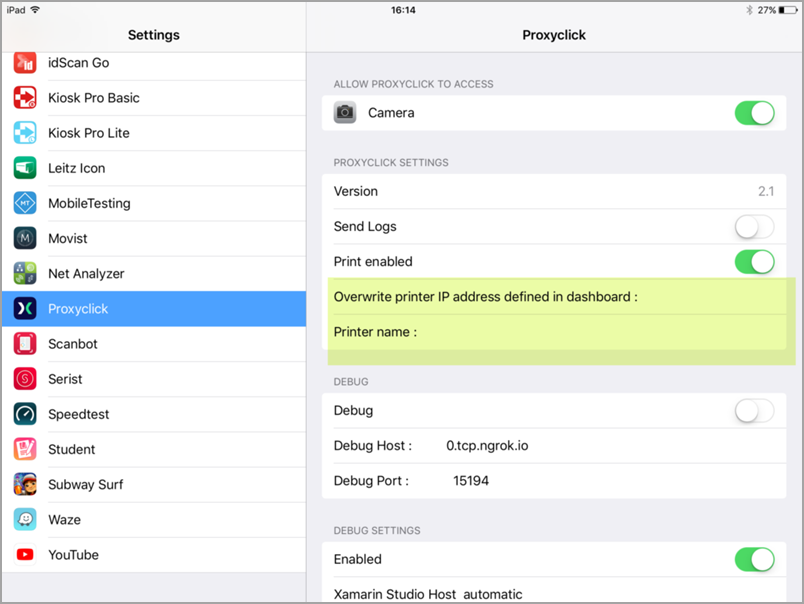
Let’s now check the iPad: please go to Settings > Proxyclick and make sure the fields “Overwrite Printer IP address defined in dashboard” and “Printer name” are empty:
1.5. Check communication from iPad to proxy
At this stage, if all previous checks are successful and Welcome still fails to print it is very likely due to “something” on the local company network preventing the communication between the iPad and the proxy.
The simplest method to verify this is to open Safari (or any other installed Web Browser) on the iPad and attempt to navigate to the Universal Print Proxy's web configuration page. This page is hosted by the Universal Print Proxy application on the machine where it is installed and running, on ports 50080 (HTTP) and 50443 (HTTPS, self-signed certificate). Using the example IP from step 1.4 above, you would enter:
http://192.168.1.65:50080
Replace '192.168.1.65' with the PC's IP address running the Print Proxy in your local environment when running this test. If the test is successful, you will see the following page:
If you do not see this page, a firewall, routing, or other local network issue prevents the iPad from communicating with the printer proxy.
2. Troubleshoot the connection between the proxy and the printer
The iPad correctly sends the print job to the proxy but then “something” prevents printing.

Here are the troubleshooting steps
2.1. Check the printer is online
You’ll see this in “devices and printers” (see the example below where the DYMO is grayed out and marked as “offline”)
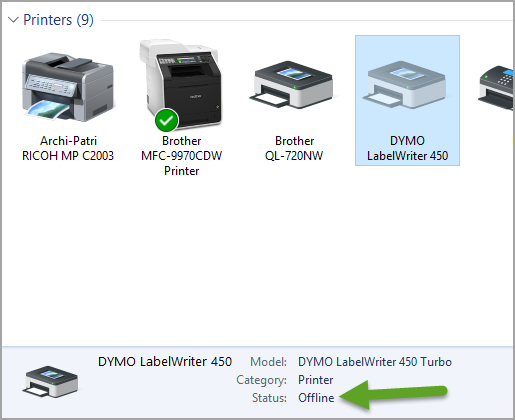
If your printer is offline, please switch it on. If it does not work, please check with your IT.
2.2. Check for paper-related issues.
Please verify you do not have any of these issues before proceeding further:
-
Paper jams.
-
No paper in the printer.
-
Paper not correctly installed or aligned in the printer.
2.3. Ensure you’ve selected the right badge reference.
This issue arises when there is a difference between the badge references selected by the driver and the references of the badge physically in the printer.
In order to check this, please perform the following steps:
-
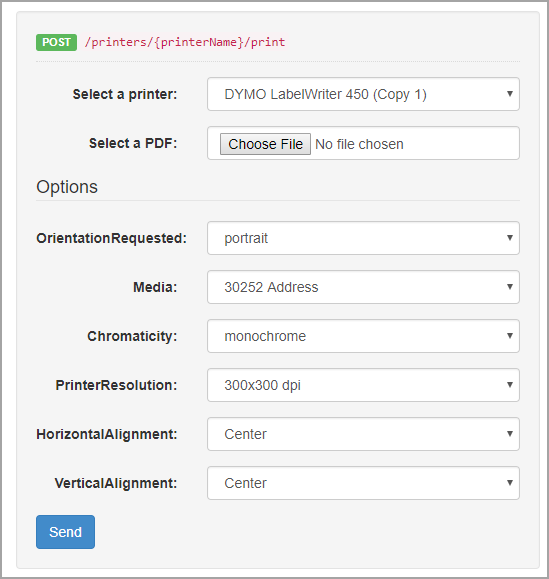
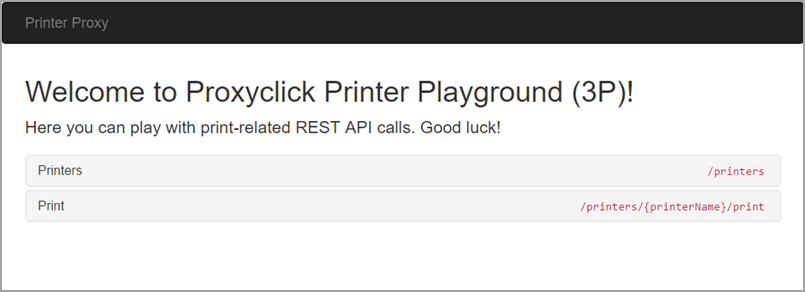
Look for the proxy Application icon on the PC in the Notification area (normally on the bottom right of your screen). Right-click on the icon to open the menu, then click on “Open Playground”.

You’ll land on this page:

-
Please click on “print” and double-check that the following items are correct:PrinterOrientationMedia: this needs to be the reference of the physical badges in the printer. If not the case, the printing may not work.
-
Horizontal and Vertical Alignment: for the majority of printers, this is “Center” (e.g., Dymo Labelwriter, Brother QL820NW, etc.).