Configure Meeting Room Data Synchronization
This reporting data will be exposed to the report builder to allow historical meeting room reports. When combined with SVLive data, this can used to draw conclusions between calendar information and real-time data.
In Report Builder the MeetingLogs and the MeetingAttendeeLogs can be queried.
MeetingLogs – this is a list of individual meetings and their details.
- ID, Summary, StartTime, EndTime
- Location (Links to Serraview container)
- Status (Confirmed/Declined)
- Visibility (Public/Private)
MeetingAttendeeLogs – this is a list of the people invited and their responses.
- Email (As downloaded from calendar), DisplayName (As downloaded from calendar), IsOrganiser (true/false)
- Response (Unknown/Declined/Tentative/Accepted)
- Link to MeetingLog
- Link to Serraview Person (if a match can be found)
Prerequisites
The calendar integration must be set up for Configure Microsoft Exchange with Basic Authentication and Google Calendar Configuration.
Register a Service Account
You will need to create a service account within Serraview for the meeting room data sync.
To create the service account, complete the following:
-
Sign into Serraview.
- Navigate to Admin > User Security.
- Click the Service Accounts icon.
- Click the + Add Service Account button.
- In the Email field, enter the email address.
The service account must be a separate email address (do not use an existing email address). For example, calendardatasync@mycompany.com.
6. In the Description field, enter a description. For example, MeetingRoomDataSync.
7. Click the Add Service Account button. The New Service Account Created dialog displays.
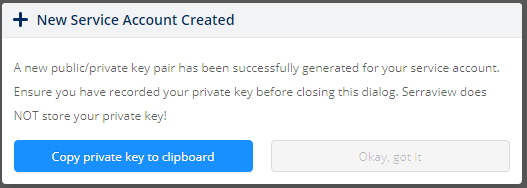
8. When the account is created, click the Copy Private Key to Clipboard button. This will copy the Private Key and you will use this in the next section.
Make sure that you keep a copy of the Private Key in a secure location as you cannot regenerate this key again.
9. Click the Okay, got it button.
Setup the Meeting Room Reporting
After the service account has been created you can configure the meeting data reporting. You will need the Private Key that was copied to the clipboard in the above section.
- Navigate to Configuration > General.
- Select Room Booking Service.
- Click the RBS is enabled check box.
- In the RBS Service Account field, enter in the account id.
This is the account id copied in the section above.
6. In the Service Account Private Key field, paste in the private key.
This is the Private Key copied in the section above.
7. Click Update button.
Configure Serraview User Permissions for the Meeting Room Data
The service account created above will need a secure action assigned to it for the data sync to work.
- Navigate to Admin > User Security.
- Click the Roles icon.
- Create the role called Meeting Room Data Sync.
- Select the new role and add the following:
- Add the new service account to the role. For example, MeetingRoomDataSync
- Add the secured action called RoomBooking (Read Only).
- Click the Update Role button.