Use Locator (Manual Occupancy) via kiosk, laptop or desktop
Find and book Space via kiosk, laptop or desktop
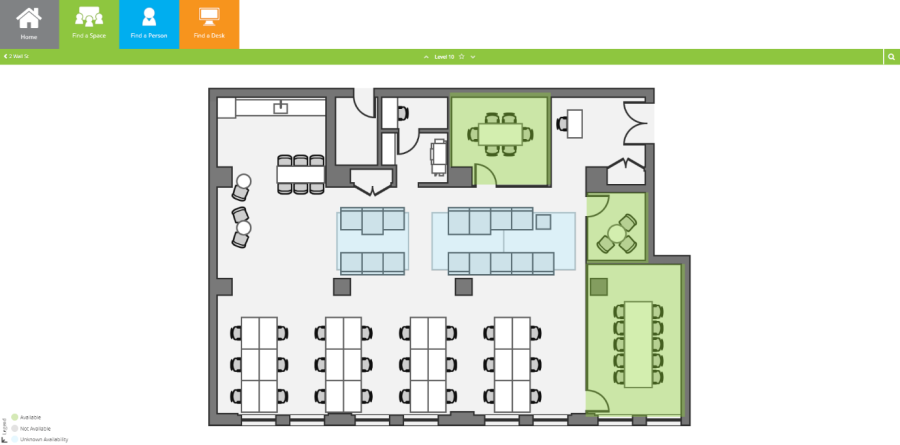
To find a space in which to have a meeting or collaborate with colleagues, use Find a Space.
- Click the
 icon to access the Find a Space tool.
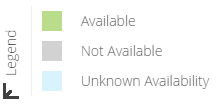
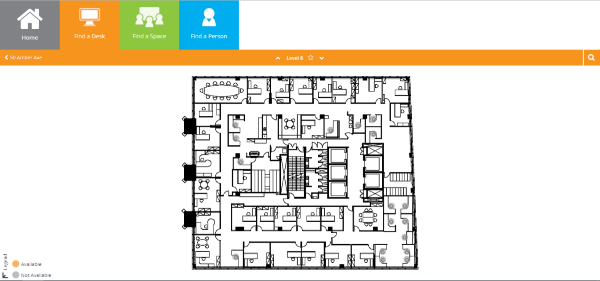
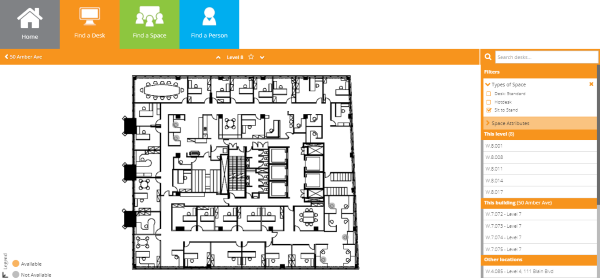
 - Select the building & floor you want to find a space in. All shared spaces that are currently available are displayed in green. Any spaces unavailable will be gray.
Locator will display, with collapsible legend in the bottom left.
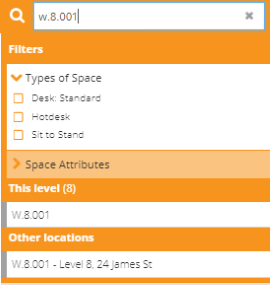
3. Click ![]() to expand the Filter panel. If you know the space name you can use the search field to type it in. Results will display underneath your filter panel, first displaying the results on your current floor, then results in other locations.
to expand the Filter panel. If you know the space name you can use the search field to type it in. Results will display underneath your filter panel, first displaying the results on your current floor, then results in other locations.
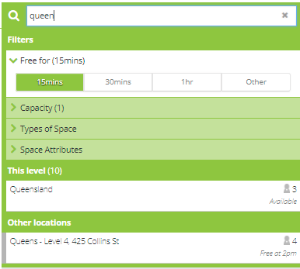
4. Select a Free For option button to select a time period for your booking.

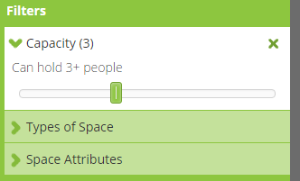
5. Drag the Capacity slider to choose the capacity of the space.
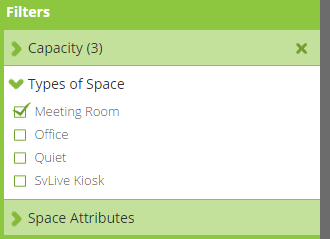
6. If you are looking for a specific space type, expand the Types of Space checklist and make your selection. Results will display underneath your filter panel, first displaying results on your current floor, then results in other locations.
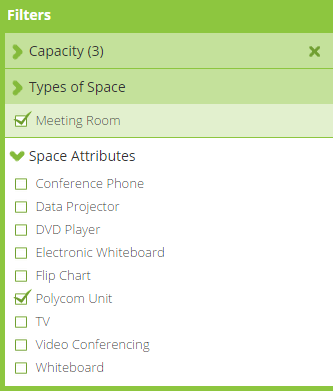
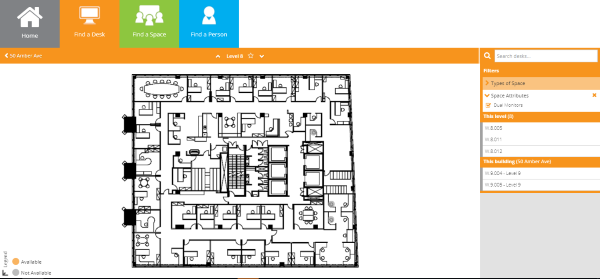
7. If you are looking for a specific attribute for a space, expand the Space Attributes checklist and make your selection.
8. Results are display at the bottom the search/filter panel, defaulting to display results on your floor first, then other locations. You can click on the results here to be taken to results on other floors. Click on the available space to select it.
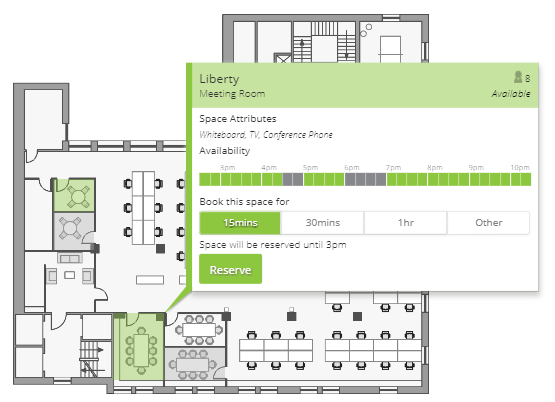
9. Choose the length of time you want to book it for.
10. Click the Reserve button.
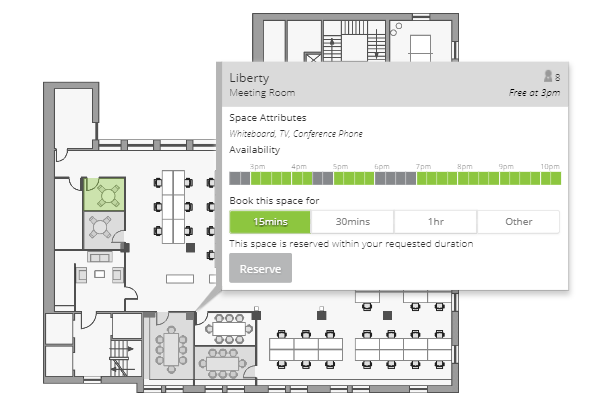
The space will be reserved for the duration of time requested.
Find a Desk via kiosk, laptop or desktop
- Click
 icon to access the Find a Desk tool.
 - Select the building and floor you want to search.
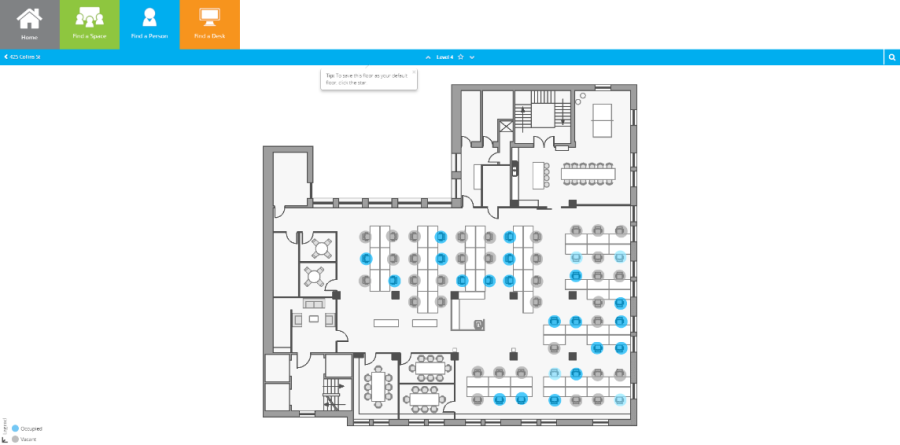
- The floorplan will display, with available desks in gray, and unavailable desks in gray. This is because using Manual Occupancy data we cannot see which desks are available and unavailable in real-time.
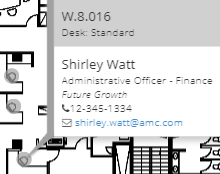
If you want to see who is already in an occupied desk, zoom in on the floorplan and click on the desk to see their details.
4. Click ![]() to expand the Filter panel. If you know the workpoint number, you can use the search field to type in all or part of the desk number. Results will display underneath your filter panel, first displaying results on your current floor, then results in other locations.
to expand the Filter panel. If you know the workpoint number, you can use the search field to type in all or part of the desk number. Results will display underneath your filter panel, first displaying results on your current floor, then results in other locations.
5. If you are looking for a specific desk type, expand the Types of Space field and make a selection. Results will display underneath your filter panel, first displaying results on your current floor, then results in other locations.
6. If you are looking for a specific desk attribute, expand the Space Attributes field and make a selection. Results will display underneath your filter panel, first displaying results on your current floor, then results in other locations. The example below displays where we have filterer by Space Type and Space Attribute.
Find a Person via kiosk, laptop or desktop
You can search for a colleague by name, employee number, email or even phone number, depending on the way Locator has been configured for your business.
- Click the Find a Person
 icon.
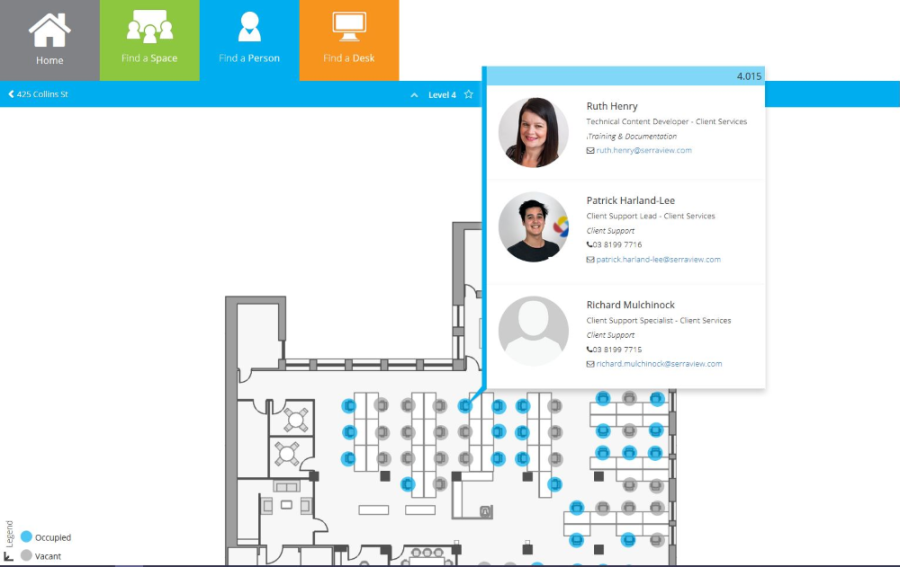
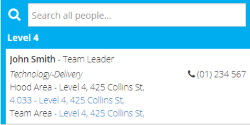
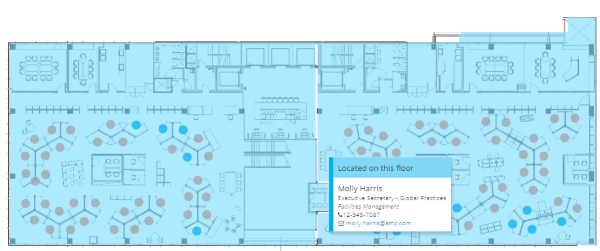
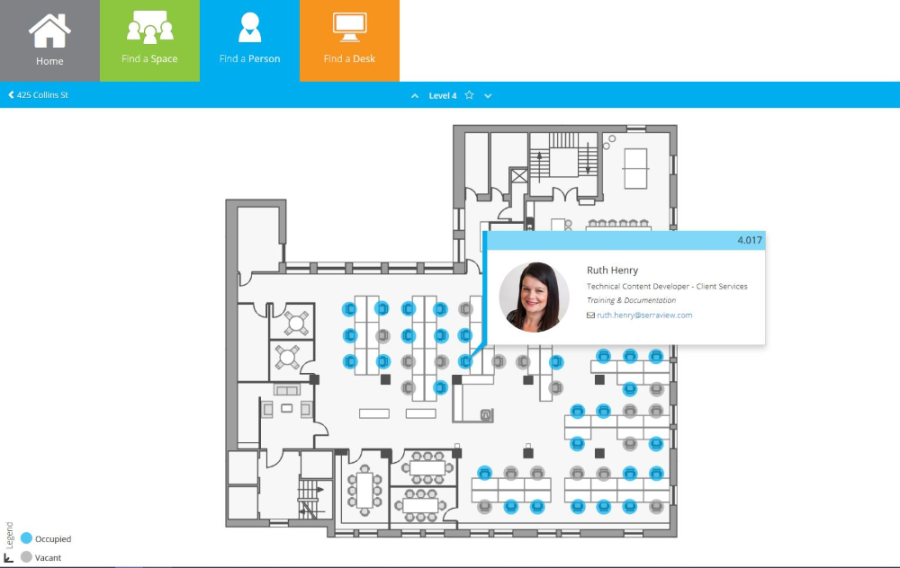
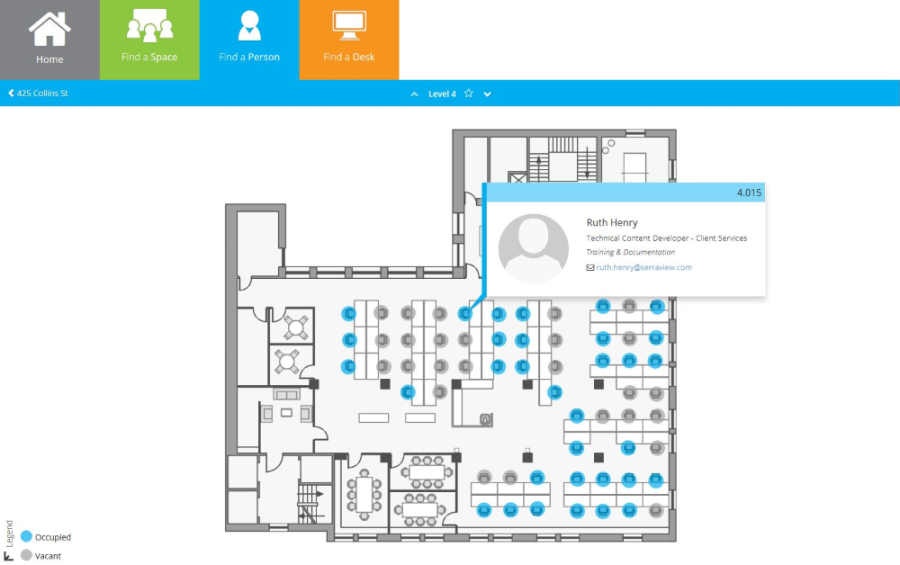
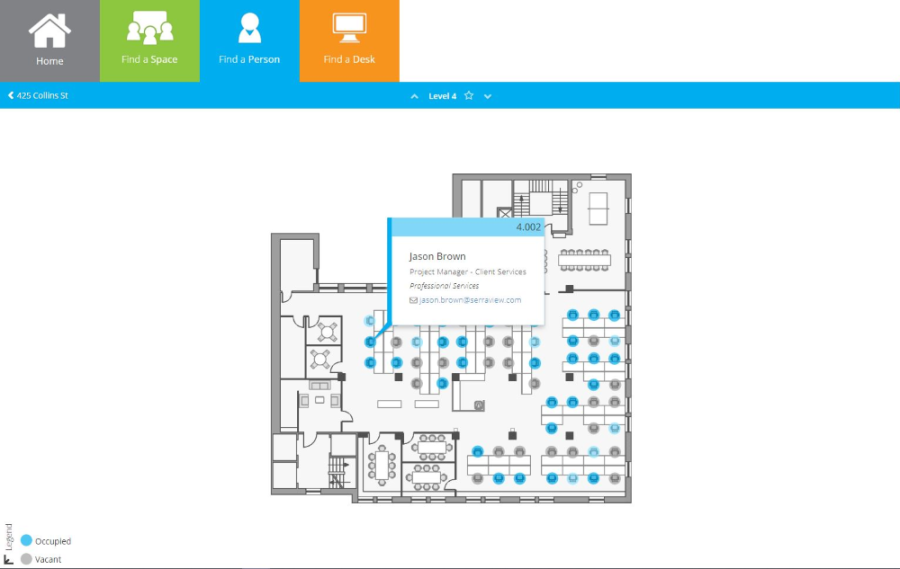
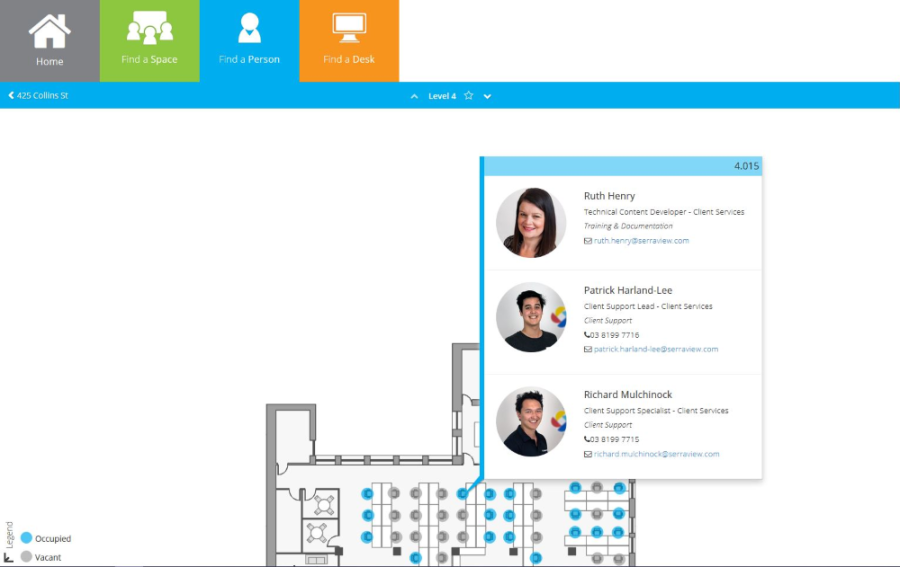
icon. - Navigate to the building and floor you want to investigate. If the workpoint is blue, it is occupied (a person or flexi team is assigned to the space) and if the workpoint is gray it is vacant (no individual or flexi team is assigned to the space). From this view you can click on the workpoint to view who is assigned to a desk.
3. Click the Search ![]() icon to expand the Search and Filter panel. This will list all people on the floor.
icon to expand the Search and Filter panel. This will list all people on the floor.
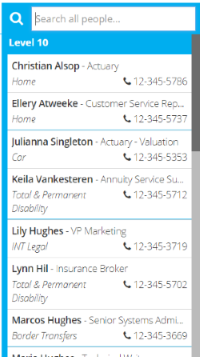
4. You can either scroll and choose from this list or use the search field to begin typing a person's name. The results will list the colleagues that match your search criteria.
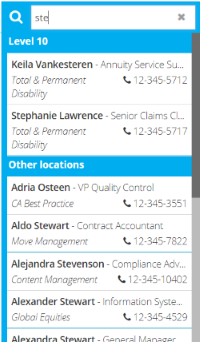
5. If you search for a user with multiple locations, they will be listed beneath the search result and you can tap the location you want to navigate to.
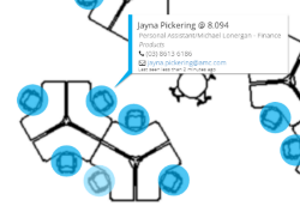
6. Tap on a user to see them highlighted on the floorplan. Below are some examples of how people will be displayed.
- Person assigned to fixed desk
- Person within Flexi team
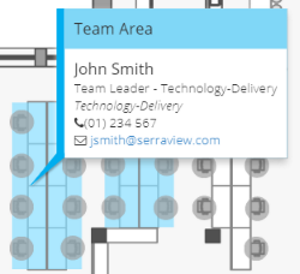
- Person in Hood
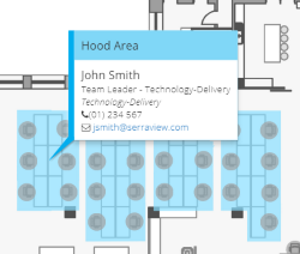
- Person assigned to Flexi team / Hood which is not blocked to specific workpoints on floor
- Desk with single occupant with employee photo.
- Desk with single occupant with no photo.
- Desk with single occupant and the employee photo has a broken link to the photo.
- Desk with multiple occupants.
- Desk with multiple occupants and one of the employee photos has a broken link to the photo.