Integrate Microsoft Exchange/Office 365 Calendar
This article describes the steps required to set up the Microsoft Office 365 Admin Center and Microsoft Exchange, prior to setting up the initial Cronofy integration for the Serraview application.
The steps for Office 365 and Exchange in this document are based on the official documentation from Cronofy, found within this URL Configuring a service account | Enterprise Connect for Office 365 and Exchange | Cronofy Docs .
Prerequisites
-
This article assumes that you have already configured Serraview and have existing resource accounts set up on your Exchange instance. These may include meeting rooms or equipment. If you do not have any resource accounts set up, then set up at least 1 resource account before completing the steps.
-
You must have admin capabilities within Microsoft Exchange/Office 365 to set up this integration.
-
An Office 365 license for the Service Account. This license must be able to grant access to Exchange Online.
Steps
Complete the following steps.
Step 1. Create a Service Account to use with Cronofy Enterprise Connect
Create a new Service Account to use with Cronofy Enterprise Connect. The Service Account will be used to impersonate rooms or users when managing events.
Step 1.1 Create a Service Account
-
Navigate to Users > Active Users.
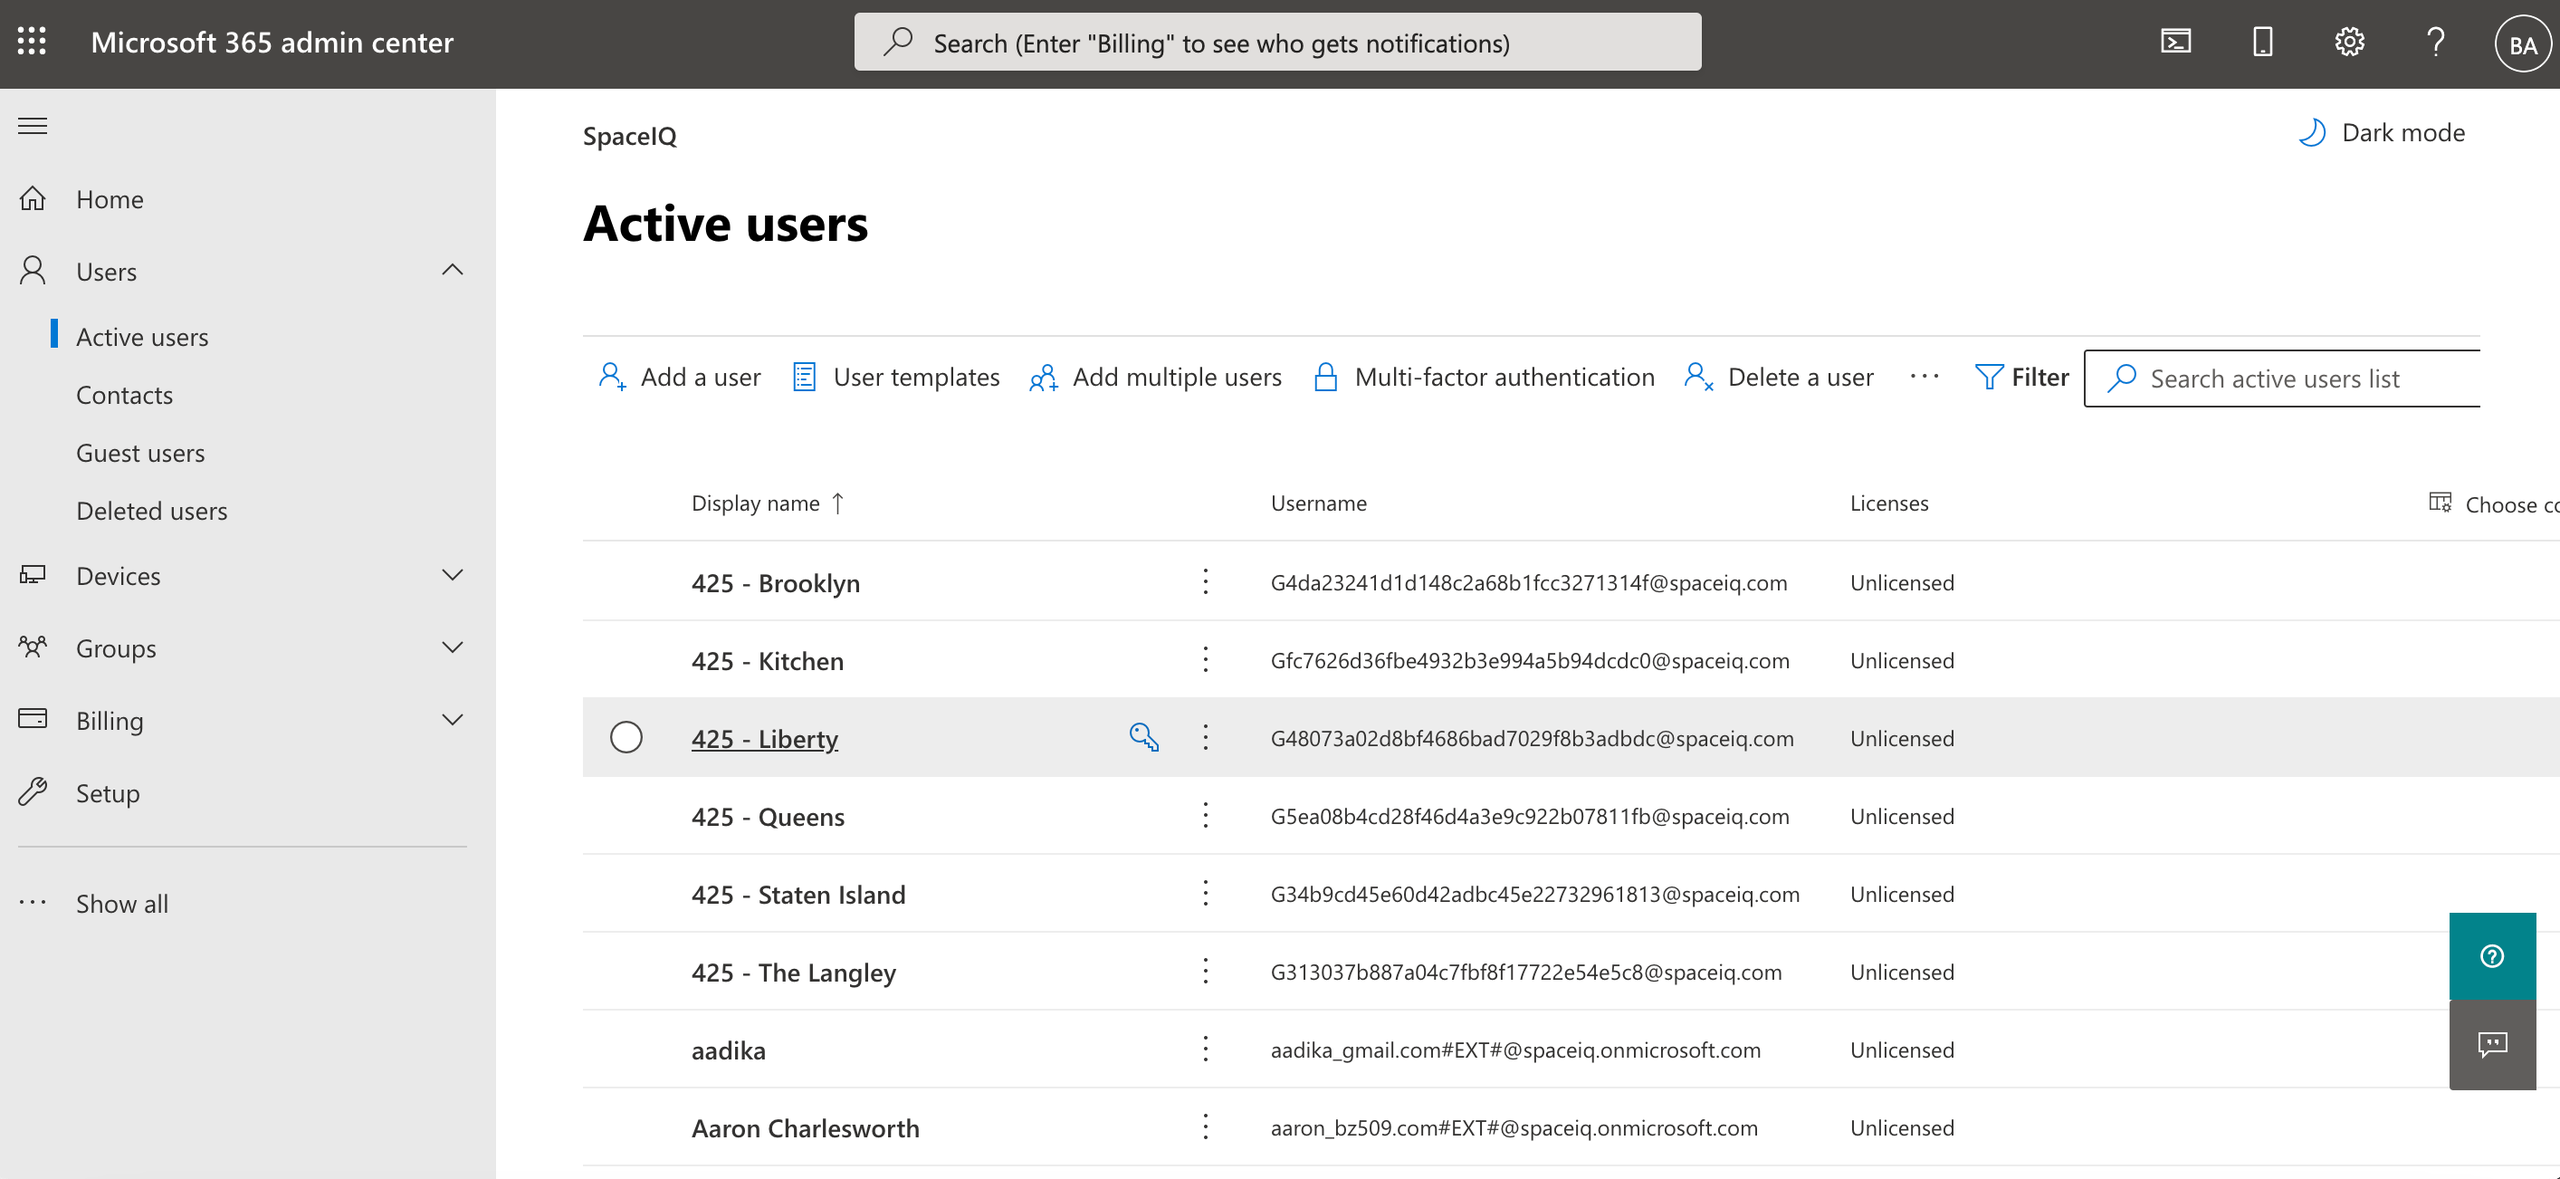
Step 1.2 Create a New User Account
-
Click on the Add a User button.
Step 1.3 Complete the Service Account details
The Set up the basics screen displays.
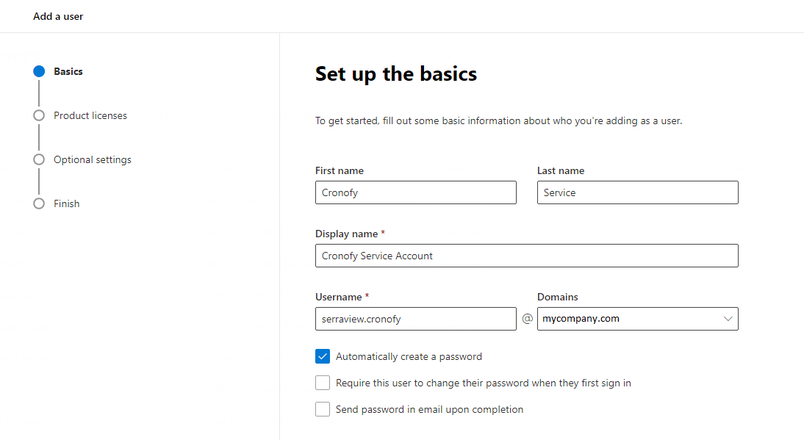
1. Complete the required information for the service account:
-
In the fields, enter the first name, last name, display name, and username.
-
From the Domains drop-down, select your Office 365 email domain. For example, cronofy.service.account@mycompany.com
- Check the Automatically create a password check box. This will allow a generic password to be created for the service account. Note: If you want to create a password, leave the check box unchecked.
2. Click the Next button.
Step 1.4 Assign Product Licenses
The Assigned Product License screen displays.
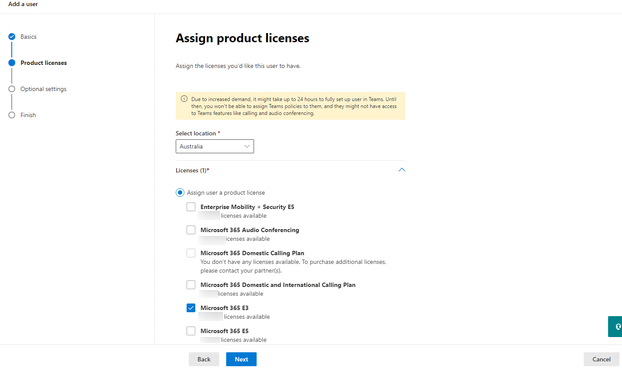
1. From the list, select your license. Note: The Microsoft license must be able to grant access to Exchange Online.
2. Click the Next button.
The Optional Settings displays.
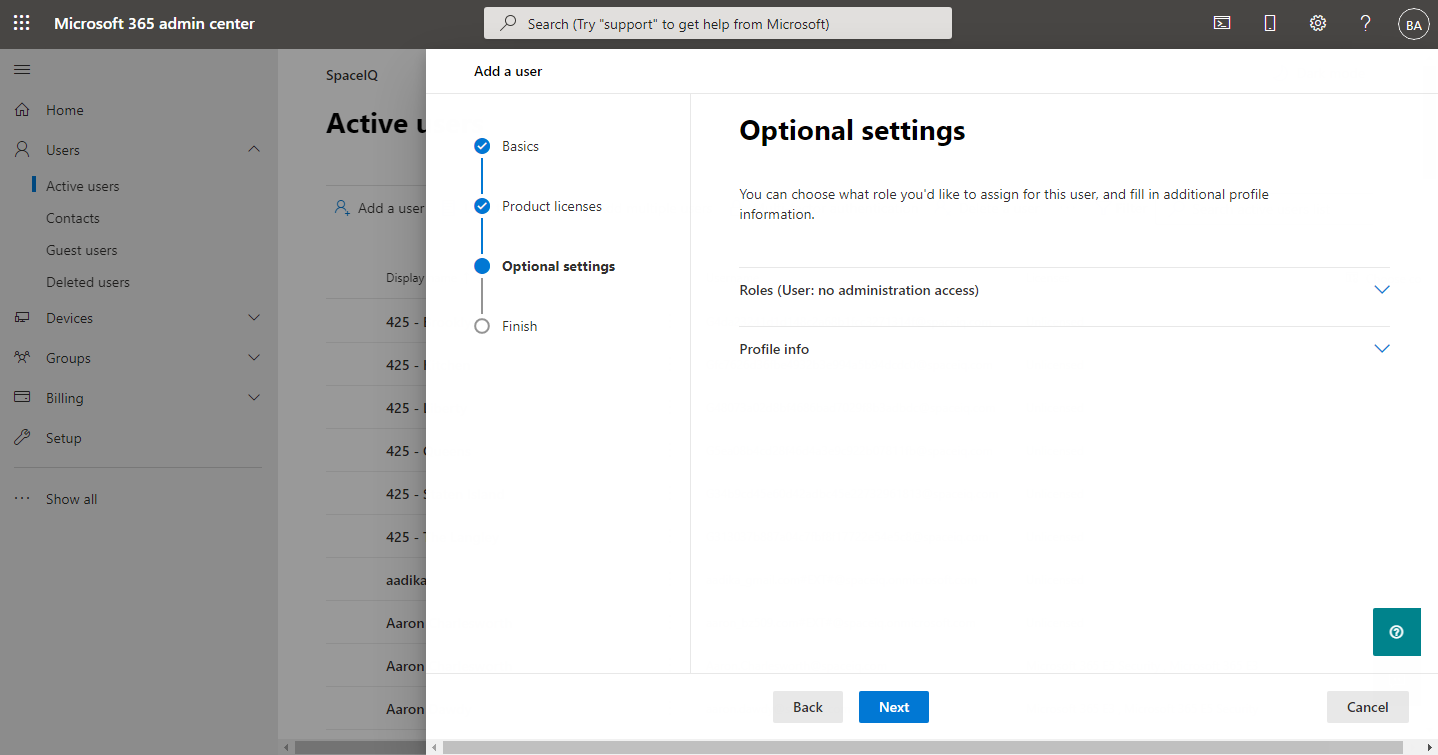
3. Click the Next button.
Step 1.5 Review the Settings
The Review and Finish screen displays.
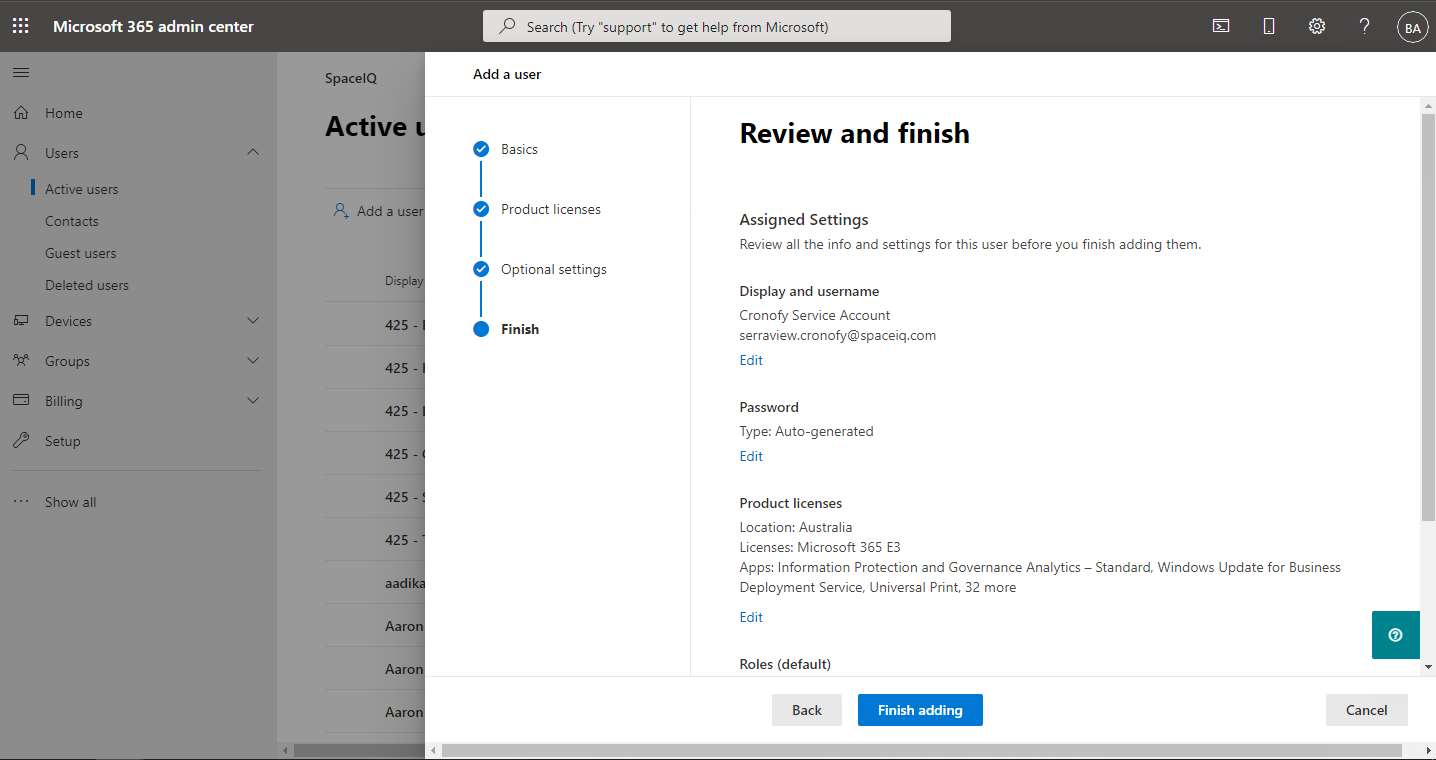
1. Click the Finish adding button.
2. Your Cronofy Service Account has been added and the User details and password displays. Record the details as these will be used later.
3. Click the Close button.
When the service account is created via the Microsoft Admin Center it may take 15 minutes for the initial mailbox to get ready.
Step 2. Create a RoomList for Resource Accounts
A RoomList is a type of distribution group that is used to store resource accounts. This will be used by the Service Account created in step 1 to access resource information (e.g., meeting rooms) for Cronofy.
- To create a RoomList, you must have the Exchange Powershell module as the RoomList can only be created via Powershell. For Office 365 administrators, set up the Exchange Online Powershell Module as instructed in Connect to Exchange Online PowerShell | Microsoft Docs.
- If your distribution group exceeds 75 members then we recommend that you bucket the room resource mailboxes into distribution groups of 75 mailboxes each.
Important
Make sure that your Exchange Online has Organization Configuration enabled. This is required in order to create roles and scopes on Exchange.
To check if this is enabled, run the following cmdlet against Powershell:
Get-OrganizationConfig | ft IsDehydrated
If the command returns False then it is okay to proceed.
If the command returns True then run the following command:
Enable-OrganizationCustomization
This command is only required to run once and it will enable you to be able to create Scopes and assign Roles required in this section. If an error occurs. Close your Powershell session and restart a new one.
Step 2.1 Create a RoomList
Create a RoomList using the New-DistributionGroup Powershell cmdlet. A -RoomList flag is required to create the Group as a RoomList.
Adjust your -Name , -Alias and -PrimarySMTPAddress values to your preference. In this example, we will create a Room List called Cronofy Room List with an address called cronofy.resource.list@mycompany.com
New-DistributionGroup -RoomList -Name "Cronofy Room List" -Alias "cronofy.resource.list" -PrimarySMTPAddress "cronofy.resource.list@mycompany.com"cronofy.resource.list@mycompany.com"
To confirm that the RoomList is created correctly, run the following command.
Get-DistributionGroup cronofy.resource.list@mycompany.com | Format-List RecipientTypeDetails
The results should come back as RecipientTypeDetails : RoomList
Step 2.2 Change the RoomList manager to the Service Account
This step is not required but it may assist in issues when Listing Resources using the Cronofy API later on.
When the RoomList is created by an IT Administrator they, by default, become the manager of the RoomList. You will need to change the manager to the service account as created in Step 1.
1. Check who is the RoomList’s manager, run the following cmdlet.
Get-DistributionGroup -Identity cronofy.resource.list@mycompany.com | Format-Table ManagedBy
The results will show who the RoomList’s manager is. For example, the manager is an IT administrator:
ManagedBy
{it.admin}
2. Change the manager to the service account using the following cmdlet.
Set-DistributionGroup -Identity cronofy.resource.list@mycompany.com -ManagedBy cronofy.service.account@mycompany.com
Step 2.3. Add Resource Accounts to the RoomList
To add the resource accounts to the RoomList created in step 2.1, use the Add-DistributionGroupMember cmdlet. For example, the resource account meetingroom10@mycompany.com will be added.
Add-DistributionGroupMember -Identity "cronofy.resource.list@mycompany.com" -Member "meetingroom10@mycompany.com"
Add Resource Accounts in Bulk
If you have an organization with many resource accounts, you can use a pipe to feed the resource accounts from a CSV file into the RoomList.
For example, use a pipe to feed the file called ResourceCalendar.csv into the Add-DistributionGroupMember cmdlet.
Below is the ResourceCalendar.csv example:
ResourceAccounts
resourcecalendar1@example.com
resourcecalendar2@example.com
Below is the cmdlet used to pipe the csv file from the above.
Import-Csv ResourceCalendars.csv | foreach { Add-DistributionGroupMember -Identity "cronofy.resource.list@mycompany.com" -Member $_.ResourceAccounts
Step 2.4. Control the access rights between the Service Account and the RoomList
In order for the Service Account to be able to access the Resource Accounts in the RoomList. The Service Account must be granted with the ApplicationImpersonation role.
In this example, you would change the following:
- cronofy.resource.list@mycompany.com to your RoomList address (as created in Step 2.1)
- cronofy.service.account@example.com to your Service Account address (as created in Step 1)
$DistGroupDN = $(Get-DistributionGroup cronofy.resource.list@mycompany.com).DistinguishedName
New-ManagementScope -Name CronofyImpersonationScope -RecipientRestrictionFilter "MemberOfGroup -eq '$DistGroupDN'"
New-ManagementRoleAssignment -Name CronofyImpersonationAssignment -User cronofy.service.account@example.com -Role ApplicationImpersonation -CustomRecipientWriteScope CronofyImpersonationScope
While it is a requirement for the Service Account to be added with the ApplicationImpersonation role. You need to be aware that this will allow the Service Account to have access to all users' calendar information in your organization.
Therefore in the command, above we have included the following:
- 1st Line - This creates a variable to store the DistinguishedName of the RoomList which will be used on the 2nd Line.
$DistGroupDN = $(Get-DistributionGroup cronofy.resource.list@mycompany.com).DistinguishedName
- 2nd Line - Creates a Management Scope CronofyImpersonationScope to filter only members of the RoomList as stored in the $DistGroupDN variable.
New-ManagementScope -Name CronofyImpersonationScope -RecipientRestrictionFilter "MemberOfGroup -eq '$DistGroupDN'"
- 3rd Line - Assigns the Service Account with the ApplicationImpersonation Role and also applies the Management scope as created in the 2nd line.
New-ManagementRoleAssignment -Name CronofyImpersonationAssignment -User cronofy.service.account@example.com -Role ApplicationImpersonation -CustomRecipientWriteScope CronofyImpersonationScope
This results in the Service Account having limited access to only members of the RoomList.
Step 3. Test the configuration
To confirm that the ApplicationImpersonation role and permissions are set up properly for the Service Account and Resource Calendars. You can use the Microsoft Remote Connectivity Analyzer tool to verify.
1. Open the https://testconnectivity.microsoft.com/
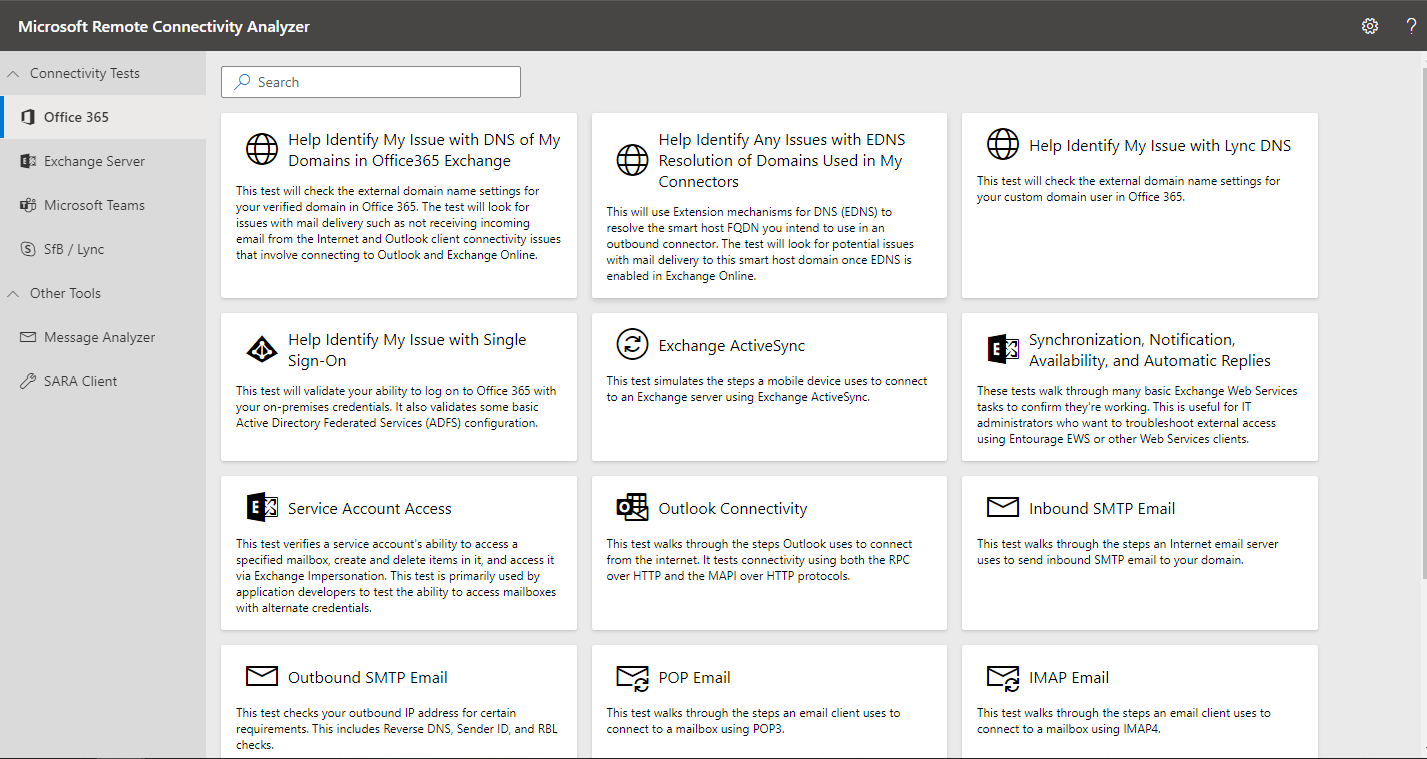
2. In the Connectivity Test menu.
a. If testing for Exchange Online via Office 365, select Office 365.
b. If testing for Exchange Server, select Exchange Server.
3. Click the Service Account Access tile. The Service Account Access (Developers) screen displays.
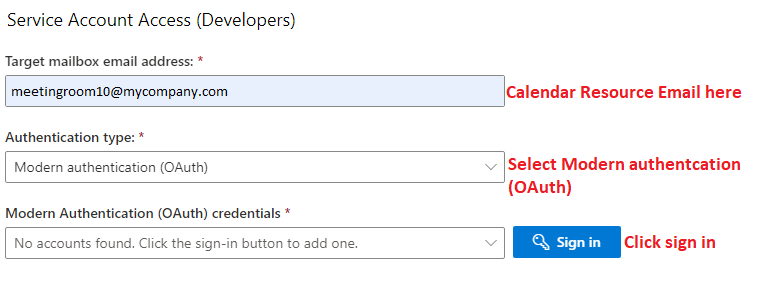
4. In the Target mailbox email address field, enter the Calendar Resource email address.
5. From the Authentication type drop-down, select either Modern Authentication (OAuth) as this is used to test the account.
Note that Basic Authentication is available if your organization wants to use this to test the account.
A new window displays.
6. Enter the credentials for the Service Account as created in Step 1 and then click the Next button.
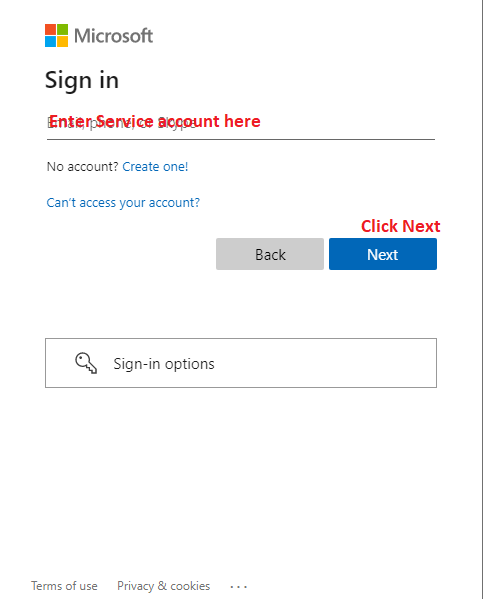
The Enter password screen displays.
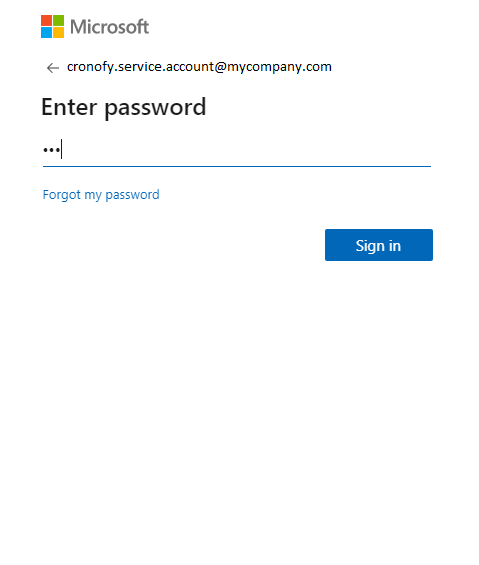
7. Enter the Service account’s password.
When the OAuth is successfully authenticated. You will return to the Service Account Access screen. You will notice the Modern Authentication field will be automatically filled out
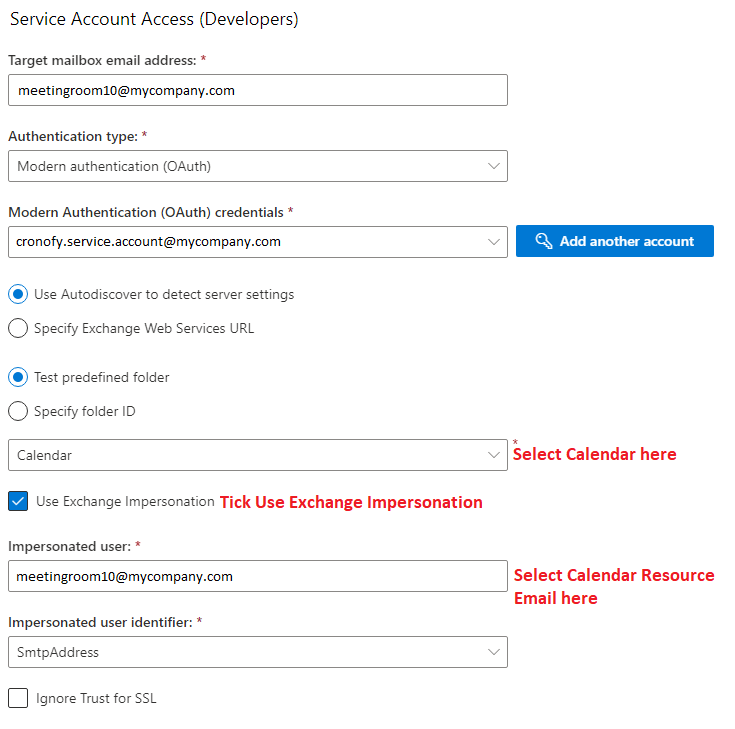
8. Select Test predefined folder option.
9. From the folder drop-down, select Calendar.
10. Tick the Use Exchange Impersonation check box.
11. In the Impersonation user field, enter the calendar resource email address.
12. From the Impersonation user identifier drop-down, select SmtpAddress.
13. Use the default Service Selection.
14. Tick the terms and conditions check box.
15. Enter the capture verification code and click the Verify button.
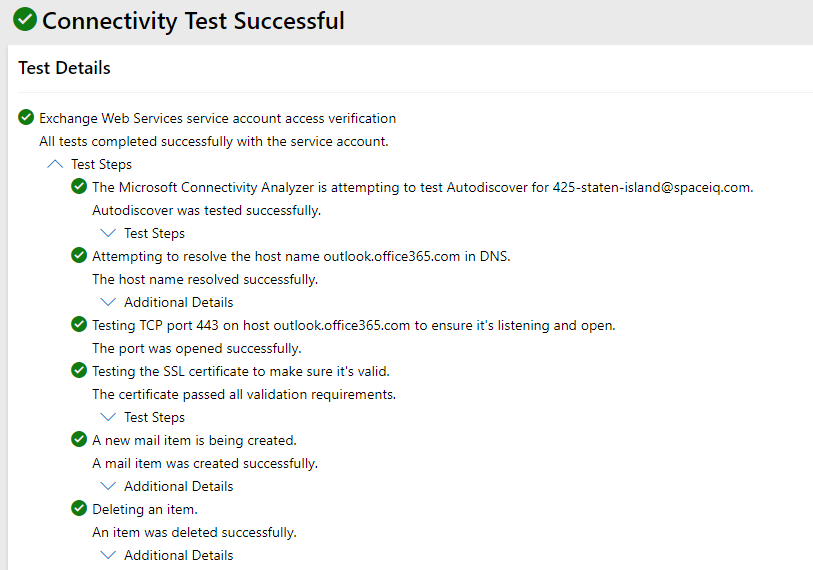
16. Click the Perform Test link to run through the required connectivity checks.
The test will tell you if it has passed or failed. If it passes, you can be confident that your Office 365 service is ready to proceed with the Cronofy Integration.
Step 4. Complete the activation in Serraview
Complete either: