Add, Edit, or Delete the Space Types
The Spaces Types, Custom Layers, and Markers can be managed by your System Administrator.
It is important to remember that for Markers these are a default set in Serraview and your System Administrator cannot add, edit, or delete these. The Markers are displayed in Serraview and in Engage. By default, they are invisible in Engage and if you want certain Markers to be visible then your System Administrator can enable them, see Make your Markers visible in Engage.
Add Space Type
You can add or edit a space type.
- Navigate to Admin Settings > Reference Data > Space Types.
- Select parent space type.
- Click the Add button. The Add Space Type form displays.
Complete the form and refer to the Edit a Space Type below for the field's description.
If you use Custom Space Layers in the CAD files you import into Serraview, then your floorplan import schema will need to be updated. You will need to email support@serraview.com with a list of the space types you have added or edited to request the update.
Note that if your schema uses the Space Layers found in Serraview CAD Preparation then your schema will not need updating.
Edit a Space Type
You edit an existing space type.
Step 1. Edit an existing Space Type
- Navigate to Admin Settings > Reference Data > Space Types.
- Click the space type. The Edit form displays.
Complete the following:
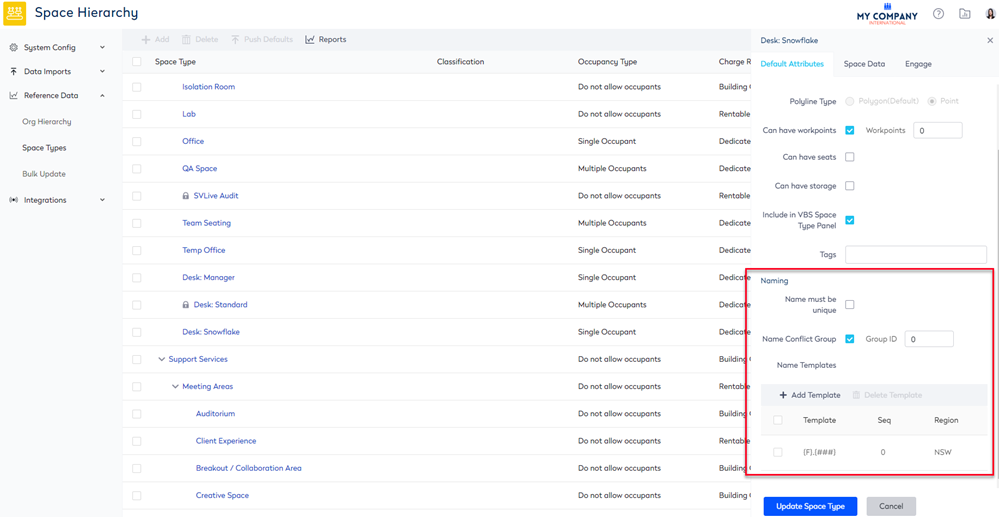
3. In the Default Attributes tab complete the following:
| Field | Description | ||||||
|---|---|---|---|---|---|---|---|
| Space Type Name field |
Enter the name of the space type. |
||||||
| Use Default Mapping Color check box |
If you want to use the default color then leave the default checkbox. If you want to use a custom color then:
|
||||||
| Polyline Type option buttons |
Select either polygon or point. For example, the parent space type will be a polygon such as Workspace and a child space type will be a point such as Desk: Standard.
|
||||||
| Can have workpoints check box |
If the space type can have workpoints then leave the default check box and in the Workpoints spin box, enter in the number of workpoints. If the space type does not have workpoints then uncheck. |
||||||
| Can have seats check box |
If the space type can have seats, then check the Can have seats check box. For example, a meeting room will contain seats. |
||||||
| Can have storage check box |
If the space type contains storage, then check the Can have seats check box. For example, a storage room or a meeting room could have a storage area. |
||||||
| Include in the VBS Space Type Panel check box |
When this is checked then this will display the space type in the VBS Information Panel's Spaces tab, refer to View the Spaces on the Block.
|
||||||
| Tags field | Enter in tags, for more details on Tags see Add, Edit, Delete, Remove, or Merge Tags. | ||||||
| Name Must be Unique check box | This lets you set that every name applied to the space type must be unique. | ||||||
| Name Conflict Group check box | If you apply for a Name Conflict Group number, all other space types with that conflict group number applied will be checked to confirm they are unique before saving. | ||||||
|
Name Templates |
The Name Templates are the format(s) that can be applied to a space type. You can create name templates in your space type hierarchy.
2. Complete the following:
3. When you have completed the format, click Add Template button. To delete a Name Template, select the template and click the Delete Template icon. |
||||||
| Tags field |
For more information, refer to Tagging. |

2. In the Space Data tab complete the following if you want to set the defaults for a space type.
Allocation
| Field | Description |
|---|---|
| Default Charge Rule drop-down |
If you use Chargeback then you can set the Default Charge Rule. For more information, refer to Chargeback. |
| Default Allow Org Unit Allocation check box | Check the Allow Org Unit Allocation check box, if the space type can be allocated to an Org Unit. Uncheck if the space type can not be allocated to an Org Unit, for example, a meeting room. |
| Chargeback Weight field |
This affects the weighting calculations of Recharge. |
| Classification drop-down |
Select the classification for the space type. This classification is set using the keyword called Space Classifications and is used for BOMA. For more information, refer to Keywords. |
| Function drop-down |
Select the function of space type and the default setting is Unknown. This defines the purpose of the space and this lets you categorize your space types from a main Space Function list, for example, Core Building Service, Encroachment, Expansion, Secondary Circulation, Training, Public Space, Laboratory, Office - Individual, Office - Collaboration, Unknown. |
Occupancy
| Field | Description |
|---|---|
| Default Occupancy Configuration drop-down |
From the Default occupancy configuration drop-down, select either:
|
4. In the Engage tab complete the following.
Engage
| Field | Description |
|---|---|
| Stylized Floorplan Render drop-down |
By default, this is set to Interactable. You can configure which buildings and floors you want to show or hide to your Engage users. For more information, refer to Set up the Space Types for Engage. |
| Default is Reserving Disabled check box |
By default, this is set to un-checked. You can disable the default reserving for certain space types. This setting is found on the Space Types, Engage tab. For example, disable the reserving for the Escalator space type. For more information, refer to Set up Desk Reservation Permissions. |
Locator
| Field | Description |
|---|---|
| Default Show Availability in Locator check box |
By default, this is set to un-checked. Check the Default Show Availability in Locator check box if you want the space type to be available in Locator. If you do not want to set the defaults for a space type you can configure the Locator settings for the space. For more information, refer to either: |
Wireup
| Field | Description |
|---|---|
| Show Space Type in Wireup check box |
By default, this is set to un-checked. If you want the space type to display in the Wireup module, then check the Show Space Type in Wireup check box. For more information, refer to Wireup Workpoints. |
| Include All Child Space Types check box |
By default, this is set to un-checked. If your want the children's space types to display in the Wireup module's floorplan, then check the Include All Child Space Types check box. For more information, refer to Wireup Workpoints. |
5. Click the Create Space Type button.
Step 2. Optional - Push Defaults to Space Types
You can force some of the space type's default settings to be updated. If your mapped space types have been manually changed, then this will update those space types.
The Space Type field that you can push the defaults for are:
- Occupancy Configuration
- Charge Rule
- Allow Org Unit Allocation
- Workpoint Count
- Show Availability in Locator
Complete the following:
- Select the space type.
- Click the Push Defaults button. The Update Space to Default dialog displays.
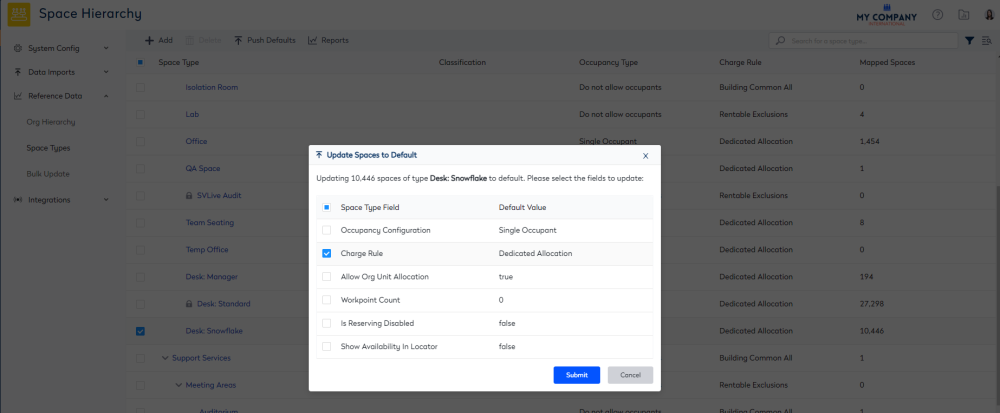
3. Click the Submit button.
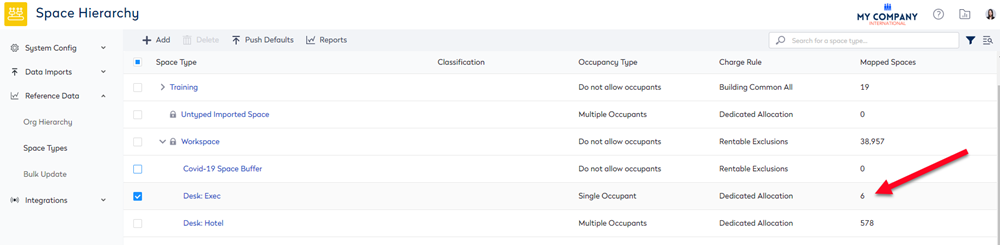
Delete a Space Type
If the space type or custom layer is mapped then you can delete the space type. For example, Desk: Exec is mapped to 6 spaces. You will need to find these space and un-map them.
Step 1. Change the Space Type color
To assist you in finding the space type, we recommend you change the space type color to a bright color, for example, bright yellow, green, or pink.
- Click the Space Type. The Edit form displays.
- Click the Custom Color picker icon.
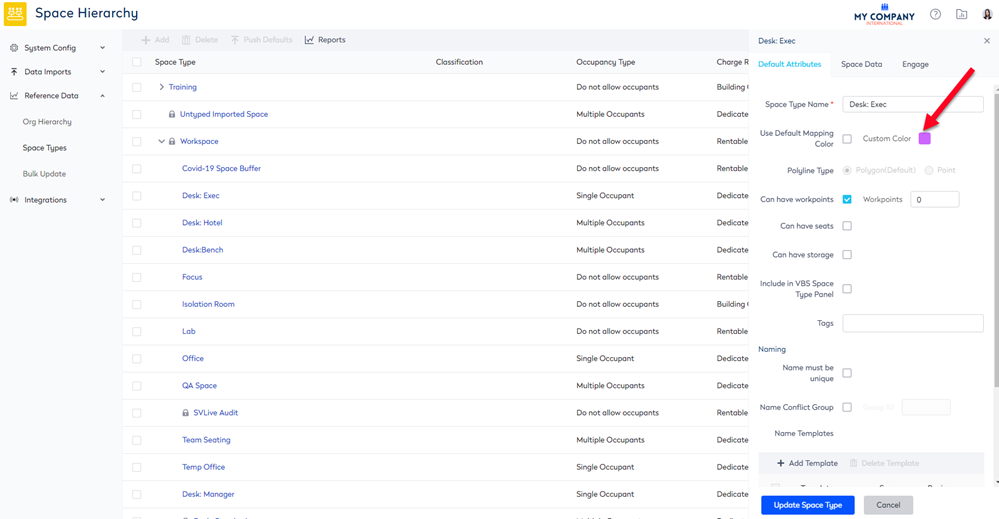
The Color Picker displays.

3. Either select the color, or enter in a HEX code or a RGB (red, green, blue) code. Refer to https://www.color-hex.com/ this site displays colors in the HEX code and the RGB code. Remember to choose a bright color, this example uses the HEX code of F4EC33.
4. Click the Update Space Type button.
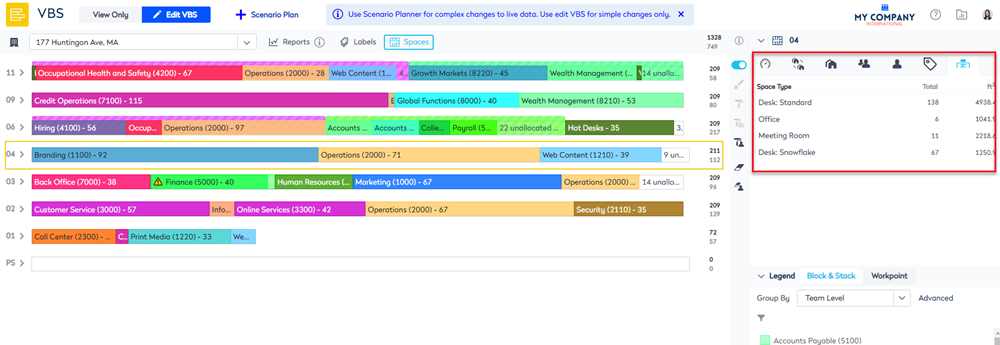
Step 2. Run 324 Mapped Space Type Report
You will need to find out where the existing space types are used.
Generate the report for all the space types:
- Click the Reports button.
- Click Mapped Space Type Report.
Generate the report for a particular space type:
- Navigate to the Insights > Reporting.
- Generate the report 324 Mapped Space Type Report for a particular space type and this will show you the building and floor where the space type is in use.
Step 3. Change the Space Type for the mapped Spaces
Next, you will need to change the space type for the mapped spaces.
- Navigate to Spaces.
- Use the Location Selector to select the building and floor.
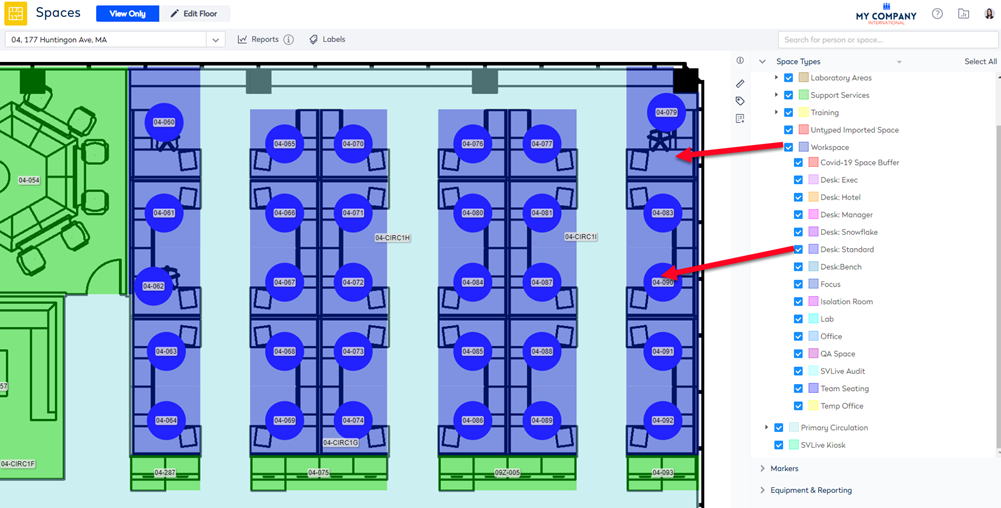
- Click the Labels button, check Space Types and uncheck Name and Occupant.
- In the Legend Selector, select the space type.
- From the map, double click the space. The Update Space form displays.
- From the Space Type drop-down, either search for or browse to the space type you want.
- Click the Update Space button.
Repeat the above steps for the spaces that have the space type you want to un-map.
Step 4. Delete the Space Type
Finally, the space type has no mapped spaces and you can now delete it.
- Navigate to Admin Settings > Reference Data > Space Types.
- Select a Space Type.
- Click the Delete button. A message displays "Are you sure you want to delete the selected space type?"
- Click the OK button.
The space type is deleted.