Add, duplicate, reset, or edit an Email Template
You can add or duplicated an email template and this will copy the email template and this will be the new email template. Or you can edit an existing email template.
The following email template types can be copied or modified:
| Email Template | Duplicate (Add) | Edit | Reset |
|---|---|---|---|
|
System Emails This includes User Security Emails and Reporting Emails. |
|||
|
|||
|
|||
|
|||
|
|||
|
|||
|
|||
|
|||
|
|||
|
|||
|
|||
| Bulk Update Emails | |||
|
|||
Do not edit the email template in the Email module. Instead edit the email at the time of sending, refer to Send out Bulk Email. |
|||
| Engage Emails | |||
|
|||
|
|||
|
|||
| Service Request Emails | |||
|
|||
|
|||
|
|||
|
|||
|
|||
|
|||
|
|||
|
|||
|
|||
| Modify the Self-manage Workplace Access Emails | |||
|
The following emails are not in the Email Template editor:
|
- | - | - |
| Update Workplace Administration Emails | |||
|
|||
|
|||
|
|||
|
|||
|
|||
|
|||
|
|||
|
Add an email template
- Navigate to Configuration > Email. The Email Templates screen displays.
- Click the Add button. The Add Email dialog displays.
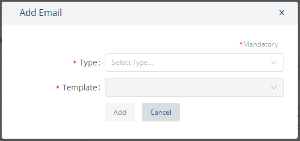
3. From the Type drop-down, select the type.
4. From the Template drop-down, select the template.
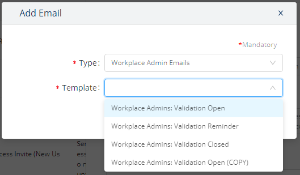
The email template will copy the email template and this will be the new email template.
![]()
5.From the email template listing, click the copied email template. The Edit email template panel displays, refer to the Edit the email template below.
Duplicate an email template
- Navigate to Admin Settings > System Config > General > Email. The Email Templates screen displays.
- Either search or filter for the email template.
- Click the email template. The Edit email template panel displays.
- Click the Duplicate icon. The email template will be copied and displayed in the email template listing with the words (COPY) in its name.
- Click the X icon to close the email template.
- From the email template listing, click the copied email template. The Edit email template panel displays, refer to the Edit the email template below.
Reset the email template
If you want to reset the email template's content back to the original content from Serraview.
- Navigate to Admin Settings > System Config > General > Email. The Email Templates screen displays.
- Either search or filter for the email template.
- Click the email template. The Edit email template panel displays.
- Click the Reset button. The email template displays the original content from Serraview.
- Click the Save button.
Edit the email template
The email template can be either a new or an existing email template.
- Click the Email Template. The Edit email template panel displays.
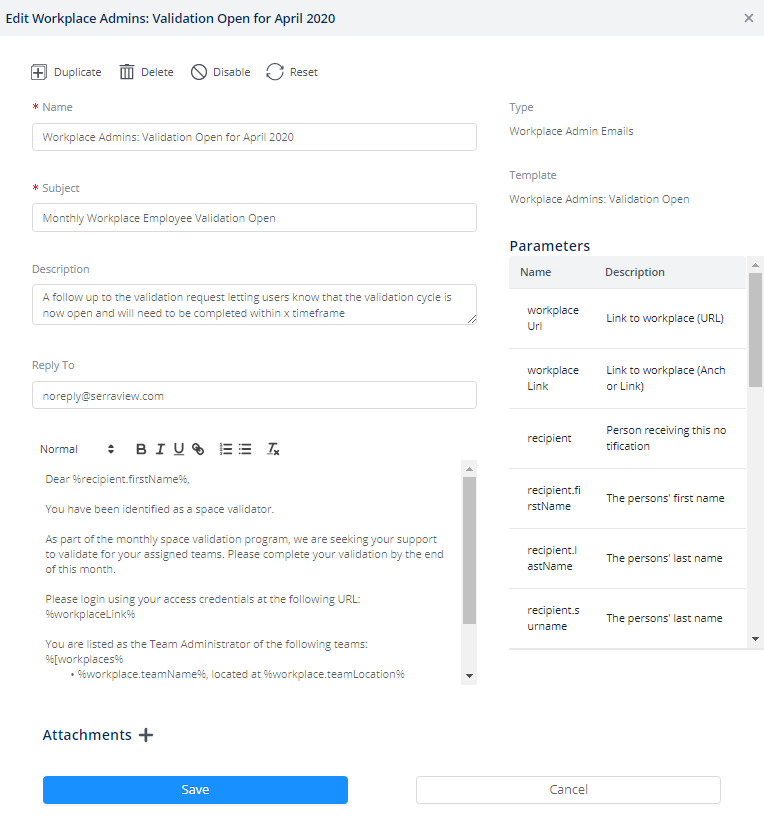
The email template consists of the following areas:
- Subject
- Description
- Reply To
- Email Editor
- Email body content
- Attachments
- Type
- Template
- Parameters
Compete the following:
| Field | Description | ||||||||||||||||||||||||||||||||||||
|---|---|---|---|---|---|---|---|---|---|---|---|---|---|---|---|---|---|---|---|---|---|---|---|---|---|---|---|---|---|---|---|---|---|---|---|---|---|
| Name | Enter the email's name. | ||||||||||||||||||||||||||||||||||||
| Subject | Enter the email's subject. | ||||||||||||||||||||||||||||||||||||
| Description | Enter the email's description, this will display on the Email Templates screen. | ||||||||||||||||||||||||||||||||||||
| Reply To | Enter the reply to's email address. | ||||||||||||||||||||||||||||||||||||
|
Email Editor |
The Email Editor's toolbar consists of:
|
||||||||||||||||||||||||||||||||||||
| Email Body Content | This contains the body content and you can edit the text, apply formatting, and add parameters. | ||||||||||||||||||||||||||||||||||||
|
Parameters |
You can use the parameters to populate your emails with content from fields and the parameters are not case sensitive. For example, the parameter called recipient.firstName will display the Person's first name in the email using the parameter format: %recipient.firstName% The panel lists the parameters with their name and description and for your reference, the parameters are listed in Email Template Parameters. If you can not find the parameter (field) you want, then contact the Serraview Support team and ask for the specified field to be exposed. Add a parameter in the body content
Remember to test your email to make sure the parameter is working. If the parameter is not working then check the spelling of the name as it needs to be an exact match. Add a custom field parameter in the body content A parameter can be a Custom Field for certain entities and the format is: %entity.cf.customFieldName% The Custom Field Entities that can be used are:
Only the custom fields with the following data types will be available:
|
||||||||||||||||||||||||||||||||||||
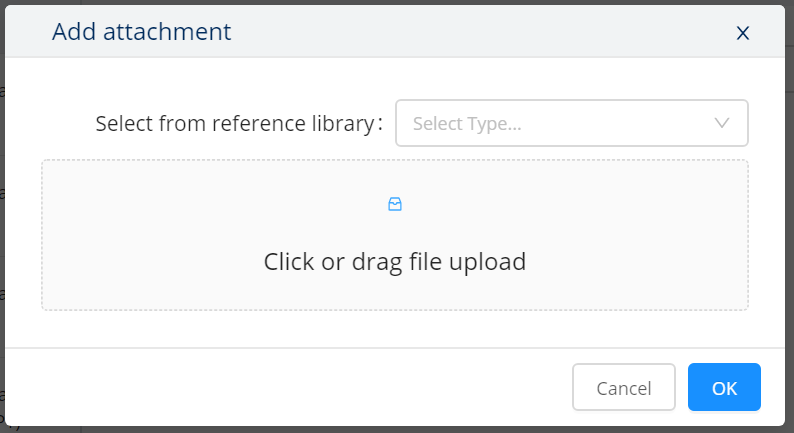
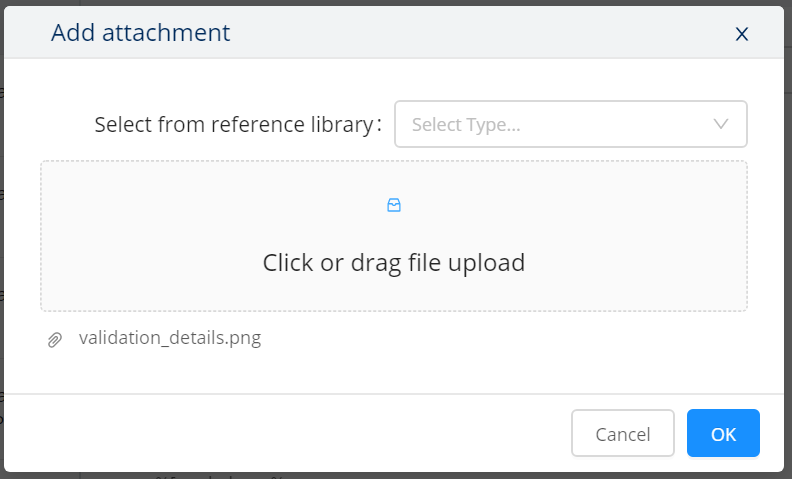
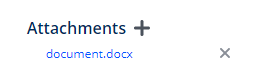
| Attachments |
You can add attachments either from the Document Library or upload the attachment.
2. Either:
Wait for the attachment to display in the dialog.
If you need to remove the attachment then, hover on the attachment and click the X icon. 3. Click the x icon to close the Edit Attachments dialog.
If you need to remove the attachment then, click the X icon. |


Save
- Click the Save button.