Read the Seating Plans on the Floor Map
When you work with the floor map, SpaceIQ provides visual references to the elements found on the floor map.
Floor Map Icons
Seats and Floor Map Colors
When you are zoomed in, you'll notice the dot icons on the floor map which are called Seats. You can hover over or click on each one to learn more about who sits there. Occupied Seats are filled in, while unoccupied Seats are hollow in the center.
Space icons are one of the several different types of space in SpaceIQ. You can learn more about how to add, move or remove spaces.
Pins
Pins are simple icons that designate important equipment and areas within the office, such as fire extinguishers and restrooms. Pins aren’t searchable, but they do help make the Floor Map more comprehensive and useful for employees.
Pins are just one of several different types of spaces in SpaceIQ. You can learn more about how to add, move, or remove pins.
You can see how many Pins you have used of each type by clicking on the Reports tab and accessing the Pins report. This report can help you with inventory tracking and to ensure you’ve properly marked various equipment on the Floor Map.
Data Drawer
The right drawer opens after clicking a seat icon [1].
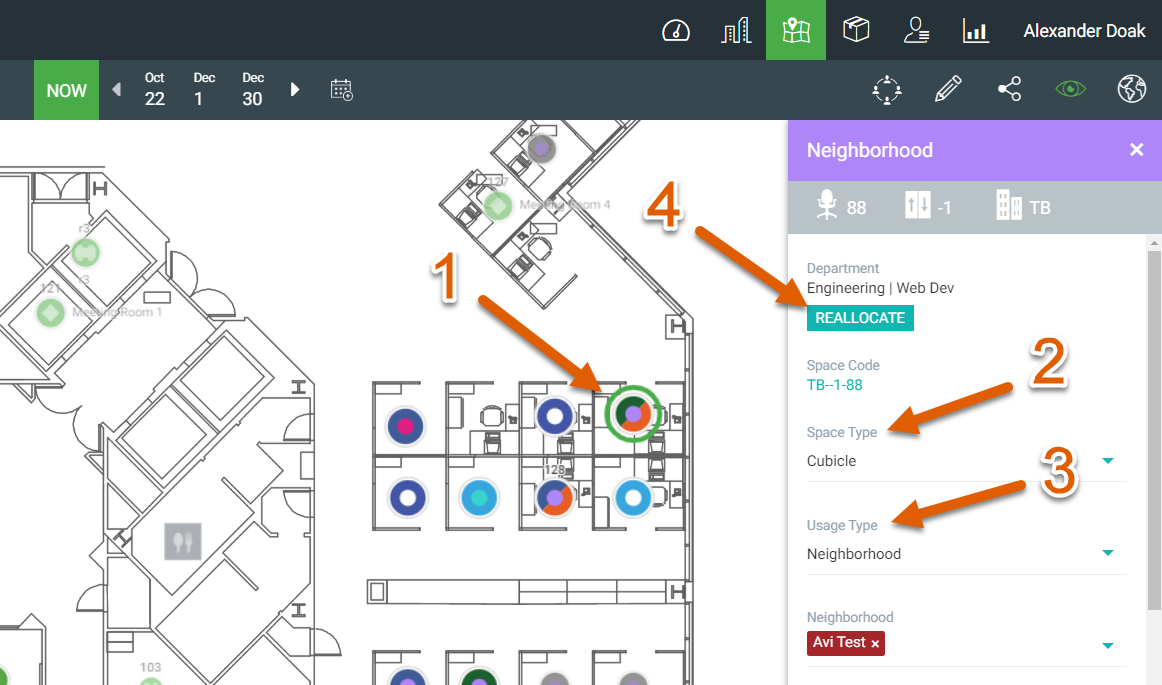
Space Type and Usage Type
You’ll notice fields for Space Type [2] and Usage Type [3] for that seat. Each of these fields has a drop-down menu that allows you to categorize the seat in question.
Space Type helps you identify what kind of workspace that icon represents, whether it’s a bench desk or a break room.
Usage Type allows you to define how the seat in question should be used. For example, choose Primary Seat if the seat should be assigned to a specific employee as their main workspace. For hoteling, choose Hoteling Desk. Scroll through the complete list of selections in these drop-downs to ensure you choose the right option.
Reallocate
The colorful dots in SpaceIQ are not only pretty to look at, but these map colors have meanings. Each color represents a department or team. If the dot doesn’t have a color, it has yet to be allocated to a department or team.
For more details, see Floor Map Colors.
To allocate a department/team to a dot, select the dot you want to allocate, click the Reallocate button [4] in the data drawer, and select the department or team to which this space belongs in the next window that opens.
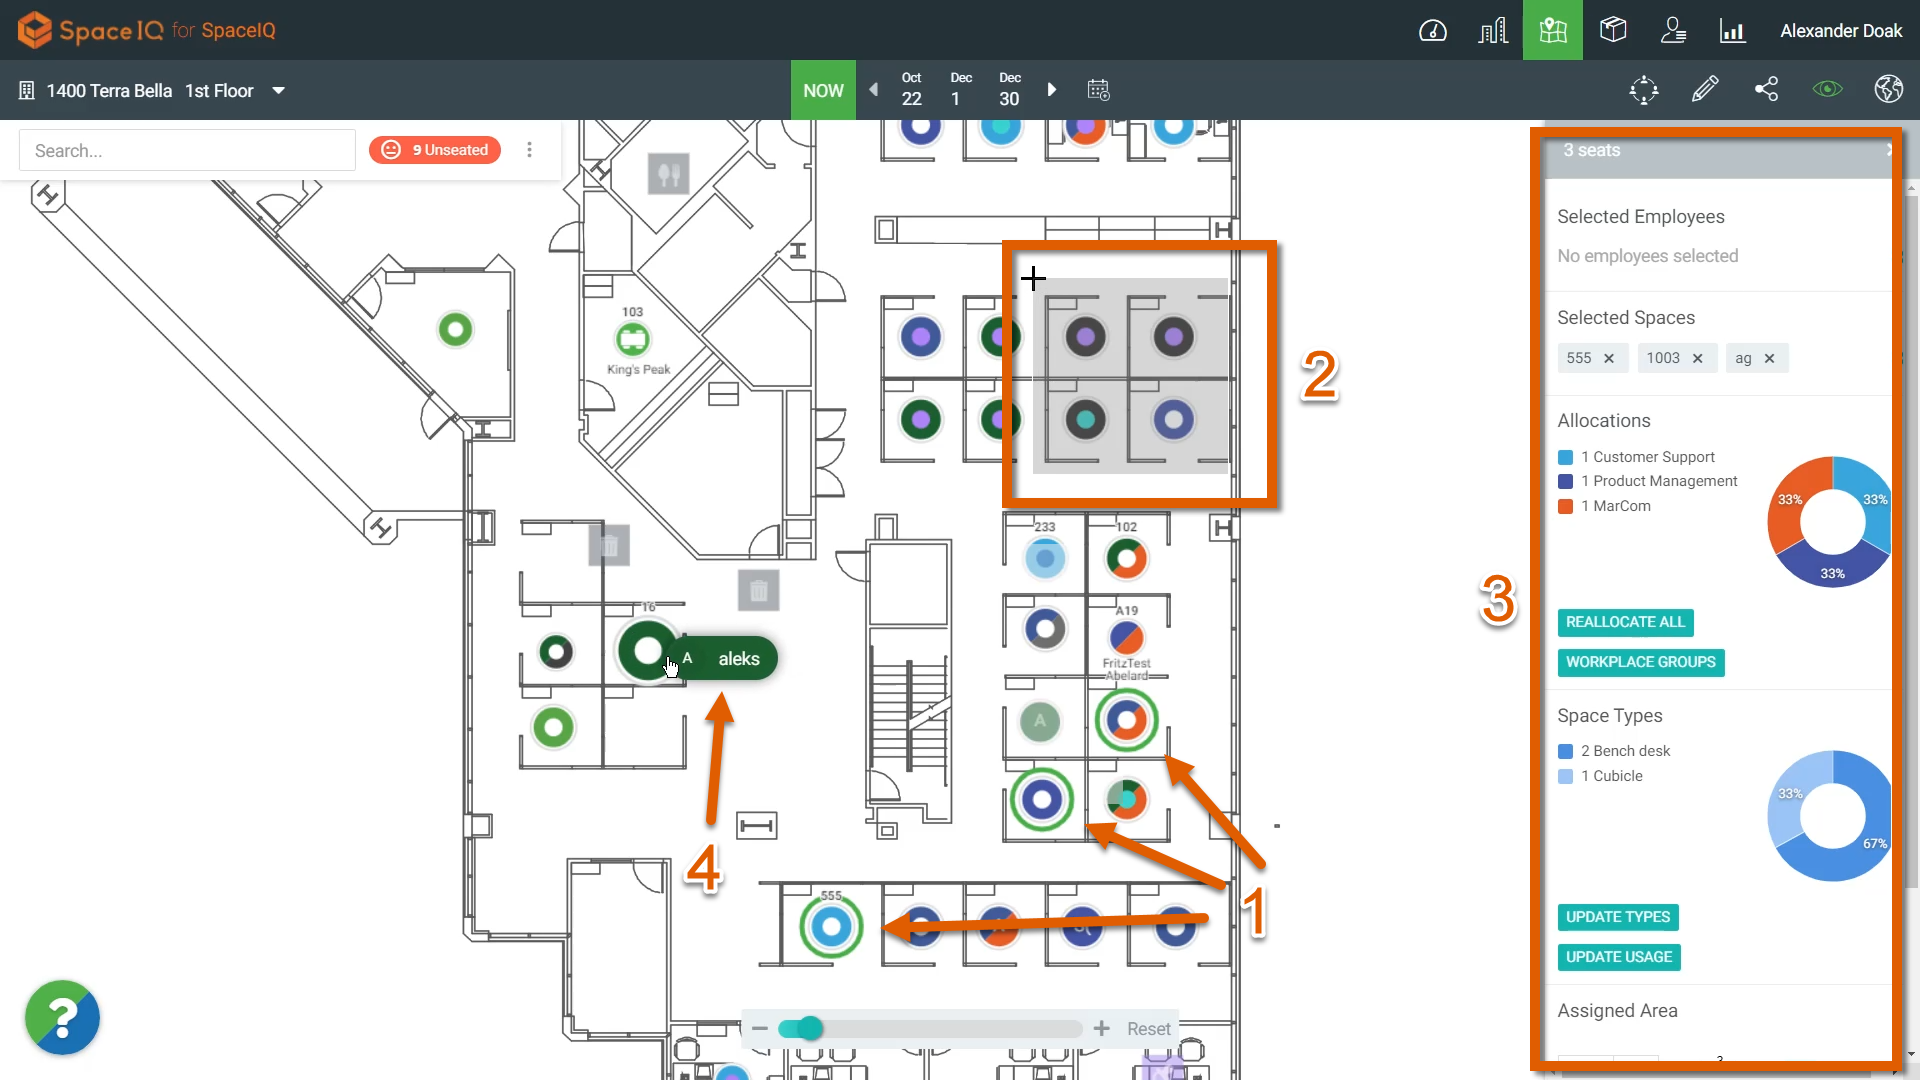
Multiple Spaces Selected, and the Data Drawer
Selecting multiple spaces [1] will give you different options in the data drawer, like the ability to manage workplace groups [2] and new visualizations [3] for the data you have selected. It is also possible to remove selected spaces by number here [4].