Add Employee Seats via the Move Order Import
When your Seating Chart has fixed desks, you can assign your unseated employees to their seats. This can be completed manually or in bulk using the Move Order Import.
Follow the steps below to set up the Move Order Import file and then import the employees' seats.
Steps
- Step 1. Copy the Employee's email address from the Employee Import file
- Step 2. Find the Seat Codes
- Step 3. Use the Move Orders Import to update the Employees's Seats
- Step 4. View your employees' seats on the Floor Map
Step 1. Copy the Employee's email address from the Employee Import file
From the Employee Import file, copy the Email address.
In the Excel spreadsheet, paste under the email column to populate the email addresses.
If you want to quickly find the employees' email addresses, then export the Employee List, see Add or Remove Employees via an Employee Import's - Export the Employee list.
Step 2. Find the Seat Codes
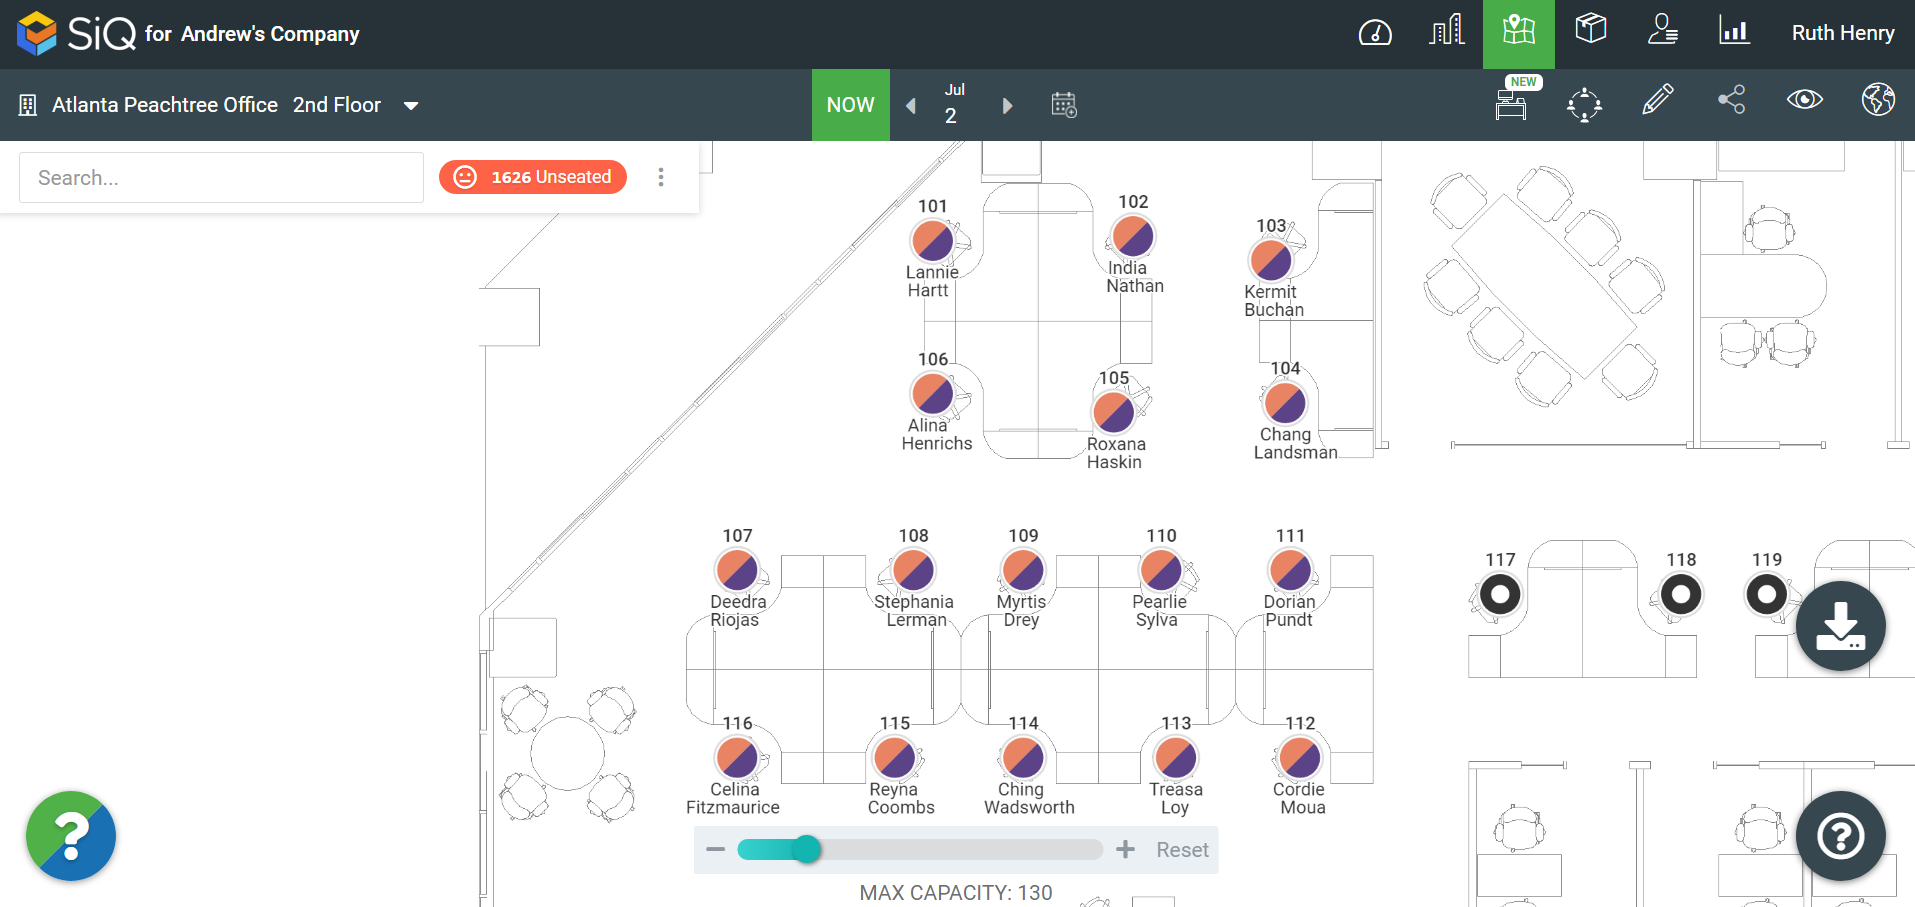
Remember you can view the employee names and seat codes on the Floor Map when you turn on the View Filter, see Customize Floor Map Views
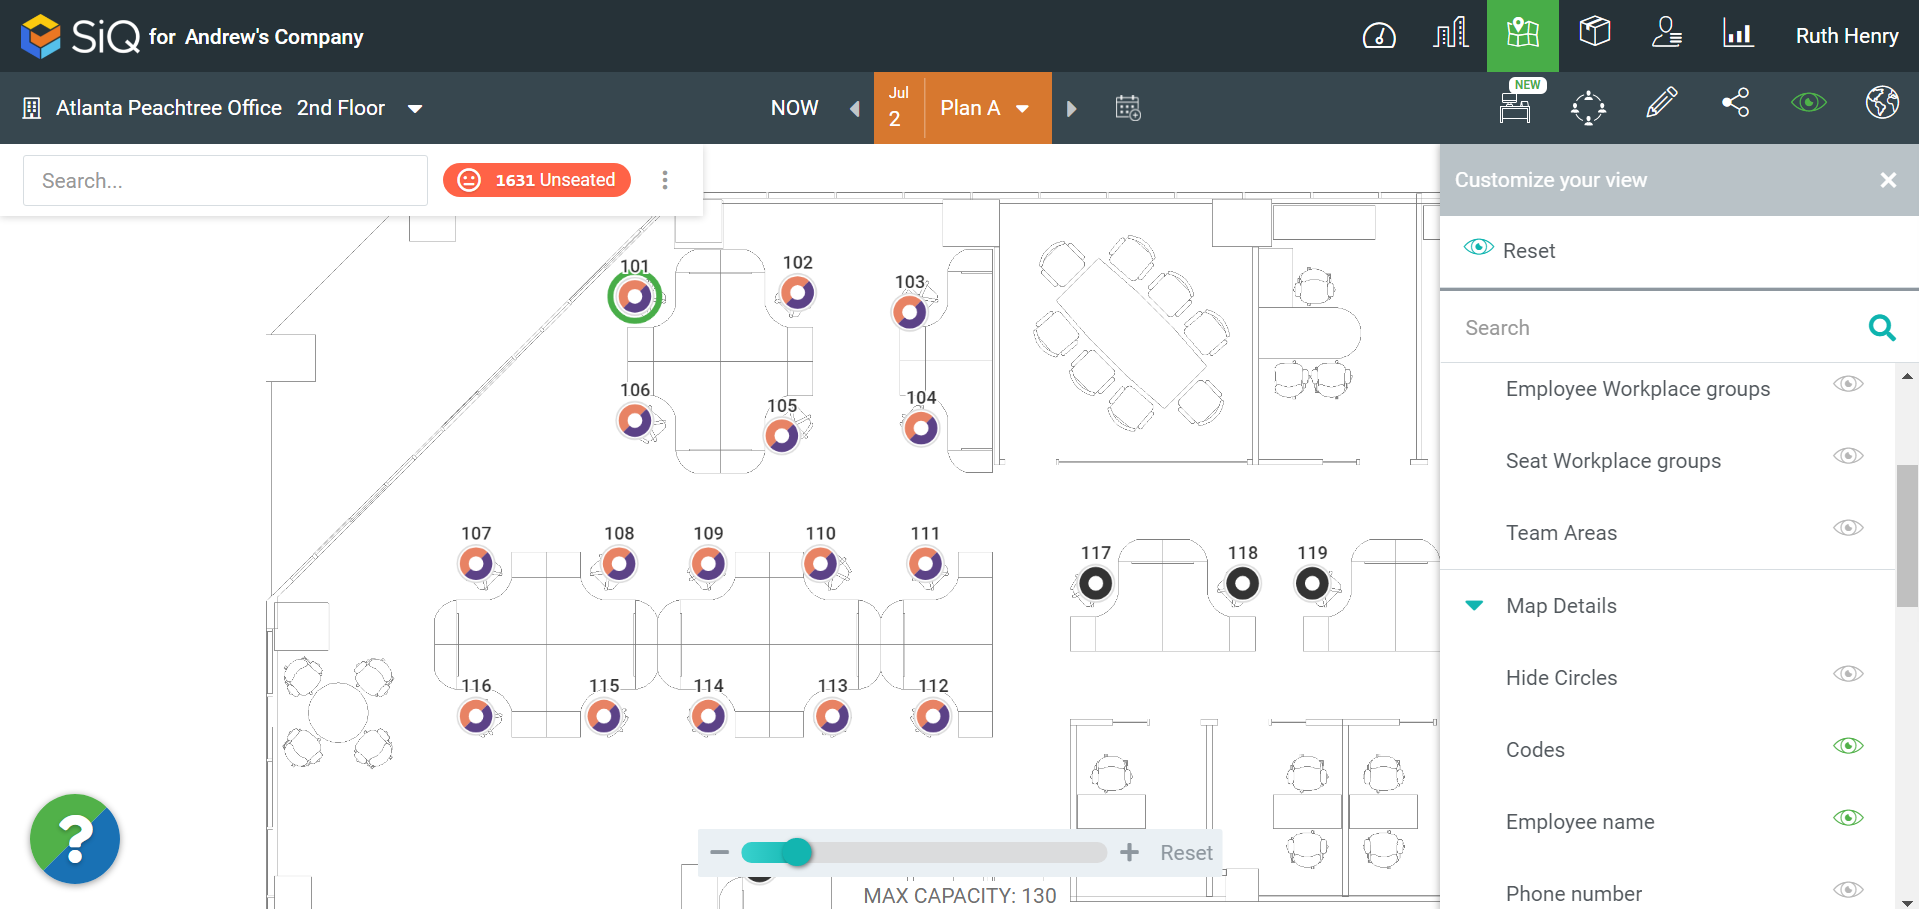
From the floor map, click the View Filters ![]() icon. The Customize your view data drawer will open.
icon. The Customize your view data drawer will open.
Click the Code filter. The space codes display.
Click the Employee name filter. As there are no employees seated yet no names will display.
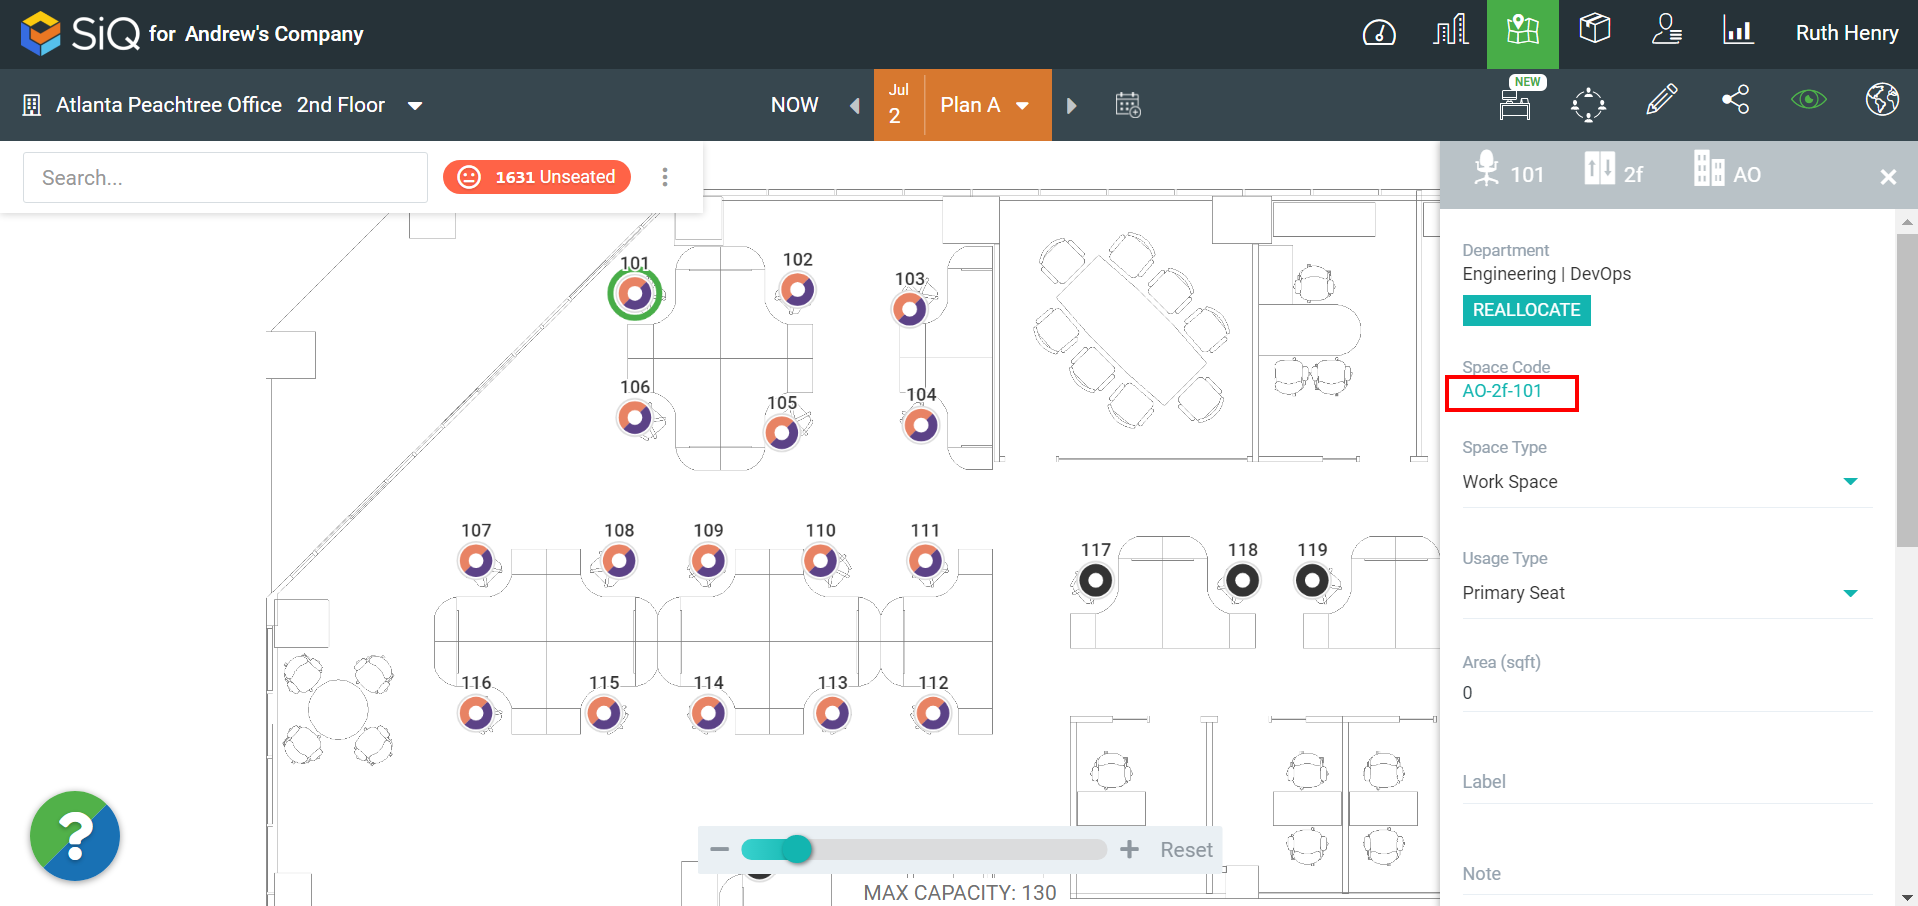
Click on a seat. The data drawer displays.
The Space Code field contains the format of the seat code. From the Space Code field, copy the seat code.
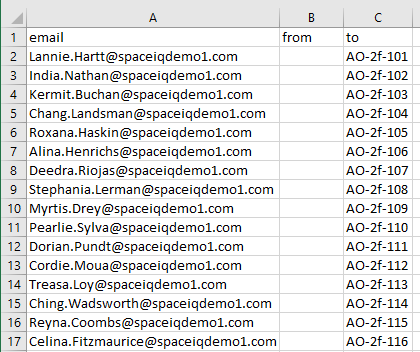
In the Excel spreadsheet, paste into the to column and then populate the rest of the space codes.
For example,
Step 3. Use the Move Orders Import to update the Employees's Seats
You can perform bulk moves on all move plans (Now and future dates). You can import move orders for a single employee, or for multiple employees using a CSV file.
Click the Move Order ![]() icon and then click the Move Plan
icon and then click the Move Plan ![]() icon. The New plan dialog displays.
icon. The New plan dialog displays.
Make sure you are paying attention to the date you have selected for the import if you have selected the NOW view and you import moves into the NOW then the moves will take immediate effect and cannot be undone (unless you set up another import to correct the moves).
For this example, we will use the NOW view.
Click the Import Move Orders  icon. The Import Move Orders dialog displays.
Either drop the file on the dialog or browse to select the file.

Click the Import button.
The warning displays the message "Changes to the current assignment plan will take effect immediately and cannot be undone".
Click the Continue button. When the import is finished the Impor Move Orders dialog displays.
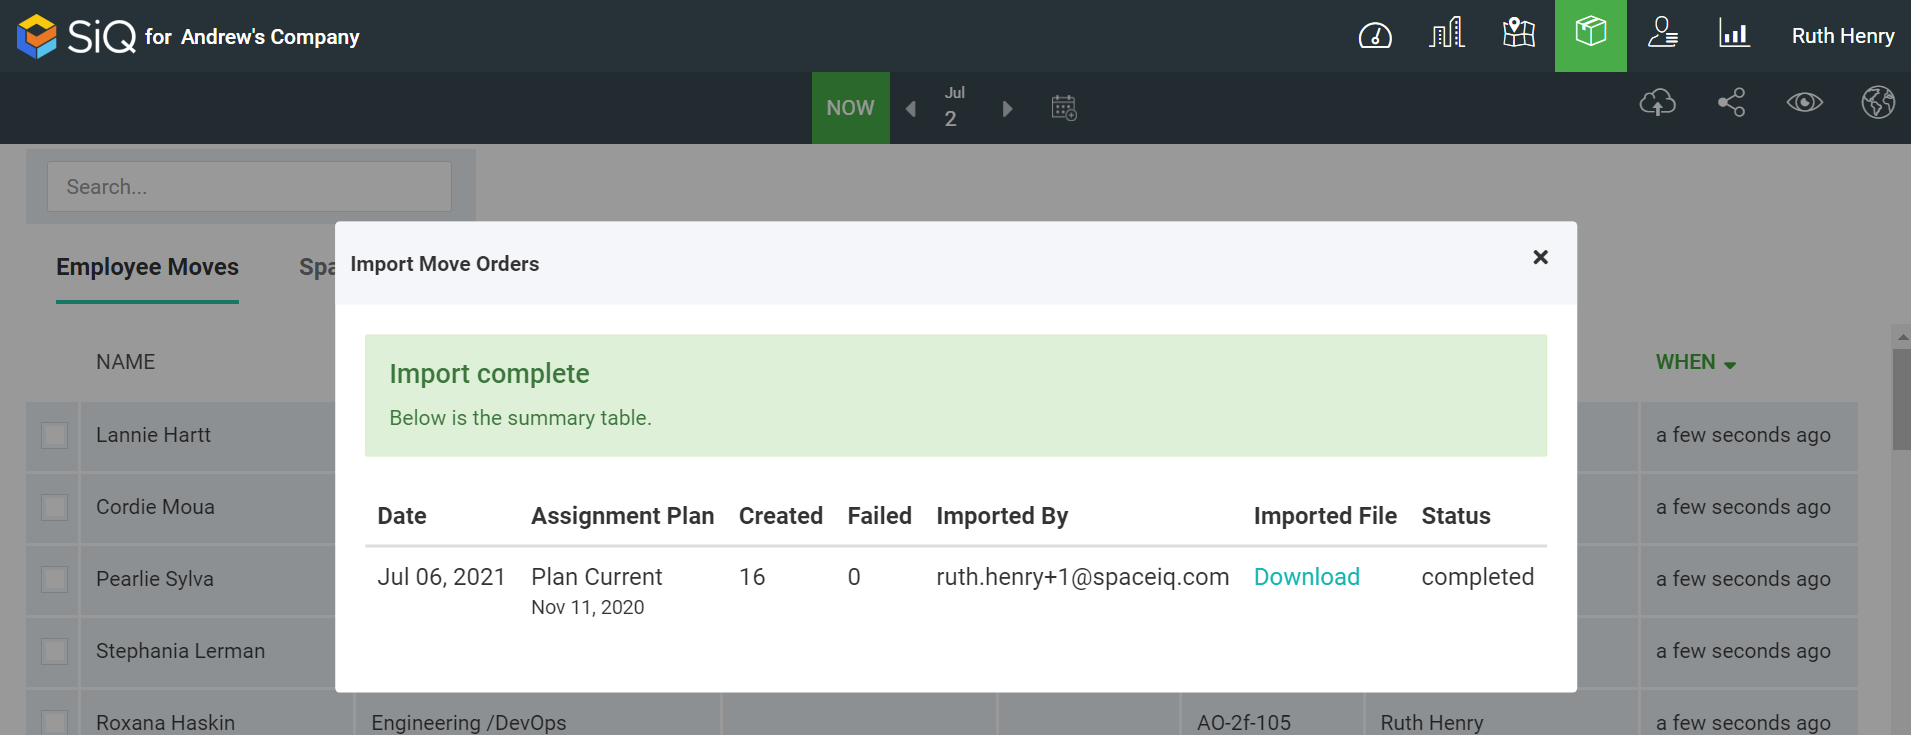
Click the X to close the dialog.
Step 4. View your employees' seats on the Floor Map
From the menu click the Floor map  icon.
icon.
Zoom into the floor map and you will see the employees are now seated.