Add Buildings via a Building Import
Remember, every building you import will overwrite existing selected fields. Therefore, it is recommended to start a new import with an export of your building list when you want to add a new building.
Follow the Steps
Complete the steps:
- Step 1. Export the Building List and Adjust
- Step 2. Import the Building List
- Step 3. Edit the Building
- Next, Add the Floor(s)
Step 1. Export the Building List and then Modify
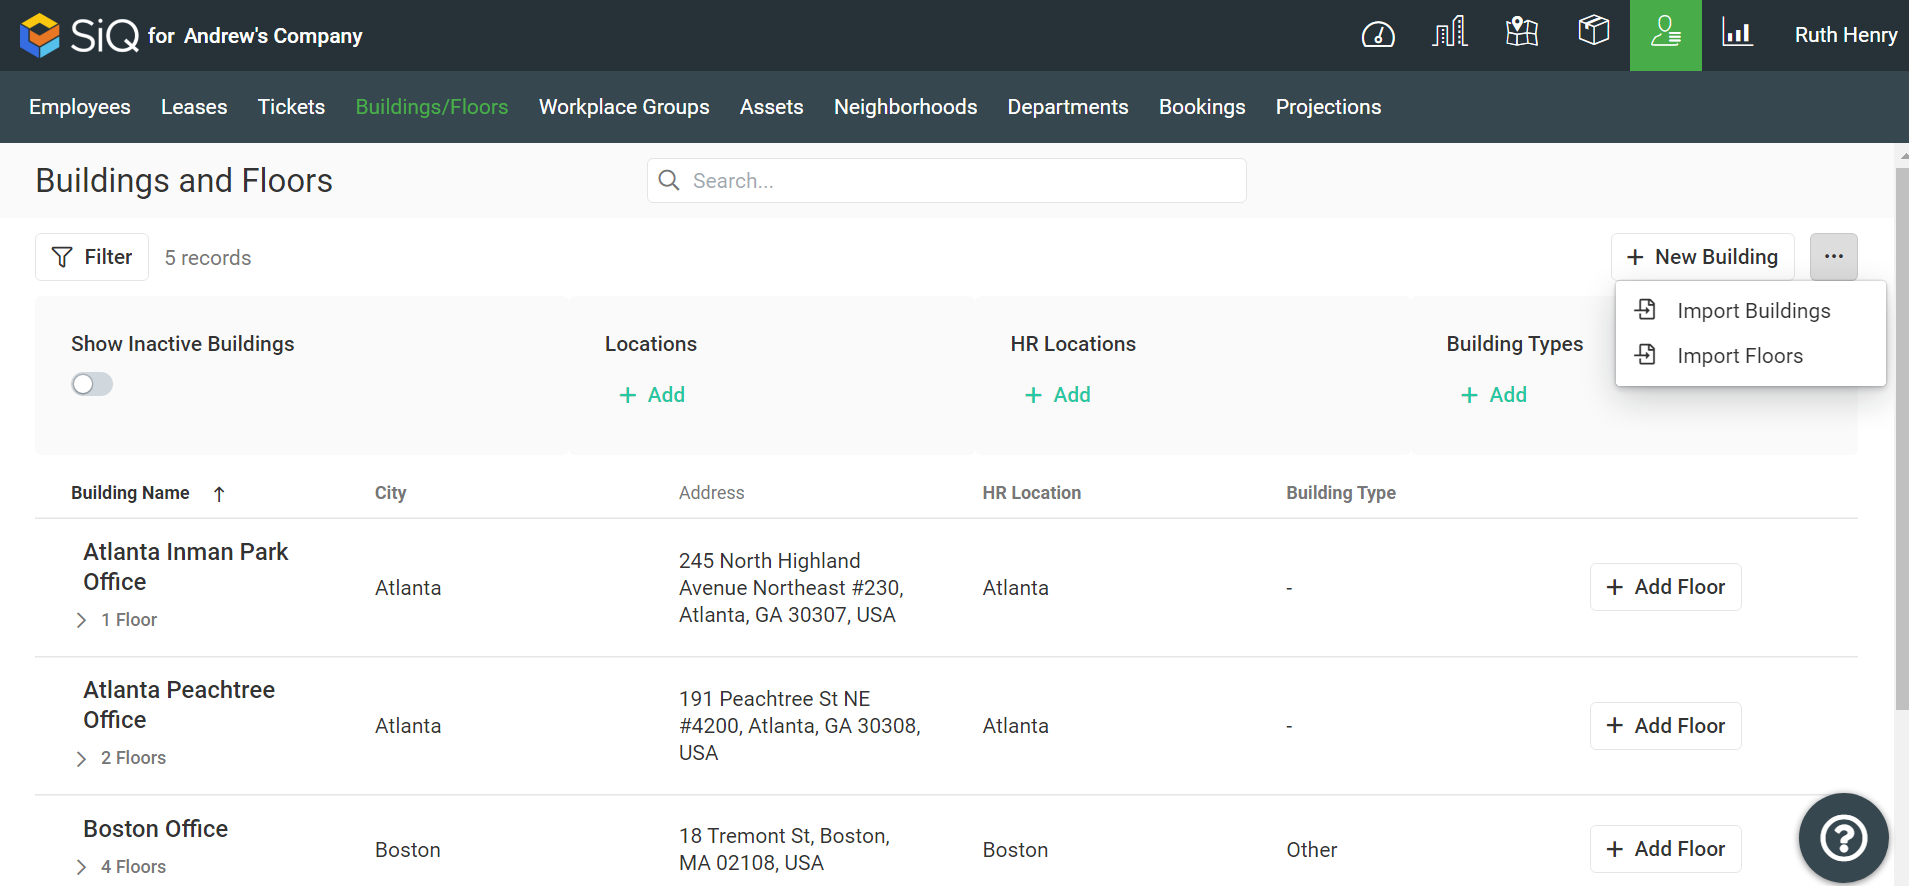
From the menu, click the Manage ![]() icon.
icon.
From the sub-menu, click Buildings/Floors. The Manage Building and Floor screen displays.
Click the More Actions icon.
Click Import Buildings.
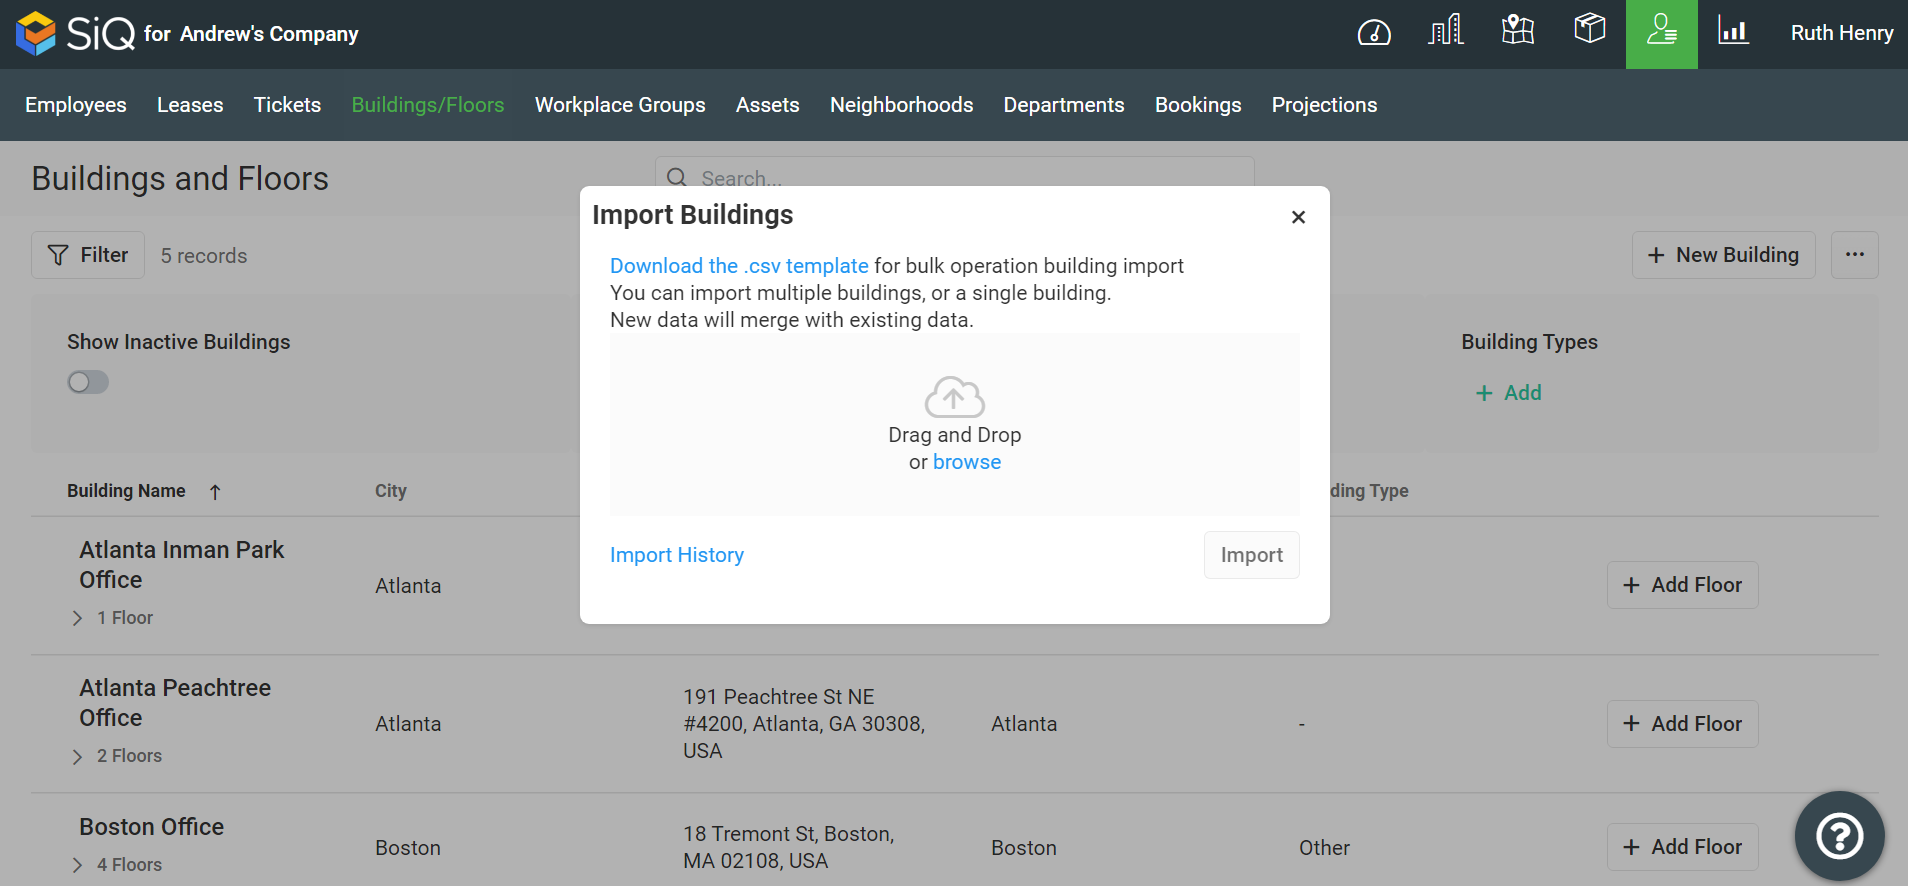
The Import Buildings dialog displays.
Existing Buildings
If you have existing buildings, then you must download the building list.
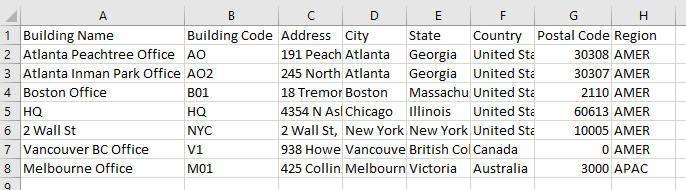
- Click the Download the .csv template. The building_imports_template.csv file downloads.
- Open the spreadsheet in Microsoft Excel and add the new building(s).
For example:
Onboarding Buildings
If you are onboarding and have no building(s) set up, then use the template.
- Click the Download the .csv template. The building_imports_template.csv file downloads.
- Open the spreadsheet in Microsoft Excel and add your building(s). Refer to the Requirements for Building Data.
Step 2. Import the Building List
From the Import Buildings dialog, either drag and drop a CSV file into the window or click and browse to select the file.
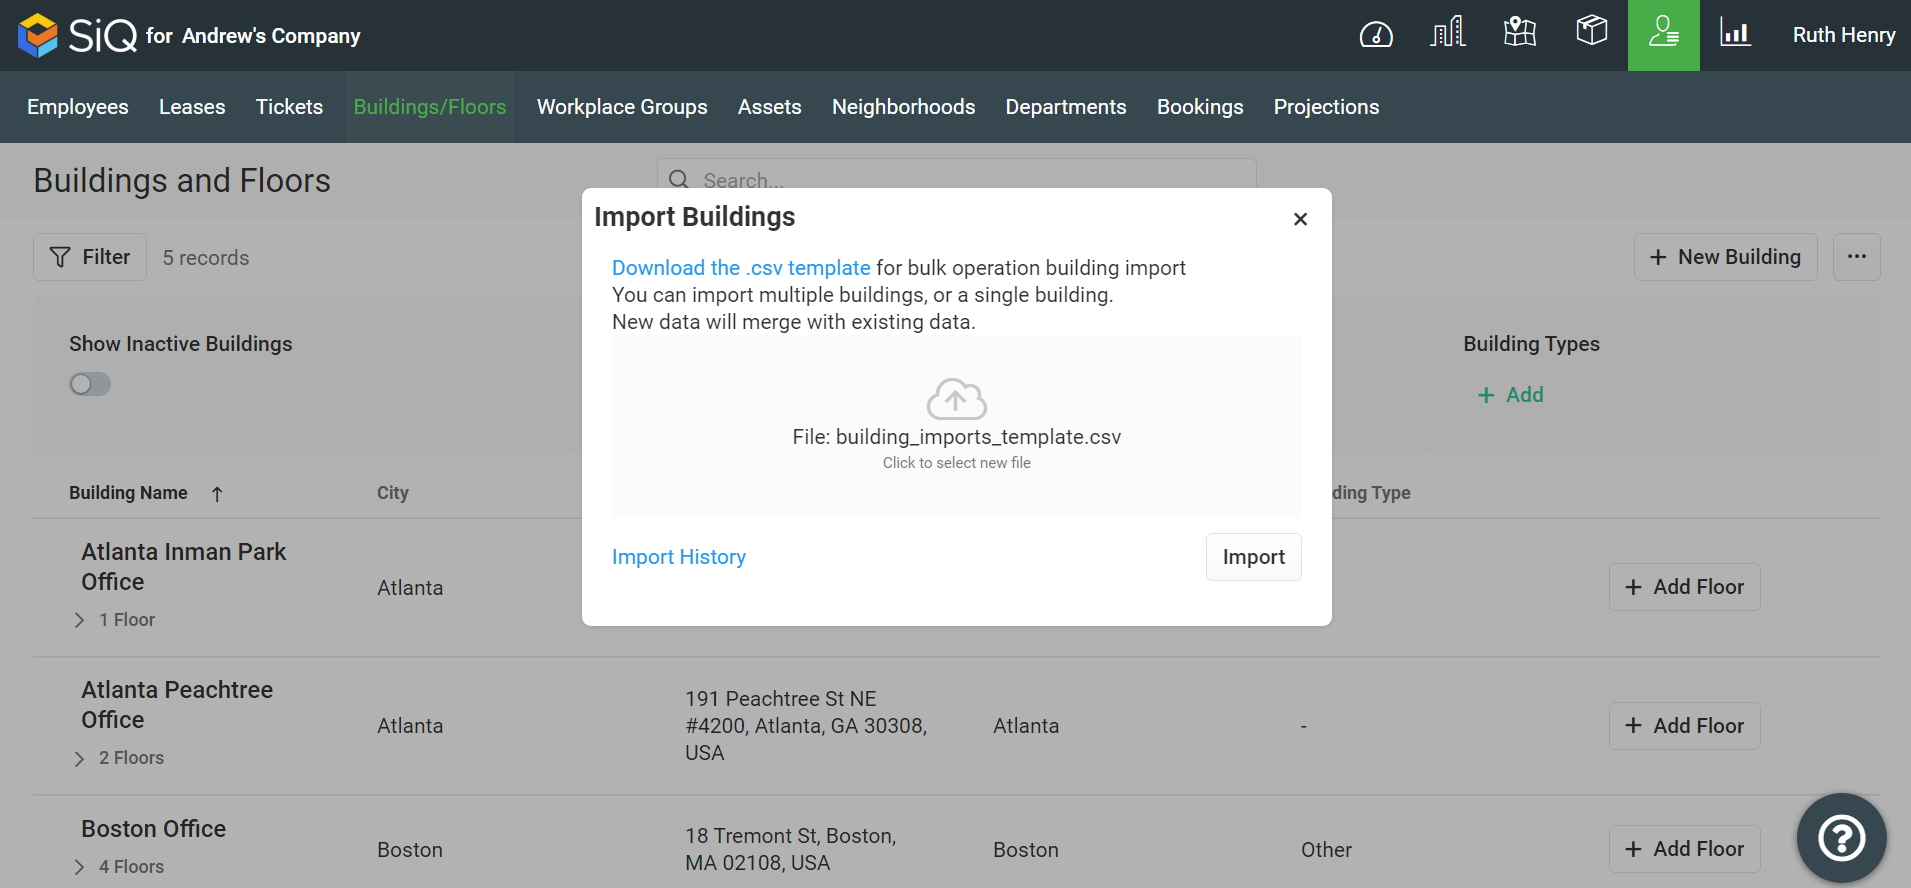
Click the Import button.
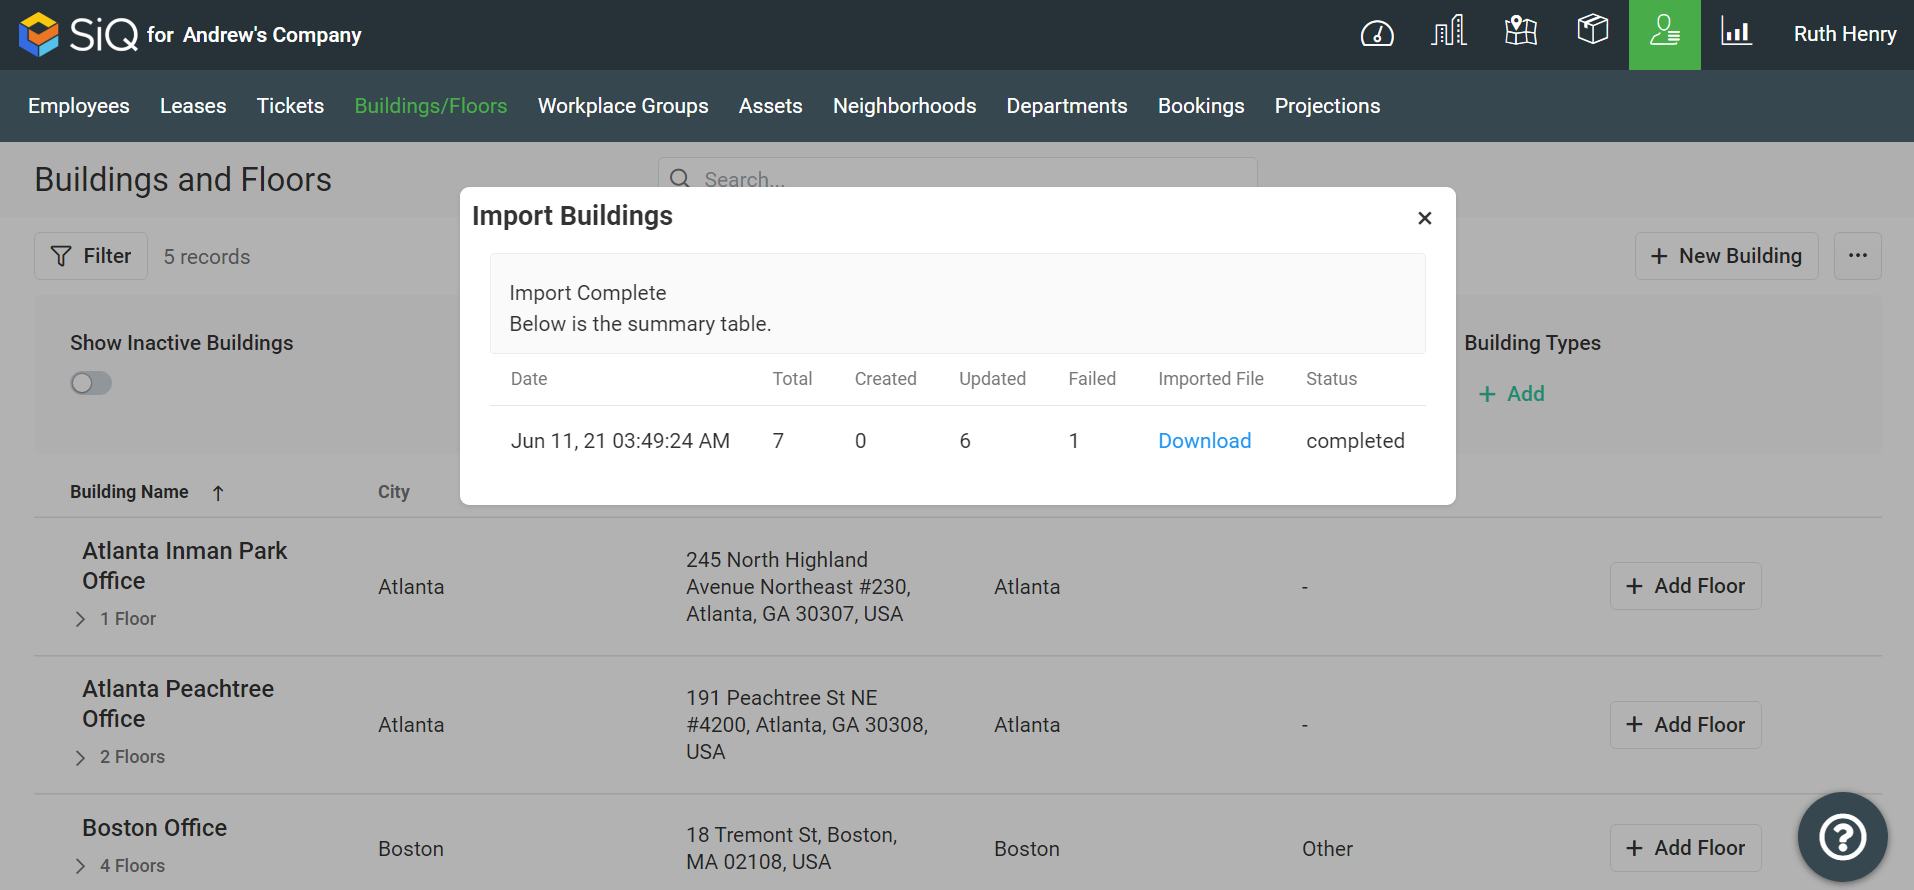
Click the x icon to close the Import Buildings dialog.
Step 3. Edit the Building
The building displays in the list.
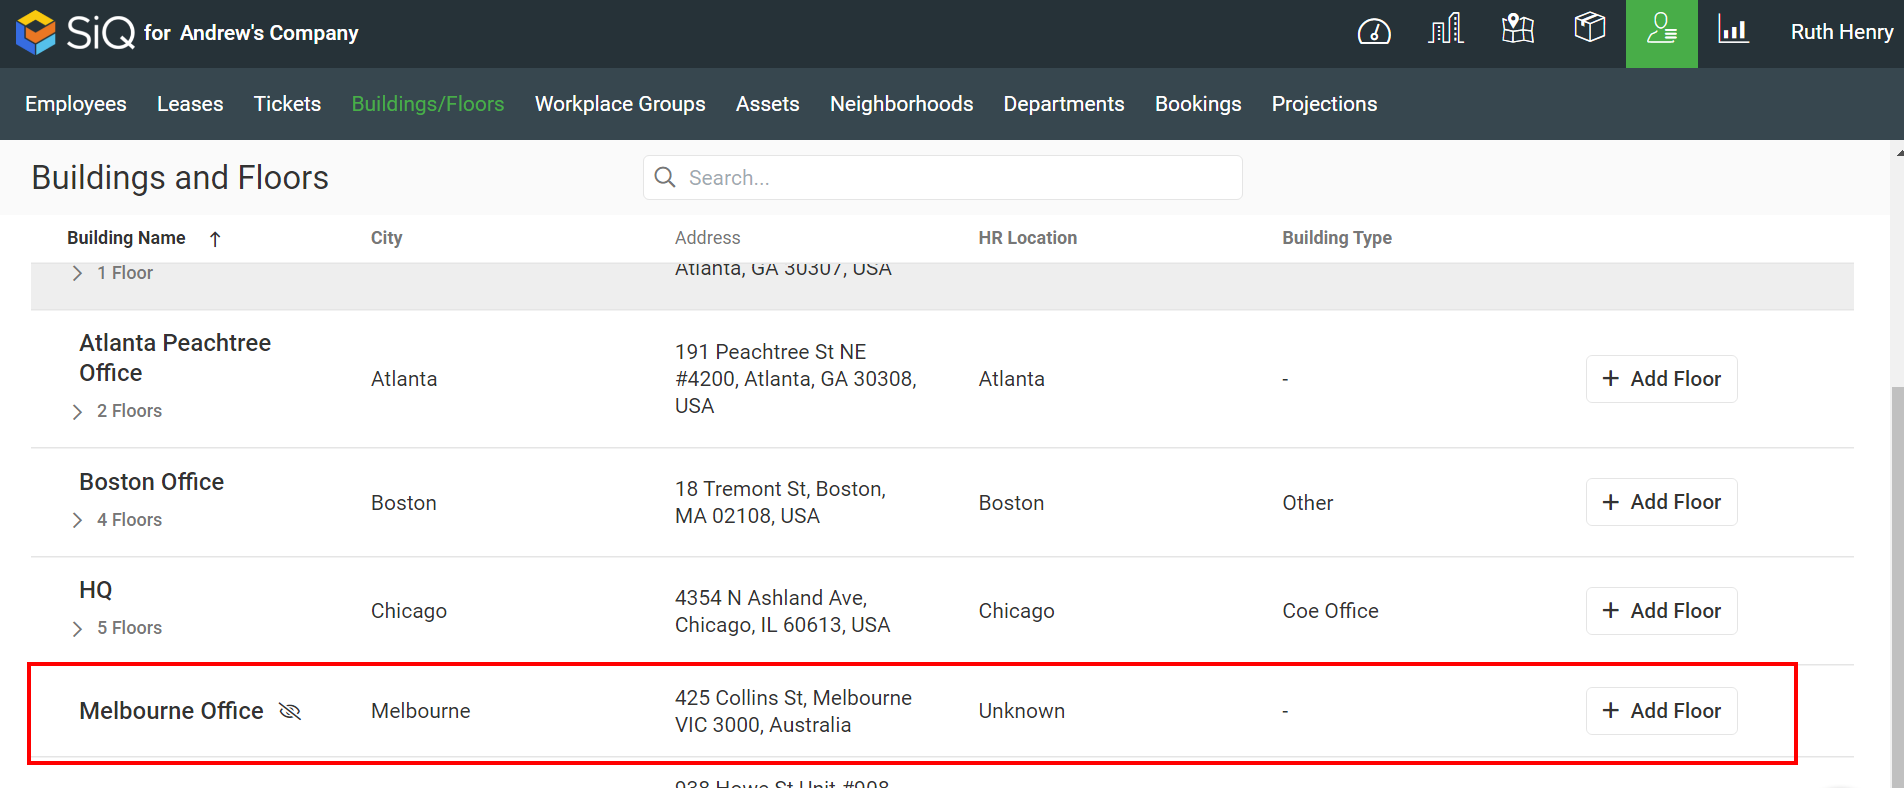
From the list, click the building. The building details dialog displays.
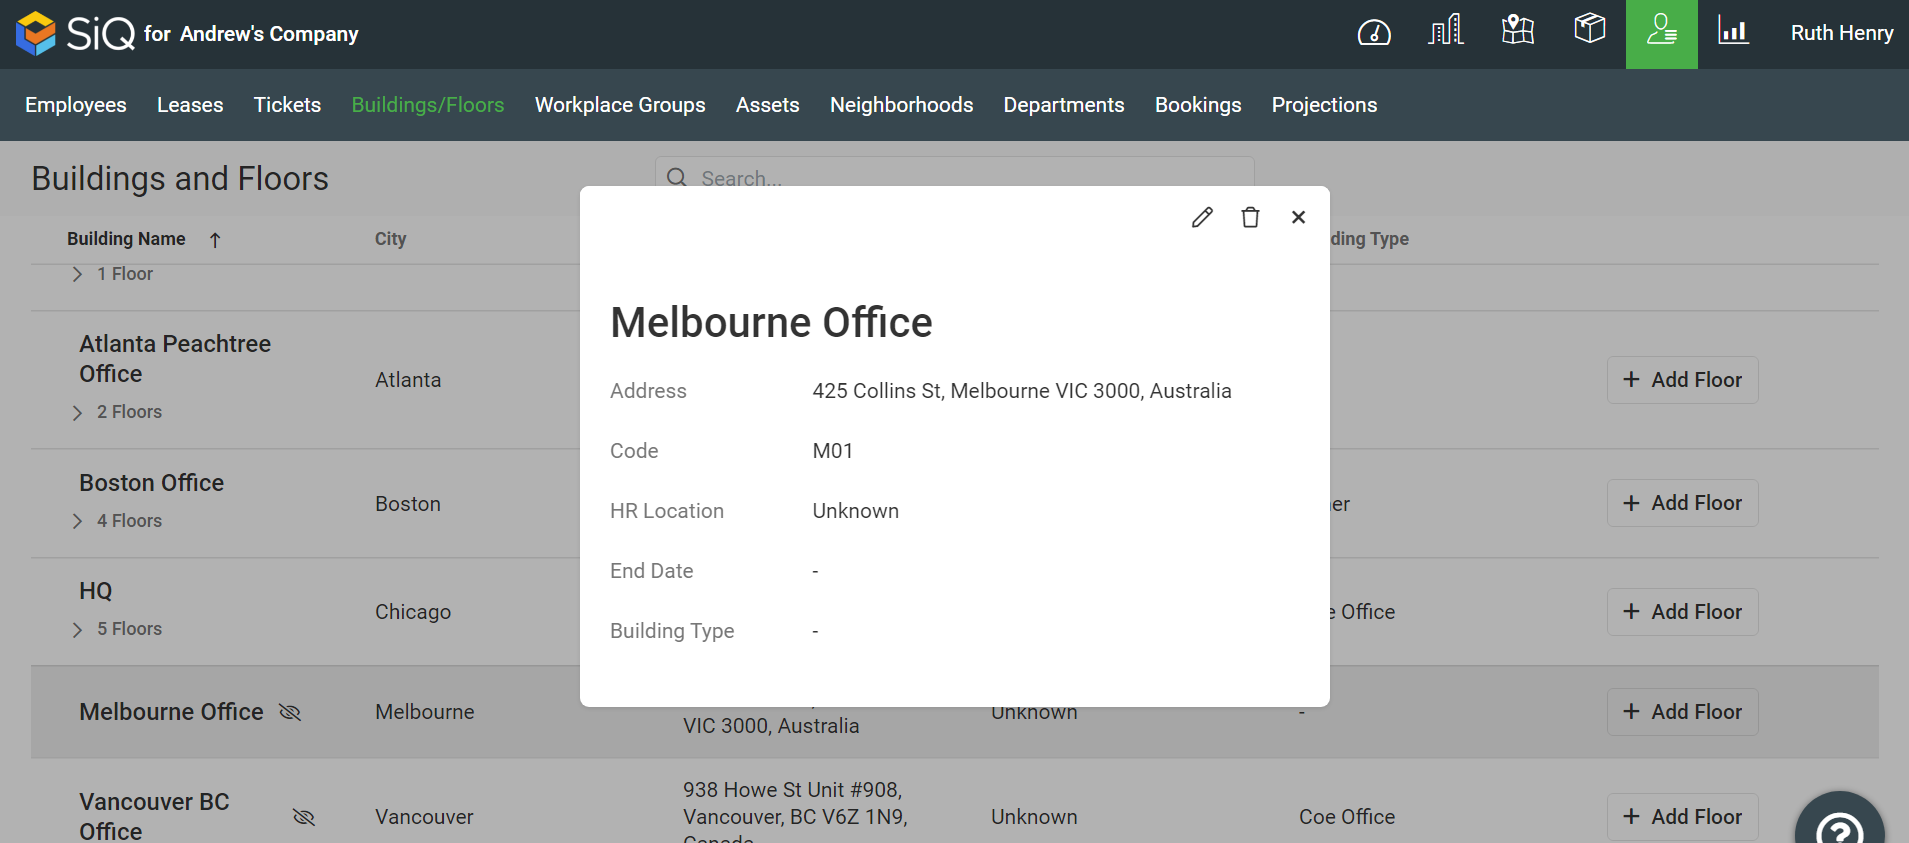
Click the Edit ![]() icon.
icon.
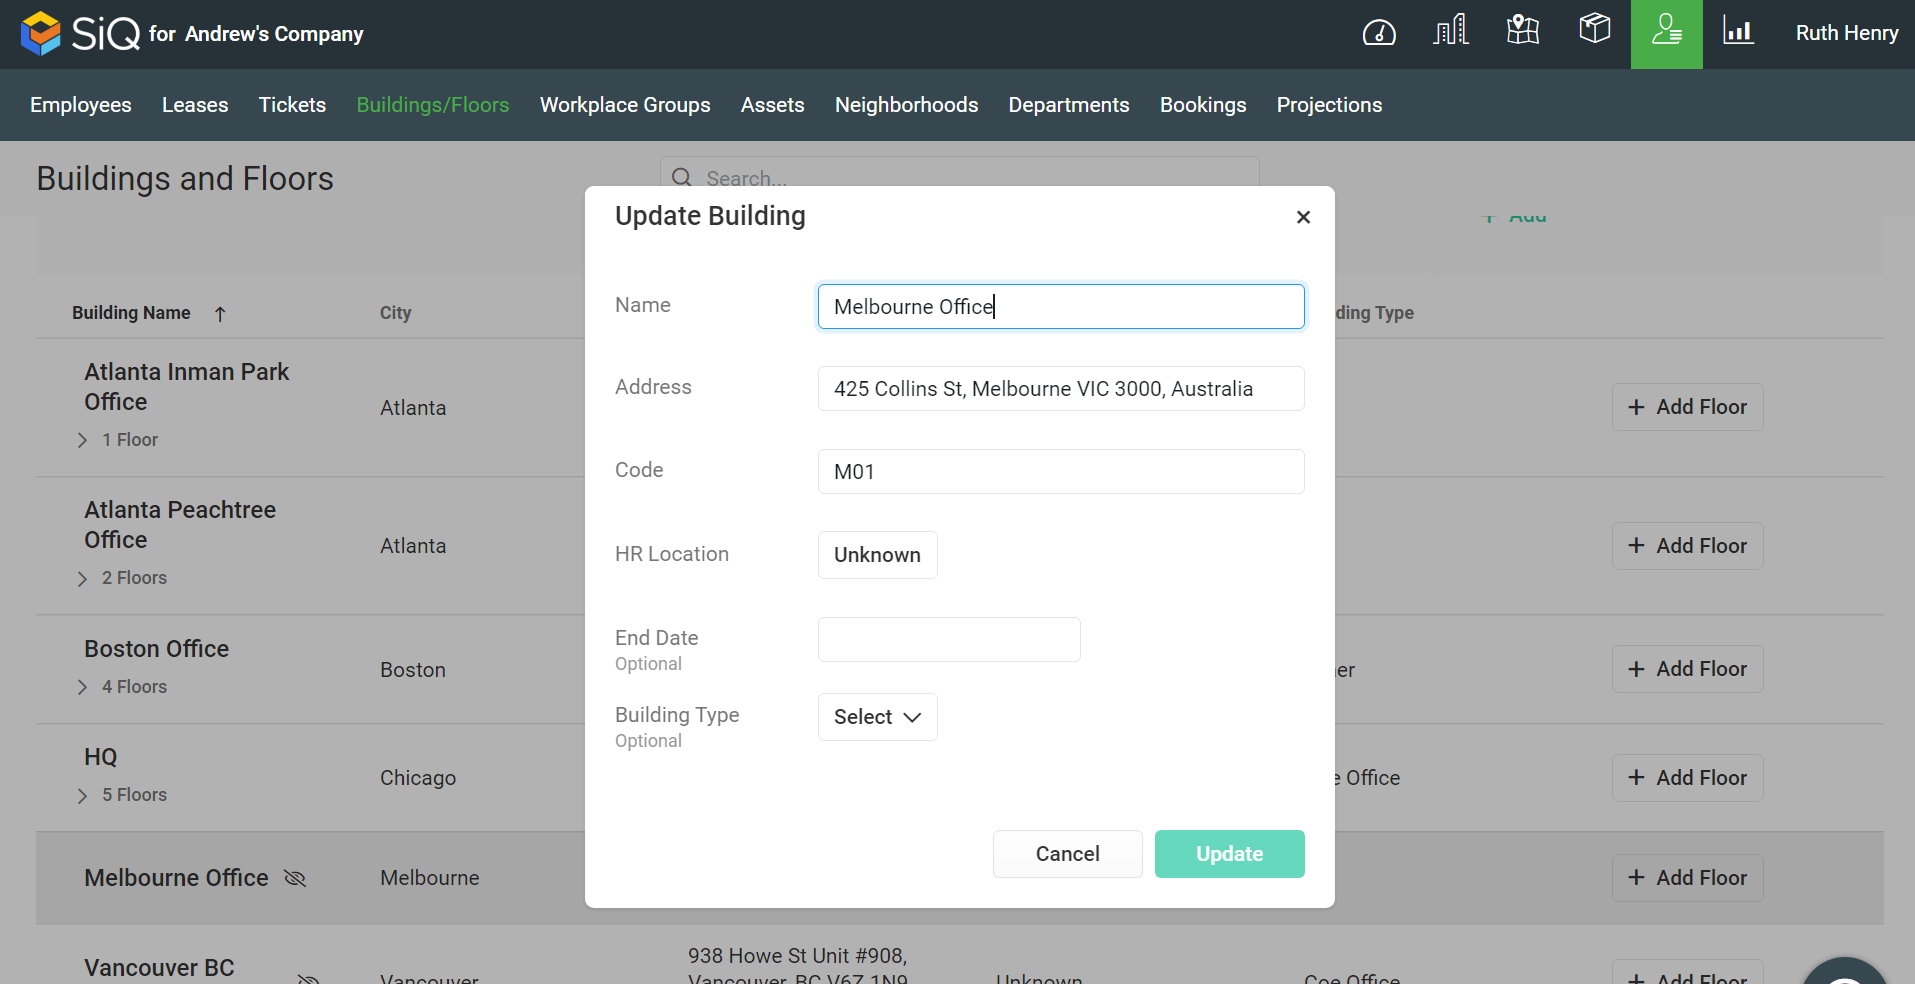
Complete the fields:
- HR Location (required): The city or area where the building is located. Choose the appropriate name from the drop-down to fill the Location field. The drop-down only displays the names of Locations to which employees have been assigned. If you’re creating a Building profile prior to adding employees, choose Unknown from the list of options as a placeholder. You can go back later and edit the Building profile to add the proper Location name after you add employees.
- End Date: This optional field lets you specify when the lease will end, and when the building should be moved to an inactive state.
- Building Type: Here you can select from a list of descriptive building types for another layer of building organization. Remember if the list does not have the building type, you can add it in Manage Building Types.
Click the Update button.
Next, Add the Floor(s)
Now you are ready to add the floor(s). Either add the floor(s) manually or via the Floor Import.