Book a Desk as an Admin
Admin
Admins can book hotel desks for themselves on SpaceIQ Web from:
- Book Desk Module - book 1-day reservations, multiple-day reservations, and repeat bookings
- Floor Map - book 1-day reservations and multiple-day reservations
- Manage Bookings - import bookings via CSV file.
This article will teach you how to book desks from the Book Desk Module and Floor Map.
Book a desk from the Book Desk Module
You can create a single-day booking, a multiple-day booking, or a recurring booking in the Book Desk Module.
- From the floor map, click the Book Desk
 icon.
icon.

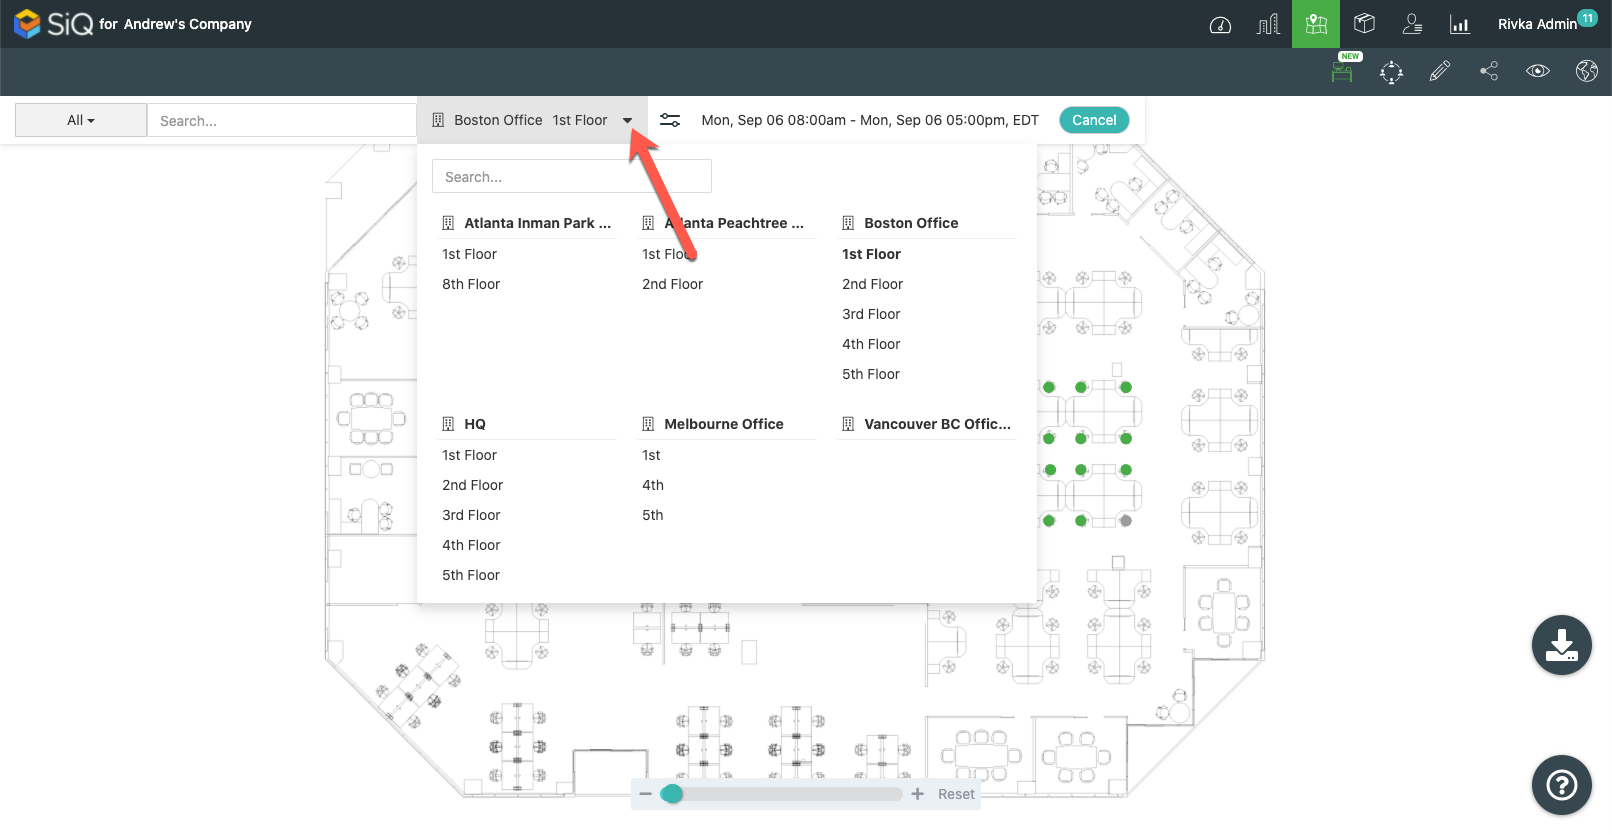
- Click the floor selector drop-down to choose a booking location.
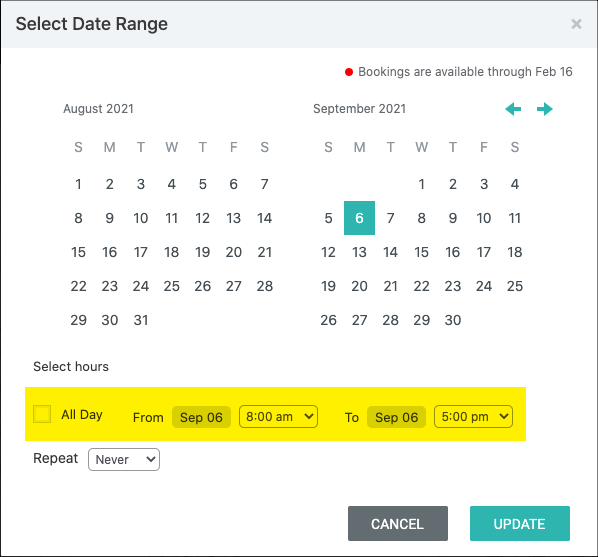
- Click on the date range.

- Select one or more dates on the calendar or choose a date range in the From and To fields.
- For a 1-day booking, select one day
- For a multiple-day booking, select multiple days
- See below for instructions on creating a recurring booking from the Repeat drop-down.

- Choose hours: either specify hours in the From and To fields or choose All Day Booking.
5. To create a recurring booking:
- Click the Repeat drop-down. You can skip this step if you don't wish to create a repeat booking.
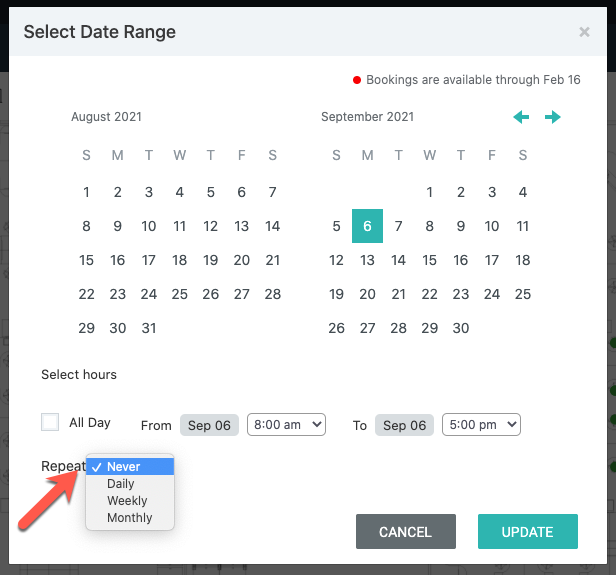
- Choose Daily, Weekly, or Monthly.
- Choose a frequency. For example, choose Weekly, and then choose the day or days you wish to repeat.
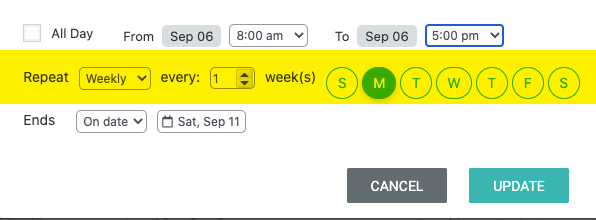
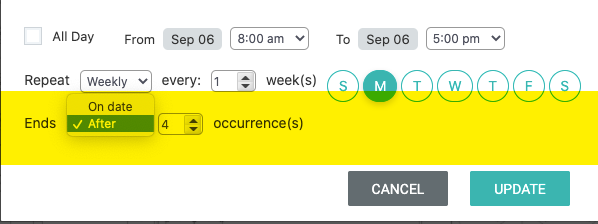
- Choose On date to end the recurrance on a specific date
- Choose After to end the recurrance after a number of occurances
For more information about recurring bookings, see: Set Up Recurring Desk Bookings and Create a Recurring Desk Booking (Web)
- Click UPDATE to save your settings.

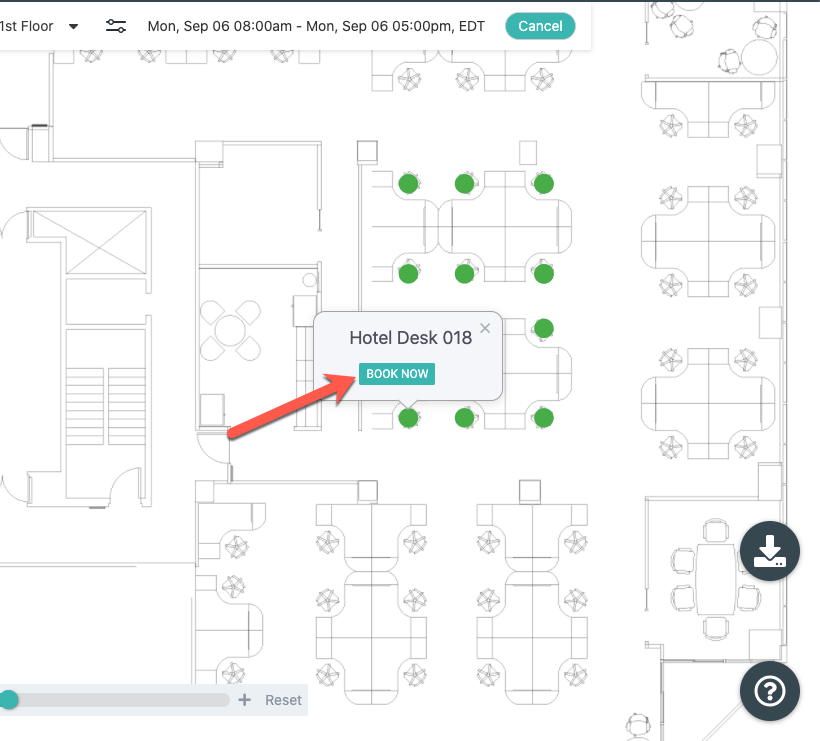
- Select an available hotel desk and click BOOK NOW.
In the Book Desk Module, available hotel desks are green and unavailable desks are gray.
You'll see a booking confirmation and your new booking is in My Bookings.
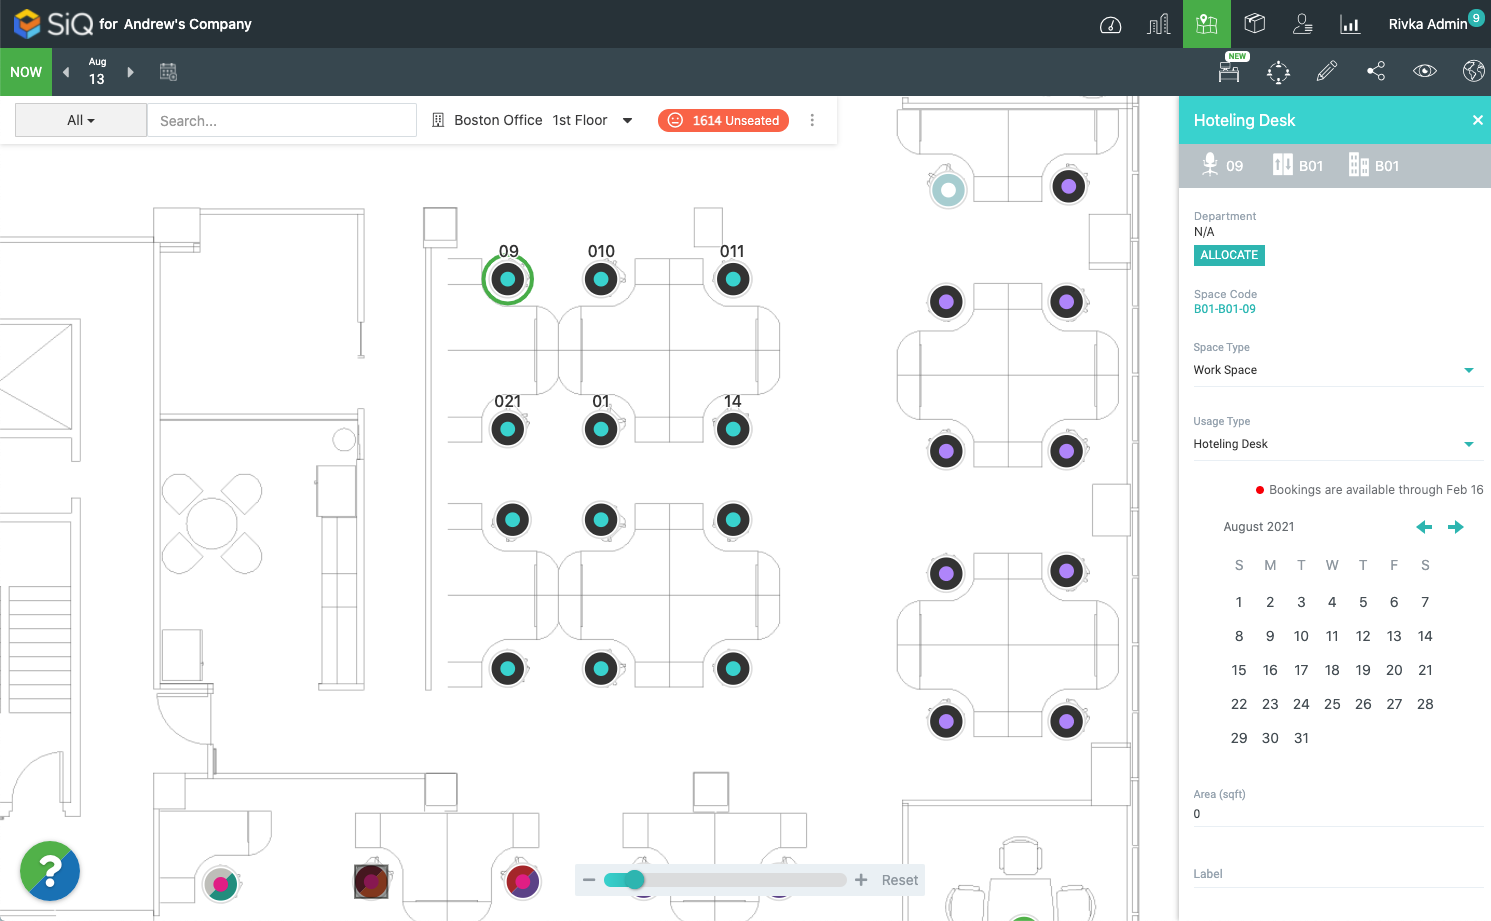
Book a desk from the Floor Map
You can create a single-day or multiple-day booking directly from the Floor Map.
- Click the floor selector drop-down to choose a booking location.
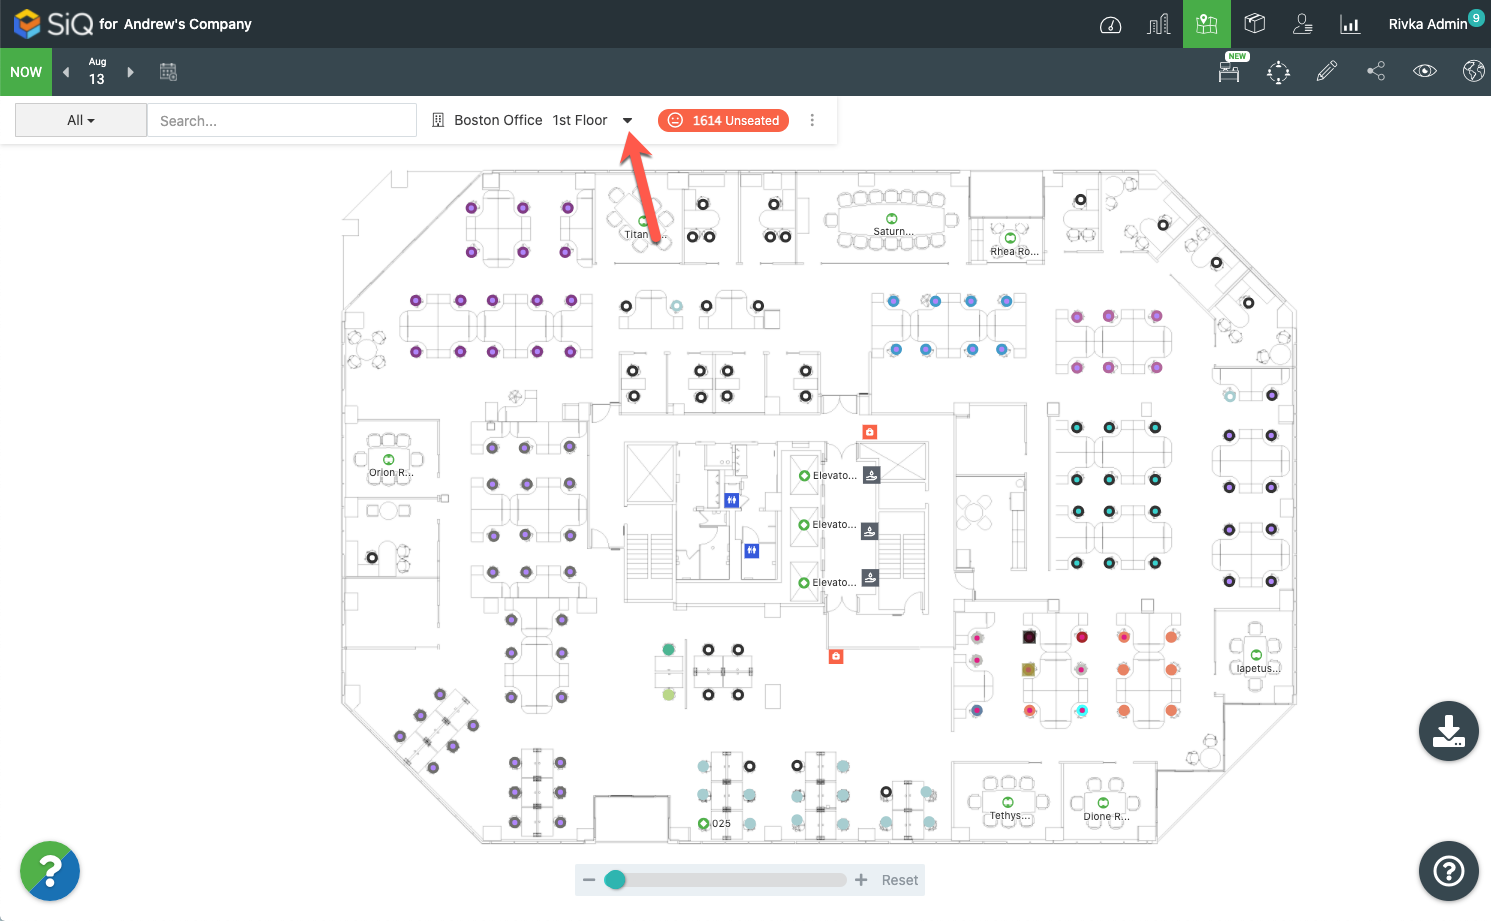
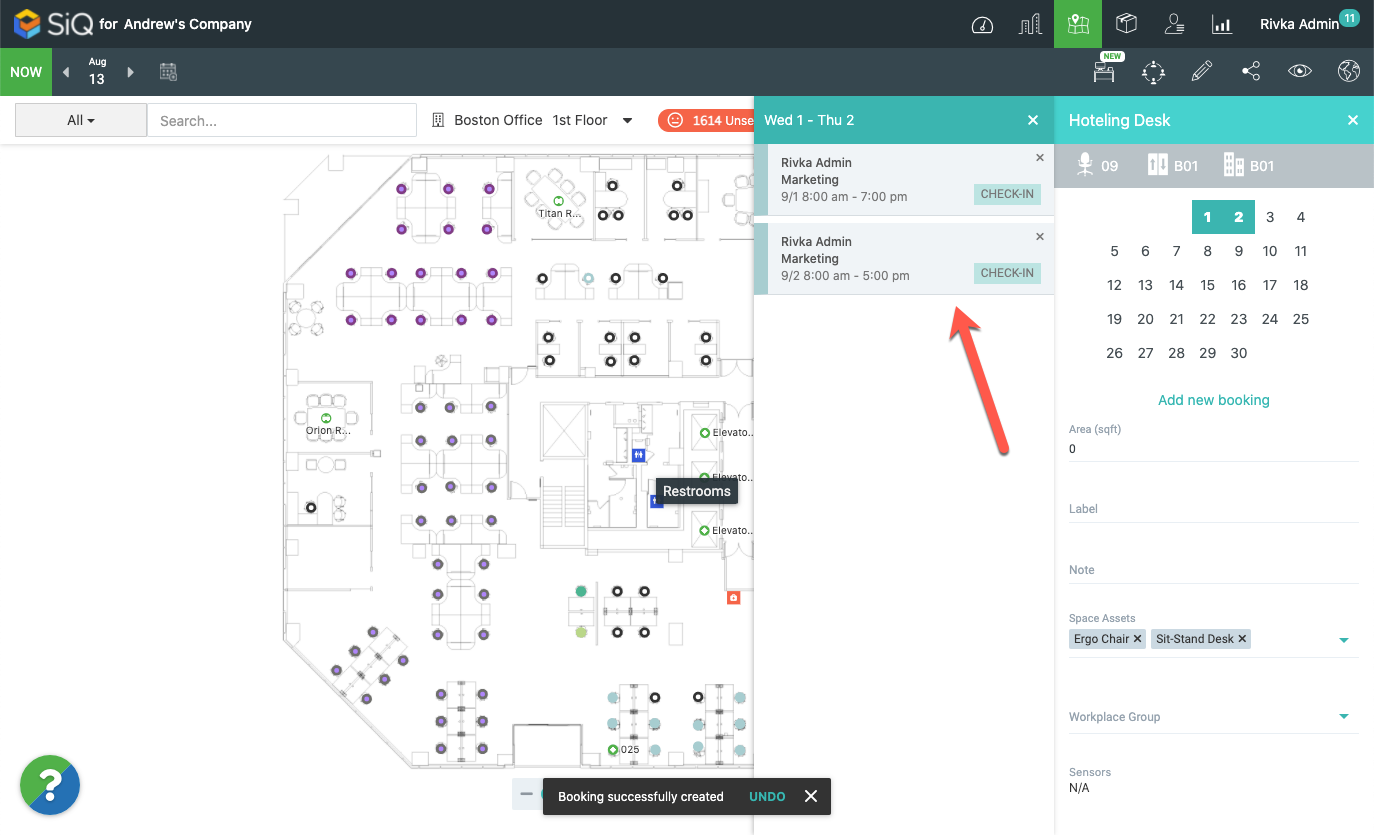
- Click on an available desk. On the floor map, hotel desks appear as dots with turquoise centers.
 A data drawer will open.
- On the calendar, choose one or more dates. You'll see availability information in the window that slides open. Then click Add new booking.
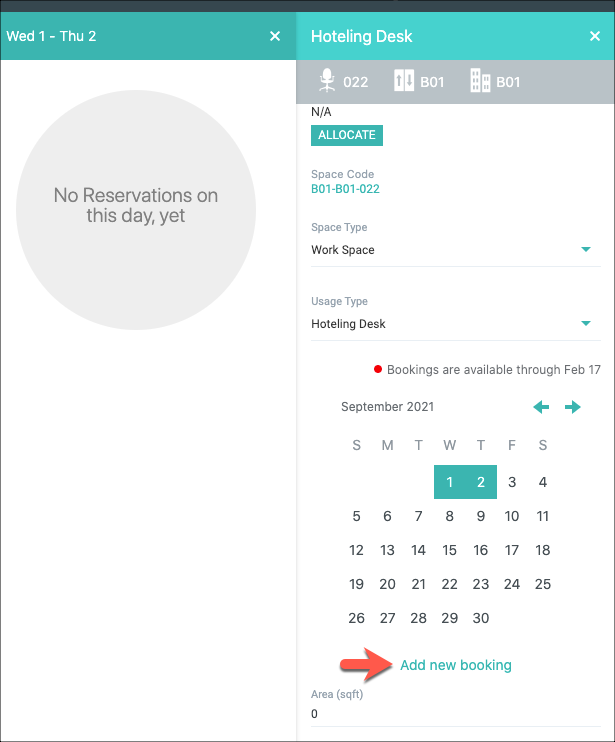
- Choose times: either select All Day Booking or specify times in the From and To fields.
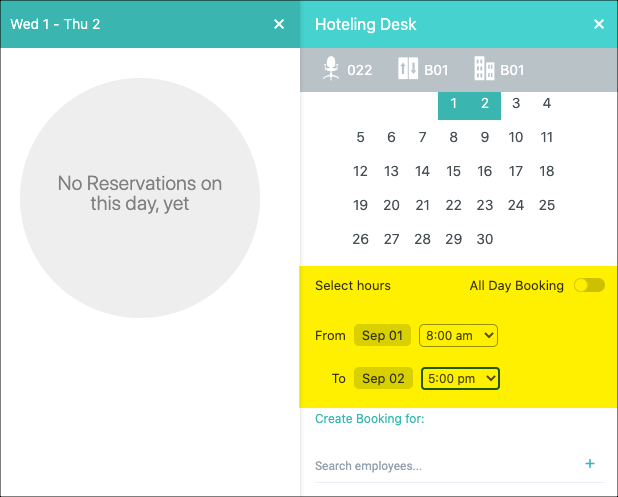
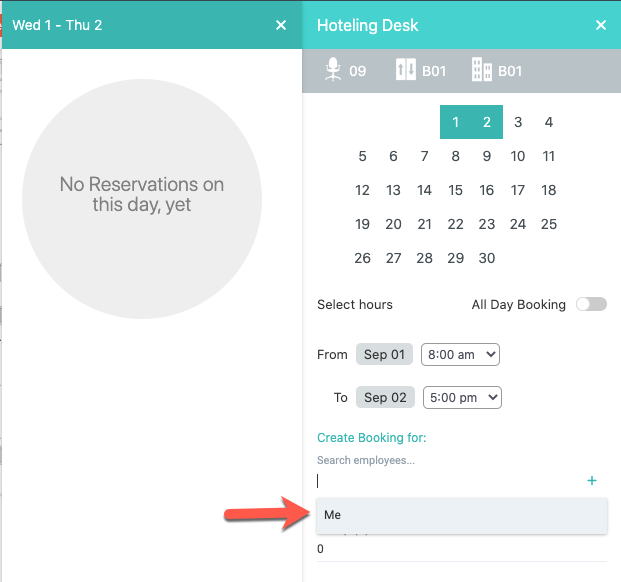
- Click into the Search employees field, and select Me.
You can also create a booking for someone else. See: Book for Someone Else.
You'll see a booking confirmation. You can also view your new bookings in My Bookings.