Add Work Space icons to the Floor Map
You can add a Personal space type to the floor map and these are Space icons that represent individual seats. In this example, you will add a Work Space icon.
Follow the Steps
From the Floor Map, complete the following:
Click the Map Editor ![]() icon. The Map Editor displays.
icon. The Map Editor displays.
Click on the ADD SPACE button. The space drawer displays.
Scroll down to the Personal spaces.
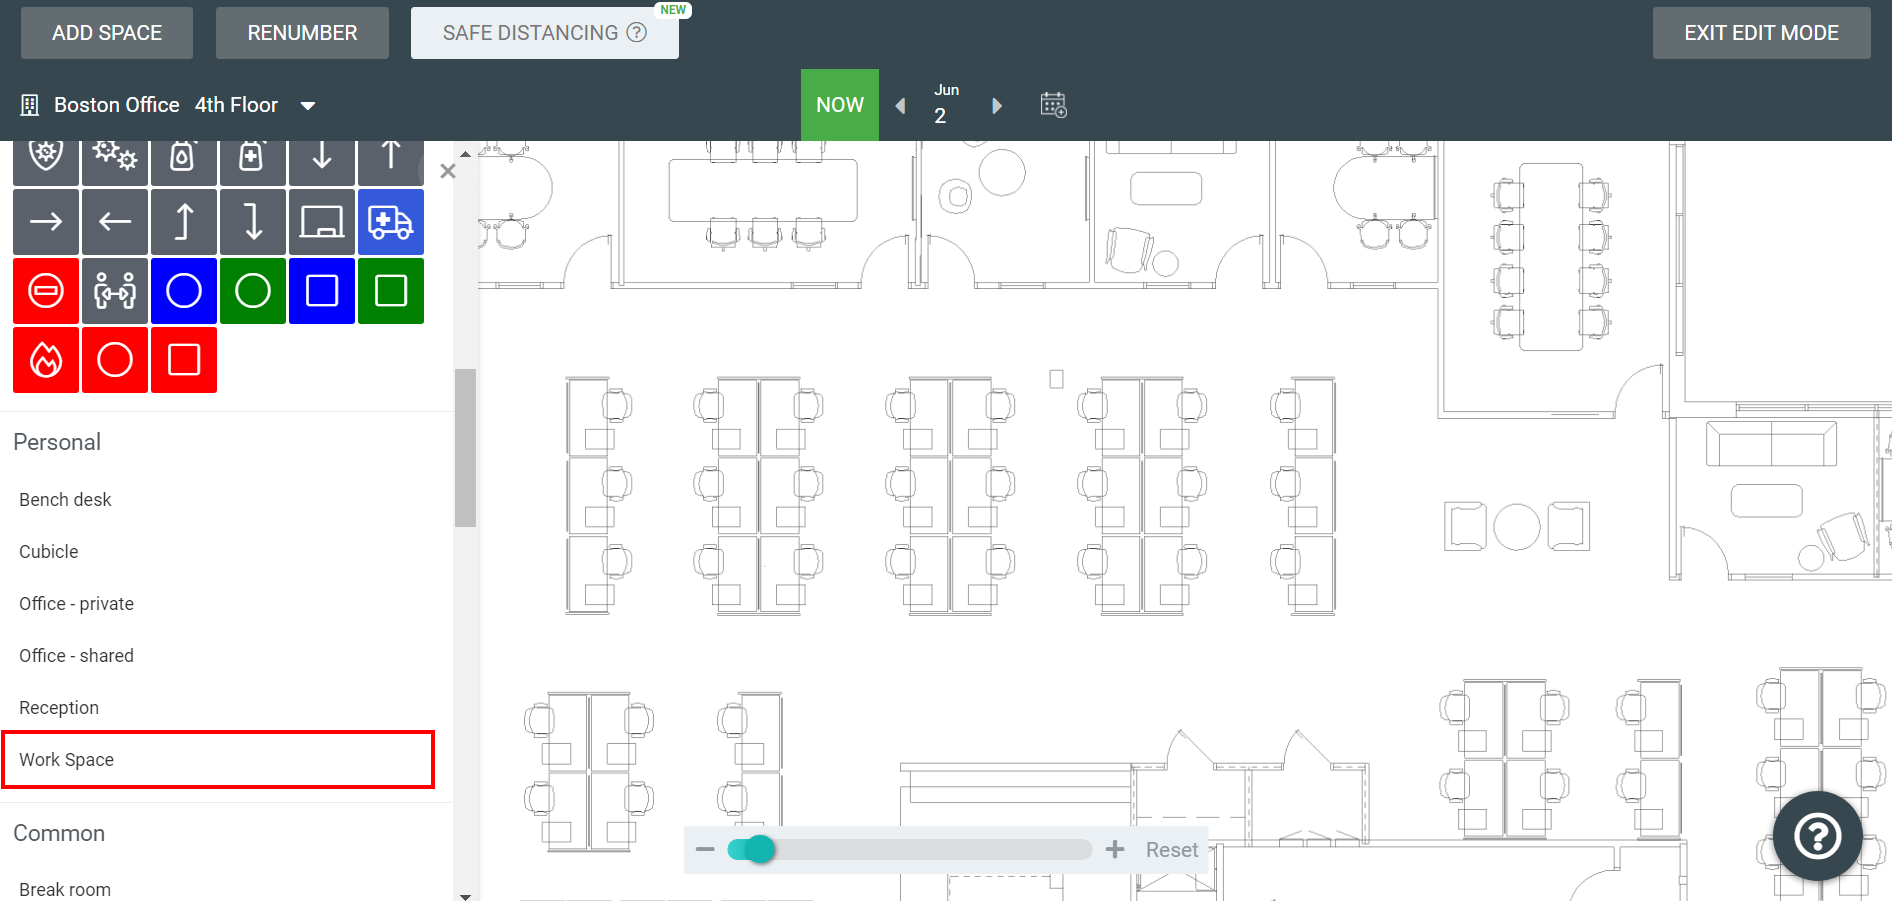
Click the Work Space. The Space code dialog displays.
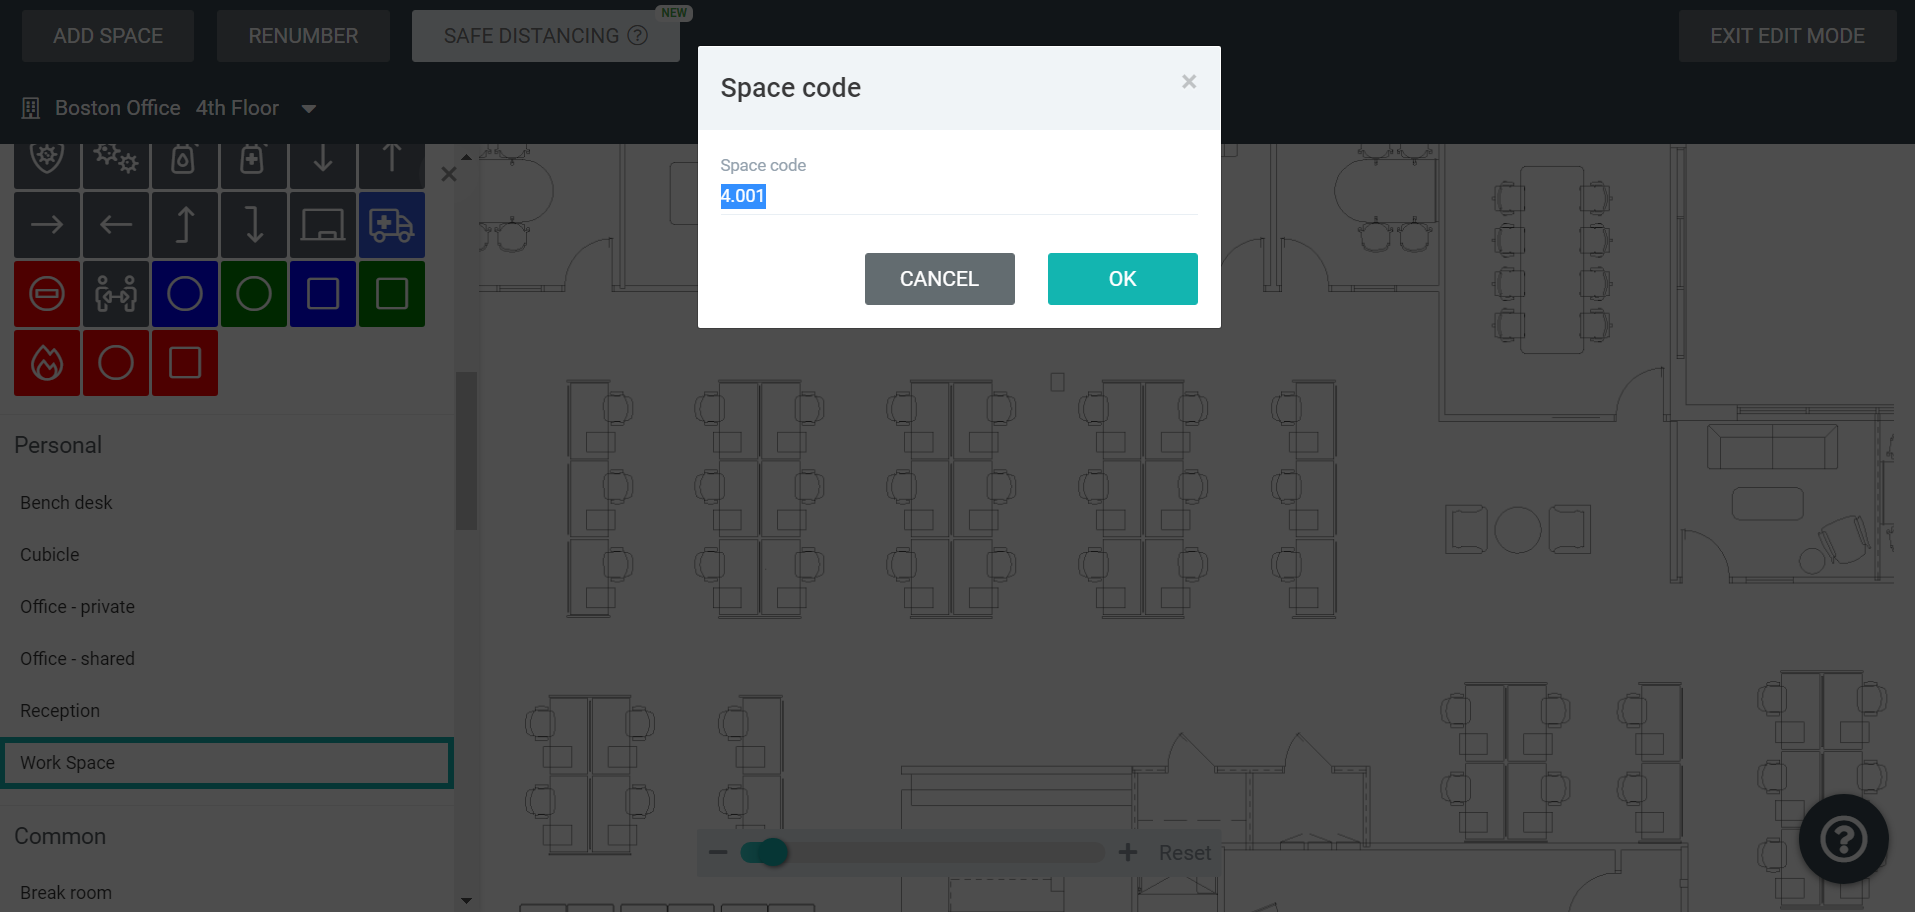
In the Space code field, enter the space code.
Remember, the space codes are unique identifiers:
- If you know your unique identifiers then enter the starting identifier.
- If you do not know the unique identifier then label the desks and offices in numerically 1-xxx from the left to right on the floor plan. For more detail, see the Floorplan Preparation's Seat Nomenclatures (Numbering).
Click the OK button.
Click on the floor map to add the space icon.
When finished press the Esc key.
![]()
Notes:
- If the dots size is too big then you can reduce the size, see Why are the dots so large on the floor map?
- If you need to correct the alignment of the Space icons, see Manage Space or Pin icons.