Set up Health Screenings
When your business needs to ensure employees are healthy before entering the office, use SpaceIQ's Health Screening feature. When enabled, health checks are sent to employees who can confirm symptom-free well before check-in time.
Follow the Steps
- Step 1. Turn on Health Screenings
- Step 2. Set up Employee Notifications
- Step 3. Set up Admin Notifications
- Step 4. Customize the Health Check Message
- Step 5. Disable Health Screenings by Location
- Step 6. Set up Health Check Message by Location
- Step 7. Set up the Post Health Check Question
Step 1. Turn on Health Screenings
From the SpaceIQ application, complete the following steps:
- In the top-right corner, click on your Profile Name, and then click on Settings.

- From the left menu, click Desk Booking Settings.
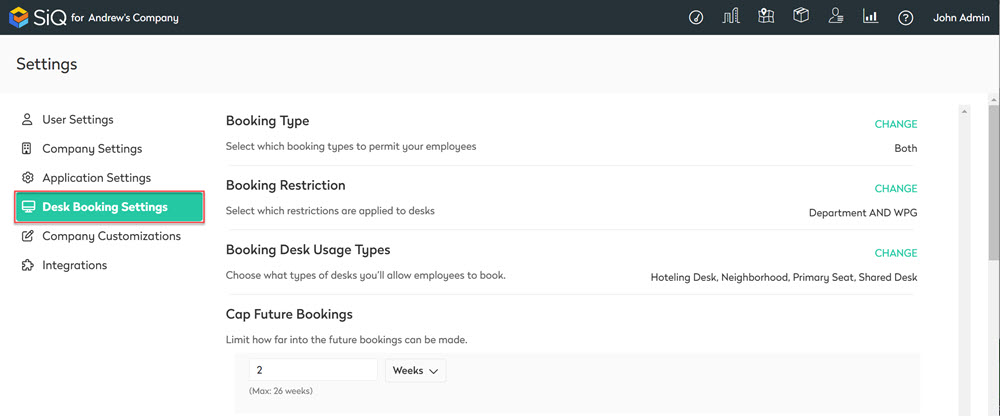
- Scroll down to find Health Screening and then toggle the setting ON.
Your Health Screening settings will expand. You can customize these settings to control the timing of employee and admin notifications and customize health check messages.
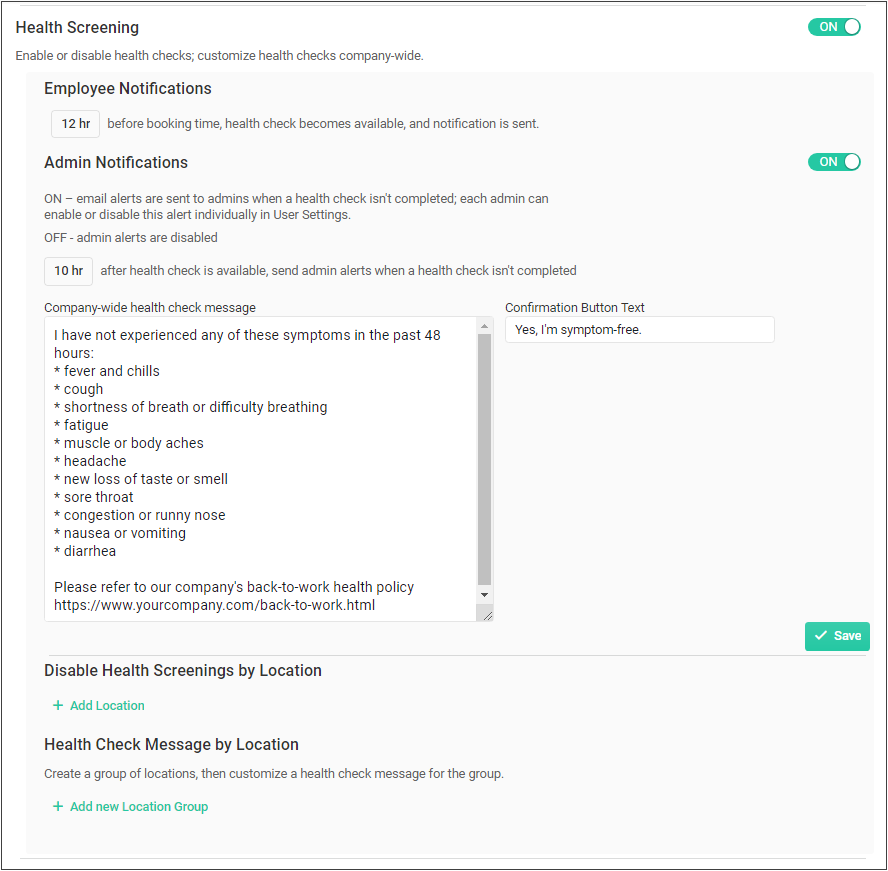
Step 2. Set up Employee Notifications
You can specify when health checks become available for employees to complete, and employees are sent a reminder notification as soon as their health check becomes available. For example, if you specify 12 hrs before booking time, an employee with a 9:00 am reservation will receive a notification at 9:00 pm the night before, reminding them that they need to complete a health check.

In the Employee Notification section, complete the following:
- In the Time field, enter or select the time the health check will display before a booking start time.
- The setting is saved automatically.
Step 3. Set up Admin Notifications
Admins are automatically sent health status messages when employees do not check-in for their bookings. Admins can use this information to cancel bookings and free up valuable space.
Below is an example of the email notification the Admin will receive.
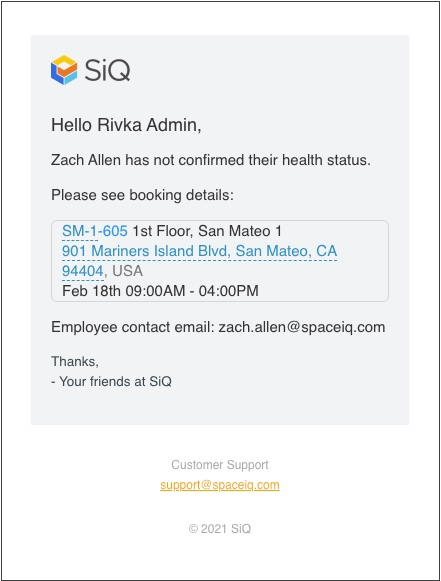
You can set up the timing on these alerts for your Admins. For example, an employee has a 9:00 am booking and can complete their health check at 9:00 pm the night before. So, if you specify 10 hr after the health check is available, the Admins will receive an email at 7:00 am informing them that the employee has not completed their health check.
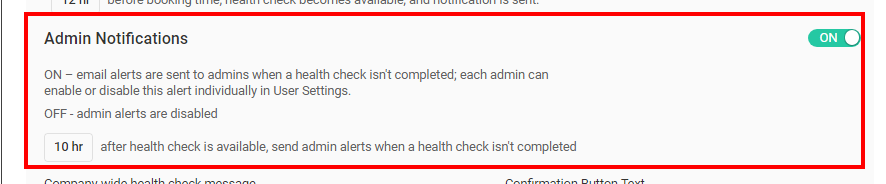
In the Admin Notification section, complete the following:
- In the Time field, enter or select the time that the notification is sent after the employee health checks become available.
- The setting is saved automatically.
If an Admin finds they no longer want to receive the health status messages, they can turn off the notifications in their individual user settings. See how to turn off your Admin Health Status Message Notifications.
Step 4. Customize the Health Check Message
SpaceIQ provides a default message for health checks, but you can customize your health check messages.
For examples of what your employee will experience, see:
- Check-in to a Desk with a Health Check (Web)
- Check-in to a Desk with a Health Check (Mobile)
- Check-in to a Desk from an Email Notification
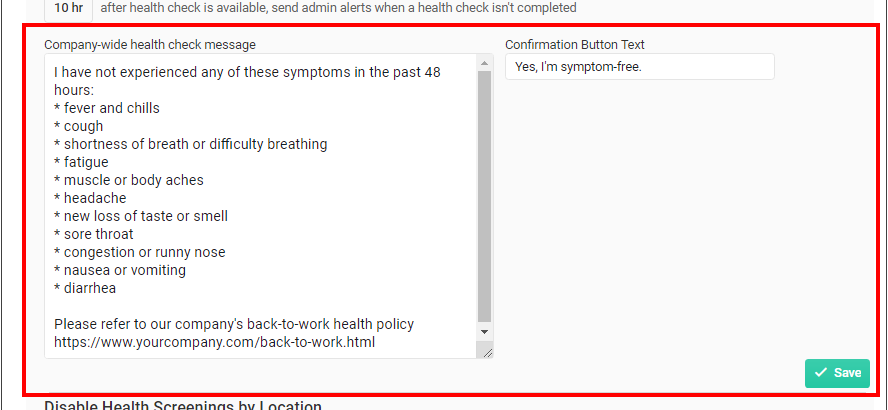
In the Company-wide health check message section, complete the following:
- In the Company-width health check message field, modify the default message.
Notes:
- There is no limit to how long your message can be.
- If you want to include a link in your health check, you can add a hyperlink in the message text, such as "Refer to our company's back-to-work health policy https://www.yourcompany.com/back-to-work.html"
- In the Confirmation Button Text field, modify the default button label.
- Click the Save button.
Step 5. Disable Health Screenings by Location
When you enable health screenings, all employees receive a company-wide health check message by default. You can disable select locations so employees in those locations do not receive health checks.

In the Disable Health Screenings by Location section, complete the following:
- Click the + Add Location link. A location search pop-up displays.
- From the location search, either enter the location or select the location. You can select multiple locations.
- The location(s) is saved automatically.

Step 6. Set up Health Check Message by Location
You can set up custom health check messages for different locations.

In the Health Check Message by Location section, complete the following:
- Click the + Add new Location Group link. The Health Check Message by Location settings displays.
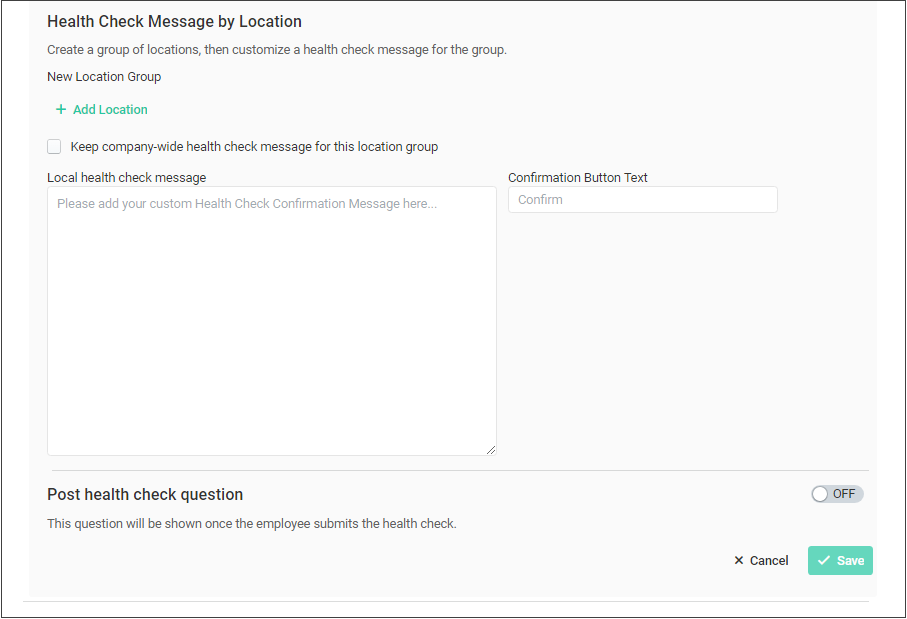
Either you can use the company-wide or use a local health check message.
Company-wide Health Check Message
- Check the Keep company-wide health check message for this location group check box.
- Either set up the post-health check question, see the section below, or click the Save button if you do not need the question.
Local Health Check Message
- Click the + Add Location link. A location search pop-up displays.
- From the location search, either enter the location or select the location. You can select multiple locations. The disabled locations will be greyed out.
- The location(s) is saved automatically.
- In the Local health check message field, enter the health check message.
- In the Confirmation Button Text field, modify the default button label.
- Either set up the post-health check question, see the section below, or click the Save button if you do not need the question.
Step 7. Set up the Post Health Check Question
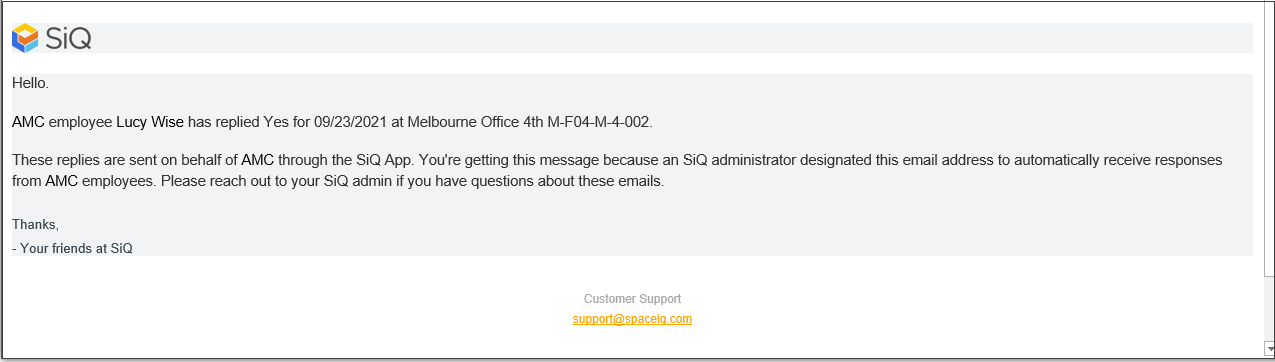
You can send your employees a question immediately after they complete their health check. So, after an employee confirms they are symptom-free, you can ask them if they want lunch ordered or their office space cleaned before arriving for their desk booking.
For an example of what your employee will experience, see Check-In to a Desk from an Email Notification, and the responsible person for the catering or cleaning will receive an email notification, such as:
Complete the following to set the post-health check question:
- For the Post Health Check Question, click the toggle ON. The setting expands.
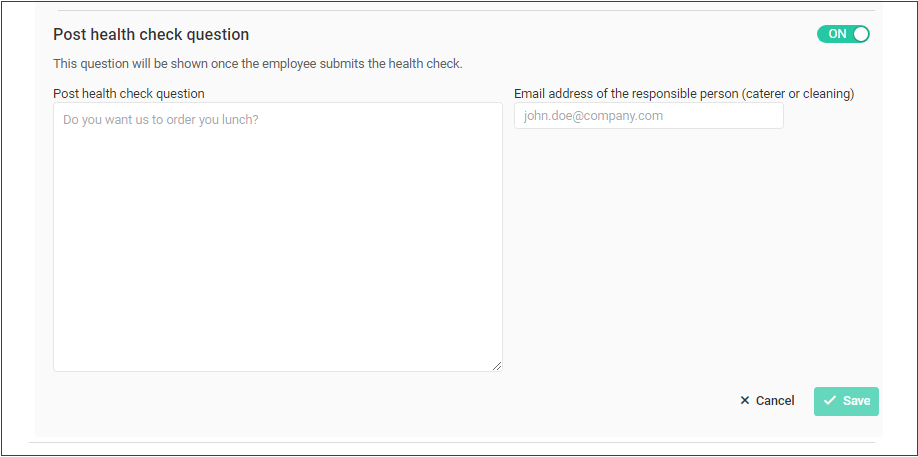
- In the Post health check question field, enter a question phrased as a Yes/No question.
- In the Email address of the responsible person field, enter the email address.
- Click the Save button.
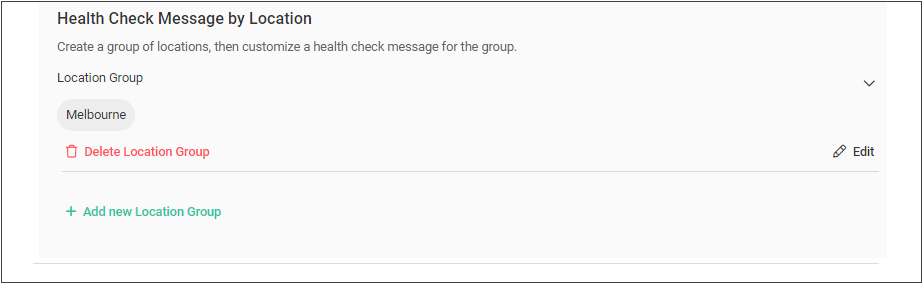
Edit or Delete Health Check Message by Location
If needed, you can edit or delete the message:
- To edit the location group, click the Edit icon.
- To remove a location group, click the Delete Location Group icon.