SFTP Employee Import
Customer IT / SpaceIQ Onboarding Team
SpaceIQ supports a number of integration options to automate the Employee data import process and enable employee access to SpaceIQ features. One common method used to import employee data is SFTP (Secure File Transfer Protocol), and this can be used to maintain the onboarding and off-boarding of staff.
Your IT team can create an automated script that extracts the appropriate data from your systems and then upload it via SFTP to our servers. Then SpaceIQ will automatically pick up the file and load it into your system.

This article describes a high-level overview of how to set up SpaceIQ to import employee roster information from customers’ HR systems. You will need to organize the following with your IT Team:
- Data extraction from your HR System using the correct file format, data requirements, and import template.
- Create an automated script that extracts the appropriate data from your HR systems.
- Upload the import file via SpaceIQ-hosted SFTP server.
- SpaceIQ will automatically pick up the file and load it into your system.
Important Notes:
- SFTP Import (this article) and SFTP Export are two separate integration processes.
- An Approval Threshold for Employee Imports can be turned on to help protect your data integrity during employee imports; see Turn on the Approval Threshold for Employee Imports.
- If you want to receive import notifications, this setting can be turned on; see Turn On Import Notifications.
Contents
File Format
Your data files need to conform to the following requirements:
- The file name must have a .csv extension. There are no other requirements regarding the file name.
- The file content type should be ASCII CSV. Files containing any other content types will be silently deleted.
- The data table header line must be present in the file.
- The file must have at least one entry. Any empty files will be silently deleted.
- The file content must be comma separated with values between double quotation marks (e.g. “first name”).
- The file size should not exceed 50MB maximum. Empty files or files exceeding 50MB size will be silently deleted.
For the data requirements, see the requirements for the Employee Data.
Employee Mappings
We recommend that you complete at least one import process manually using the SpaceIQ Web App before setting up SFTP import as this will:
- Ensure that you have the correct file format and data content.
- Create a mapping in the SpaceIQ Web app between your input file structure and SpaceIQ internal data objects.
This mapping will be used by the automated SFTP import process and can be modified later in the integration’s setting.
The mapping definition is automatically generated when the SFTP integration is activated after a successful manual import. In the off chance that it doesn't work, then Reach out to our support team for additional help.
Import Schedule
SpaceIQ's SFTP import process is asynchronous. SpaceIQ monitors for incoming files and automatically loads them into your workspace. New files are typically picked up within 5 minutes of upload and may take up to 30 minutes to process, depending on the number of records and a number of changes to existing employee records.
To safeguard against malicious attacks, SpaceIQ controls the rate at which files can be uploaded to the system. Multiple subsequent file uploads will not be automatically picked up for processing and will be held to a once-an-hour processing threshold. When multiple files have been uploaded to the SFTP server, only the most recent file will be processed; the other files will be silently deleted.
Integration Activities
Step 1. SpaceIQ to set up a dedicated secure SFTP Server
Upon enabling SFTP import integration, SpaceIQ will set up a dedicated secure SFTP server on the SpaceIQ cloud, allowing you to upload employee files.
As part of the enablement process, you will be assigned your own secured and encrypted folder where files will reside. The file will be deleted automatically once SpaceIQ completes loading it.
Step 2. Activate the SFTP Import
From the SpaceIQ application, complete the following steps:
- In the top-right corner, click on your Profile Name, and then click on Settings.

- From the left menu, click Integrations.
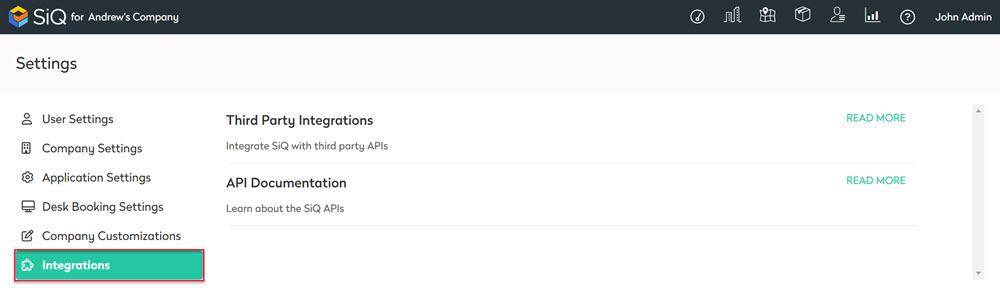
- From the Third Party Integrations area, click the READ MORE link.
The Integrations screen displays.
You can search for SFTP in the Search field or navigate to SFTP tile. To navigate, complete the following:
- From the left menu, click Employee Import.
- For SFTP, click the Activate button.
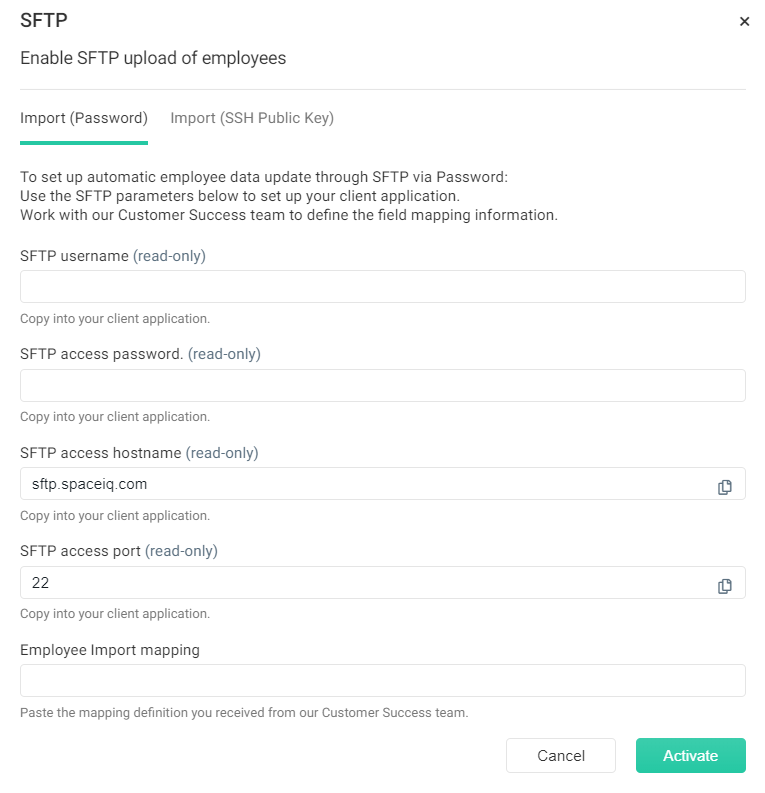
The SFTP dialog displays an Import (Password) tab and an Import (SSH Public Key) tab.
Depending on the authentication method you want to use, select either:
- Import (Password) tab
- Import (SSH Public Key) tab
SiQ will perform the following actions based on your selection:
- Import (Password) - SpaceIQ will generate a unique username and password for you to use with your SFTP client.
- Import (SSH Public Key) - SpaceIQ will generate a unique username and expect you to supply the SSH Public key you would like to use. You will need to configure your SFTP client with both. The steps to generate Public Key are listed in the section below.
In both cases, SpaceIQ will provide connection details (e.g. hostname, port) that you will use to configure your SFTP client.
Import (Password) Tab
Import (SSH Public Key) Tab
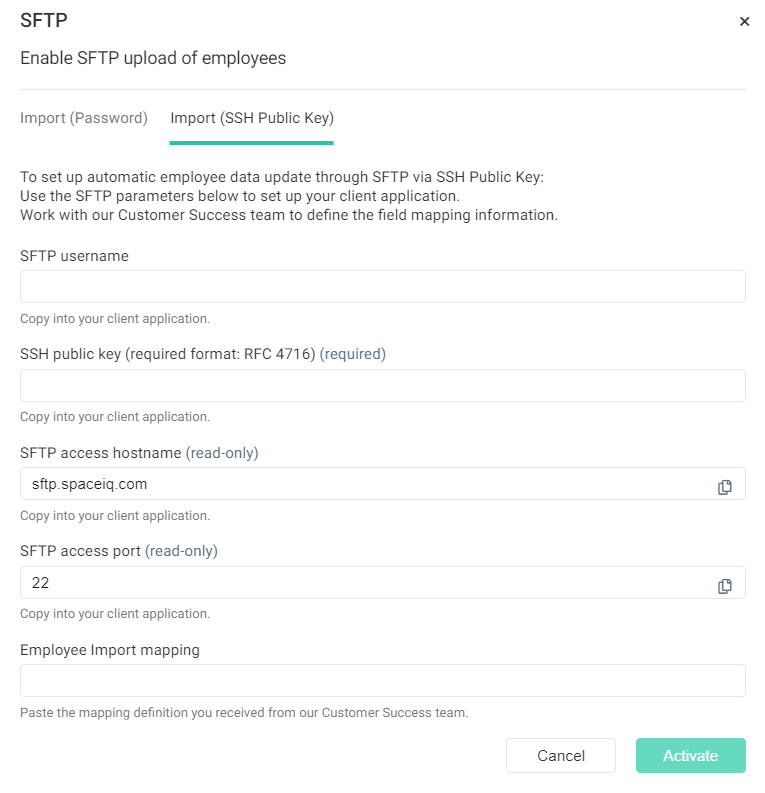
Click the Activate button to complete the process.
Generate Public & Private Key
Run the ssh-keygen command in the terminal and answer the questions when prompted. The defaults are acceptable for most use cases.
| ssh-keygen -trsa -f ~/.ssh/spaceiq.access.key |
The generated keys should now be located in your local directory:
- private key is in the ~/.ssh/spaceiq.access.key file.
- public key is in the ~/.ssh/spaceiq.access.key.pub file.
Next, convert the private key to PEM format by using ssh-keygen command:
| ssh-keygen -p -m PEM -f ~/.ssh/spaceiq.access.key |
Next, convert the public key to RFC 4716 format and configure SFTP with a public key:
Important Note: Make sure you include the --- BEGIN SSH2 PUBLIC KEY ---- and the ---- END SSH2 PUBLIC KEY ----
| ssh-keygen -e -f ~/.ssh/spaceiq.access.key.pub| egrep -v Comment |
Example:
|
---- BEGIN SSH2 PUBLIC KEY ---- AAAAB3NzaC1yc2EAAAADAQABAAABAQD22Yep70fGl9dSqX1xf2vJzeDgQL9rL3MiIvB7Kf N0hG6s3JjiFl0PCrcSWUrGO+2QqAE4MLlbL/YQQcKU9RPphyIk/XIPVaptYPr3uKveniLl JUaM8dr+KT8cJxaV4QCrCAUiWhXNgku3CacegkVLAQKVCDdaaFSvHTaEBoqFSDz7rjxCp+ NT7R+EyW1FEZFiLGJIyGpY5/pFbaB8GKVBfstNVv1bkhQenc/eb1GCXF7Na9koTYnu33yG D+f0IjUCjnIpKbyOkzo3yTXAWPNNKpr4BlyTV4bN38r5PnNfyH6ttwma6iBRfz/MSOITgS D0hGgzTPTQJawpRYBp3dmL ---- END SSH2 PUBLIC KEY ---- |