AutoCAD Plugin Installation and User Guide
SpaceIQ AutoCAD Plugin Overview
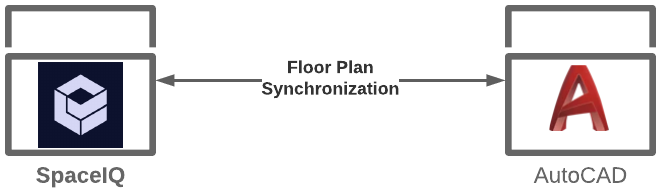
The SpaceIQ AutoCAD® plugin integration enables you to easily update your floor plans and synchronize those changes between SpaceIQ and AutoCAD.
After a quick installation of the SpaceIQ AutoCAD plugin, you’ll enable a seamless, bi-directional synchronization between SpaceIQ and AutoCAD. This means that when you modify a floor plan within SpaceIQ, those changes automatically synchronize to the original AutoCAD file. If you prefer, your AutoCAD specialist can modify .dwg floor plans within AutoCAD, and those changes automatically synchronize to SpaceIQ through the plugin.
Regardless of your preferred editing platform, the SpaceIQ AutoCAD Plugin ensures that your SpaceIQ and your AutoCAD floor plans are current.
This is what you can do with your SpaceIQ AutoCAD Plugin:
- Upload floor plans directly from AutoCAD to SpaceIQ.
- Store AutoCAD .dwg floor plans in your secure SpaceIQ cloud account.
- Download, open, and edit AutoCAD .dwg floor plan files in the SpaceIQ Web App.
- Modify floor plans within SpaceIQ.
- Edit and publish AutoCAD block subsets as separate objects in SpaceIQ
- Automatically sync floor plan changes between SpaceIQ and AutoCAD.
- Publish and edit AutoCAD block subsets as separate objects in SpaceIQ. Note: Elements part of a single background image are not editable.
Supported AutoCAD Versions
The SpaceIQ AutoCAD Plugin currently supports these AutoCAD versions:
- Autodesk AutoCAD 2016
- Autodesk AutoCAD 2017
- Autodesk AutoCAD 2018
- Autodesk AutoCAD 2019
- Autodesk AutoCAD 2020
- Autodesk AutoCAD 2021
- Autodesk AutoCAD 2022
Notes:
- The SpaceIQ AutoCAD Plugin is not compatible with Mac OS.
- Integration is limited to Autodesk AutoCAD; no other CAD software is supported.
- LT versions are not supported.
If you have questions about your AutoCAD version, then email support@spaceiq.com
Contents
Activate and Install the SpaceIQ AutoCAD Plugin
Activate the AutoCAD Plugin
From the SpaceIQ application, complete the following steps:
- In the top-right corner, click on your Profile Name, and then click on Settings.

- From the left menu, click Integrations.
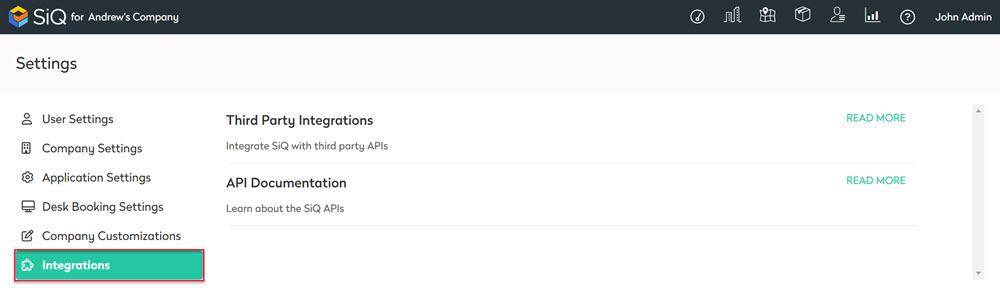
- From the Third Party Integrations area, click the READ MORE link.
The Integrations screen displays.
From the left menu, click General Integrations, and then for the AutoCAD Plugin, click the Activate button.
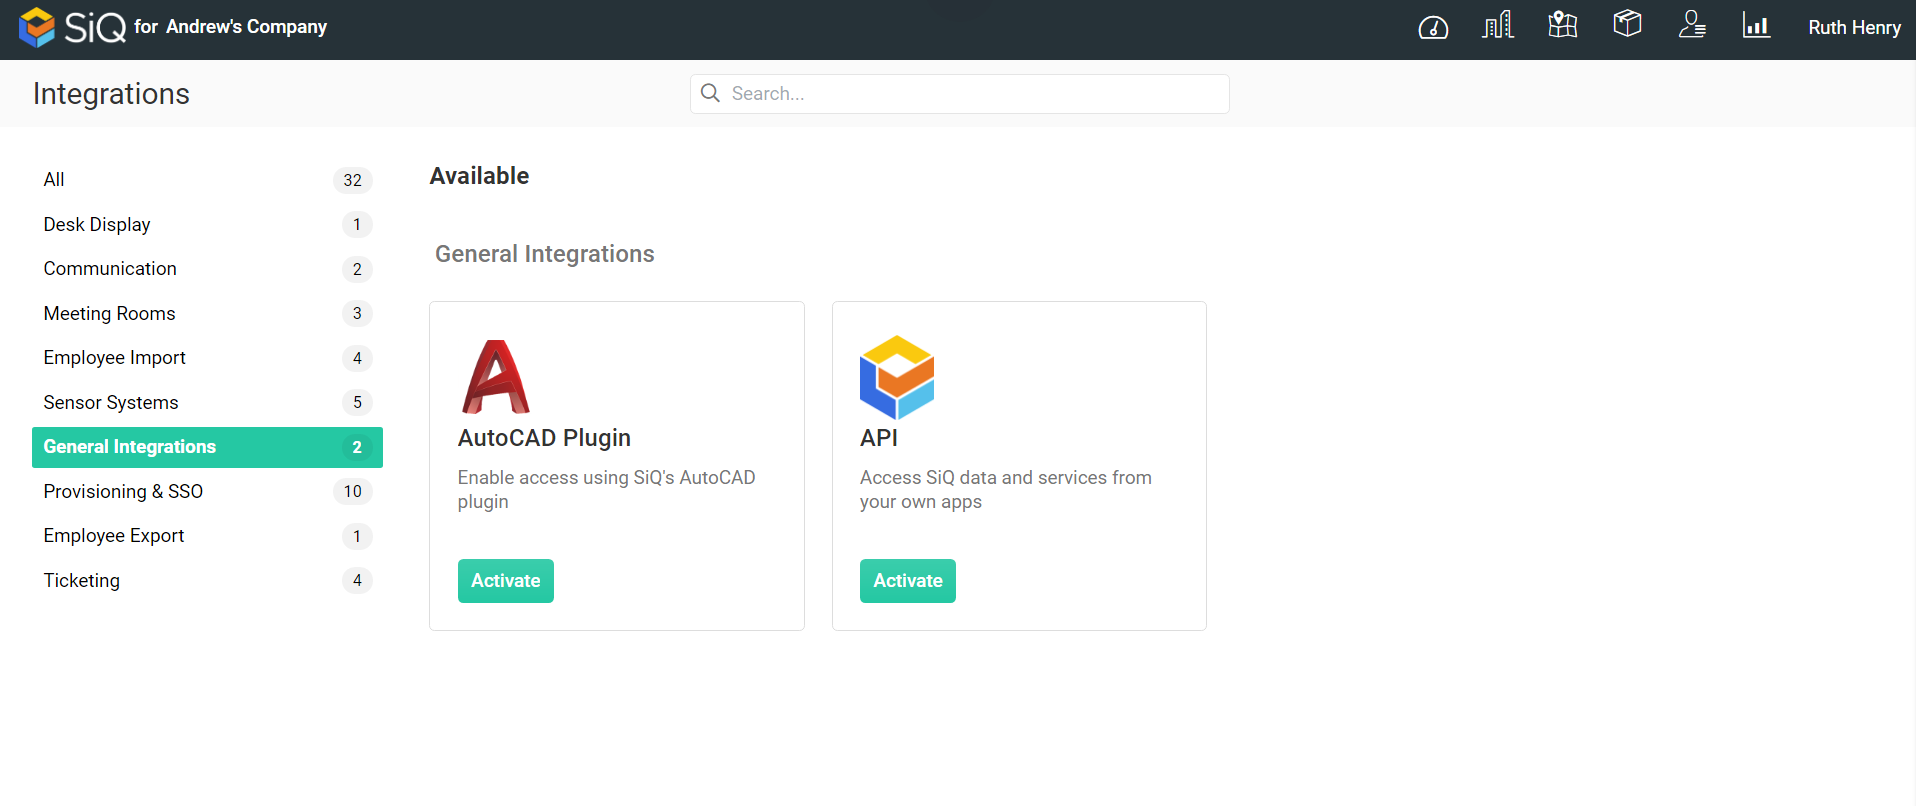
The AutoCAD Plugin dialog displays.
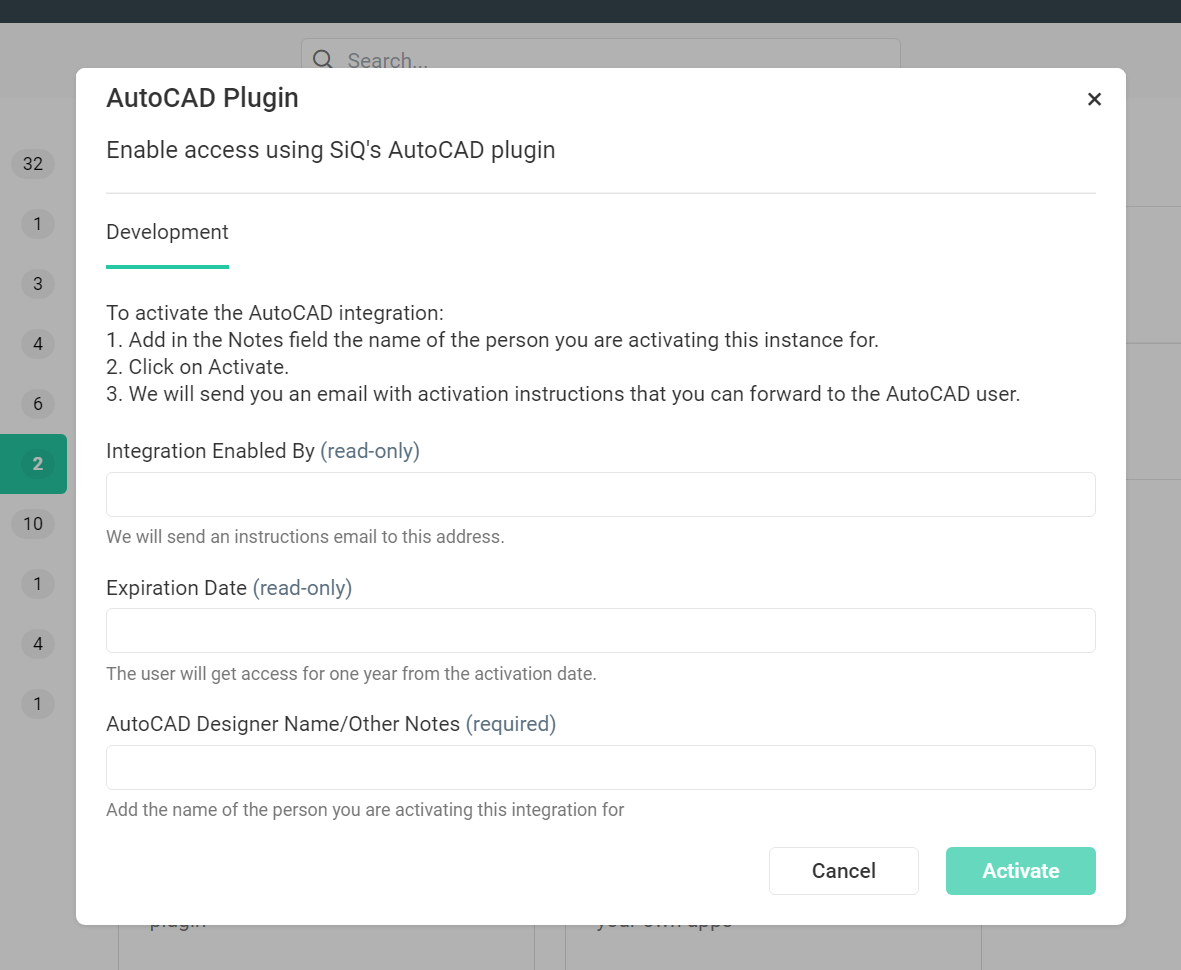
In the AutoCAD Designer Name/Other Notes field, enter the email address of the person you are activating the plugin for and then click the Activate button.
You will receive an Activation email. Open the Activation email and click the link to download the plugin.
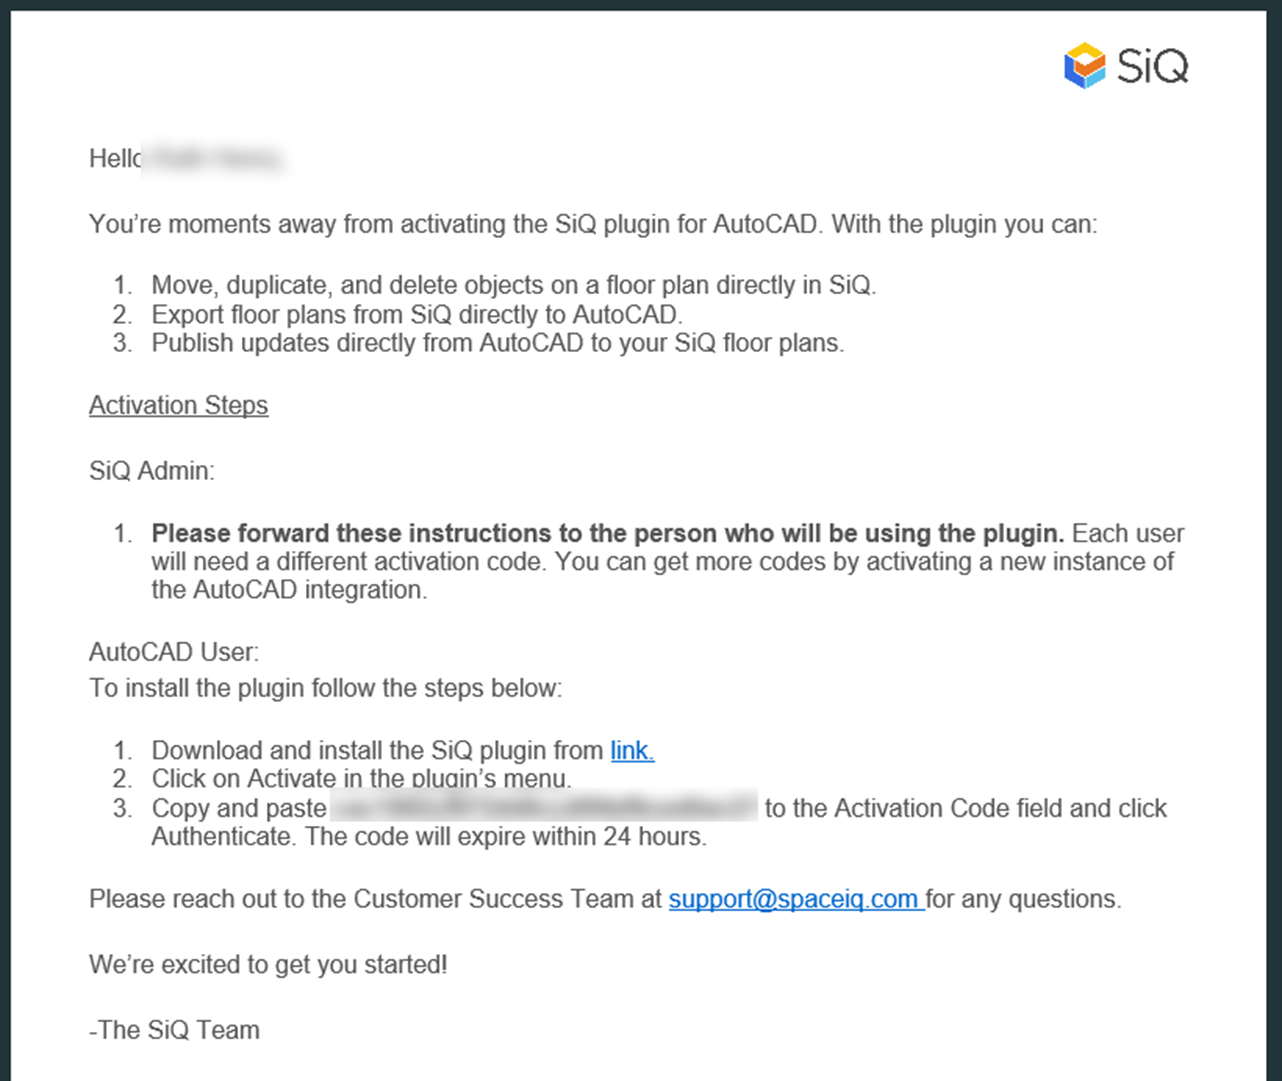
The plugin is downloaded to your Downloads folder.
Install the SpaceIQ AutoCAD Plugin
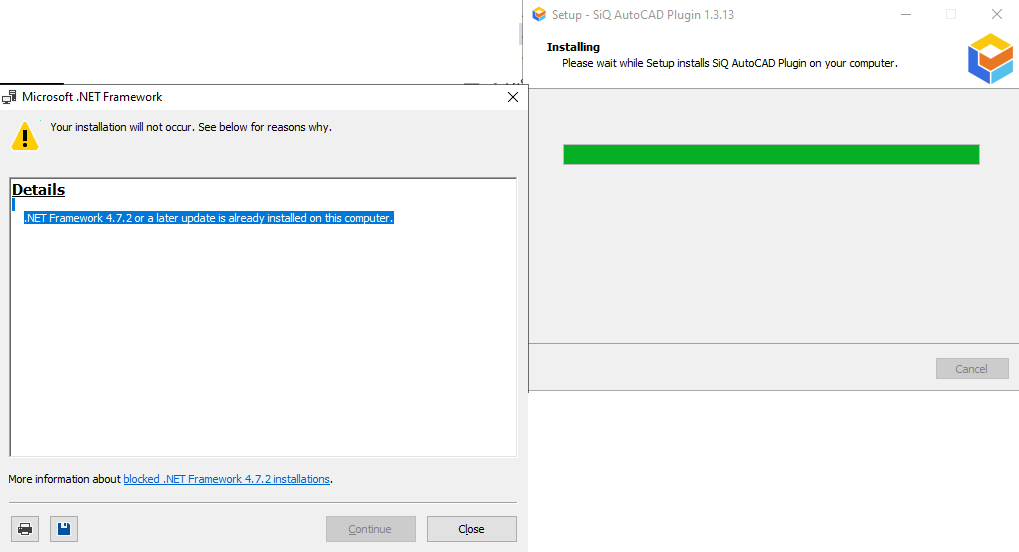
From the downloads folder, run the AutoCAD Plugin-SiQ-Setup.exe file.
Use the installation wizard to complete the installation.
If a warning dialog displays stating .NET Framework 4.7.2 or later, an update is already installed on this computer. Then click the X to close the dialog and continue with the installation.
Open AutoCAD and active the Plugin
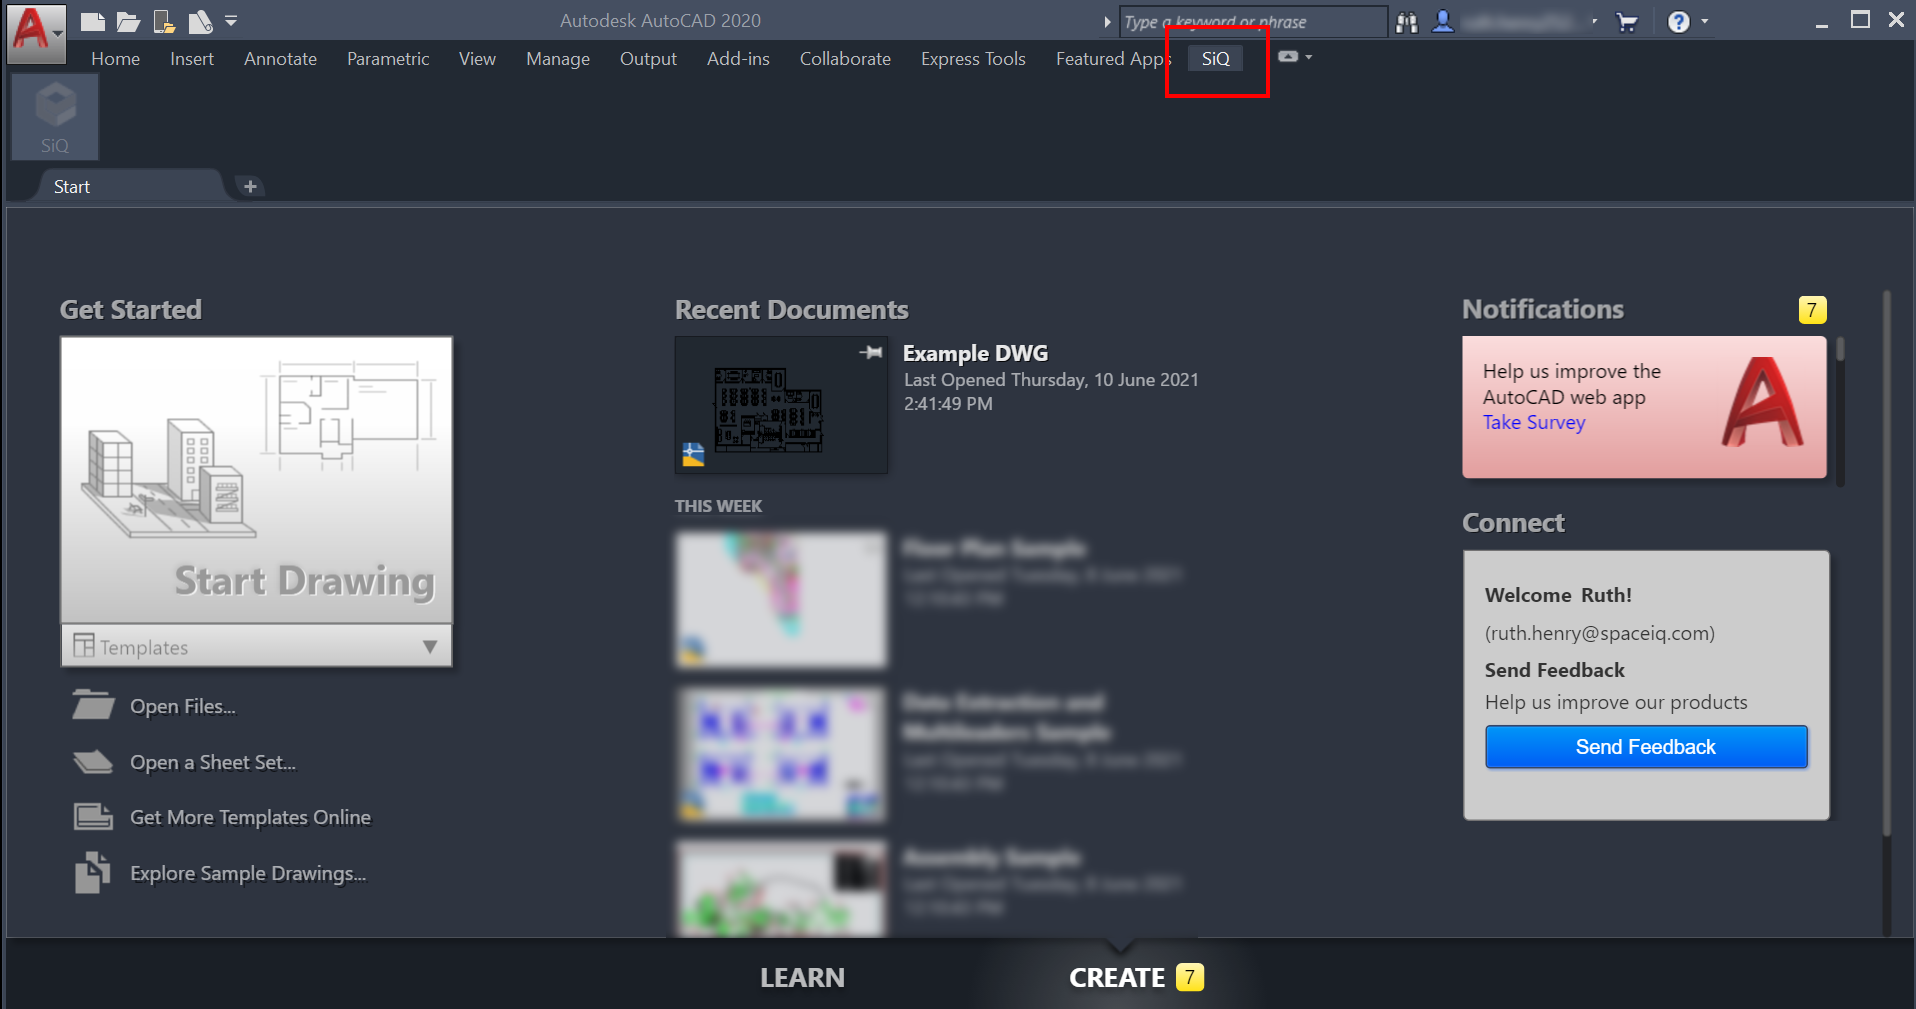
Open AutoCAD.
The SpaceIQ Plugin will display in the top menu.
Important Note: SpaceIQ Plugin Menu
If you do not see the SpaceIQ Plugin in the menu, close your drawings and display the Start tab. With the SpaceIQ Plugin displayed in the menu, you can open your drawing(s).
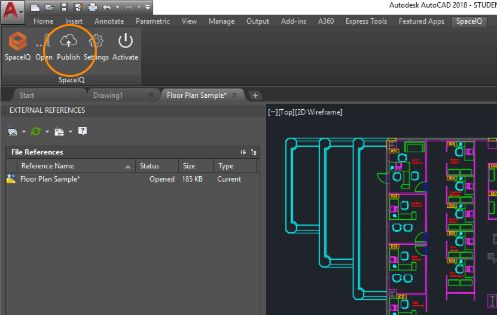
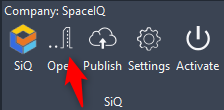
From the menu, click SiQ.
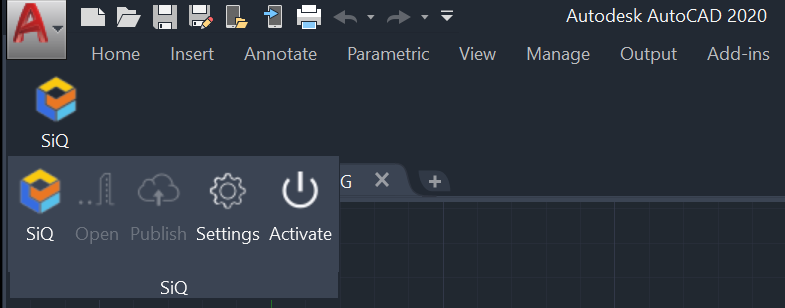
From the ribbon, click the SiQ icon.

The SiQ menu displays, and the Open and Publish icons will be inactive.
Click the Activate icon to activate the plugin. The activation code dialog displays.
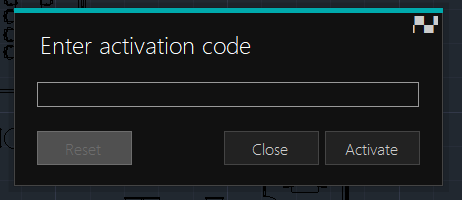
In the Enter activation code field, paste the Activation Code from the email.
Click the Activate button. The dialog changes to Plugin is activated.
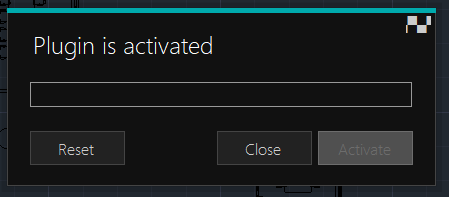
Click the Close button.
When you click the SiQ icon, you will see the active Open and Publish buttons.
SpaceIQ Plugin Commands Overview
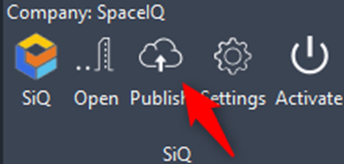
You’re ready to use the SiQ AutoCAD plugin. Let’s take a quick look at the ribbon.
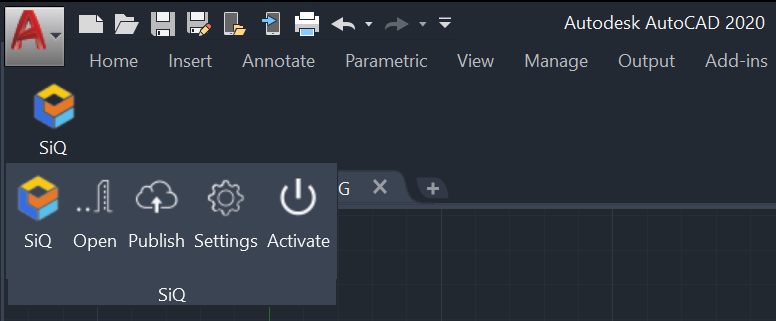
The icons in the ribbon are:
- SpaceIQ - Shows plugin version and links to the SpaceIQ web page.
- Open - Select which SpaceIQ floor plan to open in AutoCAD.
- Publish - Upload the new floor plan or update an existing floor in SpaceIQ based on the current floor plan in AutoCAD.
- Settings - Configure the plugin.
- Activate - Enter the plugin activation code.
Before You Publish Prerequisites
There are few prerequisites before creating a new floor plan or updating an existing one.
File Size
The DMG files size needs to be below or equal to16MB.
External References (Xrefs)
The SpaceIQ AutoCad Plugin uses only one drawing, meaning all external references must be part of a one-floor plan. To insert external files into the main drawing:
Run the XREF command to show the External References screen.
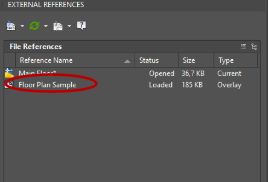
Right-click the external file, and from the pop-up menu, select Bind.
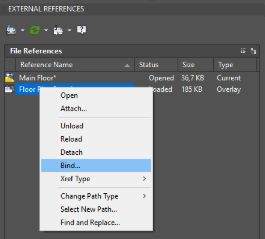
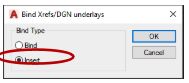
Select an Insert option and click the OK button.
Imported external references are grouped as single-block references. Select an imported block reference to ungroup objects and run the EXPLODE command.
Mirroring
All objects are exported with default scale 1 for all axes. As the scale is not synchronized within SpaceIQ, it will always show objects with its default scale. That means if a block reference is mirrored in the AutoCAD drawing, its corresponding image in SpaceIQ web application will not be mirrored.
To get objects to render correctly in SpaceIQ, create a new block with mirrored drawing elements. Use that new block instead of the mirrored one. That way, all objects will have positive scale values.
Using your Plugin
With the plugin activated and all prerequisites net, you can publish a new floor plan or modify an existing one.
Publish a New Floor Plan
Open an AutoCAD floor plan, edit as needed, and click the Publish button.
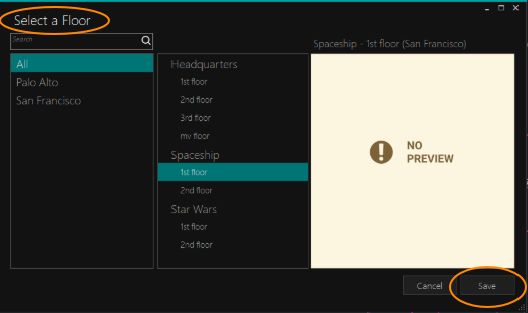
The SpaceIQ AutoCAD plugin will display a previously created searchable list of locations and buildings. Select the floor where new or revised published content will reside and then click the Save button.
When you have completed the edits, select an option:
- Just the Map - All objects (block references) will be exported as part of the floor map without the possibility for later edit in the SpaceIQ Web App.
- Map + Selected Objects - This option will open a window for selecting objects (CAD file block references) to publish. You can move, delete, and create more instances of the selected object types later in the SpaceIQ Web App. See more in the Select Objects for Publishing section.
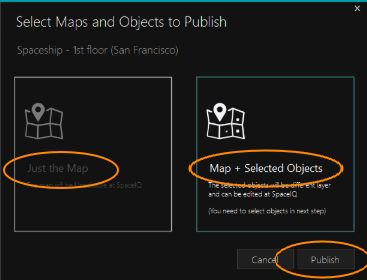
Then, click the Publish button.
Open an Existing Floor Plan
From the SpaceIQ ribbon, click the Open button.

Select the drawing and then, click the Open button.
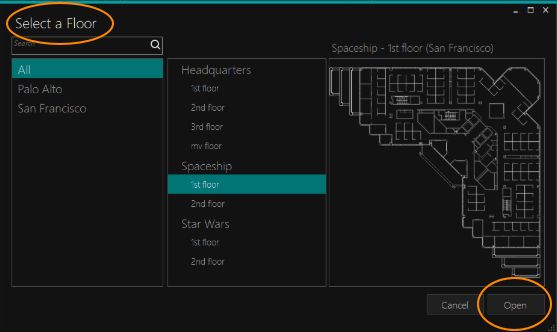
The floor’s AutoCAD file will download into a working folder and automatically open .
If the floor plan source was not a CAD file (PDF is a common file format), you can’t download a CAD file for the floor plan from SpaceIQ. After the file is opened, the AutoCAD plugin will download object position data from SpaceIQ. Objects moved, added, or deleted in the web application should update accordingly.
When you have completed the edits, select the required option:
- Just the Map - All objects (block references) will be exported as part of the floor map without the possibility of later editing in the SpaceIQ Web App.
- Map + Selected Objects - This option will open a window for selecting objects (CAD file block references) to publish. You can move, delete, and create more instances of the selected object types later in the SpaceIQ Web App. See more in the Select Objects for Publishing section.

Then, click the Publish button.
Add blocks to an existing blocked Floor Plan
- Open the existing floor plan, in AutoCAD using the SpaceIQ plug-in.
- Select any object(s) within the floor plan that has not been blocked that you want blocked. You can select a single or multiple objects but anything that is blocked together will stay as one block.
- Type block and then press the Enter key. The Block Definition dialog displays where you can name the block. Naming the block can be as simple or detailed as possible. For example, SpaceIQ Large Meeting Room Table, SpaceIQ Single Desk, SpaceIQ Single Soft Lounge Chair, etc. Note that any block name cannot be the same as any previous block.
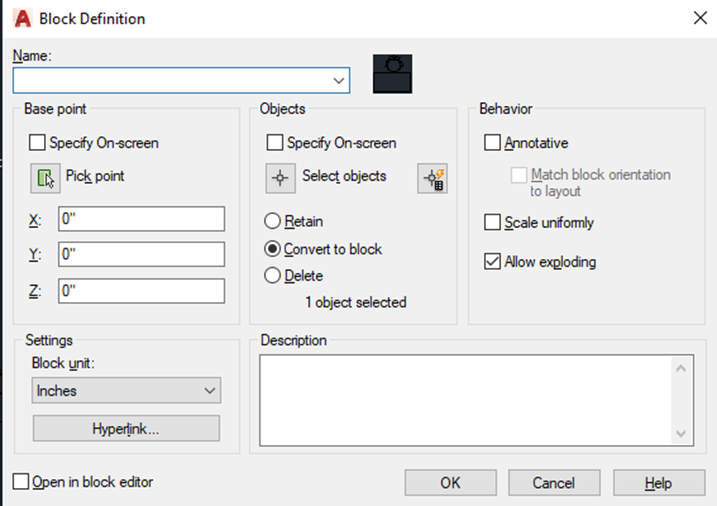
- When all blocks have been added click the Publish button in the SIQ plug-in tab through AutoCAD.
- The Select Objects for Publishing dialog displays. In this dialog you can select all new and existing blocks that you would like to be published with the floor plan.
- Click the Publish button and your plan will begin to upload to your SpaceIQ Web App.
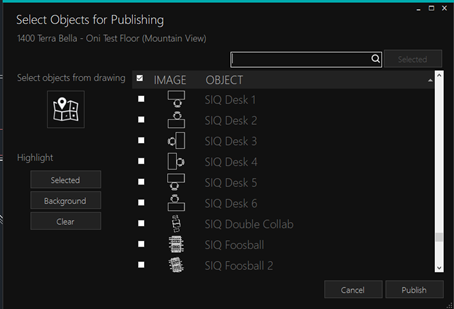
Select Objects for Publishing
When you select the Map + Selected Objects publish option, the Select Objects for Publishing dialog displays.
This allows you to identify which types of objects (AutoCAD block references) admin-type users can later move, delete, or duplicate in the SpaceIQ Web App. See Manage Furniture Blocks.
You can make the selection from the list or the drawing.
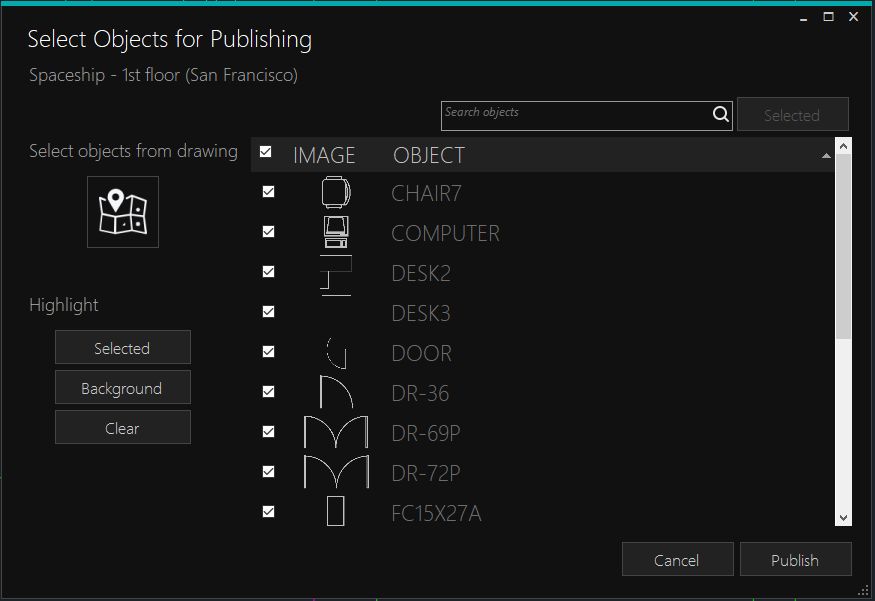
Select Objects from the List
Every listed AutoCAD block reference definition may appear in the CAD drawing as multiple object instances. For example, the list will contain one chair item, but that chair can appear in many places in the drawing.
Select which blocks to publish as separate objects in SpaceIQ by ticking the checkbox next to the object’s preview. Or you can select all objects (not recommended unless the number of objects is small) by marking the checkbox in the column header.
To select multiple blocks, check the first block, hold the Shift key, and then check the last block. Then click the top checkbox to check the selection.
Select Objects from the Drawing
You can point to required objects on the floor plan to select the relevant block reference:
- Click the Select objects from the drawing icon, for example

- While pressed, the object selection pop-up will become invisible. It will display again when you finish your selection.
- You can toggle the selection of one or more block references in the CAD drawing.
- To finish, click the right mouse button anywhere on the drawing or press the Enter key, Space key, or Escape key.
Your chosen blocks will be selected in the object list.
- Highlight Selected - Highlights all references in the drawing of the selected objects in the list.
- Highlight Background - Highlights everything except selected objects in the list.
- Highlight Clear - Clears all highlights. Double-click on the object in the list will zoom into the first block reference in the drawing.
Manage AutoCAD Changes Process
SpaceIQ offers three options to manage AutoCAD changes to your floor plans, depending on who does the work.
Manual PNG Upload/Import
| SpaceIQ | Customer |
|---|---|
|
|
Customer-Managed AutoCAD
| SpaceIQ | Customer |
|---|---|
|
|
SpaceIQ Map Editor Integration
| SpaceIQ | Customer |
|---|---|
There is a wait time depending on where the request falls in the queue. |
|
Update your SpaceIQ AutoCAD Plugin
The SpaceIQ AutoCAD Plugin has an automatic update system. Since the AutoCAD plugin is just one part of the SpaceIQ system, it depends heavily on the backend part of the application. That means that when the backend is being updated, the plugin must be updated, as well. Therefore, updates are required.
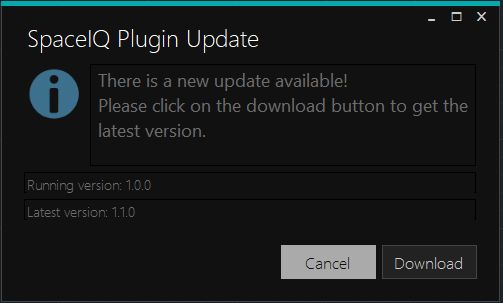
When a new version is posted to the SpaceIQ server, your plugin will open an update wizard window that requires two clicks:
Click the Download button.
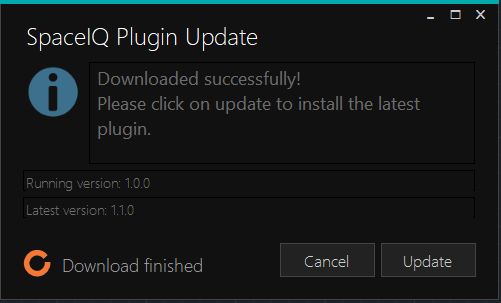
Click Update to install.
Troubleshooting
The following troubleshooting items will help you diagnose and solve problems.
| Situation | Description |
|---|---|
|
Blurry Images The problem appears when scale of block instance is set much larger than 1 because image will be enlarged that many times on the SpaceIQ Web App. Since the image is a bitmap with limited resolution, large scale will affect image quality and it will apparently become blurred. |
To avoid large scale values, increase the size of the original block geometry so block instances inserted in the drawing will have scale values of 1. |
|
Block References Appear Mirrored in SpaceIQ The SpaceIQ Web App does not support negative scale values and mirroring. Block references mirrored with negative scale values in AutoCAD will not appear mirrored in SpaceIQ . |
If there is a need for a mirrored block instance, make a copy of the block and mirror the new blocks geometry. Then, replace mirrored block instances with instances of the new block. |
|
Text Publishing Text publishing is not currently supported. |
Convert text objects into geometry. AutoCAD supports exploding text objects with the commands Express tools > Modify text > Explode text. |
|
Improperly Rendered Images Plugin is not generating images properly. |
Complete the following:
|
Issue Reporting
SpaceIQ encourages you to report any issue with your AutoCAD plugin so we can quickly track and fix the problem. Gather the following information:
- Exact steps that resulted in the issue. The more details, the better so we can replicate the problem.
- Environment specifications: Operating system version, AutoCAD version
- Sample AutoCAD drawing, if possible
Then send the information to this email autocad@eptura.com