Activate Exchange Connector in SpaceIQ
Customer IT / SpaceIQ Onboarding Team
This article describes how to enable the Exchange Connector in SpaceIQ.

Prerequisite
You must be a Microsoft Administrator in your organization in order to complete this integration.
Steps
Complete the following steps.
Step 1. Activate the integration in SpaceIQ
You will need to enable this integration in SpaceIQ.
From the SpaceIQ application, complete the following steps:
- In the top-right corner, click on your Profile Name, and then click on Settings.

- From the left menu, click Integrations.
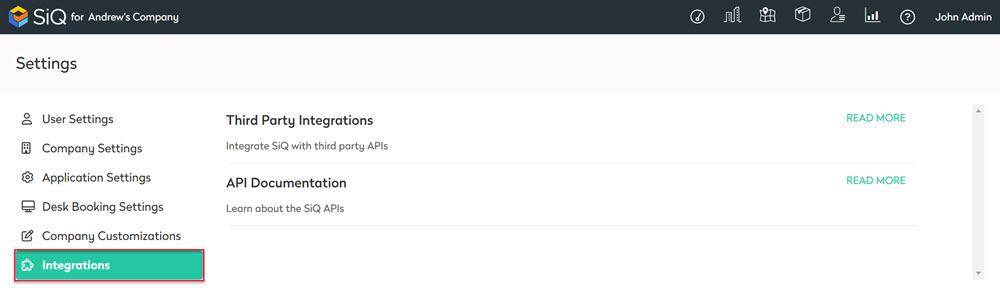
- From the Third Party Integrations area, click the READ MORE link.
The Integrations screen displays.
You can either search for Exchange Calendar in the Search field or navigate to Exchange Calendar tile. To navigate complete the following:
- From the left menu, click Meeting Rooms.
- For Exchange Calendar, click the Activate button.
The Exchange Calendar dialog displays.
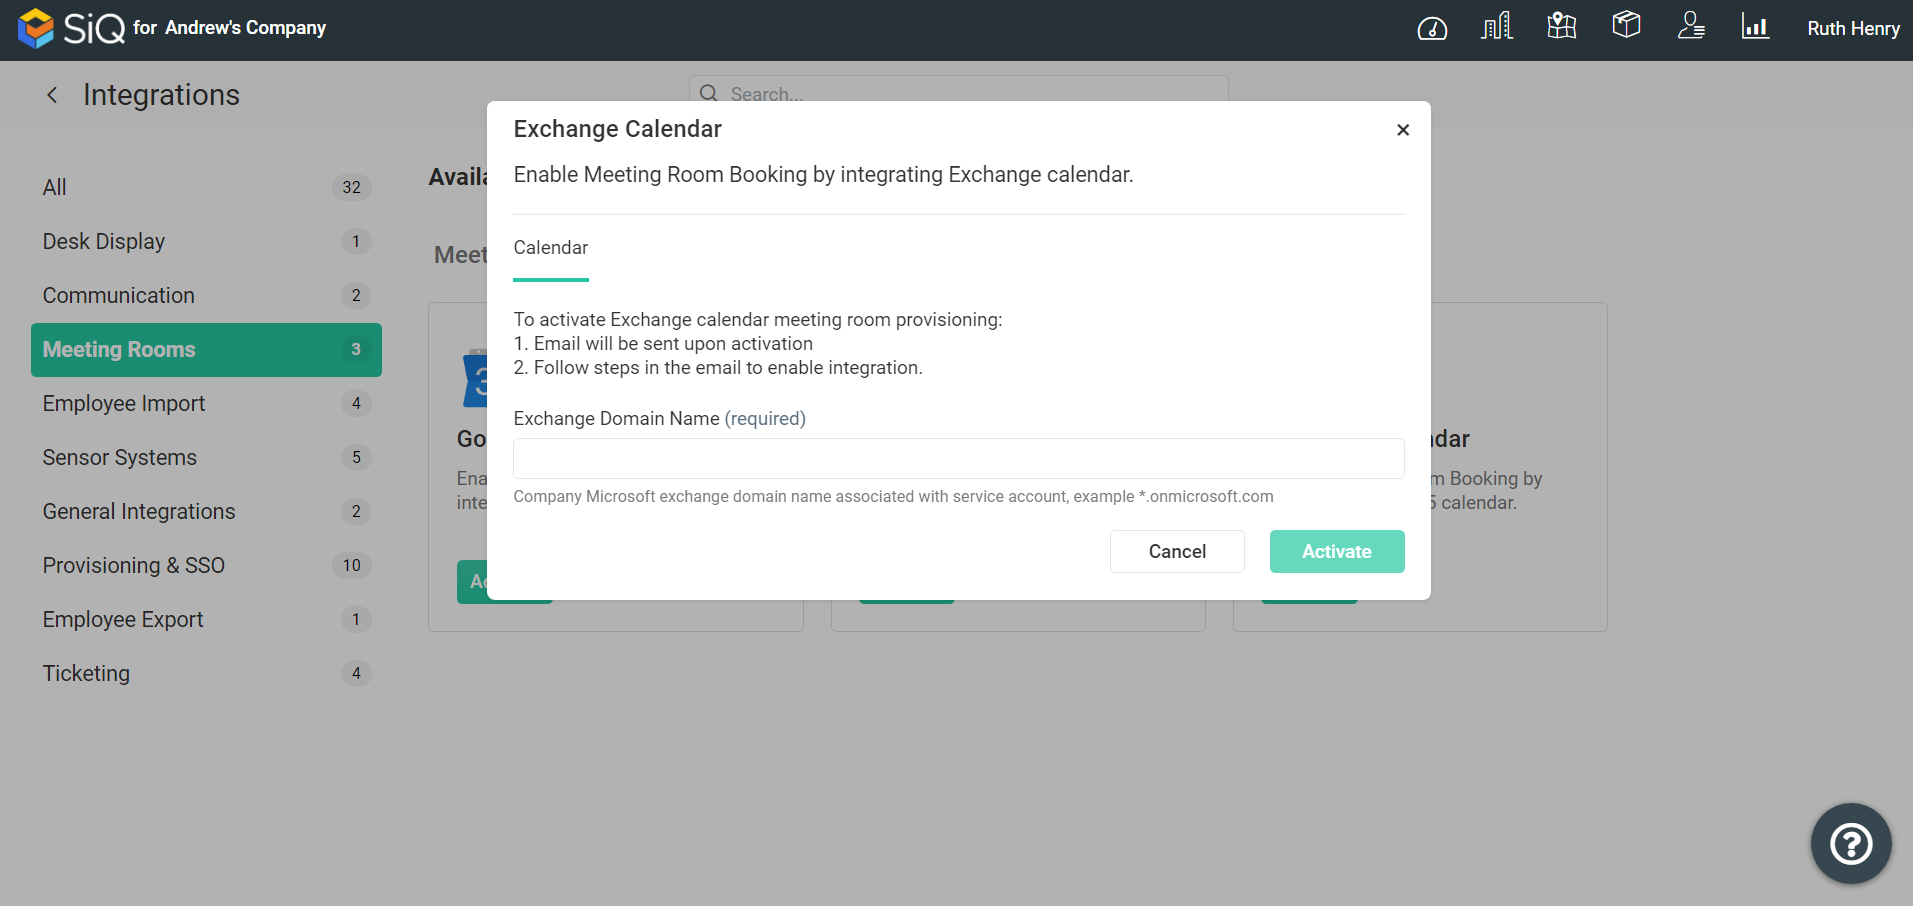
- Complete the following:
- In the Exchange Domain Name field, enter your company's Exchange domain name. Then click the Activate button.
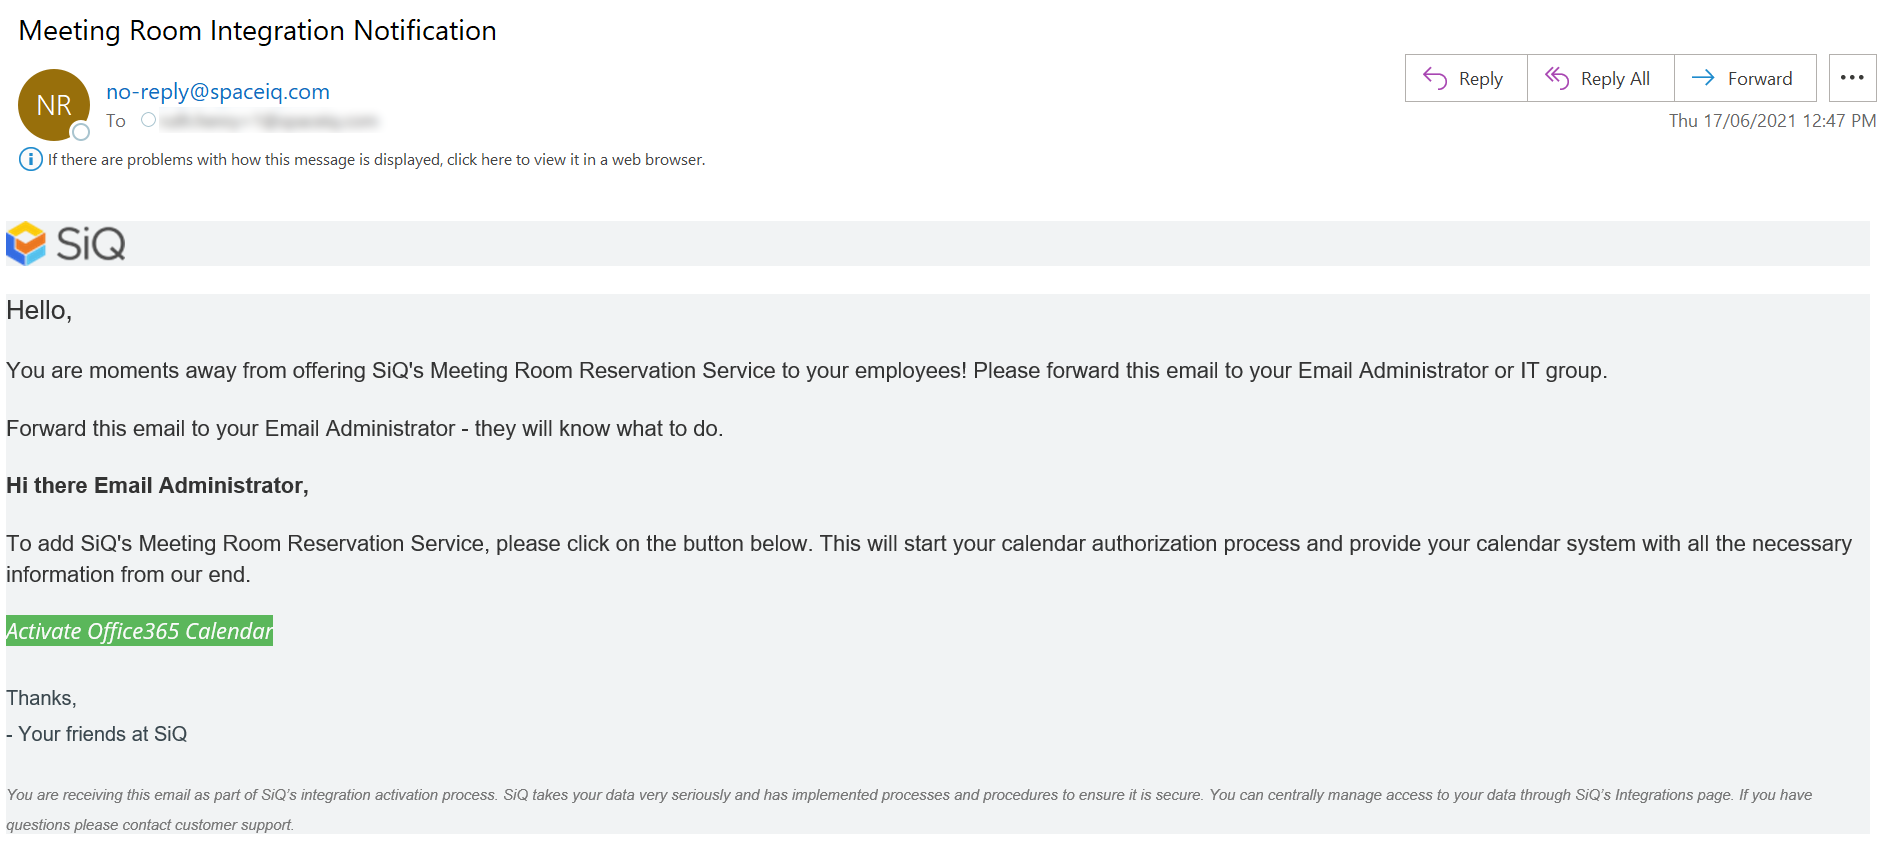
An email will be sent out to you.
You will need to send this to your Microsoft Administrator.
Step 2 Activate the Cronofy Enterprise Connect for Exchange
Your Microsoft Administrator will complete the following.
- From the email, click the Activate Calendar link.
 The Cronofy screen displays.
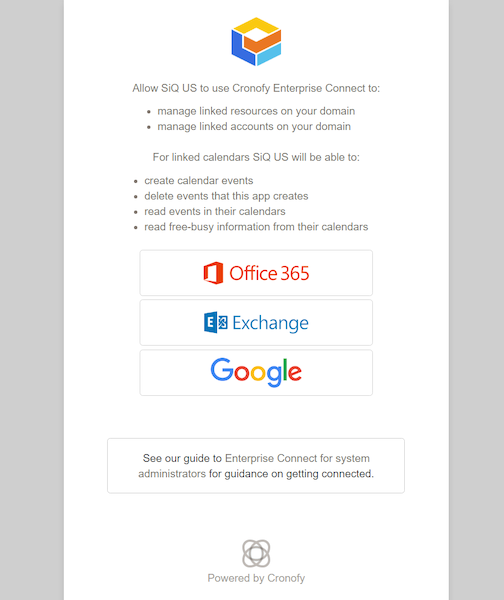
- Click the Exchange button. The Cronofy Exchange screen displays.
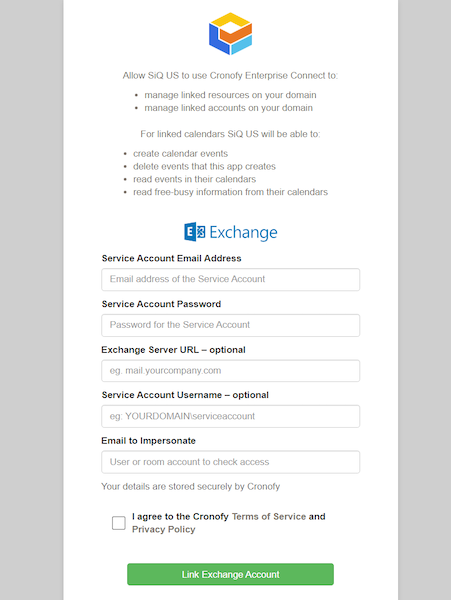
- In the Service Account Email Address field and Service Account Password field, enter the Service Account credentials to log in. Note: The Service Account was created in Step 1, refer to Set up Microsoft Exchange/Office 365 to enable application integration with Cronofy.
- In the Email to Impersonate field, enter the resource account’s email.
- Tick the I agree to the Cronofy Terms of Service and Privacy Policy check box.
- Click the Link Exchange Account button.
This will verify the Service Account and use it to impersonate the resource accounts. When complete you will be redirected back to the Cronofy success screen.

You can close this screen as the integration is now completed.
Step 3. Add the Resource's Calendar in SpaceIQ
The final step is to add the resource's calendar to the Meeting Room icon in SpaceIQ, see Add Meeting Room icon to the Floor Map.