Azure Custom Attribute Mapping
Customer IT / SpaceIQ Onboarding Team
Azure's SpaceIQ application has been enhanced to support user-defined custom attributes, which enables the import of more than 20 attributes to SpaceIQ. These attributes must be created and mapped manually.
This article describes how to complete the custom attribute mapping for SpaceIQ.
Contents
Prerequisites
You must have Azure administrator permissions in order to perform this custom attribute mapping.
The Azure Integration needs to be completed first, and the article Employee Attribute Mapping contains details of the variables.
Mapping Activities
Step 1. Define Attribute
From Azure, complete the following:
- From the left menu, click Provisioning. The Provisioning screen displays.
- Click the Edit attribute mappings.
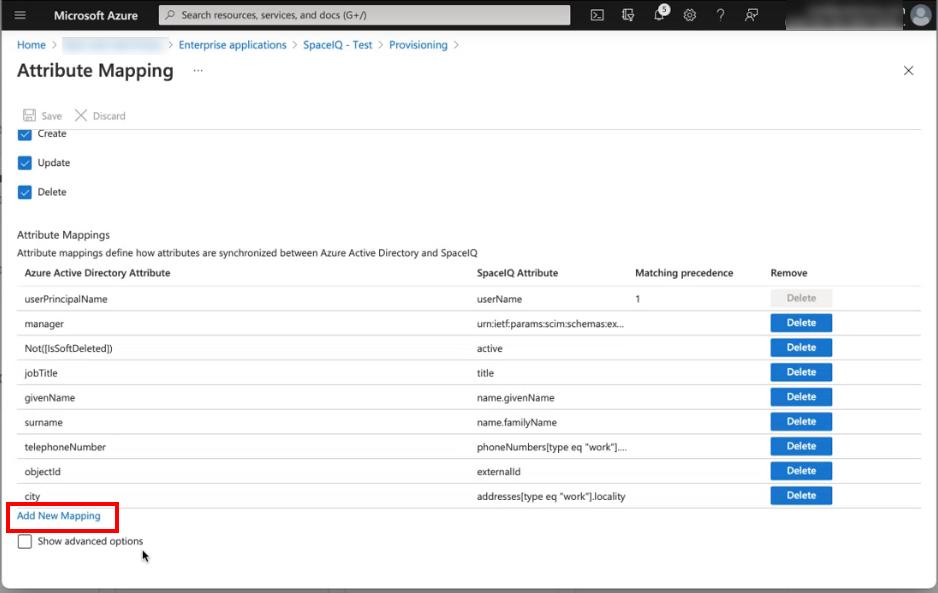
- Click the Add New Mapping link.
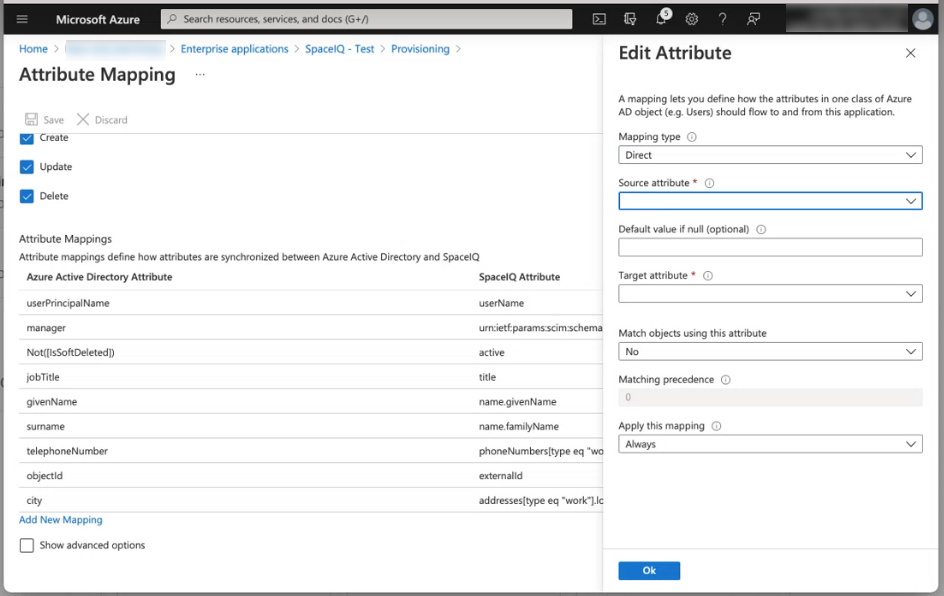
- From the Source attribute drop-down, select the source attribute. For example, department.
- From the Target attribute drop-down, select the target attribute. For example, organization.
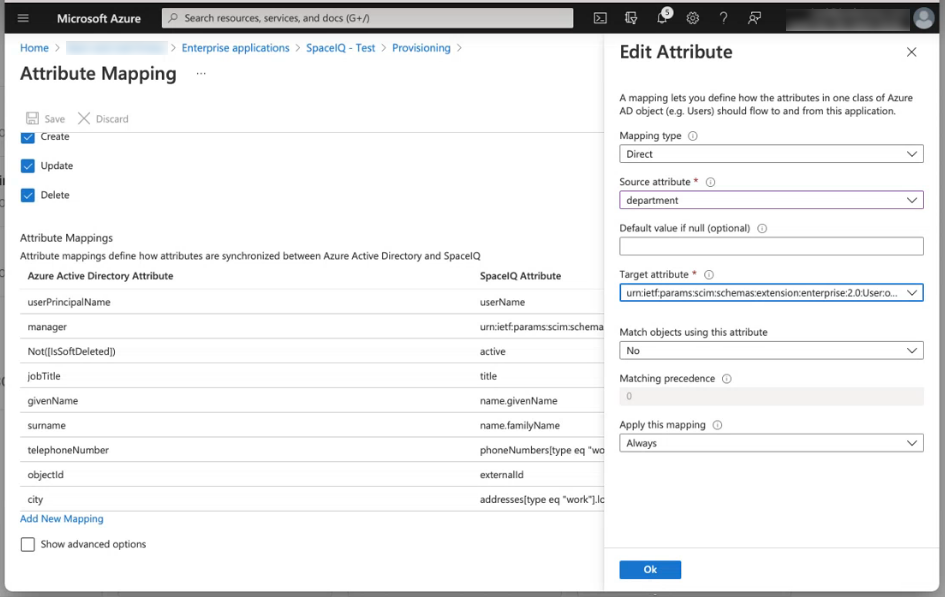
- Click the OK button.
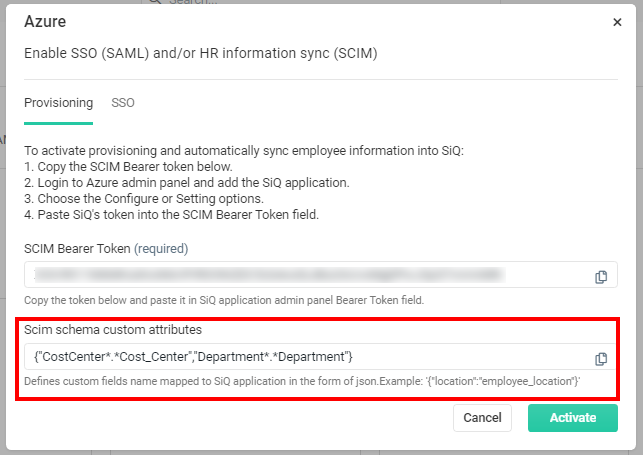
Step 2. Define the Custom Fields in SpaceIQ
Then define the Custom Field Name mappings in the SpaceIQ Web App. In the SCIM schema custom attributes field, enter the mapping code. For example:
| {"CostCenter*.*Cost_Center","Department*.*Department"} |