PingOne Integration
Customer IT / SpaceIQ Onboarding Team
SpaceIQ supports integration with the Ping identity management system. This details how to configure the PingOne integration for SpaceIQ.
It is not possible to import (or pull) new users or profile updates from within SpaceIQ. The information must be pushed from PingOne .
Contents
Prerequisites
- You will need PingOne with administration privileges to complete this integration, and for the SpaceIQ setup, you must have a SpaceIQAdmin or an IT role.
Set up SSO using SAML for SpaceIQ
This section describes how to set up SSO using SAML (Security Assertion Markup Language) (SAML), so your users can use their PingOne credentials to sign in to SpaceIQ app.
Step 1. Find the PingOne Identity Provider (IdP) information
For more information on PingOne, see their documentation.
From the PingOne SSO Admin Console, complete the following:
- Sign in to PingOne SSO admin portal as an Administrator.
- Add the SiQ application.
- Edit the SpaceIQapplication to copy the following:
- Copy Issuer URL and paste into Step 2's SAML Identity Provider Issuer URL field.
- Copy the X.509 certificate and paste into Step 2's X.509 Certificate field.
Leave the Admin console open.
Step 2. Activate the PingOne Integration in SpaceIQ
From the SpaceIQ application, complete the following steps:
- In the top-right corner, click on your Profile Name, and then click on Settings.

- From the left menu, click Integrations.
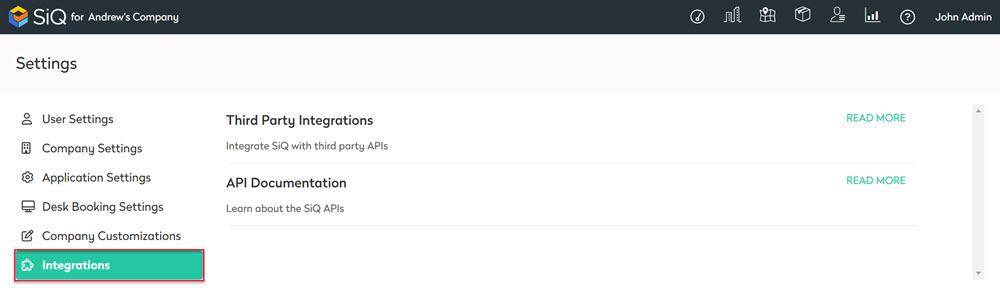
- From the Third Party Integrations area, click the READ MORE link.
The Integrations screen displays.
You can search for PingOne in the Search field or navigate to the PingOne tile. To navigate, complete the following:
- From the left menu, click Provisioning & SSO.
- For PingOne, click the Activate button.
The PingOne dialog displays and contains the Provisioning tab and the SSO tab.
- Click the SSO tab.
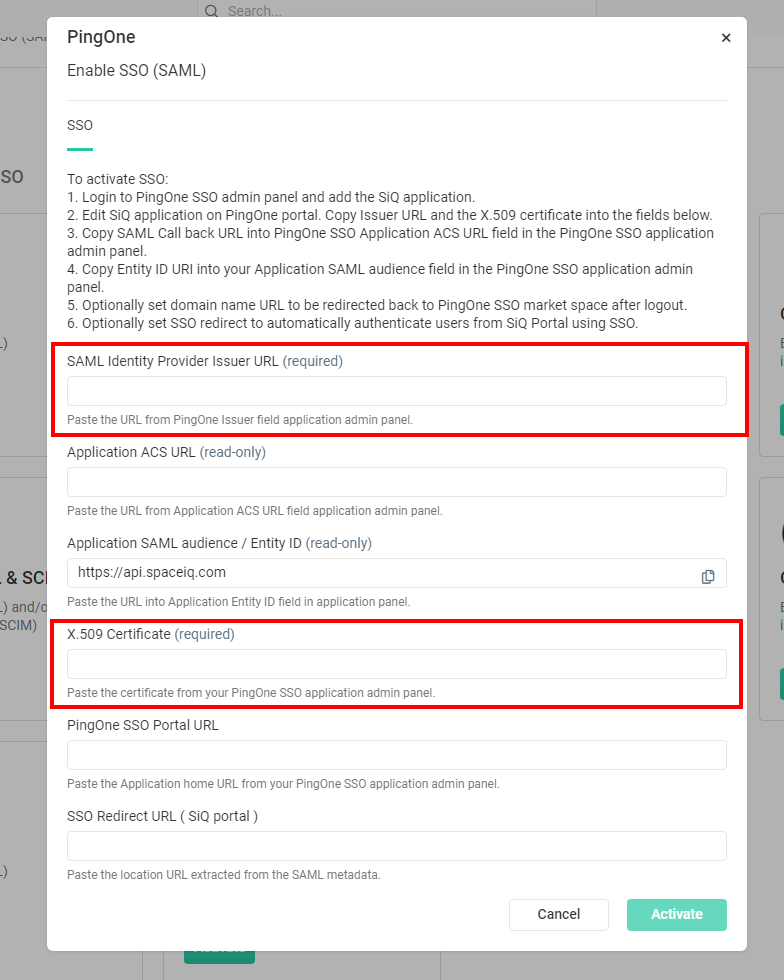
- In the SAML Identity Provider Issuer URL field, paste the Issuer URL from Step 1.
- In the X.509 Certificate field, paste the certificate you downloaded in Step 1.
Step 3. Complete the SSO Configuration in PingOne
Complete the SpaceIQ 's PingOne Integration fields.
From the PingOne SSO Admin Console, complete the following:
- Edit the SpaceIQ application to copy the following:
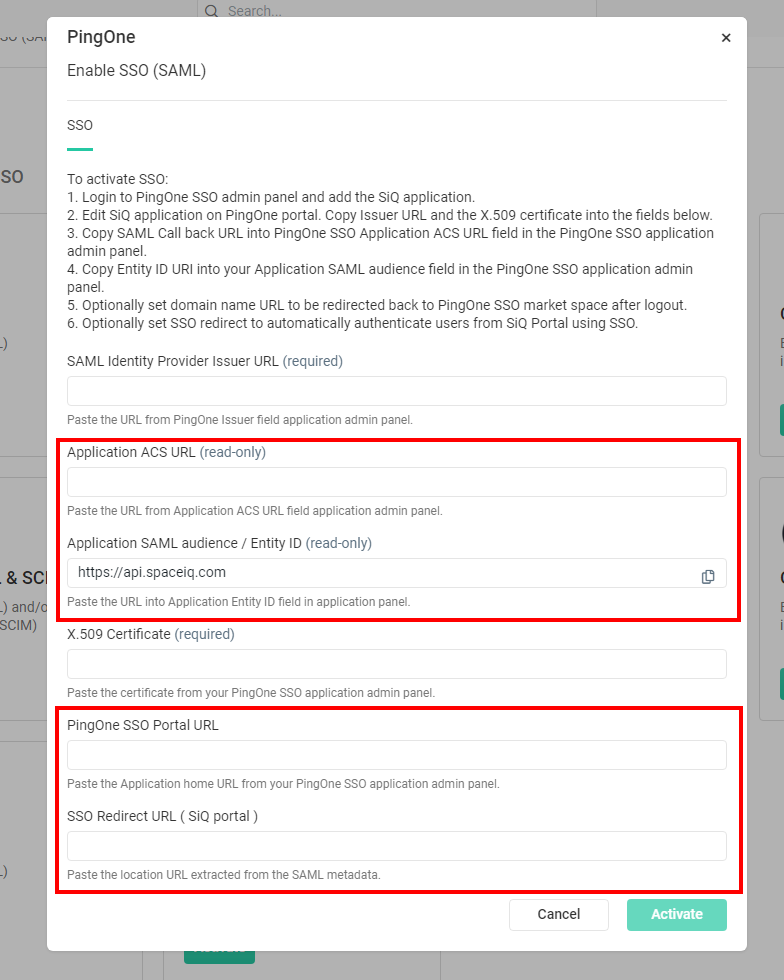
- Copy the Application ACS URL and paste it into PingOne SSO Application ACS URL field in the PingOne SSO Admin Console.
- Copy and paste the Application SAML Audience / Entity ID into the Application SAML audience field in the PingOne SSO Admin Console.
- Optional - In the PingOne SSO Portal URL field enter the domain name URL to be redirected back to PingOne SSO market space after logout.
- Optional - In the SSO Redirect URL (SpaceIQ Portal) field, enter the SSO redirect to authenticate users from the SpaceIQ Portal using SSO automatically.
- Click the Activate button.