Add a Space Profile for an Ad-hoc Room
Space Profiles use a template-based model rather than location inheritance to apply settings and space attributes to a room, desk, or lobby. You can use the space profiles to set attributes like capacity or amenities that had to be manually set at every space now can be configured at the profile level and applied to spaces.
In this example, let's set up an ad-hoc room or huddle room that can be used for immediate reservations on the day.
Step 1. Add a Space Profile for an Ad-hoc Room
From Teem Web complete the following:
1. Navigate to Manage > Locations > Space Profiles.
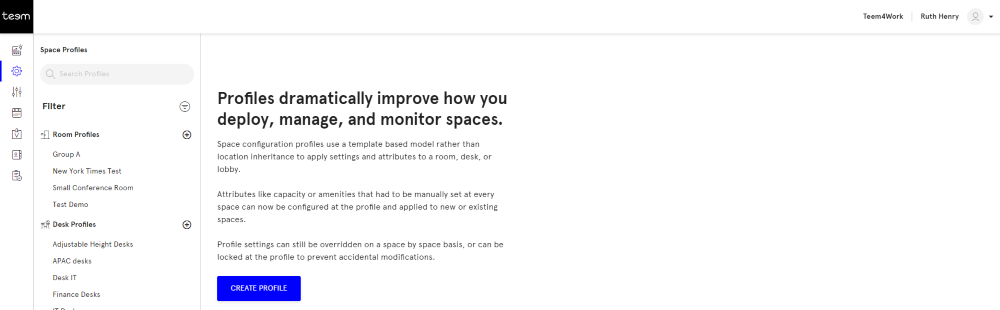
2. Click the Create Profile button. The New Profile dialog displays.
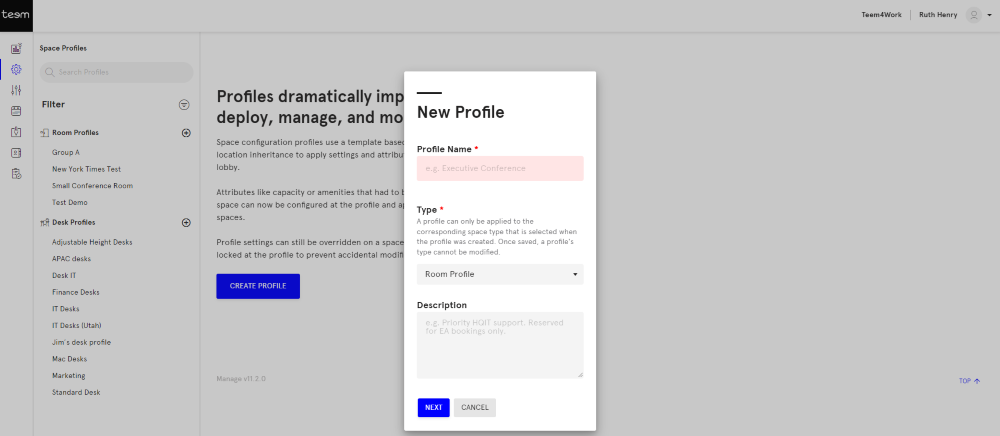
3. In the Profile Name field, enter the name.
4. For the Type drop-down, use the default Room Profile.
5. In the Description field, enter a short description.
6. Click the NEXT button.
Step 2. Set up the Attributes
The room profile is saved and the Attributes tab displays.
Important Note: You can lock an attribute at the space profile level or leave it unlocked, which means:

- Unlocked attributes can be overridden at the space level.

- Locked attributes cannot be overridden at the space level.
By default, the attributes are unlocked and if you want to lock an attribute then click the unlocked  icon (and to unlock an attribute click the Locked
  icon).
7. In the Capacity field, enter the number of seats for the room.
8. In the Notes field, enter additional information about the space and this is for internal use by Admins only.
9. In the Photo area, click the CHOOSE FROM LIBRARY button.
10. Either upload an image or select a previously uploaded image from the library. Note: The file size must be less than 2 MB.
11. In the Amenities area, tick the equipment and resources for the space.
12. Click the SAVE button.
Step 3. Set up the Booking and Display Settings
Next, you will set up the booking and display settings for the Space Profile.
13. Click the Settings tab.
The Ad-hoc meeting room will have particular settings to make sure the room can only be reserved immediately and let's include the restriction that employees can only reserve it for 1 hour.
14. Complete the settings:
- Toggle the Allow Reservations to ON.
- Toggle the Require Event Check-in to ON.
- Toggle the Immediate Reservations Only to ON.
- Toggle the Restrict Booking by Length to ON and then in the Maximum Booking Length field enter 60 minutes.
- Toggle the Allow Book Other Space to ON.
- Toggle the Allow End Events Early to ON.
- Toggle the Task Lock Mode to ON and in the Exit PIN field, enter the EventBoard app PIN.
Learn more about the Booking and Display Setting in the article called Booking and Display Settings Overview.
Step 4. Assign the Space Profile to the Room(s)
New Room
Remember when you first set up your rooms during Onboarding your room(s) will not exist yet. We recommend that you create your space profile first (which are you doing now) and then add your rooms. When you add the rooms this is where you will assign the room(s) to the space profile.
Existing Room
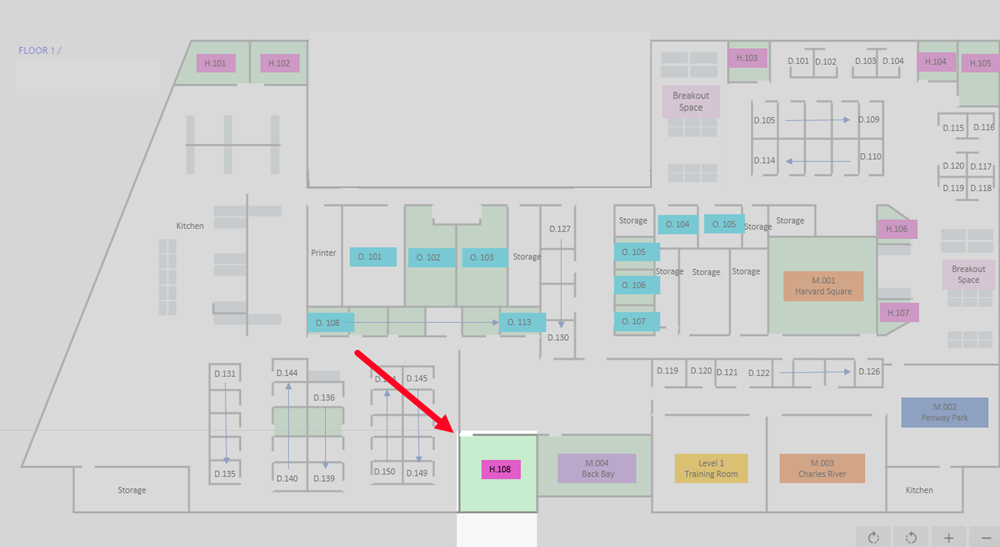
If your rooms exist then you can add the space profile to the room. In this example, you will add the ad-hoc room called H.108 to the space profile.
1. Click the Rooms tab.
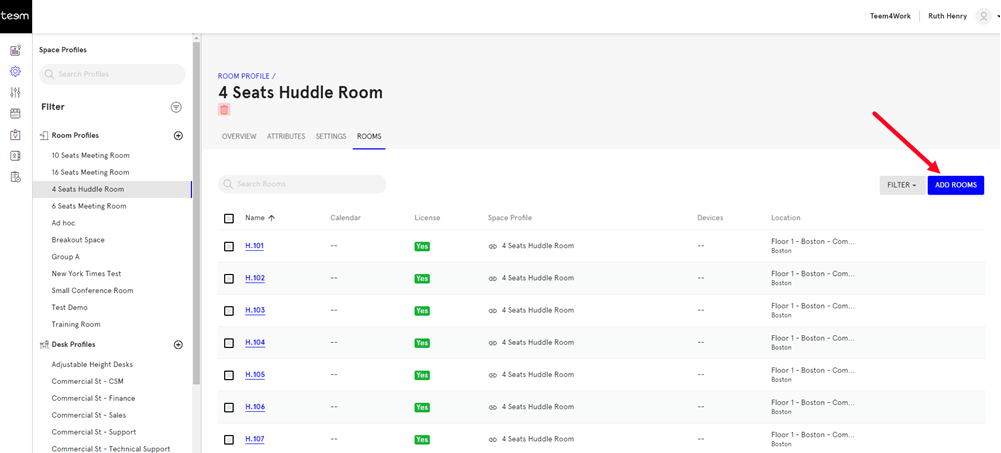
2. Click the ADD ROOM button.
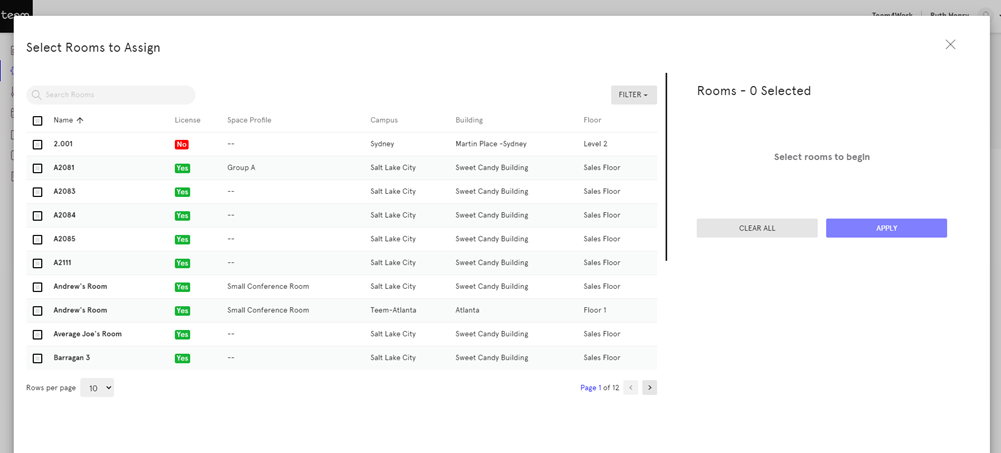
3. Click the FILTER button. The Filter form displays.

4. Filter for the location.
5. Click the APPLY FILTER button.
6. Either search for the room or browse the list for the room(s). In this example, you want to assign room H.108.
7. Select the room(s).

8. Click the APPLY button.
The message " Attributes and settings for these spaces will be reconfigured to match this profile. Previously unassigned spaces will lose all location inherited settings and overrides." displays.
9. Click the CONFIRM button.
The space profile is created.