Room Display (Eventboard) Troubleshooting
I am getting a ‘Failed to Reserve Meeting’ Error
So, you have come up to the EventBoard display and clicked the Reserve button wanting to have a quick meeting. When you do, you get an error that says, 'Failed to Reserve Meeting: Your meeting could not be reserved at this time.'
The EventBoard will give this error if the calendar you selected is read-only or no calendar is selected. This is most commonly a permissions error, but other scenarios may cause this error.
To resolve this: check that you have a calendar connected to the room that you are trying to book.
From Teem Web,
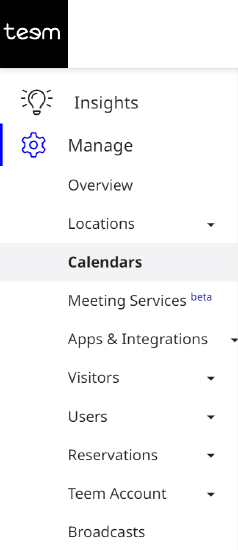
1. Click on Manage > Locations from the main menu.
2. Click on Locations, and then find the building, floor, and room that isn't allowing you to be booked.
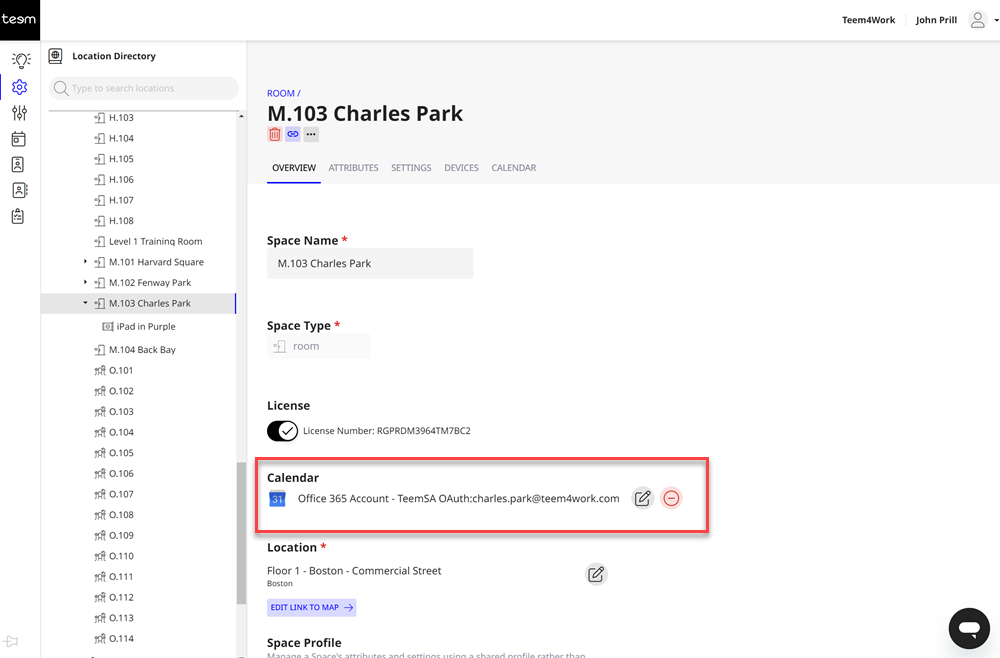
3. Click on the room name, and then click on Overview on the menu.
There you will see a Calendar section. Ensure that the box next to Room Calendar does not display the following message: Please Select a Calendar.
If you have selected a calendar but still get this error, you must check your calendar system and ensure you have the right permissions. The procedure for this depends on your calendar system; please refer to the Integration document for your calendar system for more information.
Lastly, having the EventBoard read an ICS calendar you have subscribed to is possible. The ICS format only allows read-only, so the 'Allow Reservations' feature will not work. In this case, it is best to turn off the feature in your Teem dashboard or select a different calendar.
Where to Find Crash Logs
On rare occasions, the EventBoard and LobbyConnect apps may crash; when this happens, a crash report is created. This report can be very helpful for us as it will tell our developers what went wrong and let them know if something in the app needs to be fixed or if the crash was due to some other issue with the device.
Follow the steps below to locate the crash reports on the device in the event that one of the apps crashes.
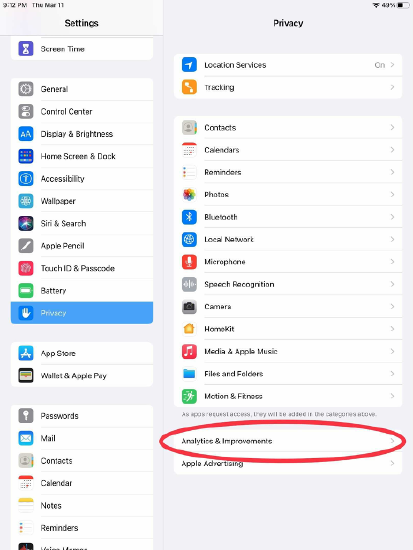
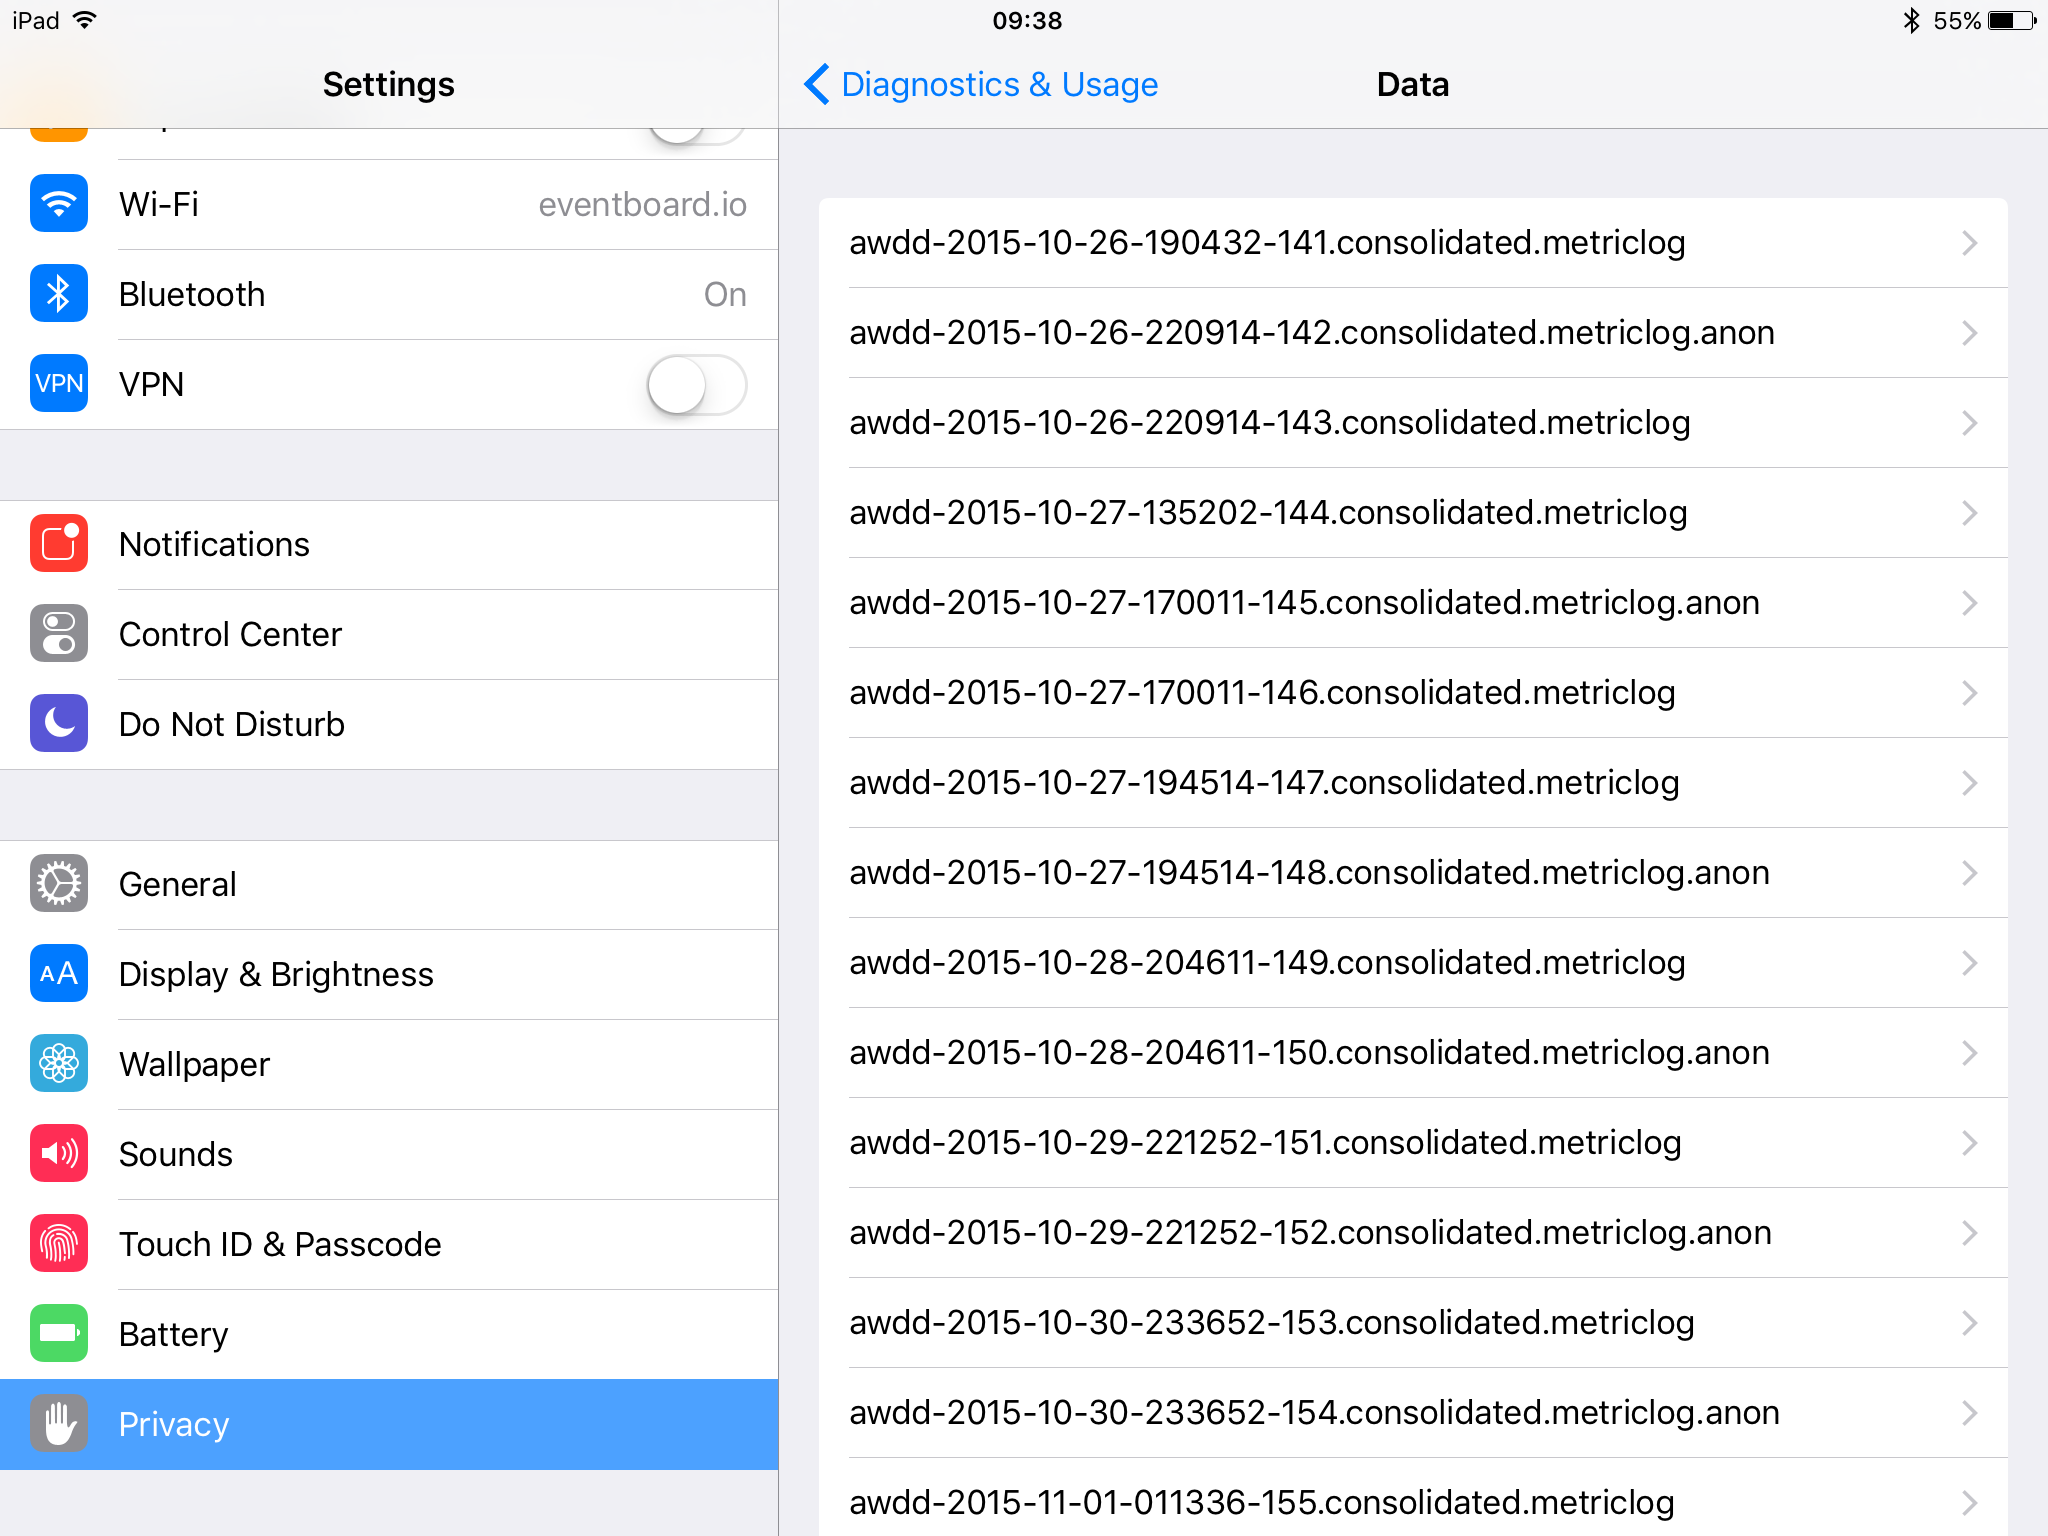
- On your device, click on the Settings app, then select Privacy.
- Scroll to the bottom of the privacy page.
- You'll be looking for either "Diagnostics" or "Analytics & Improvements," depending on your iOS version (instructions for each version are available here).
- Then you will tap “Analytics Data.”
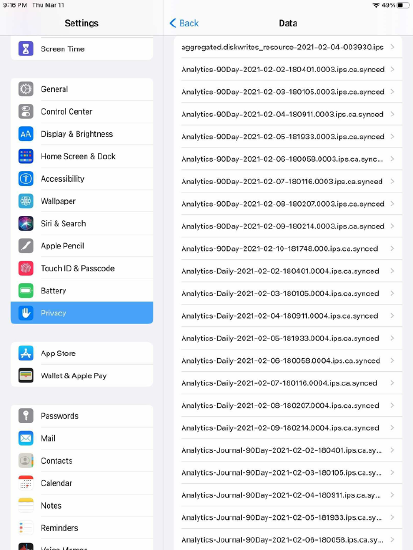
- Once in here, you will see all the crash logs for any recently crashed app.
- Find the name of the app that has crashed and tap on it. You may also see a LatestCrash.ips file.
- Now highlight all the text, copy and paste it into an email, and send it to us at support@teem.com.
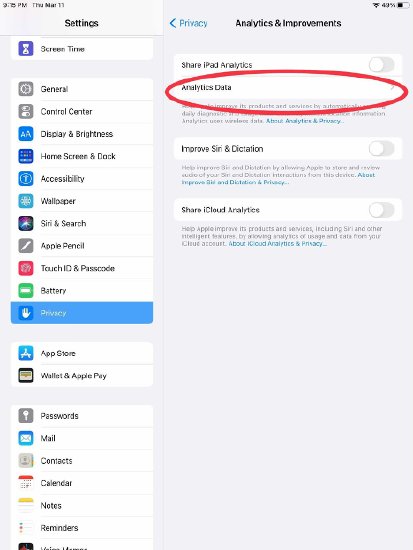
Scroll to the bottom of the privacy page. You'll be looking for either "Diagnostics" or "Analytics & Improvements," depending on your iOS version (instructions for each version are available here). Then you will tap “Analytics Data.” Once in here, you will see all the crash logs for any recently crashed app. You will want to look for the name of the crashed app and tap on it. You may also see a LatestCrash.ips file. From here, you will want to highlight all the text, copy and paste it into an email, and send that text to us at support@teem.com.
Eventboard Events not appearing on the organization's calendar.
In some instances, booking reservations may not appear on the calendar. The following are a few steps that can walk you through the process to correct this.
- The first step is to verify that the event you created does show on your organization's calendar. If it's not there, that would prove that the event was not created successfully.
- If the event shows on the calendar, double-check that the event was accepted. Usually, the event creator will get a confirmation email that the calendar successfully created and accepted the event. If the event was not accepted by the calendar, you’ll need to ensure that the proper steps were taken to book that event. Some organizations also channel their booking requests through an admin to approve them, be sure to verify the protocol for booking in your organization.
- If the calendar has accepted the event, then that proves that you have successfully created it, and there should be no issue with how it was booked. The next step would be to verify that the EventBoard app is up to date for the device in question. You may also want to consider updating the OS if it’s far out of date (both of these can be found on the locations page on your Teem web portal when viewing a device).
- Once you’ve verified that the device is up to date, let’s check if your calendars are producing any errors. You can view this from the Calendars page in your Teem web portal. If there are any errors, they will appear in red under the “Last Sync” column; otherwise, it will show you the last successful sync time. If you see an error that does not provide clear instructions, contact support to understand what the error means.
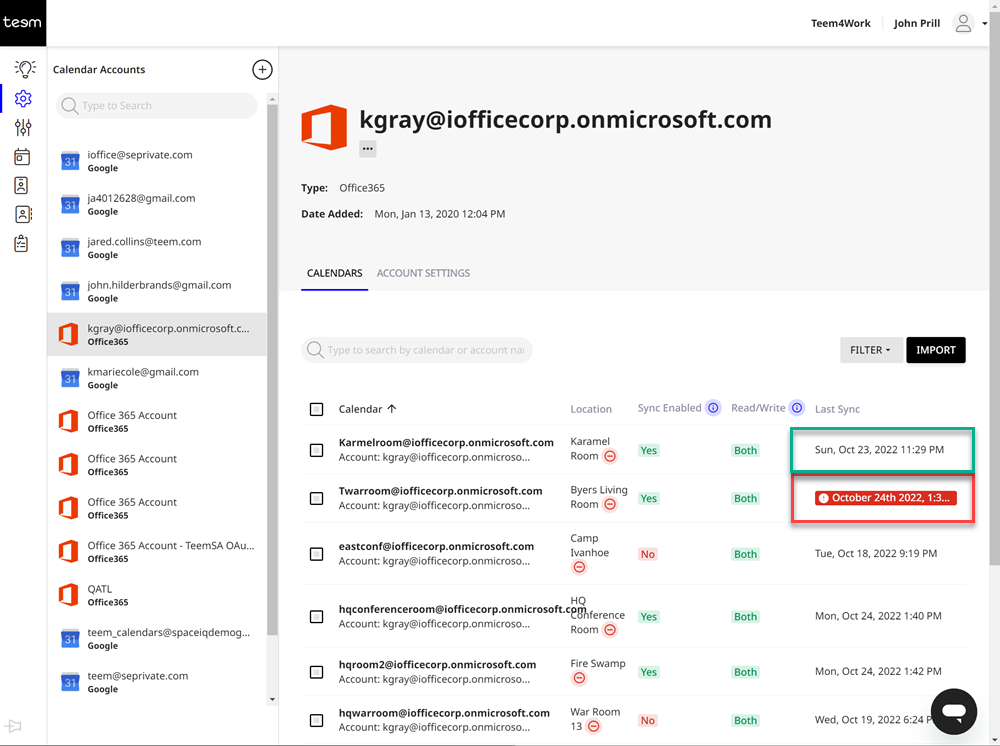
- If you do not see an error, take a look at the last sync time to see if it reflects the last time an event was created for that event. If the last sync time does not reflect the last time an event was created, this means that Teem does not recognize that a change has been made to that calendar.
- Next, let’s manually re-sync the calendar for the device in question. You can do this by selecting the check-box beside the calendar name and clicking on the option to “Re-Sync” that will appear above.
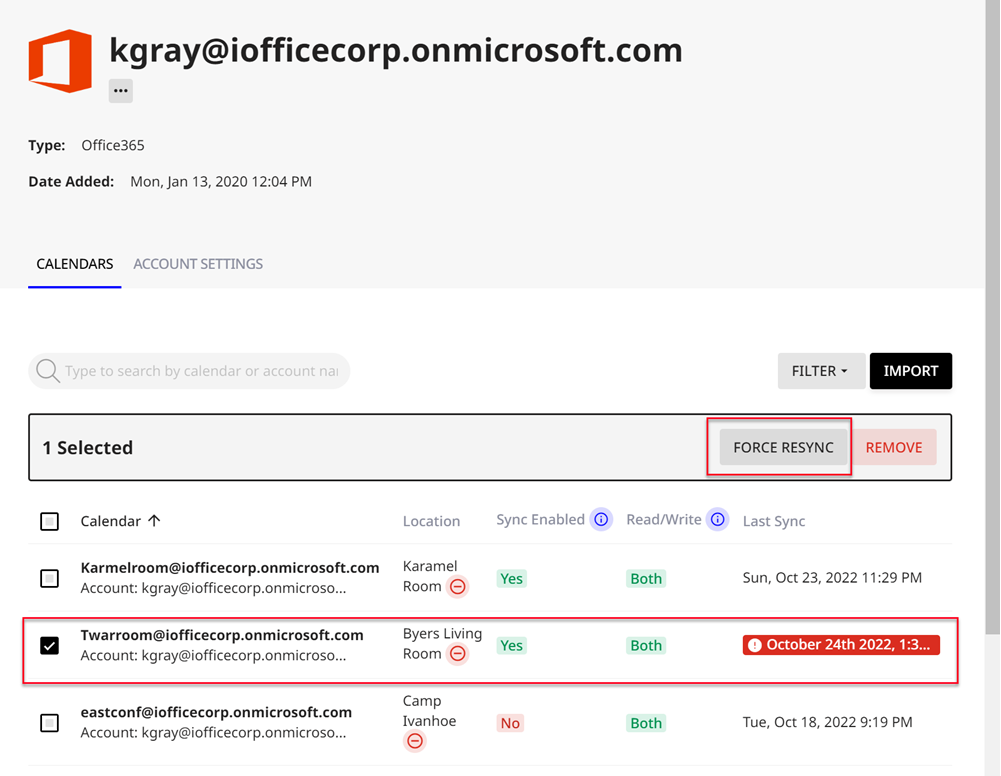
- Suppose the manual re-sync causes the event to appear on EventBoard. In that case, this indicates that your calendar fails to notify Teem that a change has been made to update the app automatically. If you are an Exchange user - this is likely due to your Exchange service failing to send push notifications to Teem.
- There’s also a possibility that your network or firewall is preventing this communication, in which case you can review our ports article:
401 Server Error
Error: Could not connect with the credentials provided.
The message returned from the server was: The request failed. The remote server returned an error: (401) Unauthorized.
A 401 error indicates that Teem cannot authenticate to your calendar(s) due to authentication failure (most likely because the password entered in the Teem web portal for that calendar account is invalid or the password for your calendar account has expired). A common resolution for this is to update the password for that calendar account and then re-authenticate that account password in the Teem web portal (Manage > Calendars > Account Settings). Once you have re-entered the new password, re-sync your calendars by selecting the “Select All” checkbox on the Calendars page and choosing “Re-Sync”
You can tell by looking at the calendar in Teem - if it displays the service account's email address, it means they're not using OAuth.
Non-OAuth Account Connection
OAuth Account Connection
A new service account will need to be created to correct this connection, and the current calendar connections will need to be imported.
From TEEM Web:
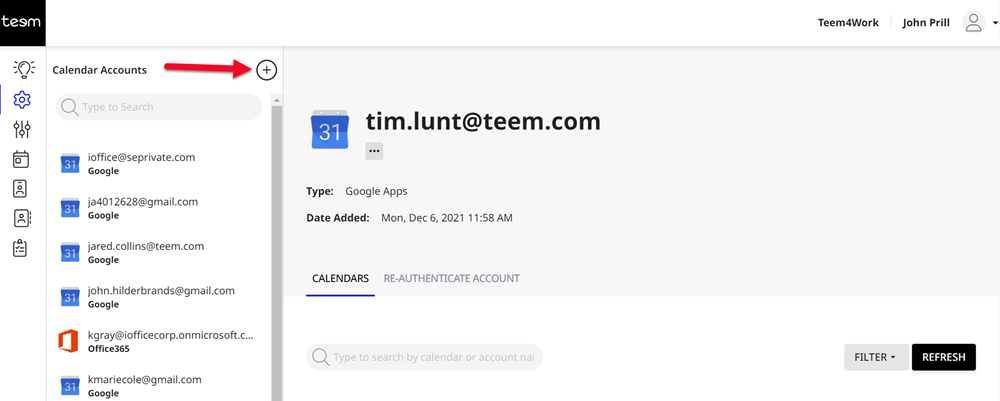
1. From the menu, click on Manage > Calendars
2. Select the plus button to add a new service account
3. You will see the option to choose Office 365 Oauth
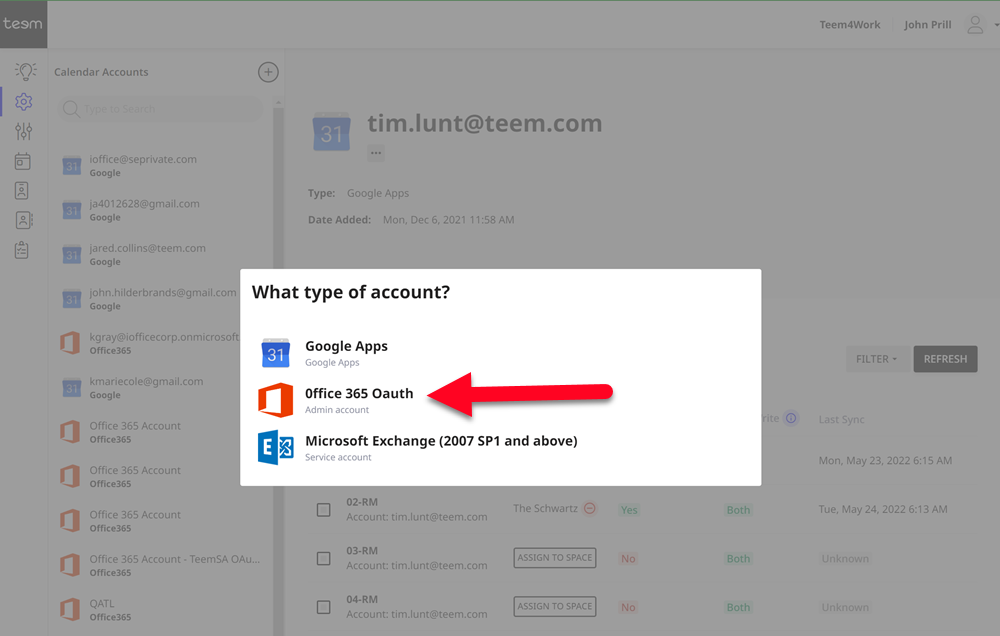
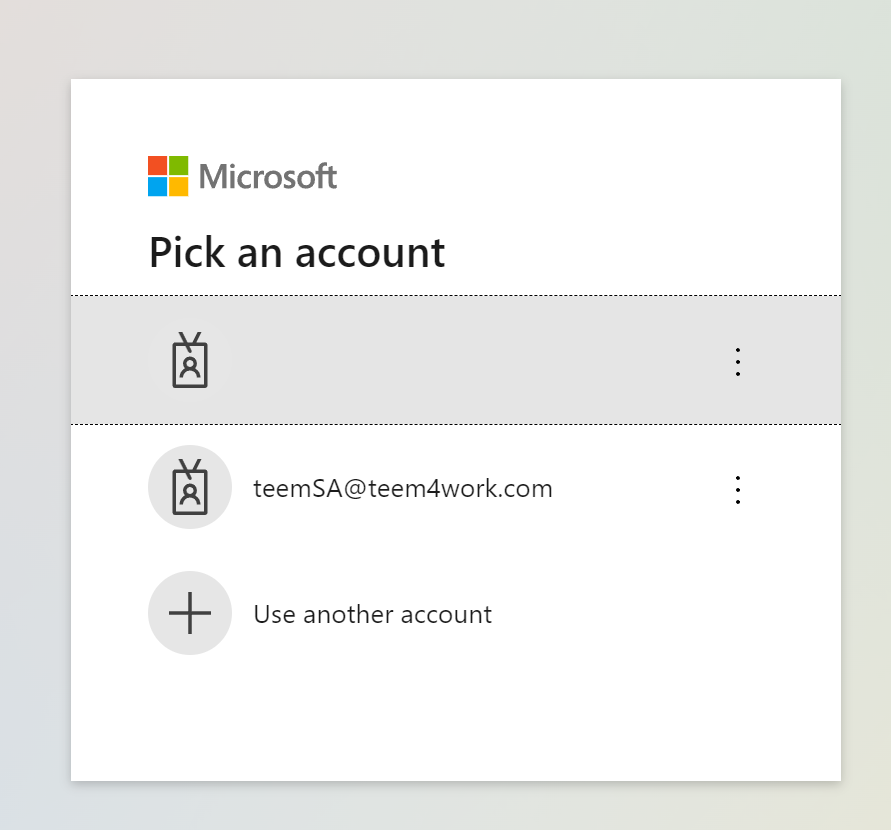
4. Selecting that option will push you to the Microsoft portal to sign in via Oauth.
If your account is not listed, select the option for Use another account.
5. You may need to refresh the Teem page and import the room resource calendars
This link will show you more about setting up the room resource calendars:
https://help.teem.com/integrations/t...e-365-calendar