iPad Device Recommended Settings for Eventboard
This document details the settings that TEEM recommends to use on iPads running Eventboard.
iPad Device Recommended Settings
We have found certain device settings allow for a smoother experience using EventBoard. While settings should be selected based on individual needs, the following can be a great baseline.
Ask to Join Networks
Under Wi-Fi, set Ask to Join Networks to OFF.
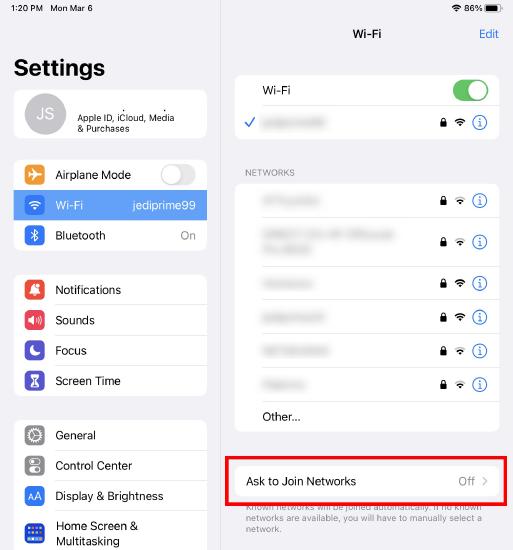
We have found that when this is on and Wi-Fi drops while in Guided Access, the iPad may reboot.
Bluetooth
The app does not use Bluetooth, and you will conserve the battery by turning it off.
1. Navigate to Settings > Bluetooth.
2. For the Bluetooth setting, toggle this to OFF.
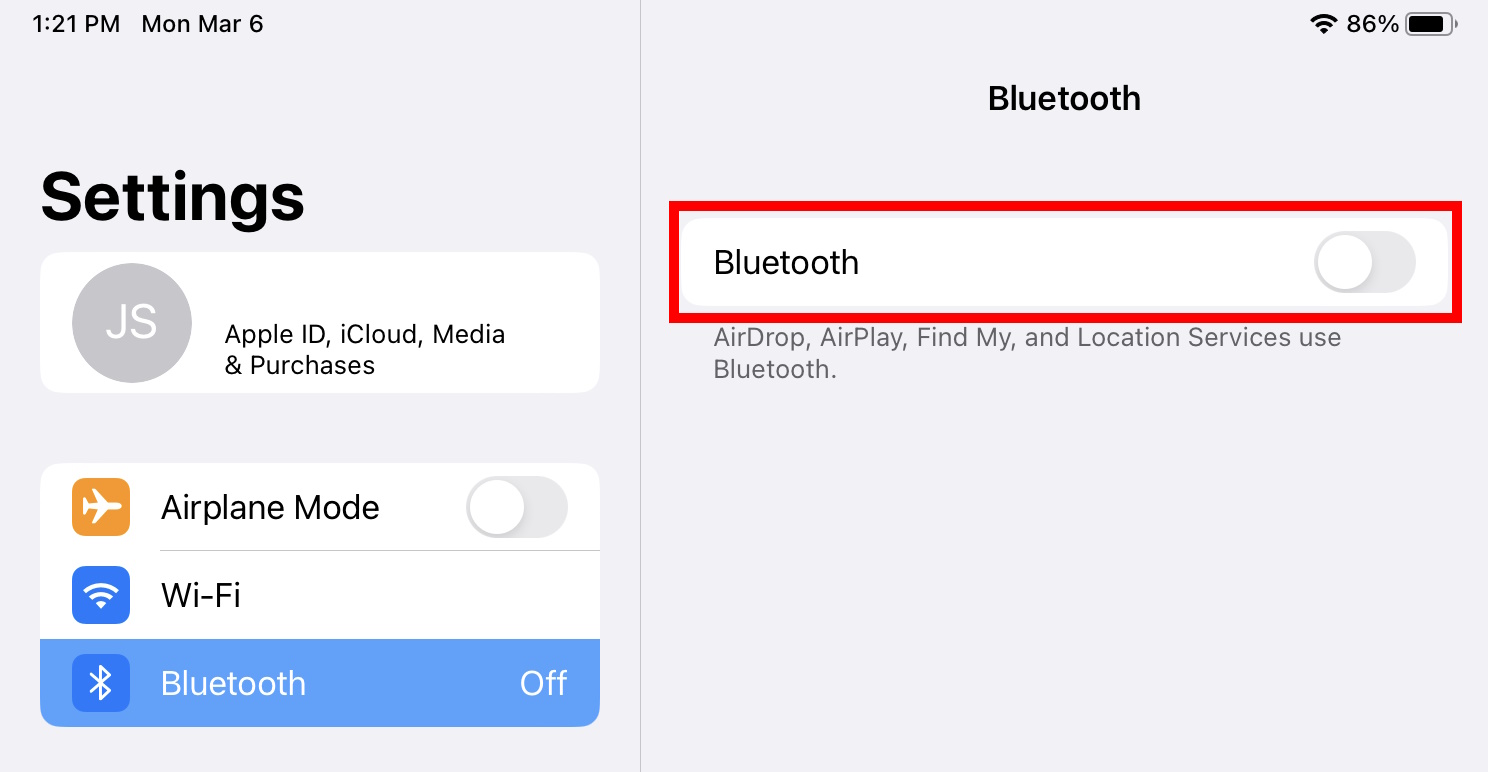
Bluetooth is only needed for a few things. By turning that off, you can conserve and better use the battery.
Background App Refresh
Under General > Background App Refresh, make sure that EventBoard is set to ON.
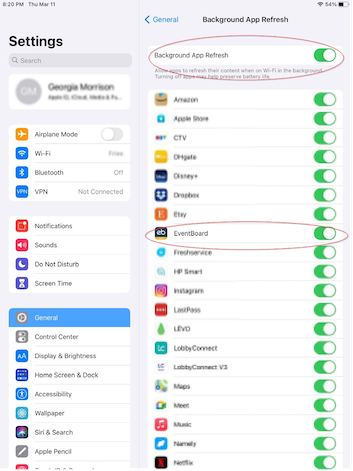
This is a required setting to make sure that we can get the updates that we need.
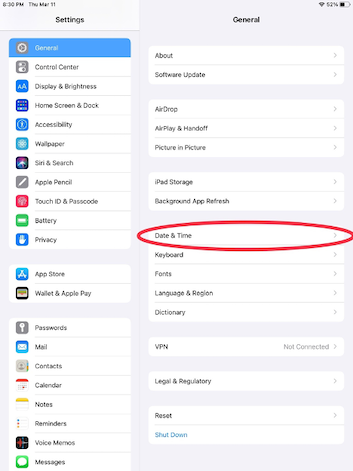
Date & Time
Under General > Date & Time, turn OFF Set Automatically and confirm the appropriate Time Zone.
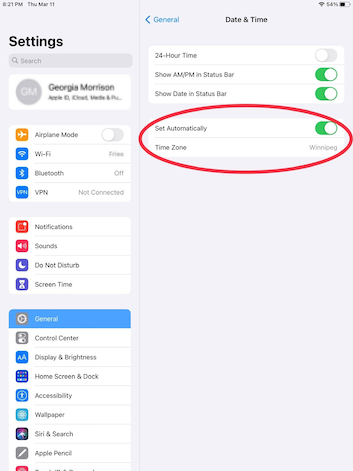
This can help EventBoard know the device's time zone and localize specific time displays. In addition, this can help avoid time drift in the app itself.
Privacy
Under Privacy, turn Location Services OFF.
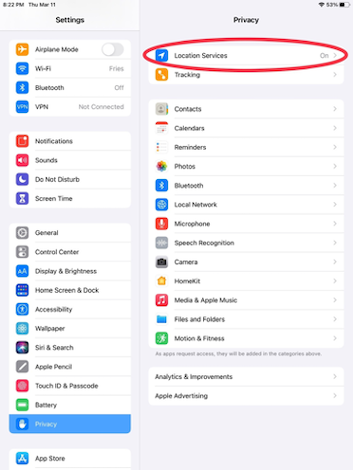
Having this on increases power use. In addition, it often doesn't work that well indoors. And in most cases, the iPad is mounted to the wall.
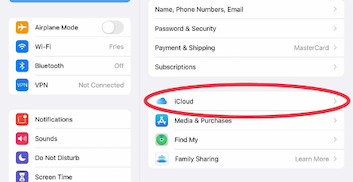
iCloud
If you are using specific iCloud Calendars or iCloud Contacts turn off the following:
- iCloud Drive, Photos, Mail, Reminders, Safari, Backup set to OFF
- Find My iPad set to OFF.
If you are not using these iCloud assets, sign out of iCloud.
iCloud can be noisy. Notifications about FaceTime, Messaging, Missing Backups, etc., will appear on every device that the iCloud account is on, appearing in front of EventBoard and possibly making the app background. We recommend turning off Messages and FaceTime.
For those who also want improved security when EventBoard is on, we encourage using Guided Access Mode.
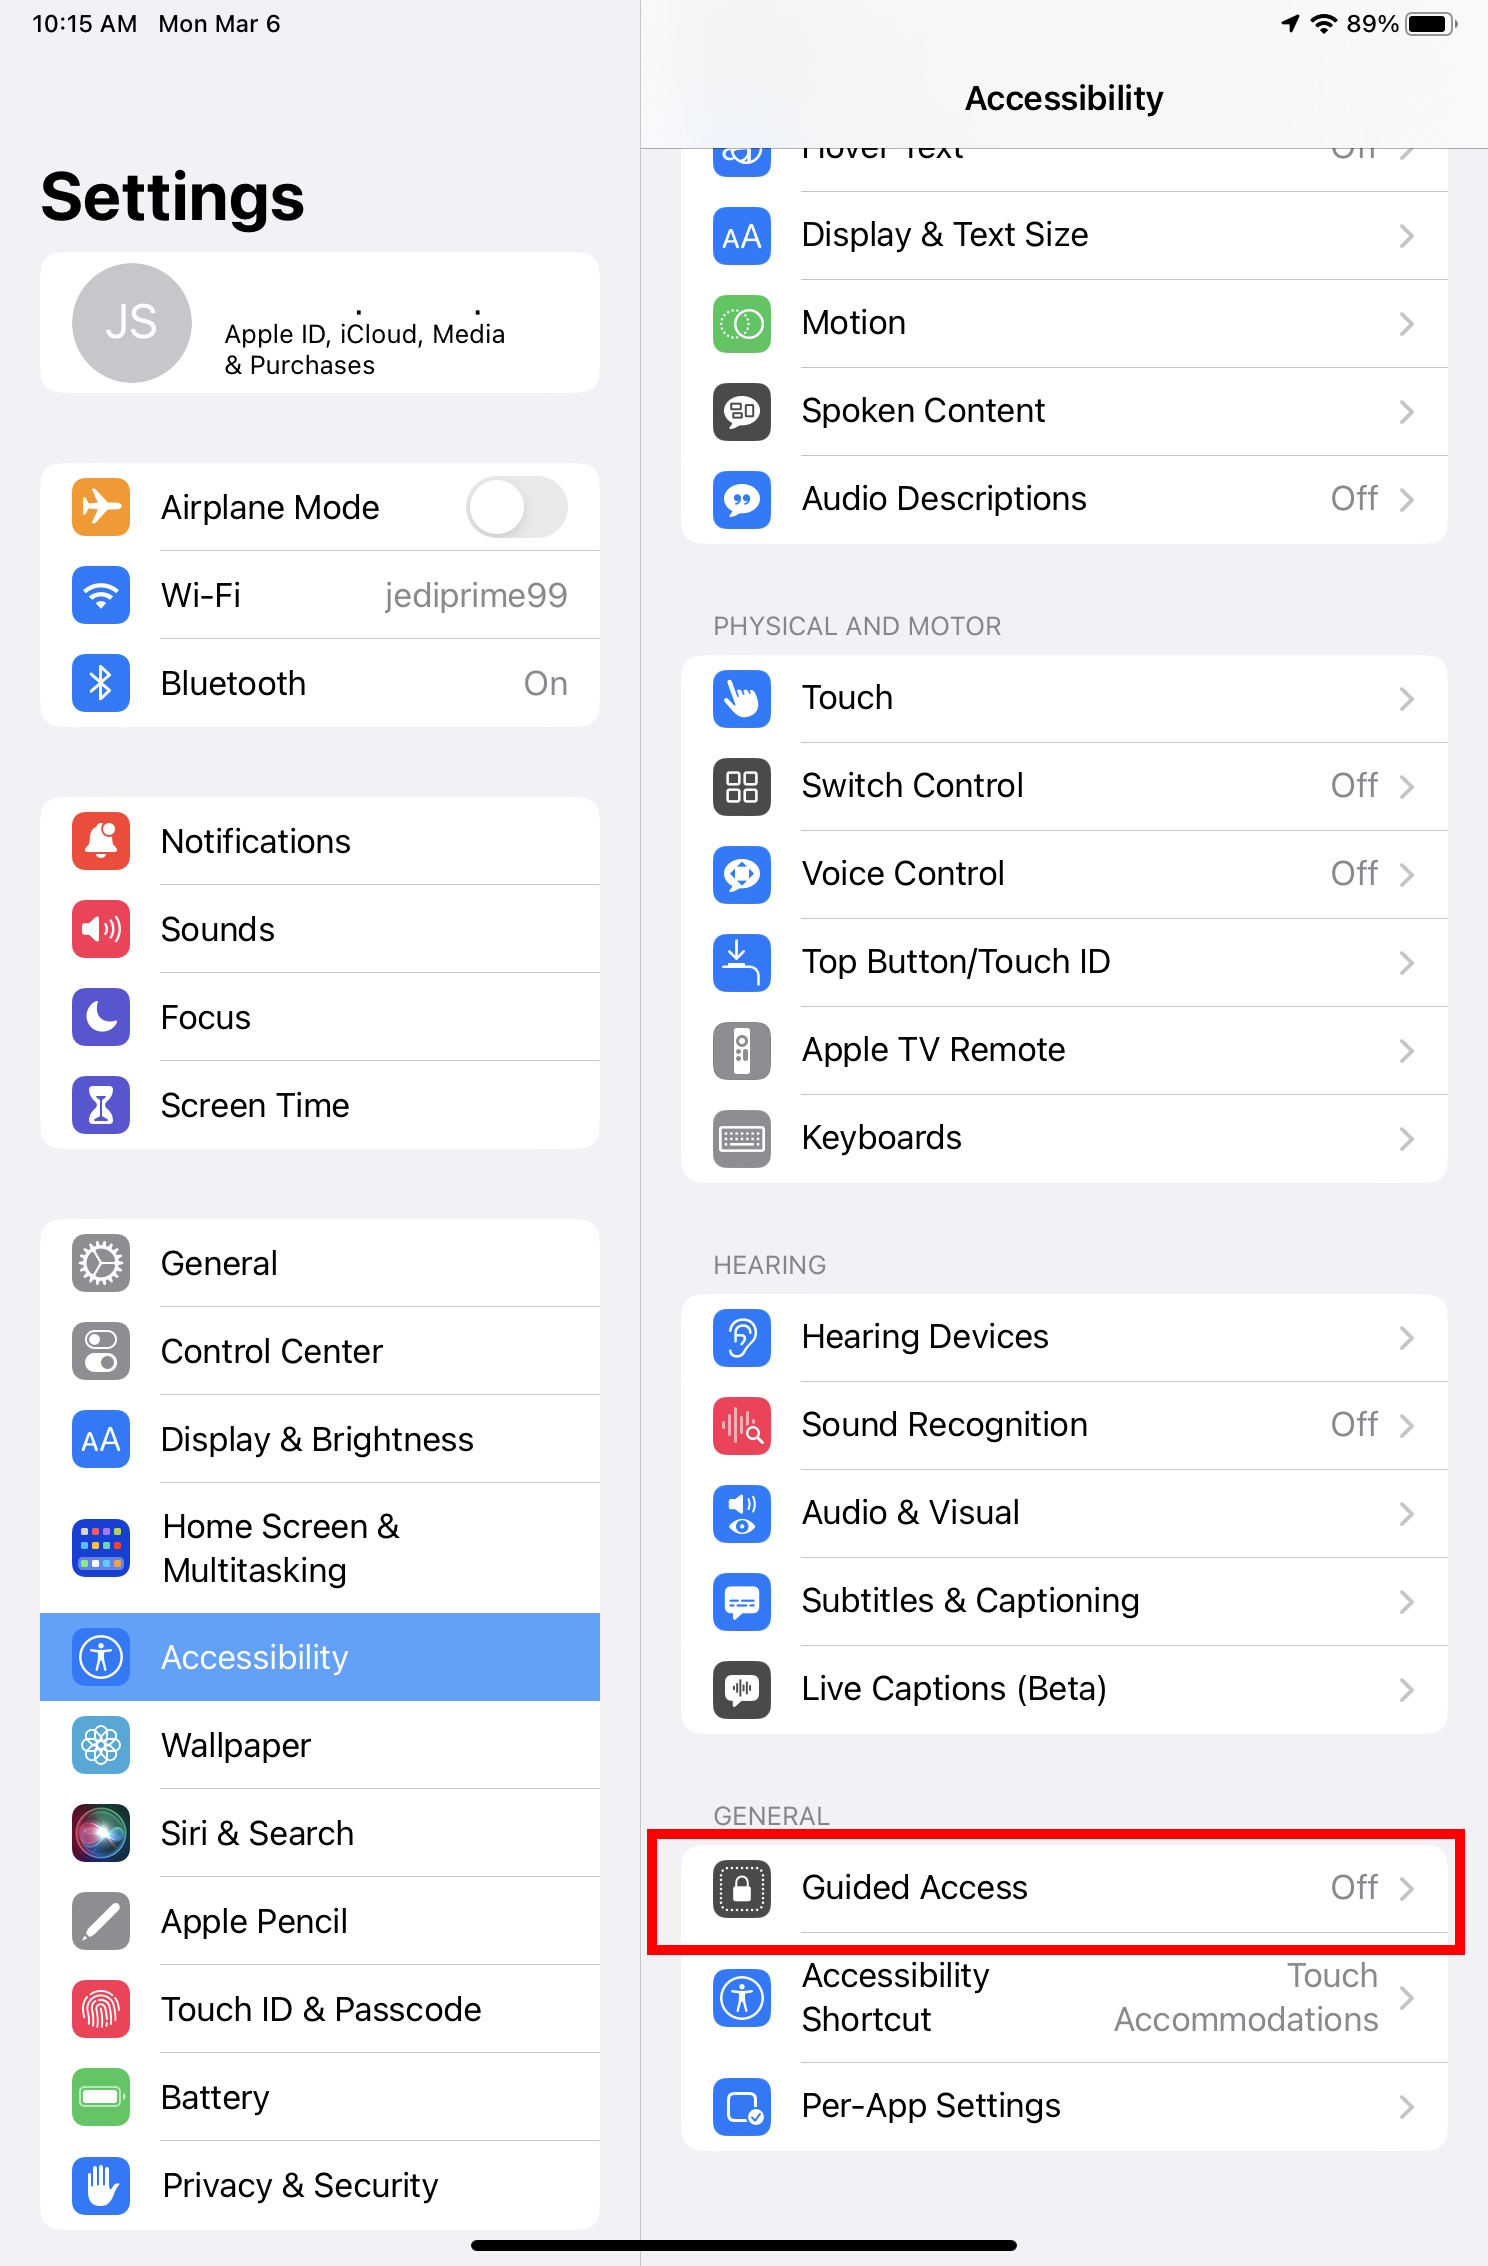
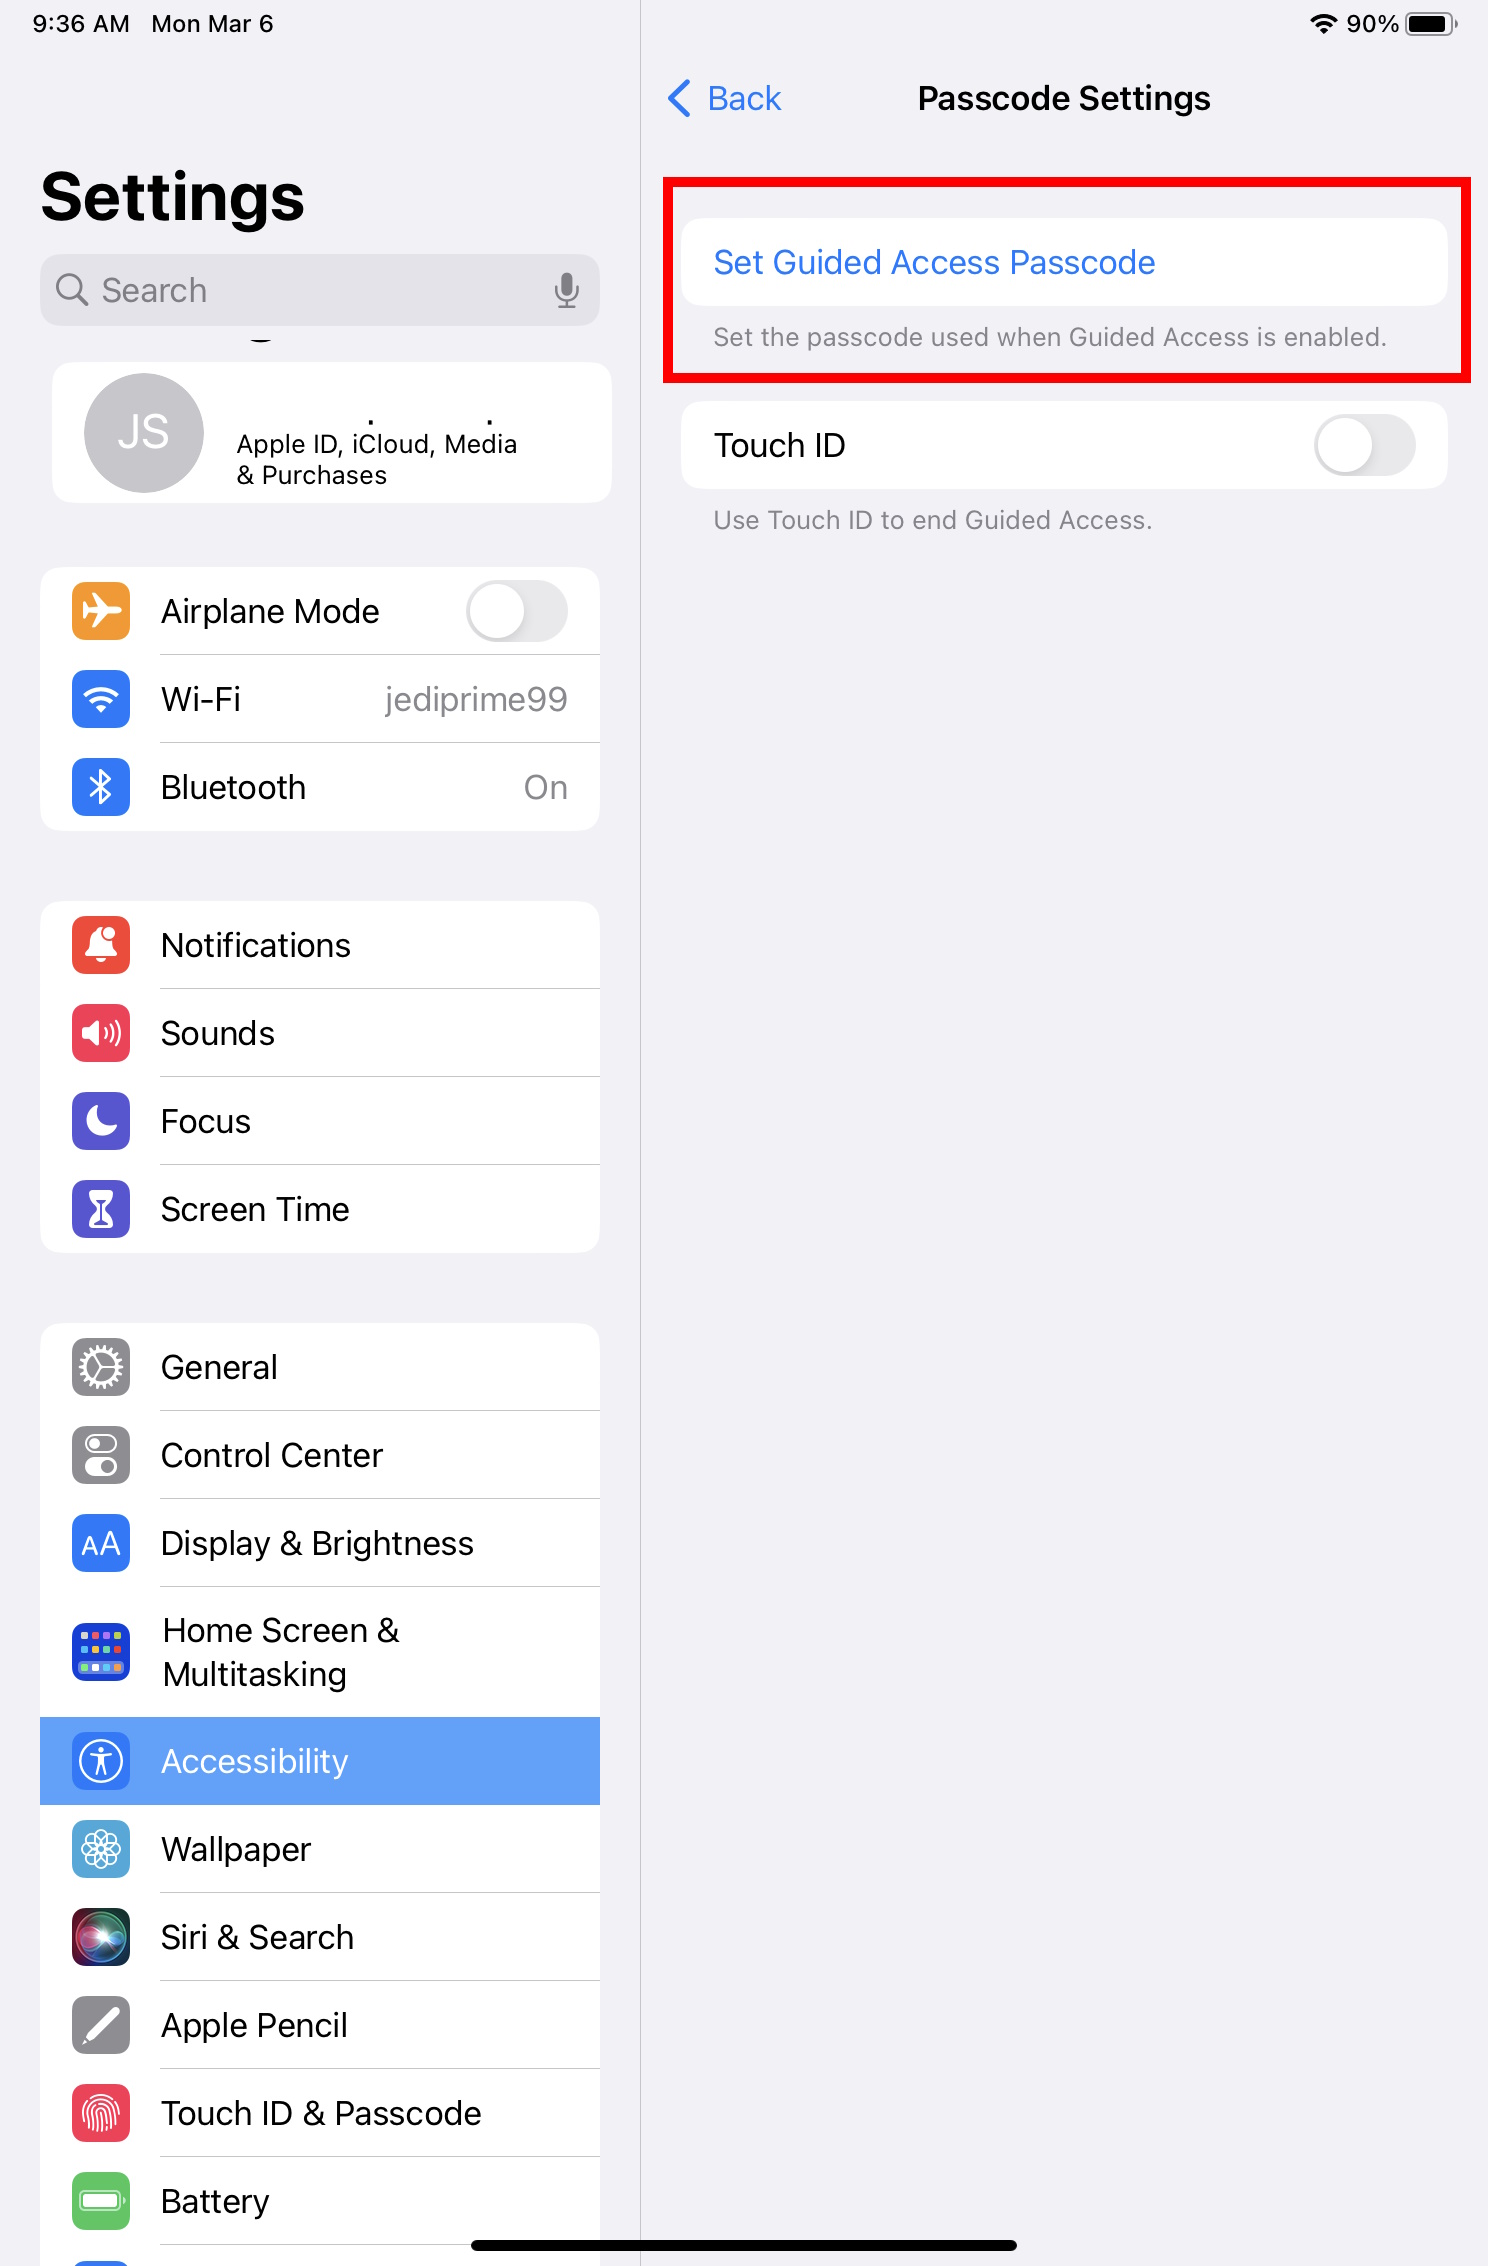
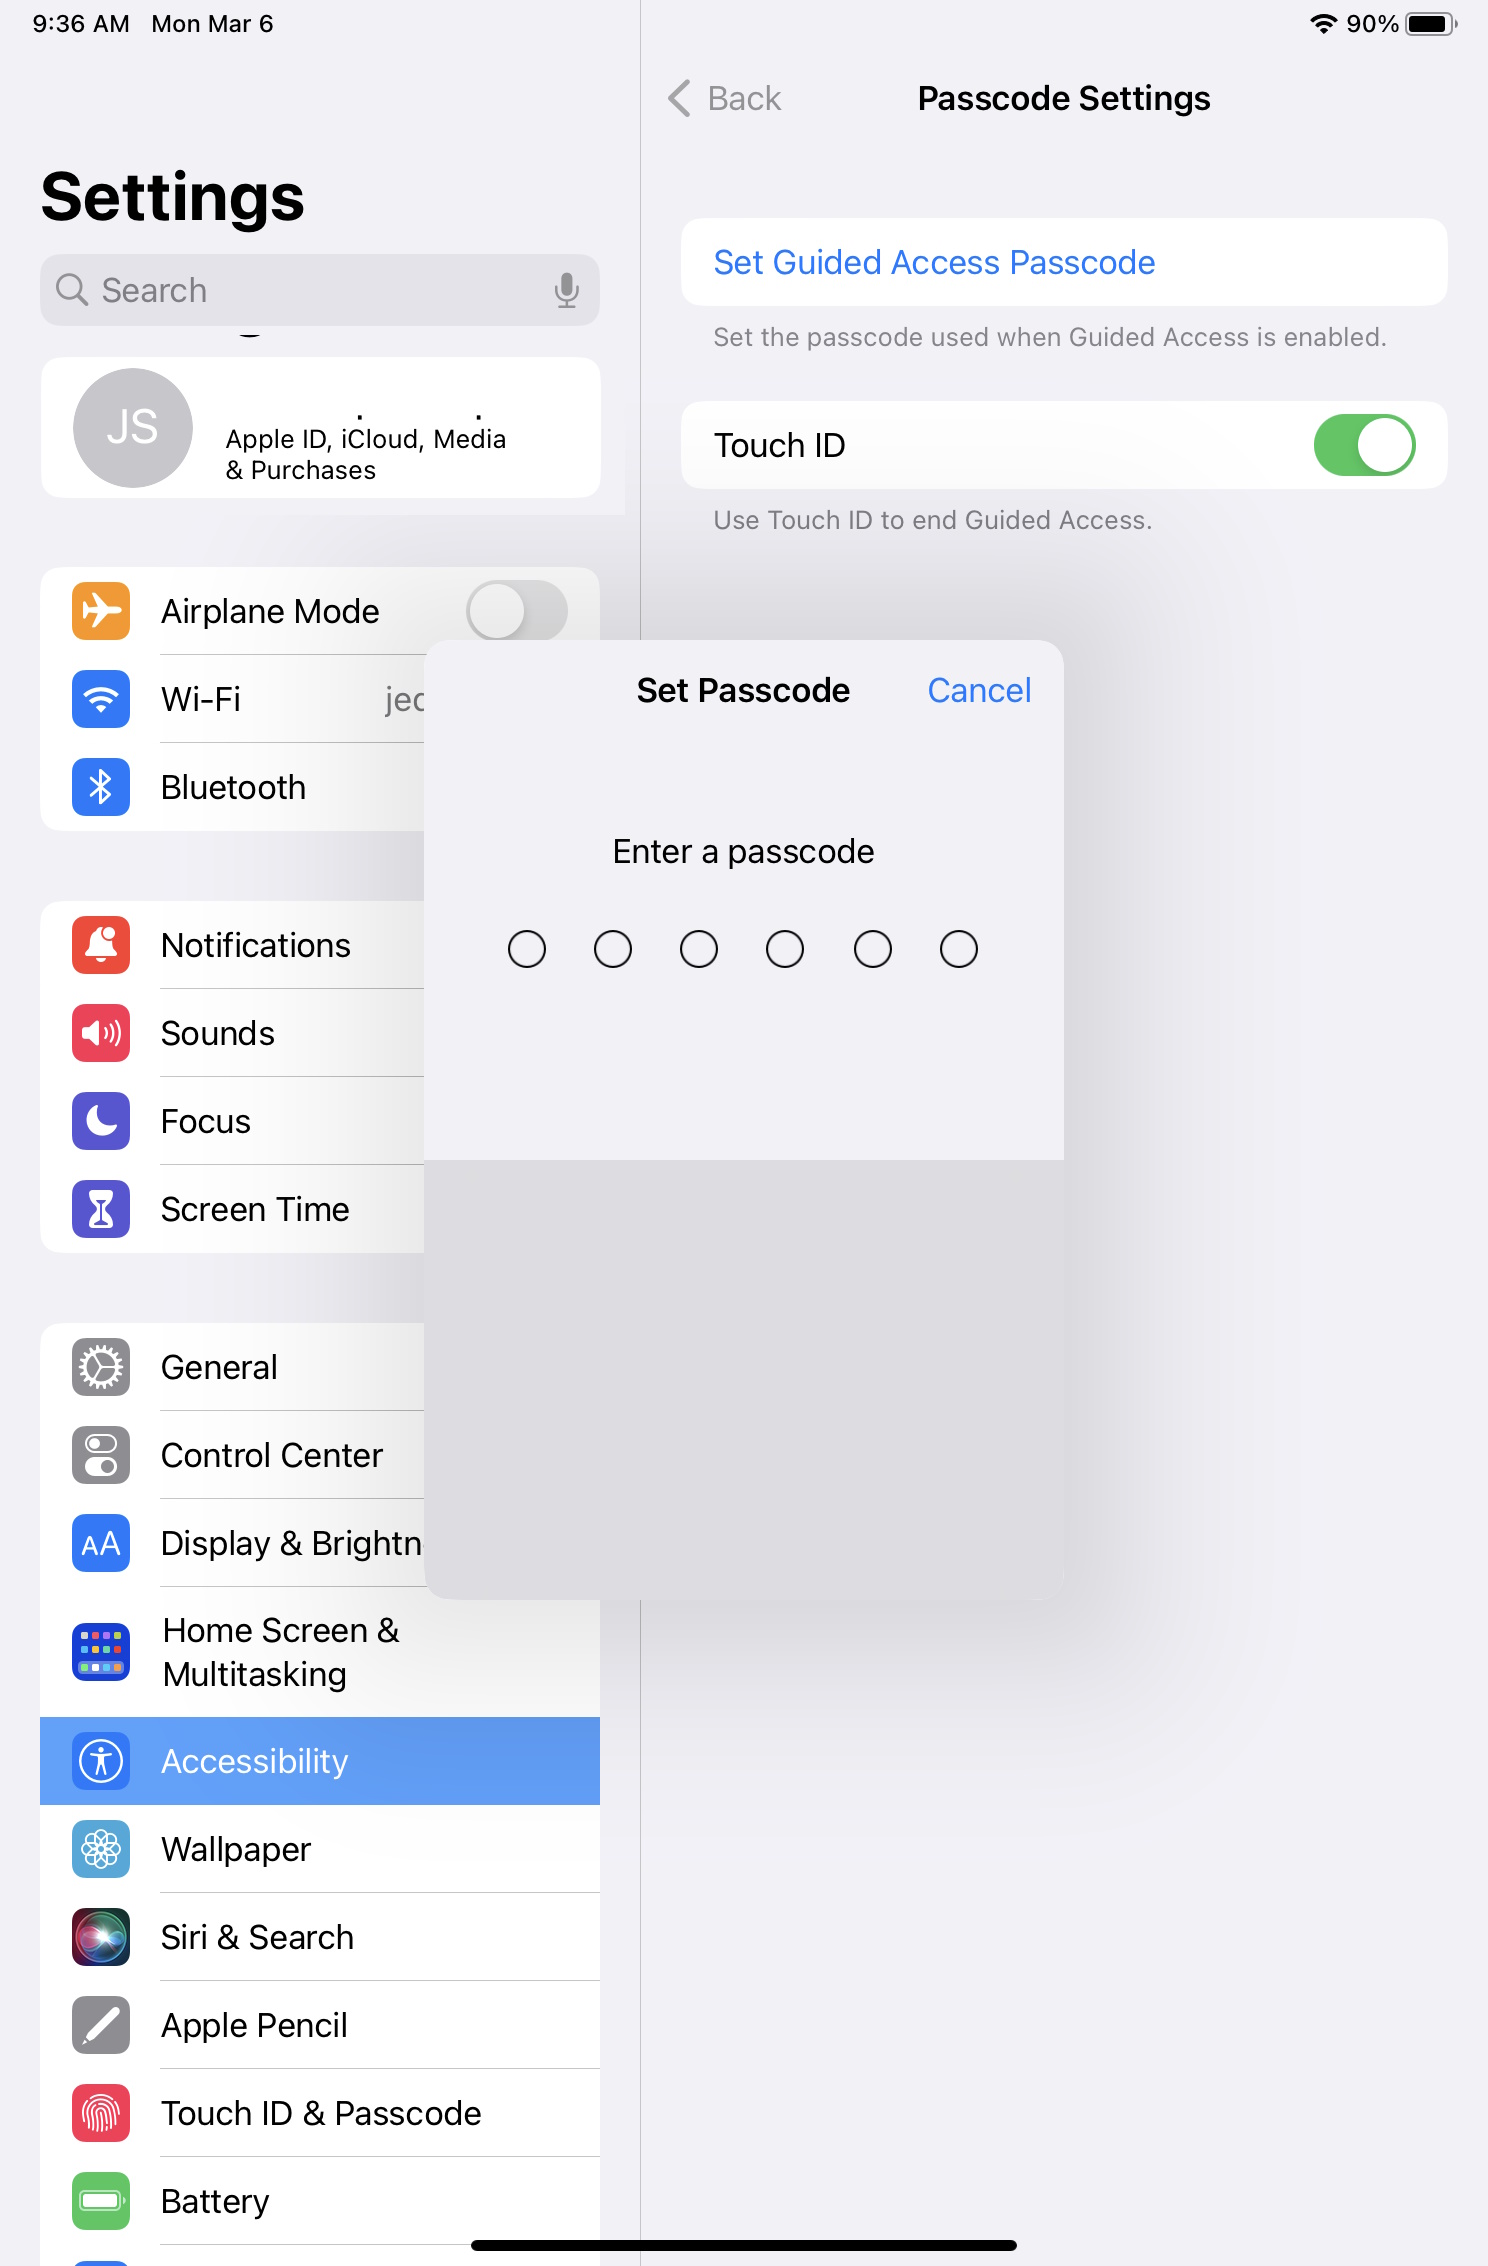
Guided Access Mode
In iOS, we have the ability to set up Guided Access Mode on the device. This mode will disable any physical button and lock the device on the EventBoard app. In the unlikely event that EventBoard crashes, if it is in Guided Access Mode, the app will reboot itself.
From the iPad device, complete the following:
- Tap the iPad Settings icon.
- Tap Accessibility.
- Under the General section, tap Guided Access.
4. For the Guided Access setting, toggle this ON.
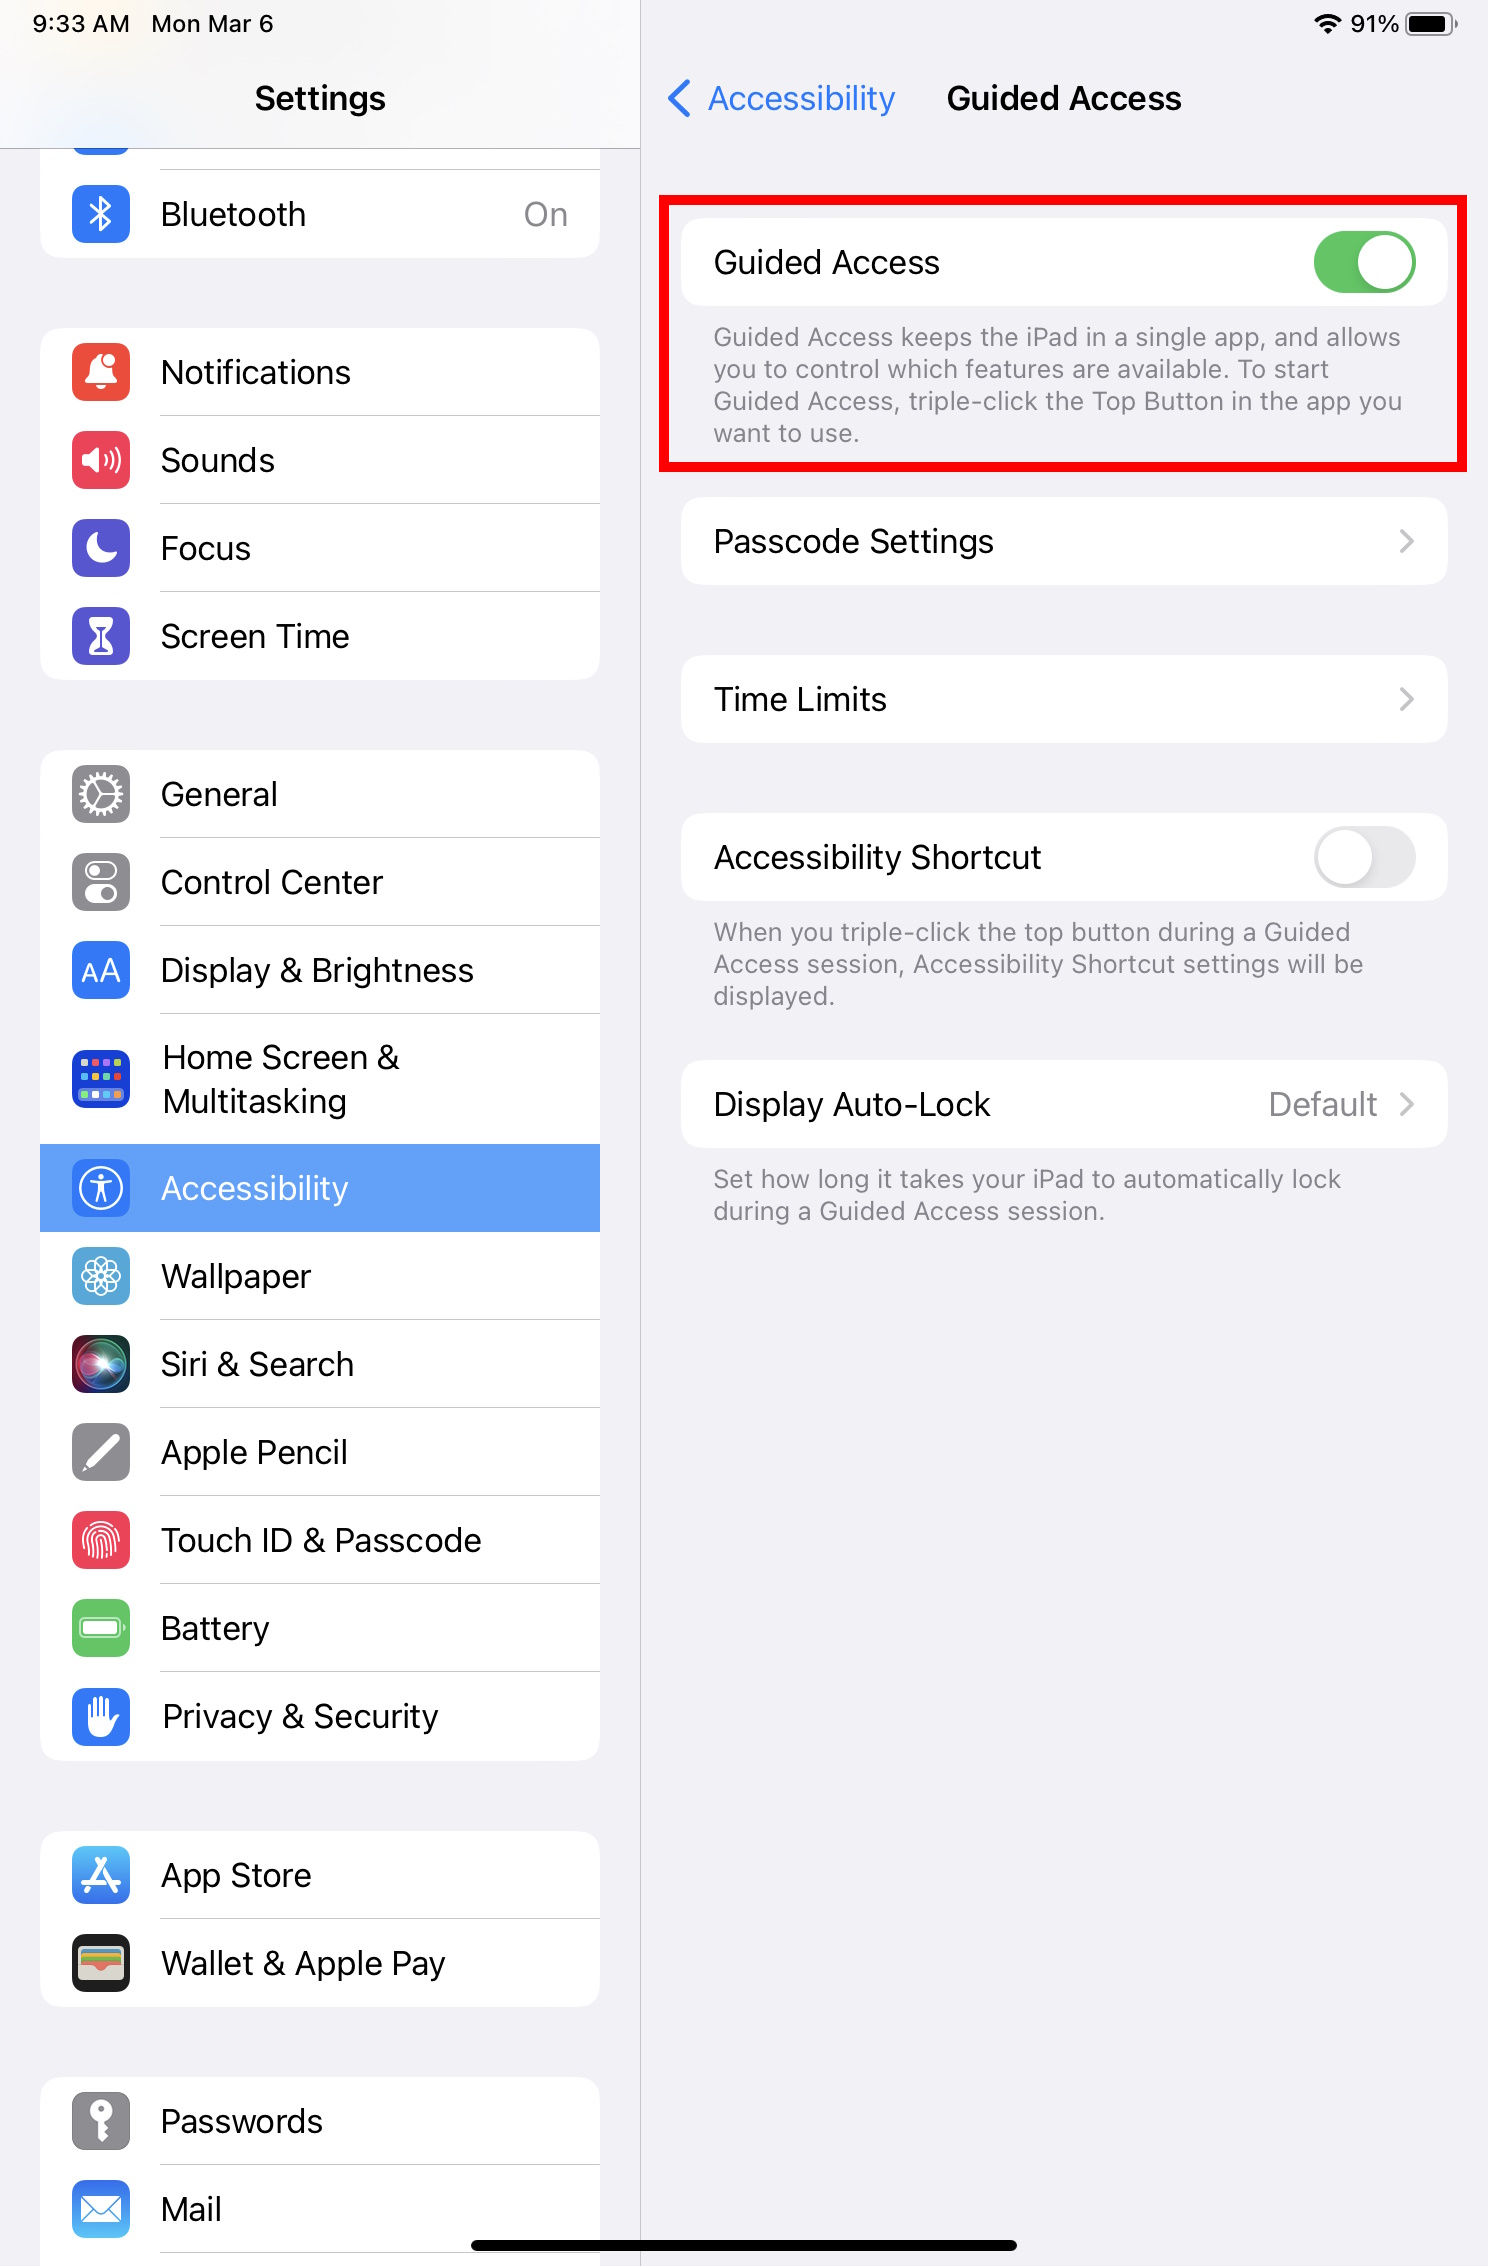
5. For the Accessibility Shortcut setting, toggle this to ON.
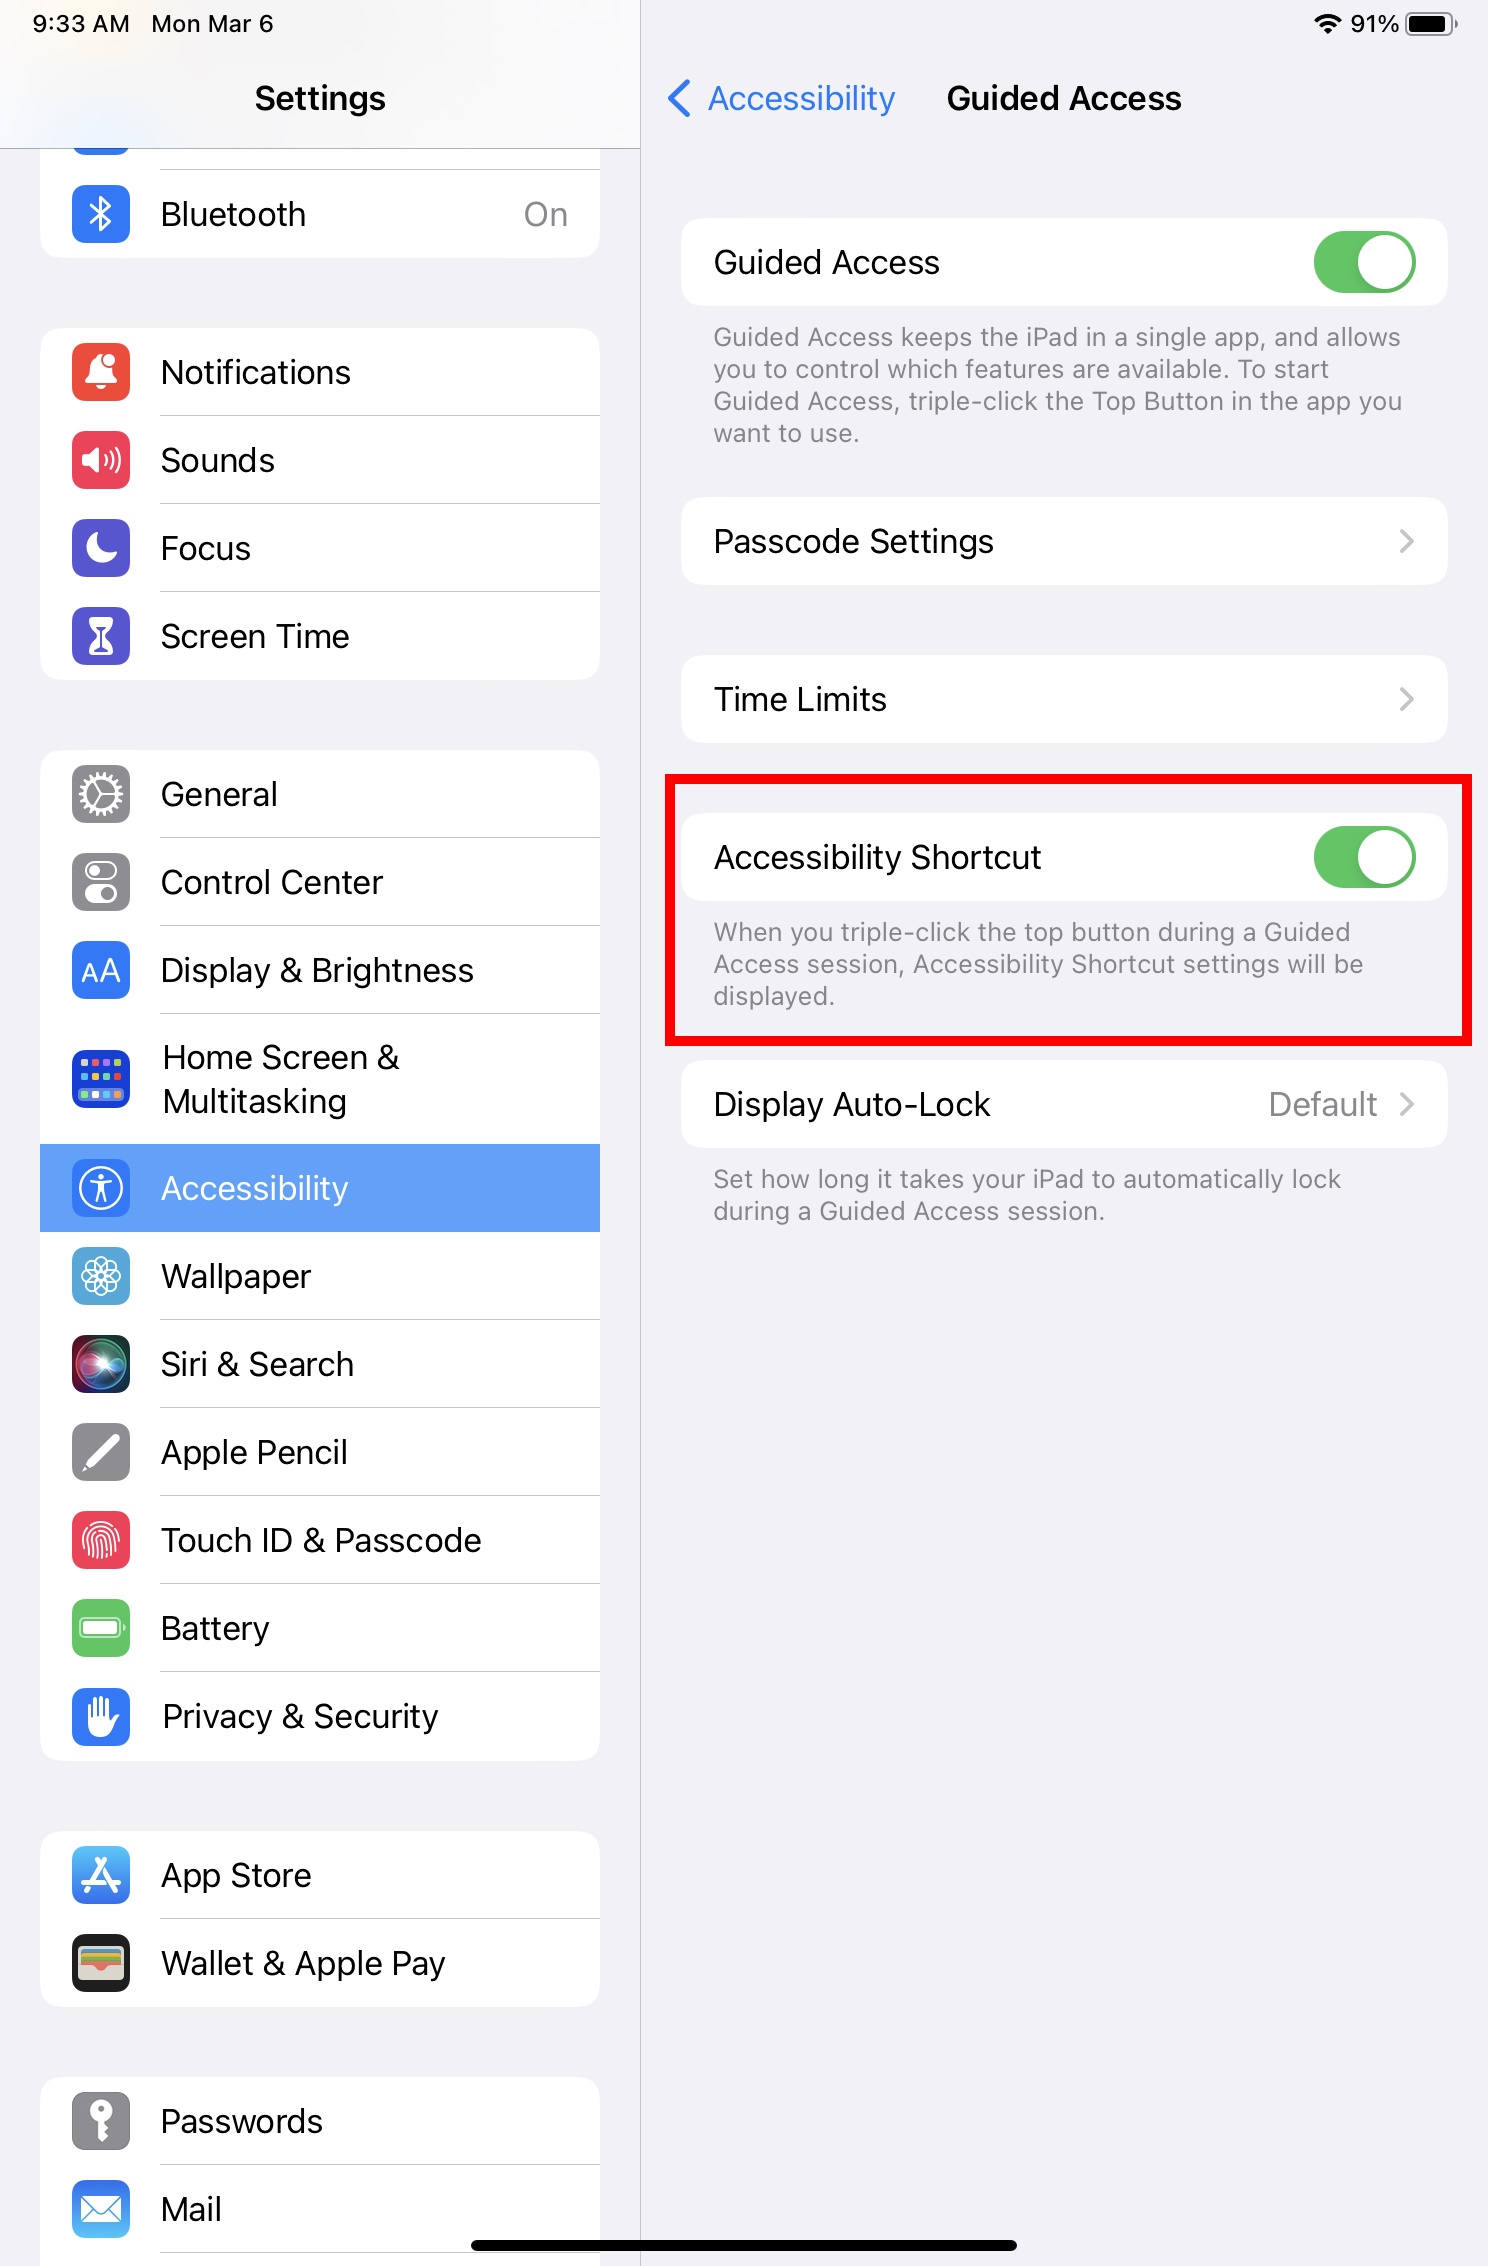
6. If you use iOS 14 or later, you must toggle the Display Auto-Lock setting to ON.
7. Finally, set the passcode and record the passcode in a safe location.
7. Launch the EventBoard app.
8. Tap the Home Button on the device three times. This will launch the app into Guided Access Mode Setup.
9. Tap Resume or Start to begin Guided Access Mode.
10. Tap the Home Button on the device three times to exit. This will bring up the password prompt; when entered, you can tap End to exit Guided Access and leave the EventBoard app.
Additional information about Guided Access can be found on Apple's website.
Change the Display to 24-Hour Time
If you want to change the iPad's time to display in 24 Hour time, this can be done in the iPad's settings.
1. Make sure your iPad is up to date on the latest iOS software.
2. Tap the Settings app.
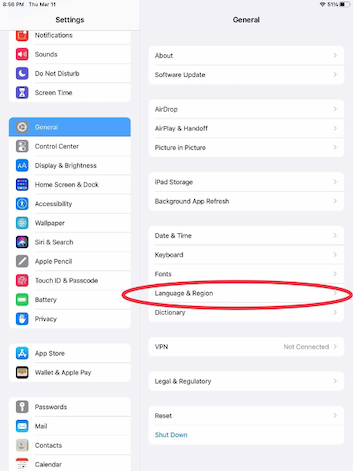
3. Tap the General tab.
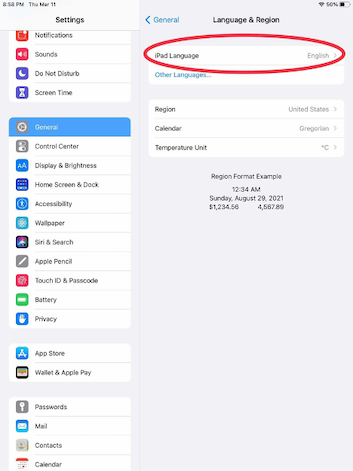
4. Tap the Language & Region button.
5. In the Language & Region menu, you will tap the iPad Language option.
6. Change it to your desired language.
7. Now you can go back to the General menu.
8. Tap the Date & Time option.
9. Tap the 24-Hour Time toggle to ON.
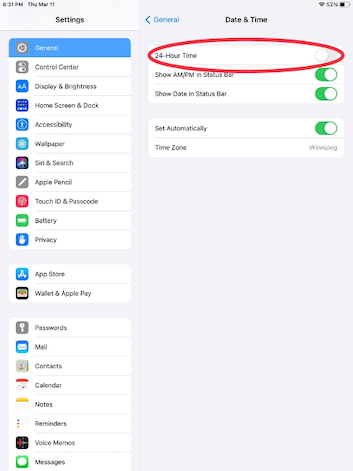
10. When this is done, force close and re-open the EventBoard app to ensure the time is being displayed in the desired format.
Remember to make sure your time zone is correct.
Device Brightness & Operating Hours
We recommend that customers set up device hours to be on during work hours and off during away hours. This will keep your Display Devices from being fully lit all day, every day, by scheduling device hours in your EventBoard Admin Dashboard. Though iPads do not typically experience burn-in, the cost of always-on displays can get expensive. As well as allow them to run cooler in an enclosure.
1. To access the brightness settings for the device, navigate to eventboard.io.
2. Near the top of the page, click on the drop-down arrow next to 'Spaces' and select 'Devices.'
3. Select the device you want to change the settings for and scroll down to the section called 'Device Configuration.'
4. Select your desired percentage.
5. Once selected, click on ‘Save Changes’ at the bottom of the page.
6. To access the Device Schedule, click on 'Device Setup' near the top of the page.
7. Scroll to the bottom of the page and see a section called 'Device Operating Hours.’
8. You can add a schedule or edit the current schedule by clicking on the times listed; once they are set to your desired time, select the green check mark, and it will be saved.
We suggest you set the Awake Brightness between 70% and 100%, then set the Asleep Brightness between 10% and 0%.
Awake Brightness - Recommendation: 70%
Asleep Brightness - Recommendation: 0%
Device Brightness Hours - Recommendation: Business hours for your organization.
Adding schedules for your devices allows you to conserve energy and lengthen the life of the device screens. Outside the defined set Brightness Hours schedule, the devices will automatically enter power-save mode and dim to the Asleep Brightness setting. If you need to see the display, a tap on the screen will brighten the device again for a short period of time.
Wi-Fi Tips
You’ll find two major factors in your connection: your iPads' mounts and the building/space itself. With that said, we have suggestions that have been shown to help with Wi-Fi stability.
1. On the device, turn off "Ask to Join Networks.” This is off by default. Turning it on causes devices not to reconnect and to display a dialog. This dialog will crash guided access mode and reboot the iPad if enabled.
2. If using MDM, don't override MDM network settings with settings directly from the device. This can cause devices to end up off the network.
3. Use a 2.4 GHz-only network. Newer versions of iOS have a difficult time connecting back to dual-band wireless. In our own office, we set up a hidden SSID only on 2.4 GHz and then attached devices.
4. Perform a site survey for wireless coverage. Wi-Fi is a form of RF or Radio Frequency. While RF will traverse most solid objects, it has difficulty with thick or close-together metal. Make sure that there is good wireless coverage for each device.
5. Make sure that wireless broadcast powers aren’t turned up (too much). This creates problems for low-power Wi-Fi signals to go up to the APS. If you must, add more APs and turn them down low but place them close to the iPads.
In connection with my suggestion about a specific SSID for 2.4 GHz, iPads are very jealous of the AP they first connect to. If the iPad is load balanced from one AP to the next, it will say the network is invalid and refuse to reconnect automatically. Having a dedicated SSID seems to help alleviate this.