Using the Map to Book a Room on Room Display
The EventBoard Maps feature is for select licenses only, so this may or may not apply or be available to all users.
In the map view, The user can quickly see which rooms are available and where preventing anyone from running around room to room looking for an open meeting space. The user can view different floors and buildings and then book an available space anywhere, right from the display.
1. If available, tap the Map button on the Room Display screen.
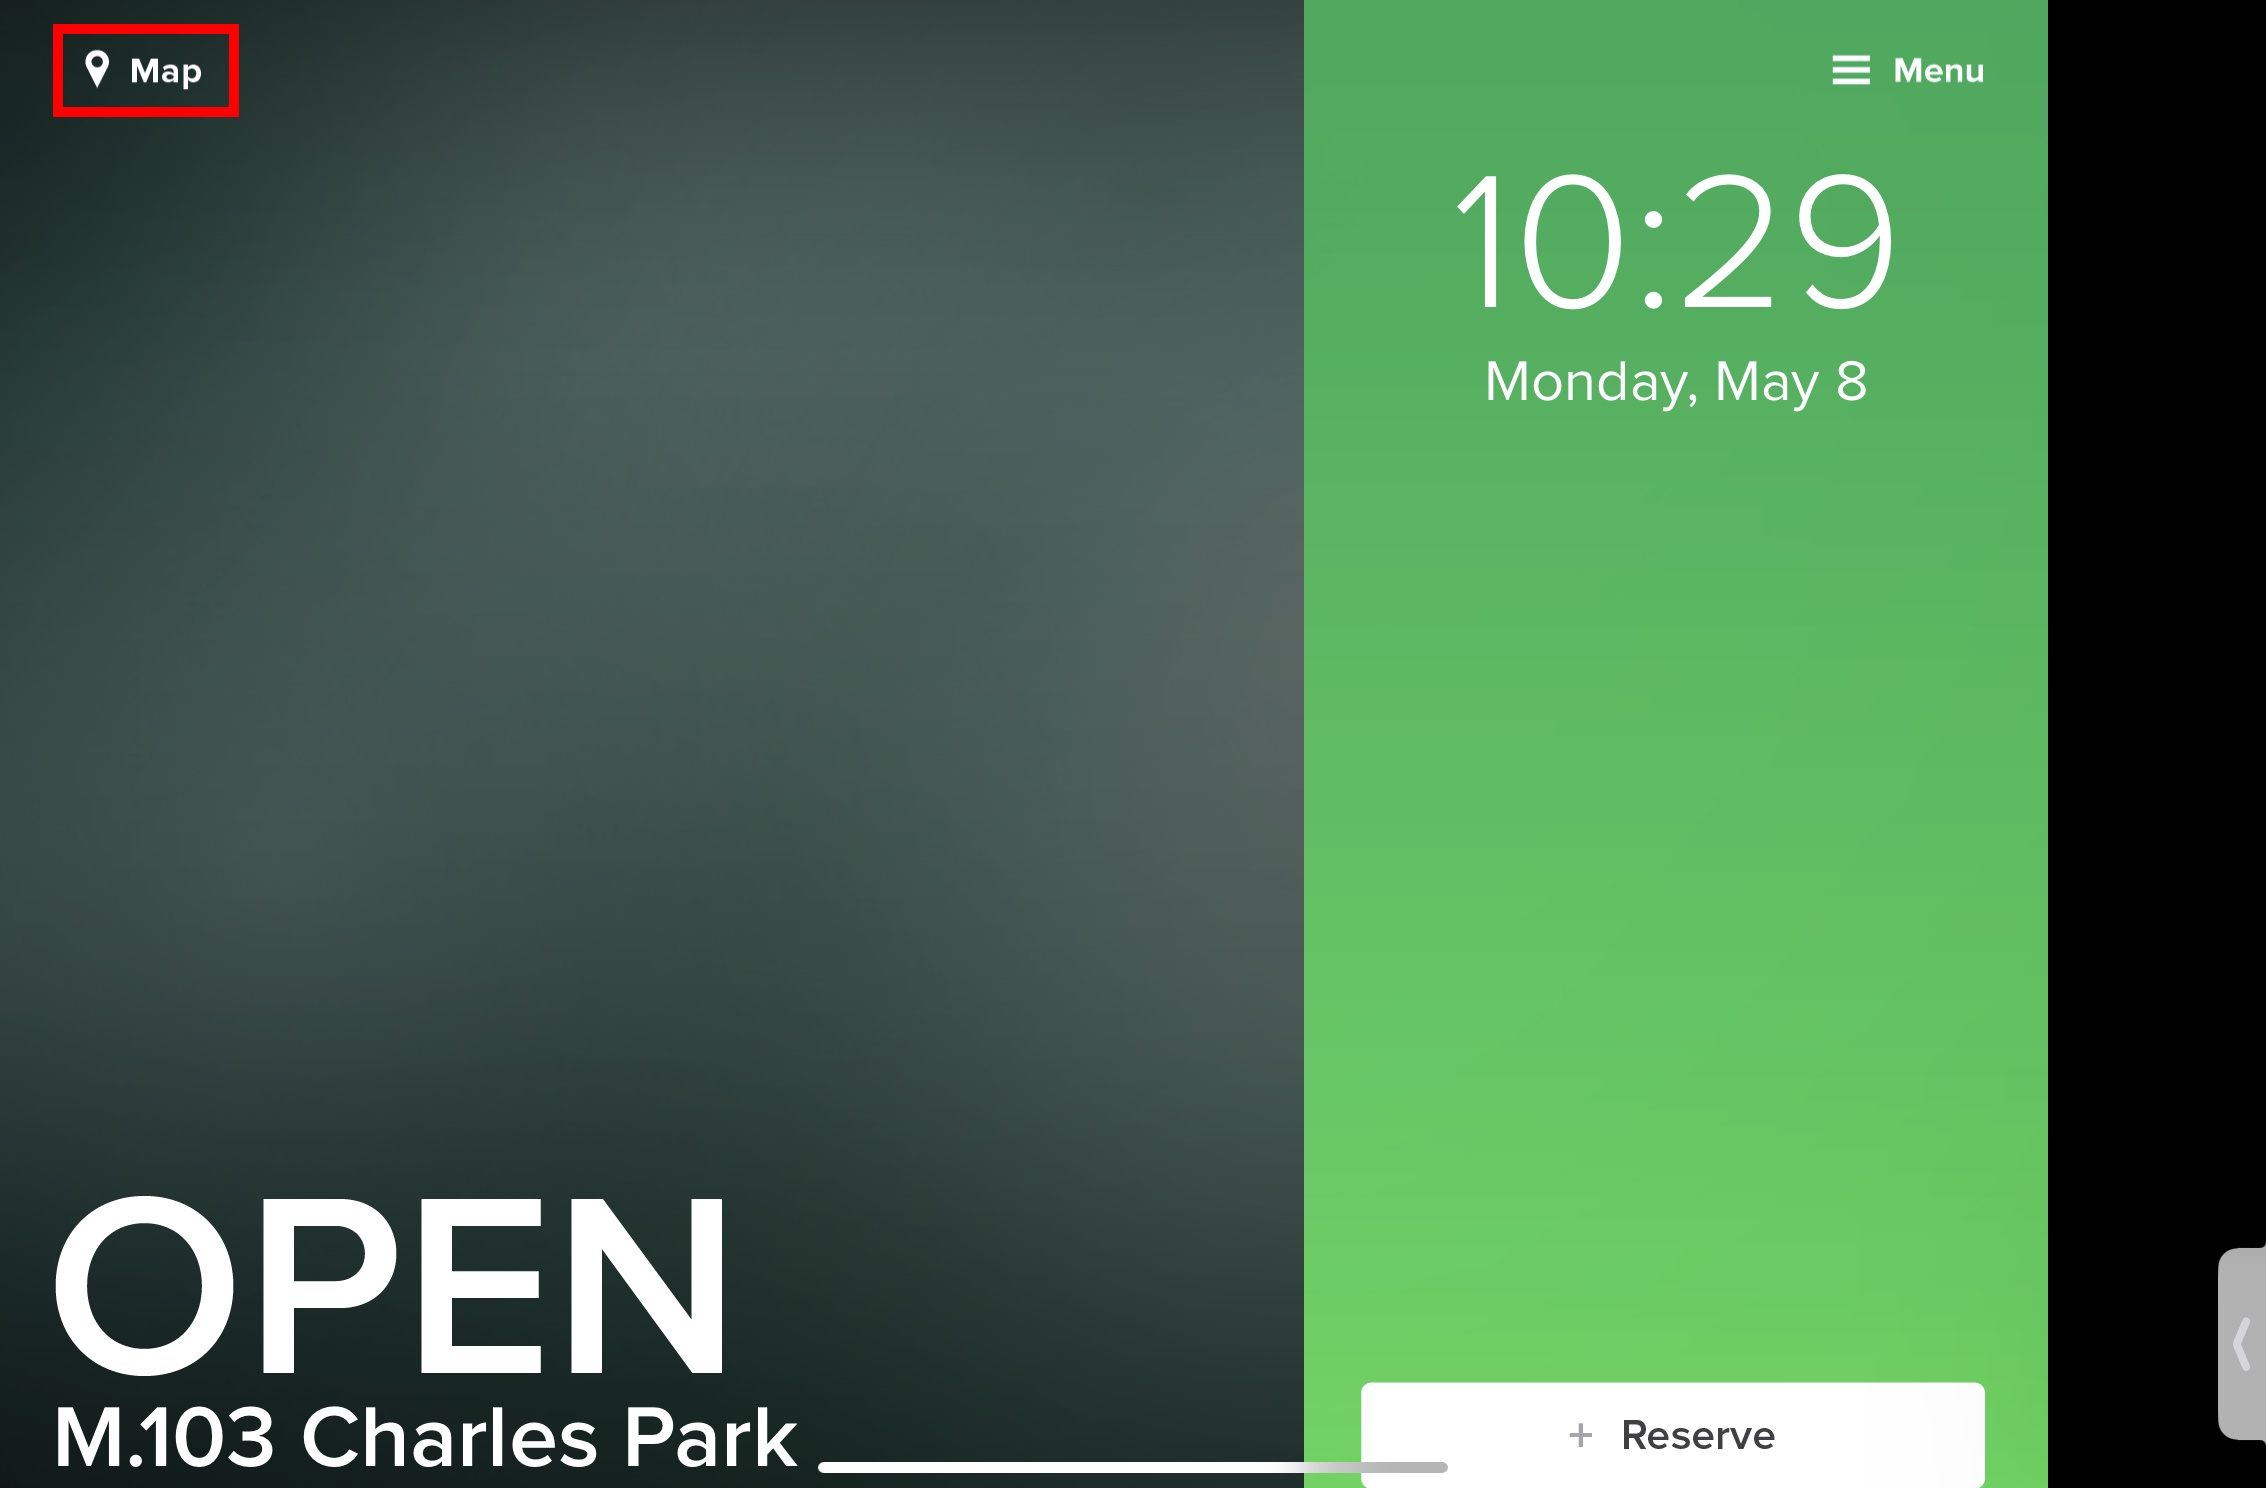
A map view of the floor will be on display. Keep in mind that in some instances, the user may see different Campuses, Buildings, and Floors from this view.
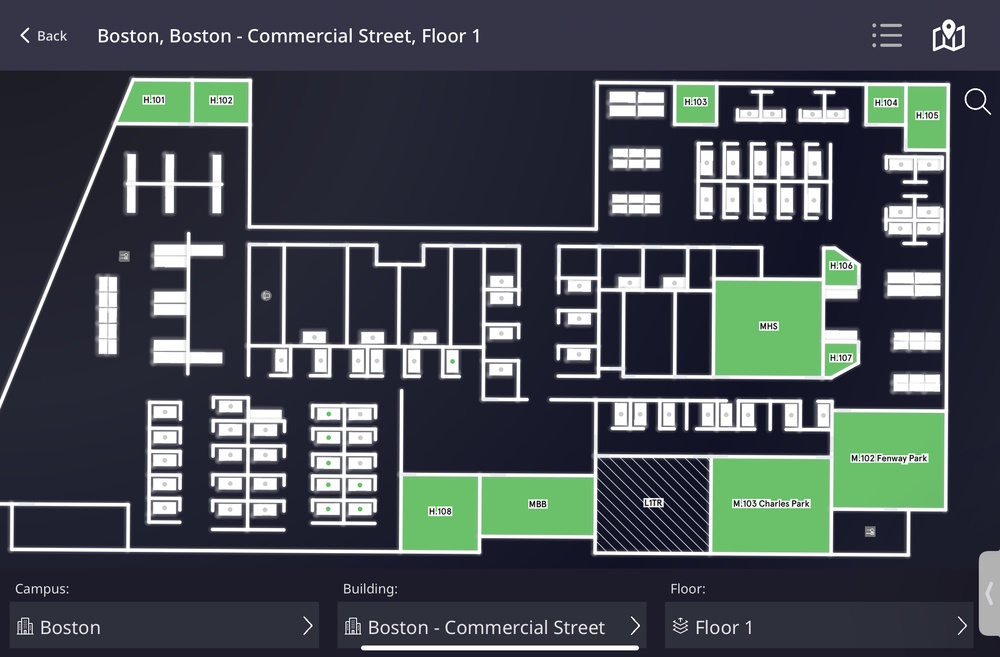
2. Then tap on a room you’d like to reserve. Its Room Information will appear.
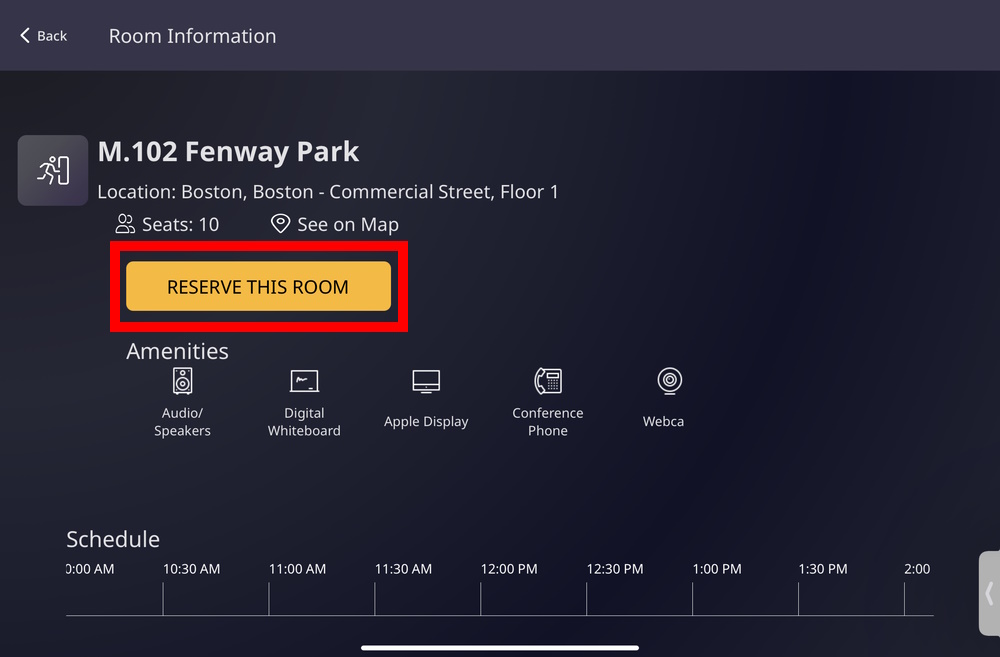
3. Tap Reserve This Room.
The following screen will appear.
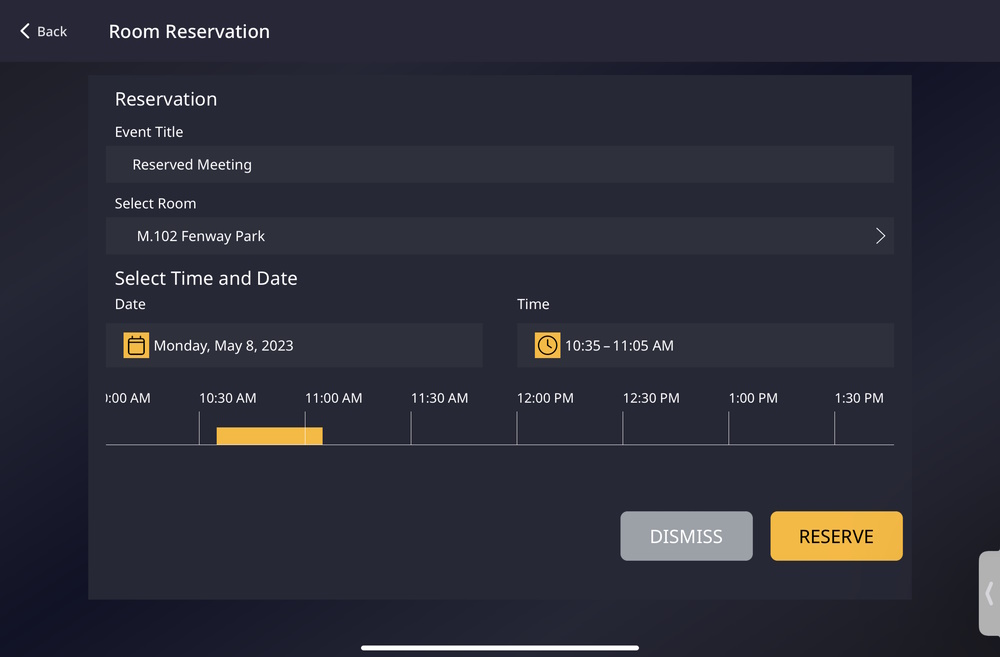
From this screen, the user can do the following:
- Change the Event Title (or meeting name) by tapping on "Reserved Meeting" under the EVENT TITLE header.
- Change the room from the one listed (if desired) by tapping on the room name under the ROOM header.
- Change the event date from Today to another in the future by tapping on the date under the DATE header.
- Select the time for the meeting using the Timeline feature or tapping the Time area.
- Teem will only allow you to book for open, available time for a room. If the room isn’t available during your selected time, Teem will show a scheduling conflict.
4. Clicking on the Dismiss button will close this screen.
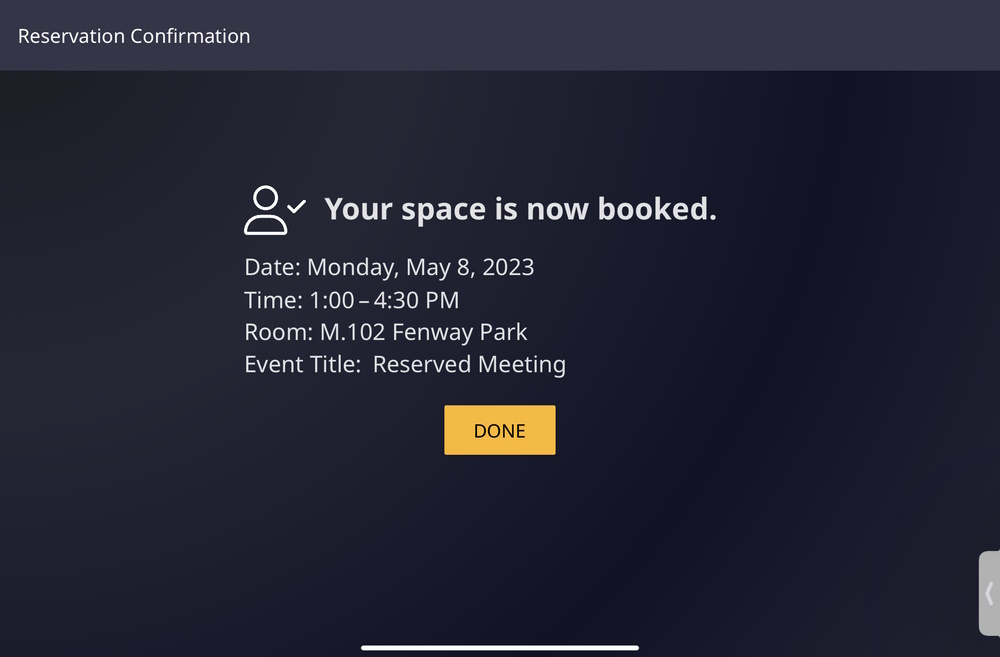
5. Once the meeting options have been set, tap the Reserve button to confirm the reservation. A room reservation confirmation screen will appear.