Create a Service Ticket from a Reservation
You must have the Service Request Module in order to add a ticket to the Reservations Module.
When you are using a space and need to create a service ticket, this can be done from the My Reservations screen or the Reservation Queue screen.
Create a Service Ticket from the My Reservations screen
1. Navigate to Reservations > My Reservations. The My Reservations screen displays.
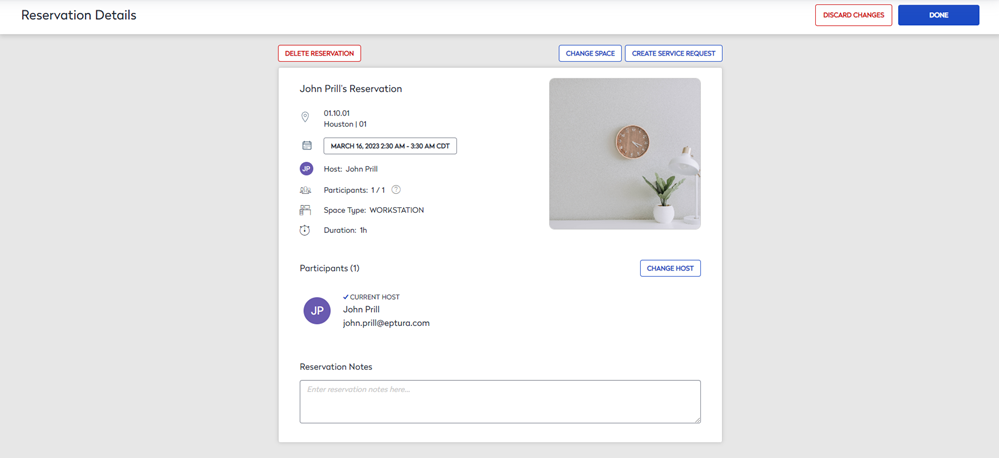
2. On the reservation, you want to create the ticket for, click the CREATE SERVICE REQUEST button.
The Create a New Request screen displays.
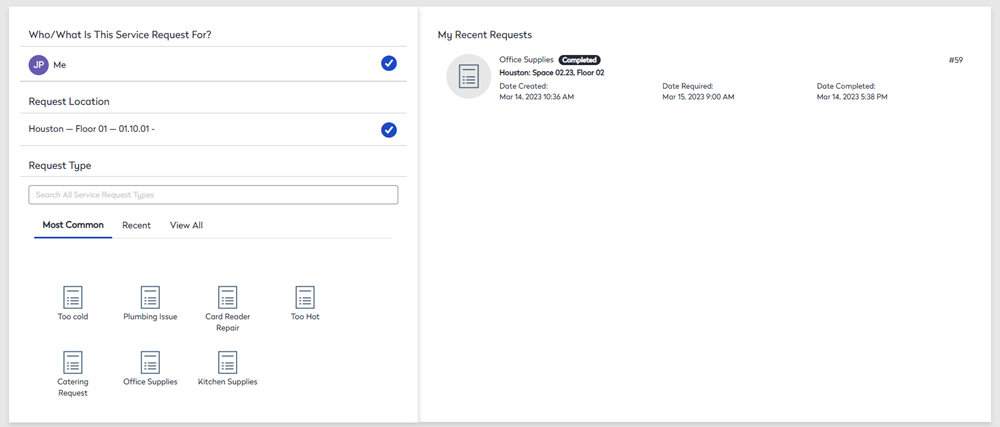
3. For Who/What is this Service Request for? Field, either:
- leave it as Me
- OR click the Me to change it to:
- Specific Asset - then search and select the asset.
- Someone Else - the search and select the person.
4. For Request Type either select a type from the Most Common list, Recent list, or View All.
The service request details screen displays.
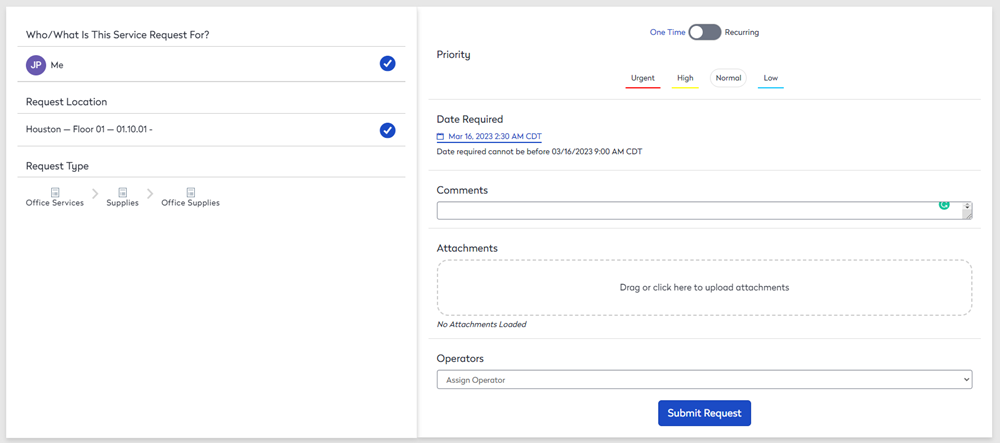
5. Select the toggle to indicate if the issue is One Time or Recurring.
6. Set the Priority as Urgent, High, Normal, or Low.
7. Set the date required.
8. In the Comments field, enter any comments about the issue.
9. In the Attachments field, either drag and drop the attachment or upload it.
10. From the Operator drop-down, assign the ticket to an operator.
11. Click the Submit Request button.
The reservation details screen displays.
Create a Service Ticket from the Reservation Queue screen
1. Navigate Reservations > Reservation Queue.
2. On the reservation, you want to create the ticket for, click the TICKET button.
The Create a Ticket screen displays.
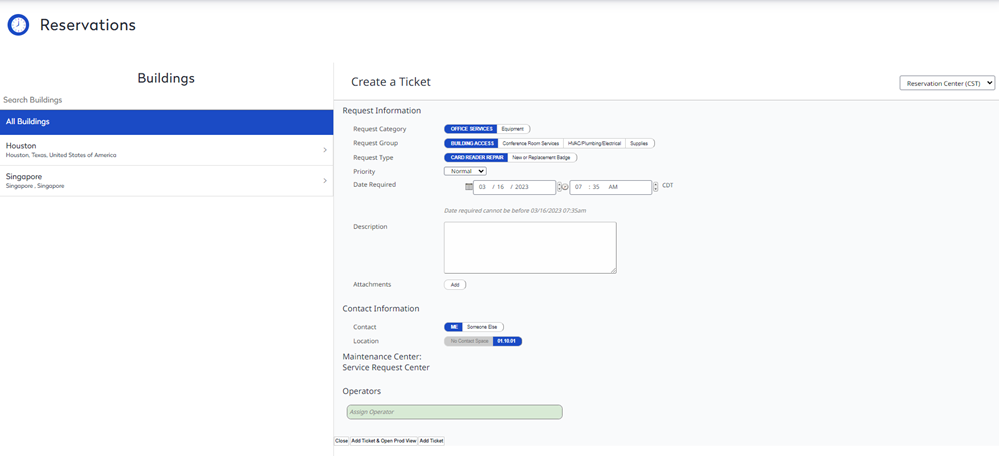
3. Select the request category.
4. Select your request group.
5. Select the request type. This is based on your Request Category and Request Groups selections.
6. Select the request priority.
7. From the calendar picker, select the date that you require this request to be completed.
8. Enter any applicable information about your ticket in the Description field.
9. If you have an attachment, click the Attachment button and then load the attachments.
10. Select the request contact, If the requestor is you, select Me or if the request is for someone else, then select Someone Else and then enter their name.
11. Select the request location. If the contact is you, select the My Space or select the space and then enter the space name or number.
12. Select the operator.
13. When ready, click either:
- Add Ticket button - The ticket is created.
- Add Ticket & Open Prod View button - The ticket is created, and then you can view it in the Service Request module.