Create a Report
The Insights module can be used to create your own custom reports. You can either create report or you can copy an existing report and then modify it.
Step 1. Access and Create a Report
-
Navigate to Insights > Create Reports. The Choose Your Data screen displays.

- Select the module you want to pull the data.
- Select the data.
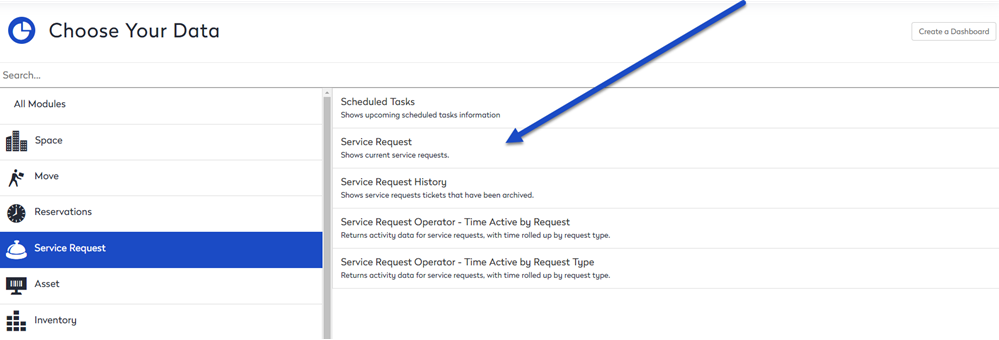
The Create a Report screen displays.
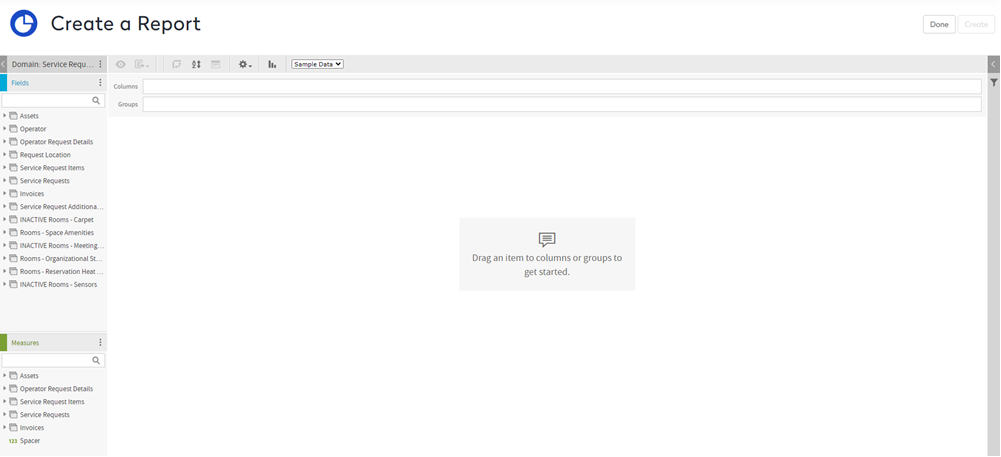
All the fields associated with the domain are selected automatically, and the Report Editor screen displays.
Step 2. Add Fields as Columns
You can add fields to the report's columns using a variety of methods.
- In the Fields section, click the folder to display the fields.
- To add a field you an either:
- double-click the field name.
- drag and drop the field to the Columns line.
- right-click on a field and from the menu click Add as Column option.
The field is added to the Columns line.

Create a Report vs Copy a Report
If you create a report then all available fields will display in the Fields section. However, if you copy from an existing report, there may be fields that do not display on the list of available fields in the Fields section. To see all the fields:
- Select the Domain's More Action
 icon and then click the Select Fields option. The Select Fields dialog displays.
 - From the Available Fields list, move any fields that you would like to display to the Selected Fields list.
Step 3. Add a Filter
If you want to filter the report's data then you can add filter.
- Right-click on the column and the pop-up menu displays.
- Click the Create Filter item.

The Filter displays.
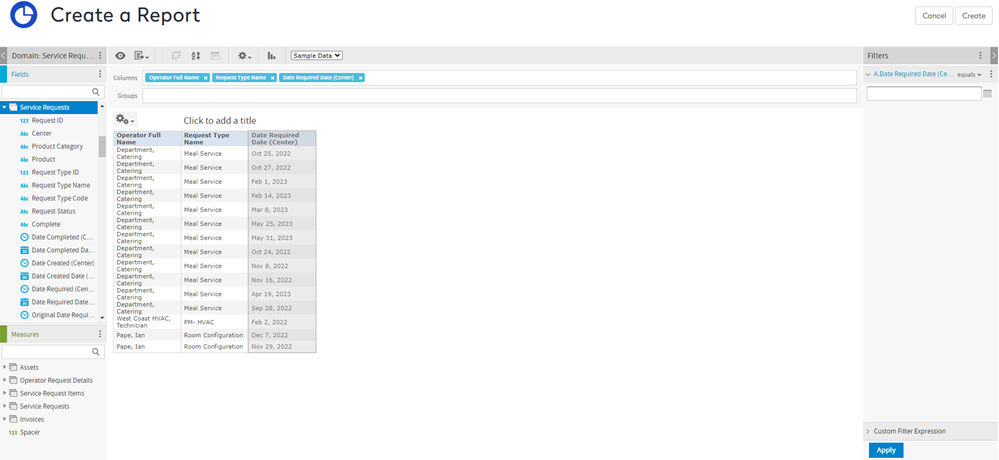
- Compete the filter.
- Click the Apply button.
The result will be displayed.
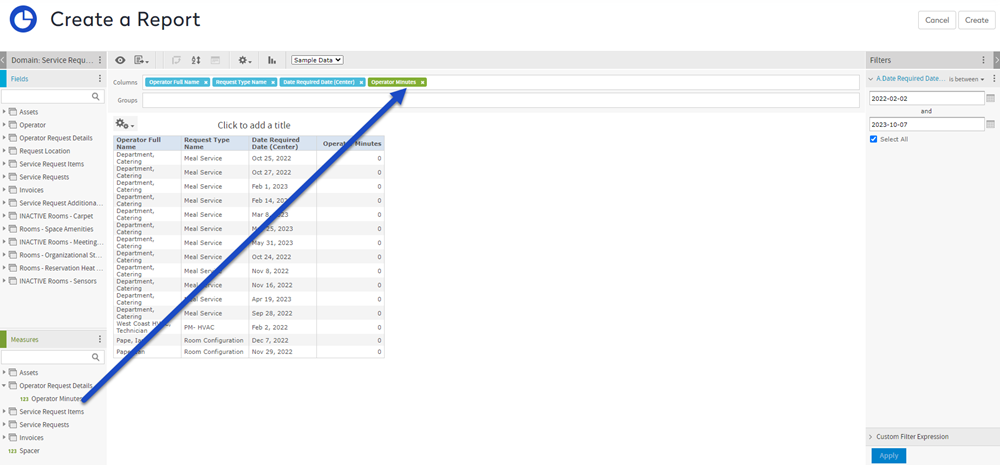
Step 4. Optional - Add a Measure
If you want you can add measures to your report and there are default measures in in data set.
From the Measures area, complete the following:
- Click the folder to display the measures.
- To add a field you an either:
- double-click the measure.
- drag and drop the measure to the Columns line.
- right-click on a measure and from the menu click Add as Column option.
The measure is added to the Columns line.
Step 5. Optional - Create your own Measure
If you need to create your own measure, then this can be added to your report.
To create a calculated measure, complete the following:
- From the Measures area, click the More Actions
 icon.
icon. - From the Hover over the Option icon in the Measures section and select the Create Calculated Measure... option.
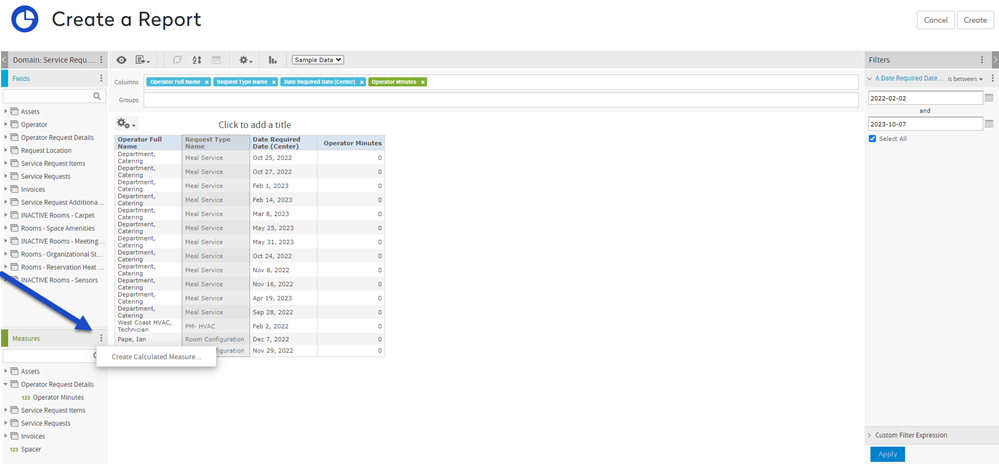
The New Calculated Measure dialog displays.
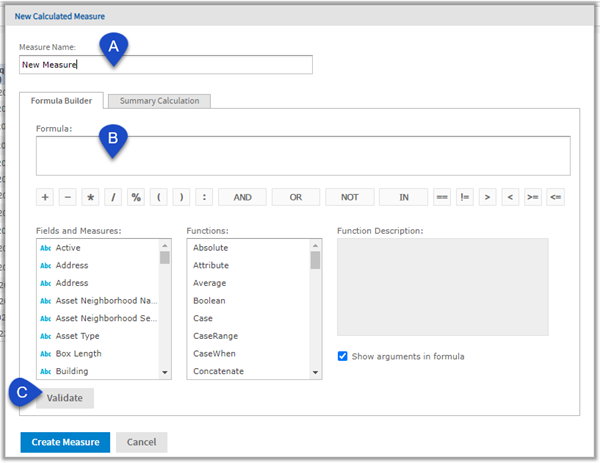
- Complete the formula and validate:
- (A) Measure Name - this is the new measure's name.
- (B) Formula Builder - this where you can add the fields, measures, functions, and logic to define your formula. There is a formula cheat sheet below, which is designed to help you create measure columns for your report.
- (C) Validate - when you are ready you can click the Validate button to check if your formula will work. Remember that each function has different criteria for what is considered valid, so complex functions can require both trial and error as well as additional research. Feel free to dive in and experiment as that is the best way to learn!
- After you have validated formula, click the Create Measure button. The new measure is available in the Measures section.
- To add a field you an either:
- double-click the measure.
- drag and drop the measure to the Columns line.
- right-click on a measure and from the menu click Add as Column option.
The measure is added to the Columns line.
Create Measure - IF Example
In this example, you don't want to display notes on the report, but you want to know whether notes have been entered for mail items on the report.
For this particular measure, use the following formula:
IF(Contains("Notes", ' '), 'Notes Added', 'No Notes')
To break this down into parts, you are telling the report that IF the "Notes" field Contains '(a space)':
- read this field value as true and display 'Notes Added' in the column
- otherwise, read the field value as false and display 'No Notes' in the column
When you are finished entering your formula, click the Validate button to determine whether your formula is valid.

Step 6. Save a Custom Report
When you have finished the report, you will need to save it.
- Click the Create button in the upper-right corner of your screen. The Save Report dialog displays.

- In the Name field, enter name of your report.
- In the Description field, enter information about your report.
- If you want your report to be only available to you, check the Private check box.
- Click the Save button to save your report. The custom report is saved.
- Click the Done button and you report will be generated.
Formula Cheat Sheet
Use the following formulas to help you create the corresponding report type.
Space Measure Examples
|
Measure Name |
Description |
Formula |
|
Area per Occupant |
Square footage per user |
("Area" / "Occupant Count")
|
|
Number of Rooms |
Number of rooms |
CountDistinct("Room Name", 'Current')
|
|
Ratio |
Percentage of rooms |
PercentOf("Number of Rooms", 'Current')
|
|
Area per Room |
Square footage per room |
("Area" / "Number of Rooms")
|
|
Summary by Classification |
Building summary by Space Classification |
IF(StartsWith("Type", '13'), 'Interior Parking', IF(StartsWith("Type", '14'), 'Vertical Penetration', IF(StartsWith("Type", '15'), 'Void', IF(StartsWith("Type", '21'), 'Core Building Service', IF(StartsWith("Type", '22'), 'Primary Circulation', IF(StartsWith("Type", '32'), 'Expansion', IF(StartsWith("Type", '33'), 'Secondary Circulation', IF(StartsWith("Type", '41'), 'Business Support', IF(StartsWith("Type", '42'), 'Personnel Service', IF(StartsWith("Type", '43'), 'Training & Collaboration', IF(StartsWith("Type", '44'), 'Public Space', IF(StartsWith("Type", '51'), 'Office', IF(StartsWith("Type", '52'), 'Environmentally Controlled', IF(StartsWith("Type", '53'), 'Medical Practice', IF(StartsWith("Type", '55'), 'Laboratory', IF(StartsWith("Type", '61'), 'Commercial Space', IF(StartsWith("Type", '71'), 'Production', IF(StartsWith("Type", '72'), 'Warehouse', IF(StartsWith("Type", '81'), 'Residential', IF(StartsWith("Type", '91'), 'Alternative Workplace', IF(StartsWith("Type", '92'), 'Non-enclosed Roof', 'False')))))))))))))))))))))
|
| Vacancy | Calculated vacancy |
CaseWhen("Available Capacity" - "Occupant Count" <= 0, 0, "Available Capacity")
|
| Vacancy Percentage | Calculated percentage of vacancy |
"Vacancy" / "Capacity" |
Move Measure Examples
|
Measure Name |
Description |
Formula |
|---|---|---|
|
New Hires |
Display a count of new hire transactions. If necessary, replace the word 'New' with the applicable term. |
IF(Contains("Request Type", 'New'), 1, 0)
|
|
Terminations |
Display a count of terminate transactions. If necessary, replace the word 'Exiting' with the applicable term. |
IF(Contains("Request Type", 'Exiting'), -1, 0)
|
|
Moves |
Displays a count of move transactions. If necessary, replace the word 'Employee' with the applicable term. |
IF(Contains("Request Type", 'Employee'), 1, 0)
|
Service Request Measure Examples
|
Measure Name |
Description |
Formula |
|---|---|---|
|
Work Started |
Use to determine whether an open request as been started. |
IF(IsNull("Date Time Started"), 'Overdue - Not Started', 'Overdue - Started')
|
|
Overdue |
Use to determine if open request is overdue. |
IF(ElapsedMinutes("Date Required", Today(0)) >= 0, 'On Time', 'Overdue')
|
|
OnTime vs. Late |
Use to determine whether a request is on time or late. |
IF("Date Completed" < "Date Required", 'On Time', 'Late')
|
|
Overdue |
Use to determine whether an archived request is overdue. |
IF("Date Completed" > "Date Required", 'Overdue', 'On-time')
|
|
Required by Time (hrs) |
Use to determine whether the duration of the request is required. |
ElapsedHours("Date Required", "Date Created")
|
|
Time to Complete (hrs) |
Use to determine the time required to complete the request. |
ElapsedHours("Date Completed", "Date Created")
|
|
Percentage |
Use to determine the percentage of flagged requests to supplement the counts for Request Number. |
PercentOf("Request Number", 'ColumnGroup')
|
|
Scheduled Task |
Determine whether there is a scheduled task flag to help you differentiate between scheduled tasks and on-demand requests. |
IF("Scheduled Task Flag" == 'Yes', 'Scheduled Tasks', 'On-Demand Requests')
|
Reservation Measure Examples
|
Measure Name |
Description |
Formula |
|---|---|---|
|
Reservation Count |
Total number of reservations |
CountAll("Reservation ID")
|
| Average Cancelled | Average of cancelled reservations |
CountAll(IF("Cancelled" == 'true', "Reservation ID")) / CountAll("Reservation ID")
|