Datamax 4210 / Honeywell PM43 Mail Label Printer Installation and Troubleshooting
Installation
You will need to download and install the printer driver.
Step 1. Download the Print Driver
1. Navigate to the Downloadable Content article where the printer driver installation file is located.
2. Under the Driver Updates section, click on the Mail / Datamax Printer Drivers (software installer) or Mail / Honeywell PM43 (Software installer) link.
The printer driver is automatically downloaded.
Step 2. Install the Print Driver
1. Open the download folder.
2. Double click the Mail - Datamax Printer Drivers (software installer).exe or Honeywell_2022.2.exe file.
The message "Datamax print driver installer. Files will be extracted to C:/temp." displays.
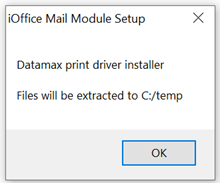
3. Click the OK button.
The License Agreement dialog displays.
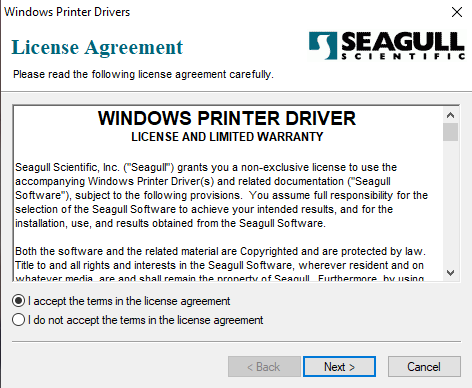
4. Select the I accept the terms in the license agreement option button.
5. Click the Next > button.
The Installation Director dialog displays.

6. You do not need to change anything on this screen. Click the Next > button.
The Installation Information dialog displays.
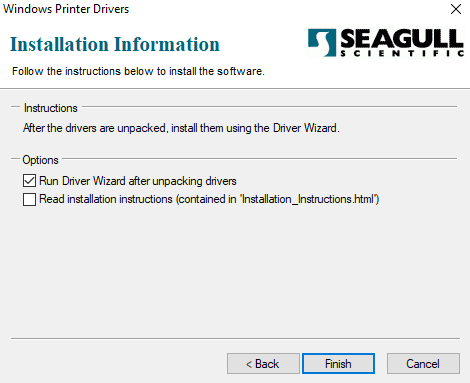
7. Clear the Read Installation Instructions check box.
8. Click the Finish button.
9. If you are challenged by User Account Control the message "Do you want to allow this app to make changes to your device?" displays.
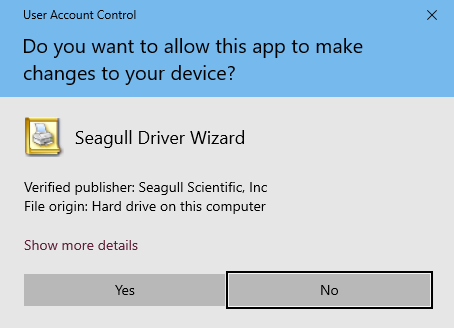
10. Click the Yes button.
Next, the Installation Wizard will run.
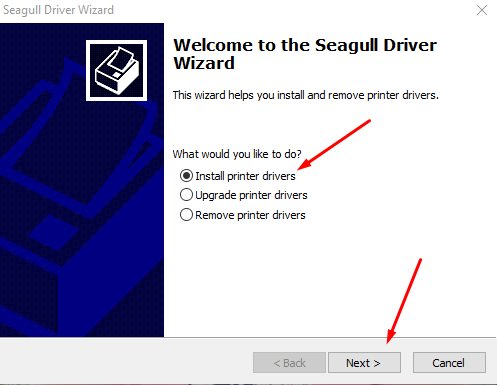
11. Select Install printer drivers option.
12. Click the Next > button.
The Specify Printer Module dialog displays.
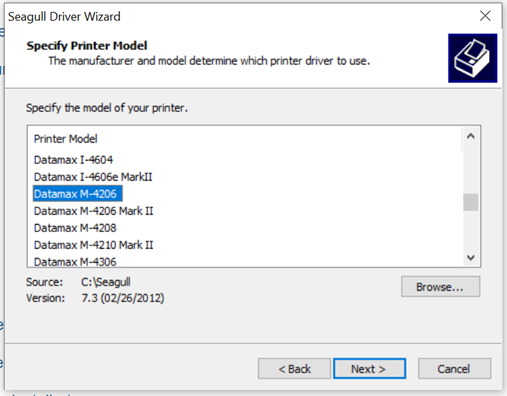
You may be asked to specify the printer model from a list of options.
13. From the list, select the appropriate printer model. The printer must be named “Datamax M-4206” for it to work.
14. Click the Next > button.
The Specify Port dialog displays.
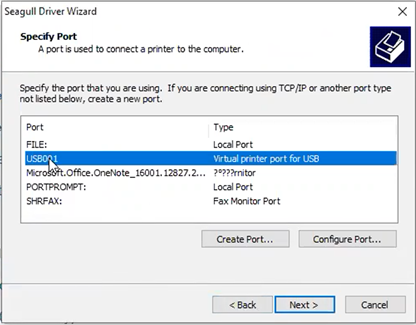
15. From the list select the USB001 port.
16. Click the Next > button.
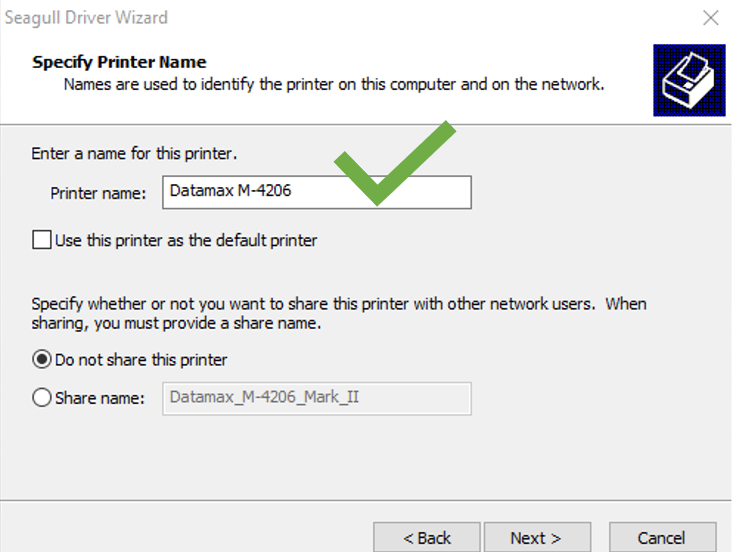
The Specify Printer Name dialog displays.
The printer name must be “Datamax M-4206” and if “Mark II” appears at the end, delete it. Also make sure there is no space after the 6.
INCORRECT
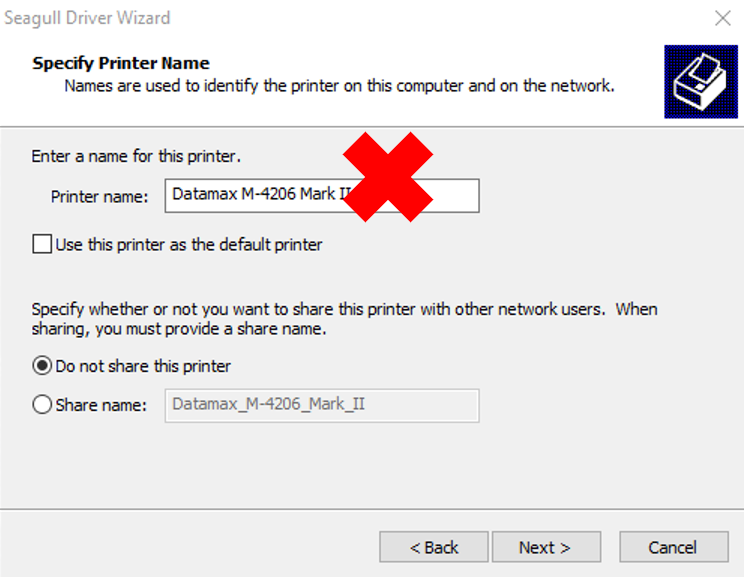
CORRECT
The Completing the Seagull Driver Wizard dialog displays.

17. Click the Finish button.
The installer will complete the installation.
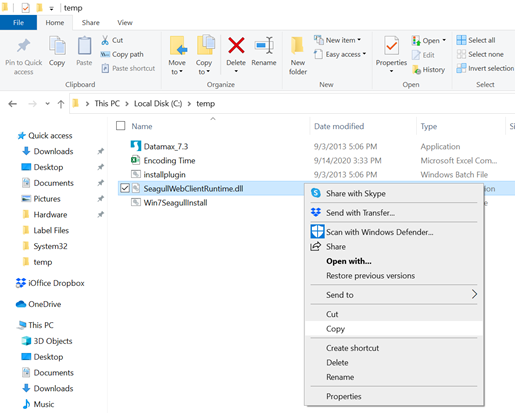
18. Navigate to C:\temp.
19. Find the SeagullWebClientRuntime.dll file.
20. Right-click on the file and select Copy.
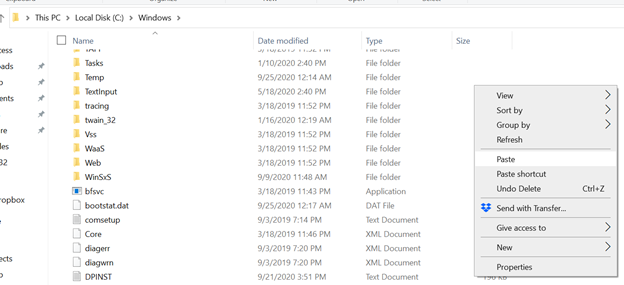
21. Navigate to C:\Windows\System32
22. Paste the file into the folder.
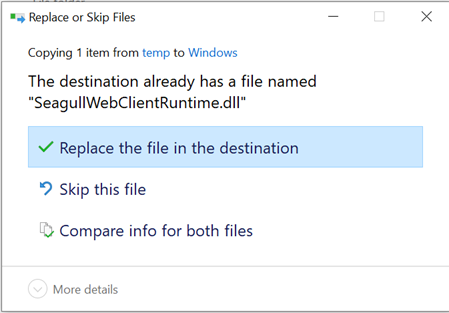
If you get a message that the file is already there, then replace it.
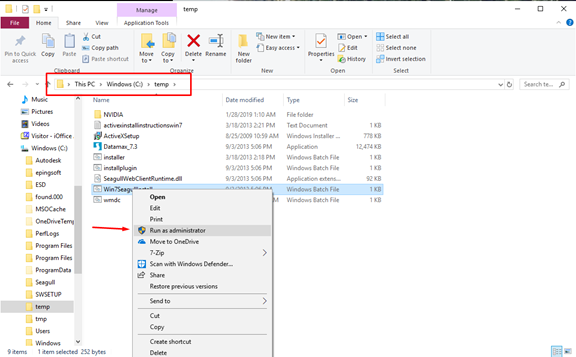
23. Navigate back to C:\temp folder.
24. Right-click on the Win7SeagullInstall.bat file.
25. Select Run as administrator.
You may be prompted with User Account Control.
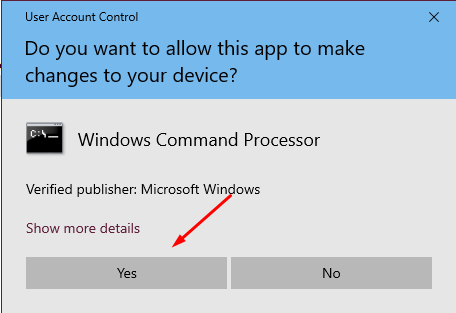
Click the Yes button.
The file will run, and if successful, it will say “SeagullWebClientRuntime.dll succeeded”.
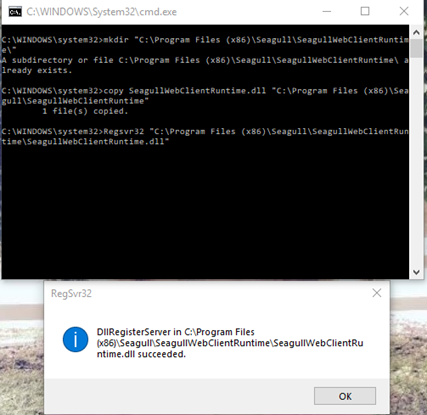
26. Click the OK button.
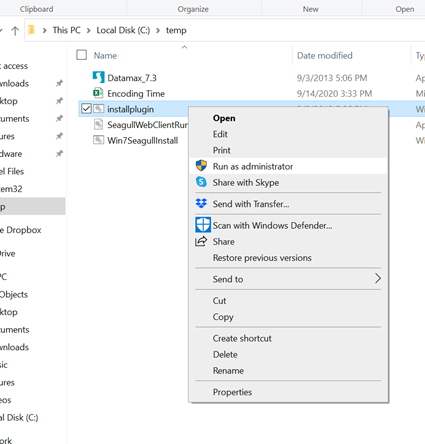
27. In the C:\temp folder, right-click on the installplugin.bat file.
28. Select the Run as administrator.
Step 3. Allow the Print Driver to work in the Eptura Workplace Web app
Internet Explorer
For the print driver to work in the Mail module you must open and use Eptura Workplace within Internet Explorer. If your company only has Microsoft Edge then you can change the browser settings to Internal Explorer mode.
First, we recommend you contact your IT team to find out if they manage the browser settings.
- If they manage the browser settings then you will need to request them to change the settings.
- If they don't manage the browser settings then you can follow the steps in this article called How to use Internet Explorer mode in the Microsoft Edge browser for Windows 11.
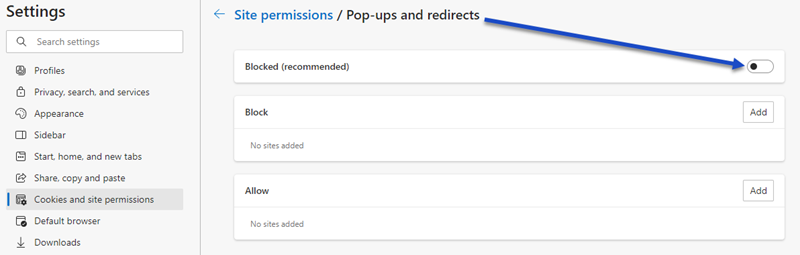
- Follow the below steps to Enable pop-ups in Microsoft Edge:
- In Edge, click the More Actions ••• icon, found at the top-right of your browser.
- From the menu, click Settings.
- From the Settings menu, click Cookies and site permissions.
- Under the All permissions area, click Pop-ups and redirects.
- Toggle the Blocked (recommended) to OFF.
When you have the Eptura Workplace site in Internet Explorer or use Microsoft Edge in Internet Explorer mode, you can complete the following:
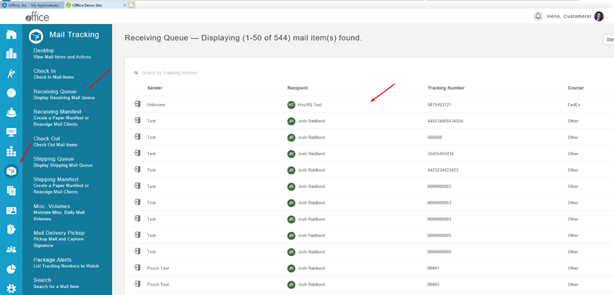
1. Navigate to Mail > Receiving Queue.
2. Click on a package.
Next, you will get a popup saying SeagullWebClientRuntime is not installed or is inaccessible.
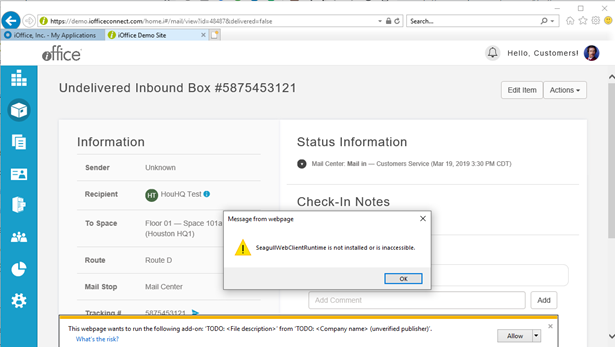
3. Click the OK button.
4. Locate the popup at the bottom of the screen.

5. Click the drop-down arrow next to Allow and choose Allow for all websites.
The page will refresh, next try to print a label again. If everything is installed correctly it will print.
Datamax Troubleshooting
Typically, it means that the printer is not installed correctly.

To resolve:
Option 1
- Check that you are either using the Internet Explorer browser or using Microsoft Edge in Internet Explorer mode.
Option 2
1. From Microsoft Windows navigate to Start > Settings > Devices and select Printers and Scanners.
2. Make sure the printer is named Datamax M-4206. The printer MUST have this name.
3. If not, Click on the printer and then click Manage> Printer properties > General, and you can change the name.
4. Repeat steps 18-28.
Option 3
- Try completely reinstalling the printer.
Related Topics
DYMO/DataMax Printer Template Codes
DataMax Label Order Information