Create a Reservation
The Hummingbird app can be used to reserve workstations and meeting spaces in your building. Employees have access to a variety of options, from simple search to filtered floor plan and list views, allowing them to locate and reserve a space appropriate to their needs.
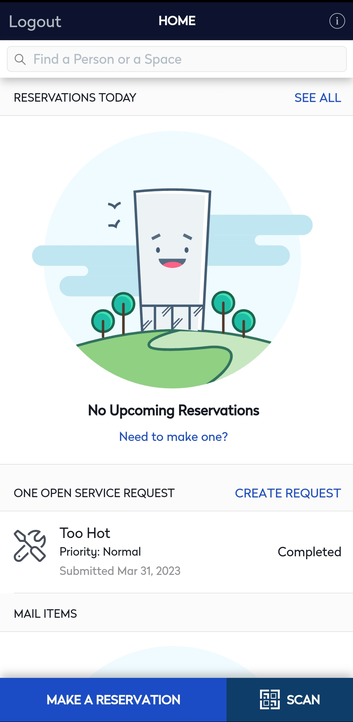
After you successfully sign in to the Hummingbird app you can create a new reservation.
- From the Hummingbird home screen, tap the Make a Reservation button.
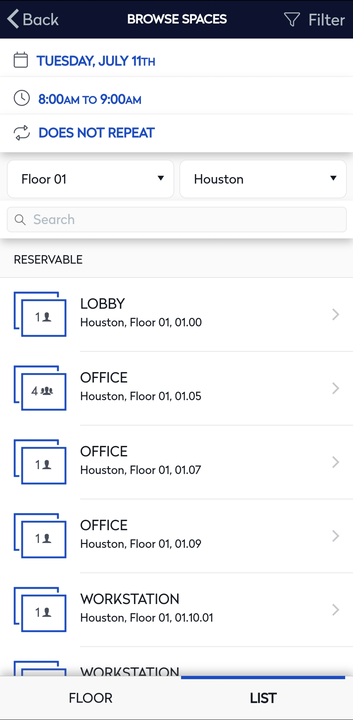
Available rooms display automatically on the Browse Rooms screen.
If the Space module is licensed, rooms display in the floor plan view by default. Otherwise, rooms display in the list view.
- If you have access to both views, you can either tap Floor or List at the bottom of the screen to display the corresponding view.

- Tap the date displayed at the top of the screen. The current date displays by default in the calendar.
- Either tap the default date or a future date.
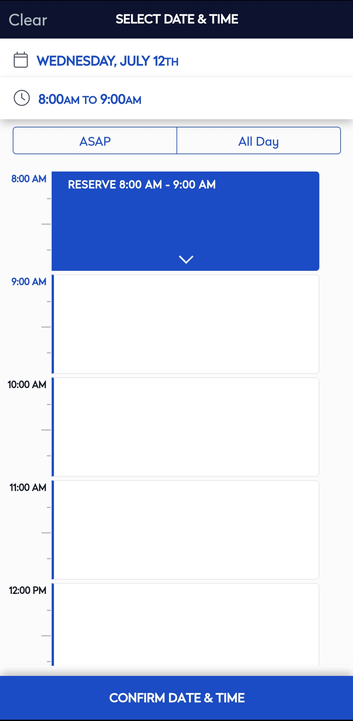
- To select the time, either:
- tap the time to quickly select an hour time range
- tap the time and then tap and drag the time range box down to adjust the range.
- tap the ASAP button to select the earliest available time slot.
- tap the All Day button to select the entire day.
- Tap the Confirm Date and Time button.
The available spaces for the date and time displays.
- If you are looking a particular space, then tap the Filter button.
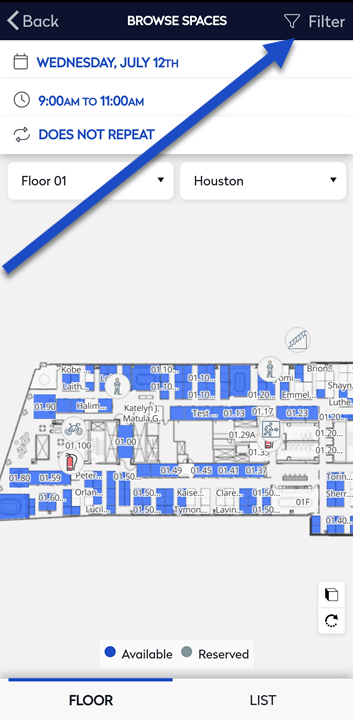
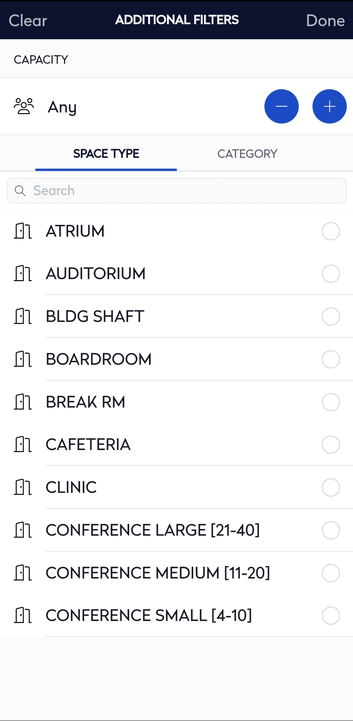
The Additional Filters display.
- Tap the capacity + and - icons to select the capacity of the space you want.
- From the Sapce Type tab, tap the space type filters you want to apply.
- Tap the Category tab.
- From the Category tab, tap the space category filters you want to apply.
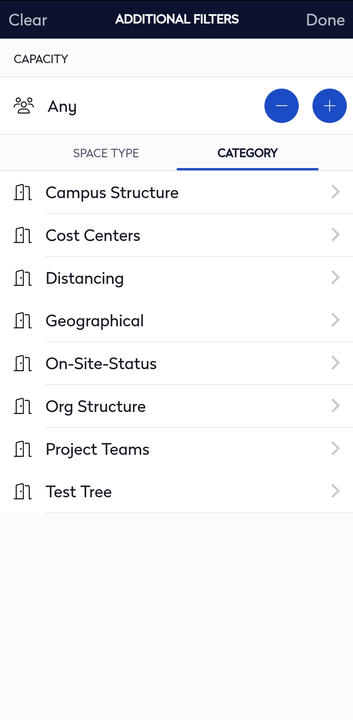
Tap the Clear button to clear all the filters.
- When finished, tap the Done button.
The available spaces matching the filters display on the floor plan.
- You can pinch and expand the screen to zoom into the spaces.
- Tap the room or workstation you want to reserve.
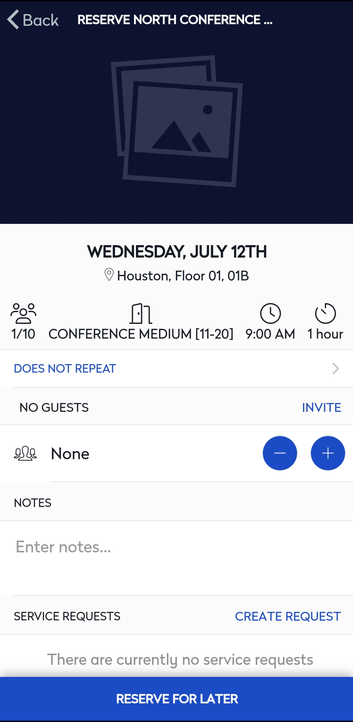
In this example a meeting room has been selected.
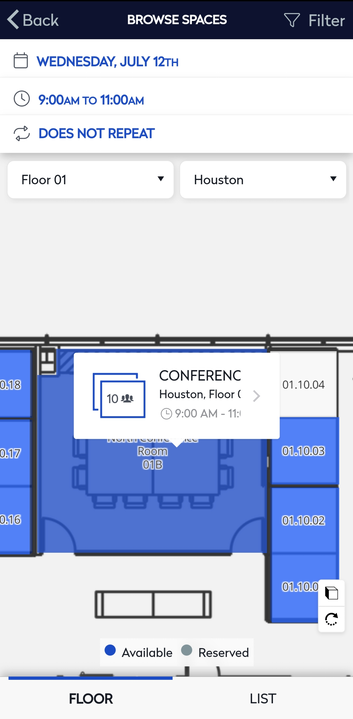
- Tap the space card. The space details screen displays.
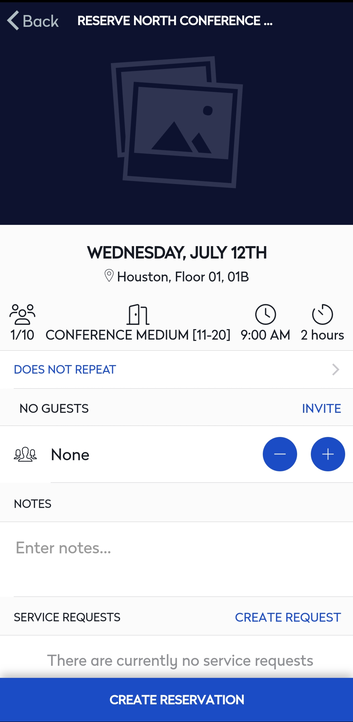
As this a meeting room you will be able to invite guests to meeting room reservation.
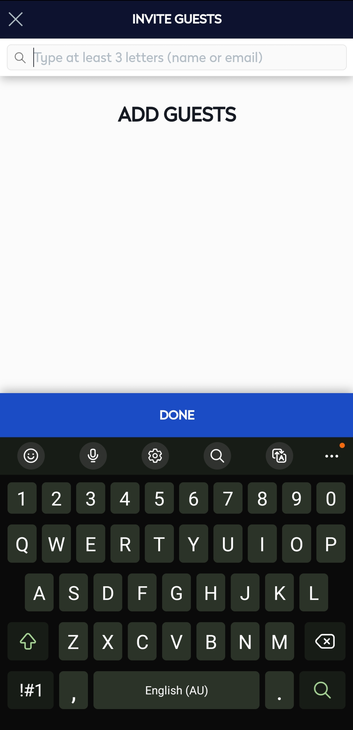
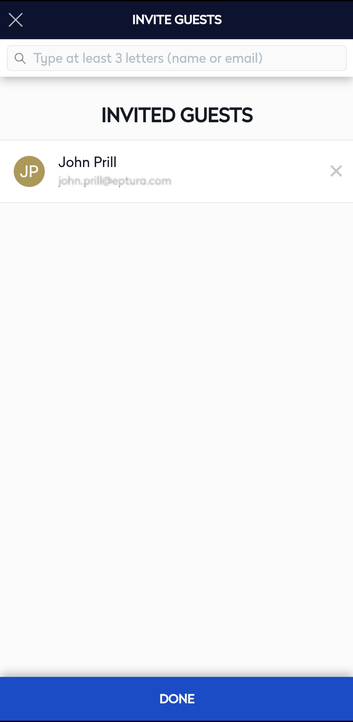
- Tap the Invite link and the Invite Guest screen displays.
- In the Search field, enter your guest's name.
- Tap guest's name.
- Repeat the steps 2 and 3 to add more guests.
- When finished, tap Done.
- If needed, in the Notes field, enter any additional notes.
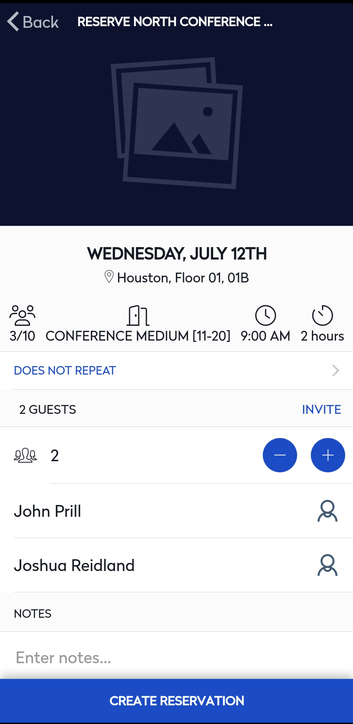
- Tap the Create Reservations button.
Your reservation is created, and email confirmations are sent to you and your guests.
If the space is currently reserved you will will see the Reserve for Later button. You can tap the button, quickly select a date and time, and then reserve the space.