Set up new Allocation, Depths, and Items
Level: Administrator
Before you can create the depths and items used to form the hierarchy of your Allocation structure, you need to create the parent Allocation. Items can then be maintained at any depth or level, within your structure.
Step 1. Create a new Allocation
1. Navigate to Admin > Allocations.
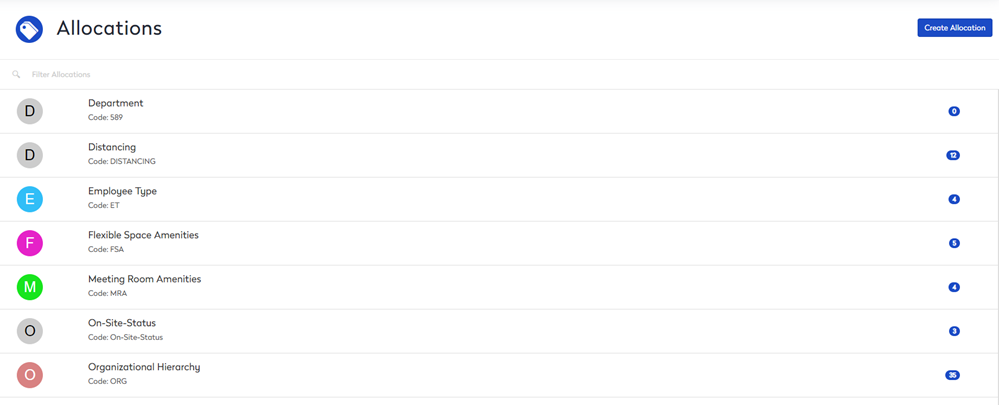
- Click the Create Allocation button. The New Allocation Info section displays.
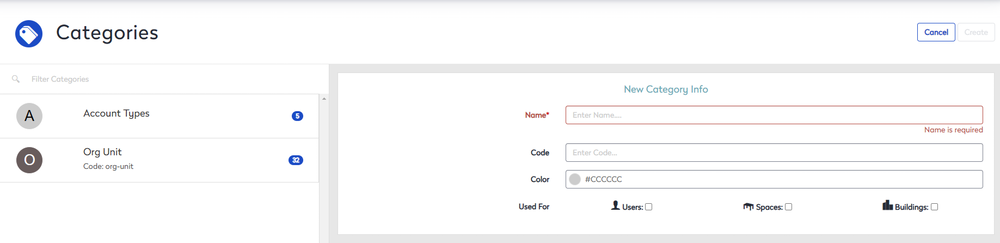
- In the Name field, enter the name of the Allocation.
- Optional - In the Code field, enter the code for the Allocation.
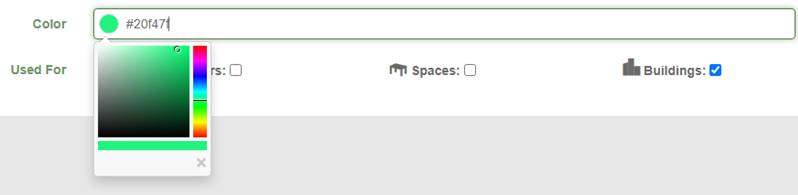
- Optional - From the Color field, enter in the Hex code or click the Color picker and then select a color.
- Optional - Indicate what the Allocation is used for; check the check box for either:
- Users
- Spaces
- Buildings
- Click the Create button.
The Allocation is added, and you can now define depths and items for the Allocation as needed.
Step 2. Add the new Depths
The depth of the allocation will depend on your organization's structure and reporting requirements. The Allocation depth can be defined to 0, 1, or 2 levels or it could go to further levels down.
Shallow Example
In this example, the Organization Unit Allocation, has the buildings sit under a city, and this is useful when you have a few buildings in your portfolio.
| Name | Depth |
|---|---|
| Department | 0 |
| Cost Center | 1 |
Deep Example
In this example, the Organization Unit Allocation, has the buildings under defined depths as your portfolio has many buildings in different locations.
| Name | Depth |
|---|---|
| Company | 0 |
| Org Unit Level 1 | 1 |
| Org Unit Level 2 | 2 |
| Org Unit Level 3 | 3 |
To add another depth, complete the following:
- Click the Add New button. The new line displays.
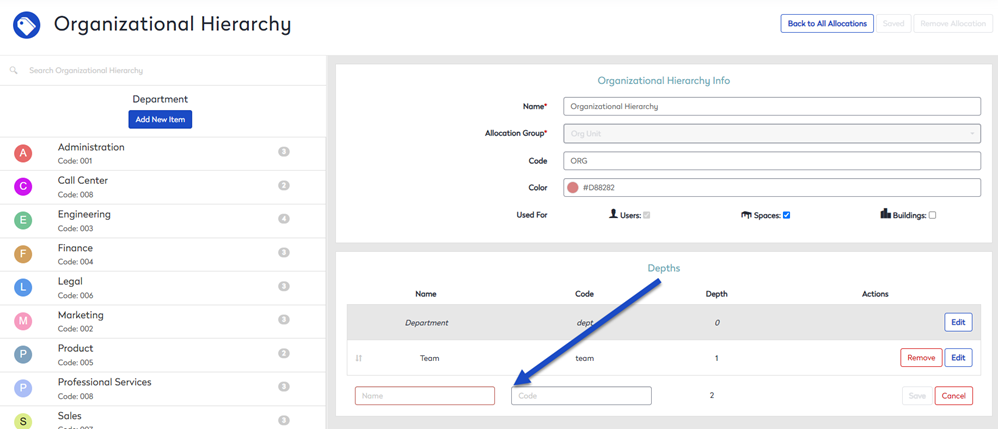
- In the Name field, enter the depth's name.
- Optional - In the Code field, enter the code.
- Click the Save button.
Step 3. Add the new Item
After you have defined the Allocation depths, you can add the items.
- Click the Add New Item button.
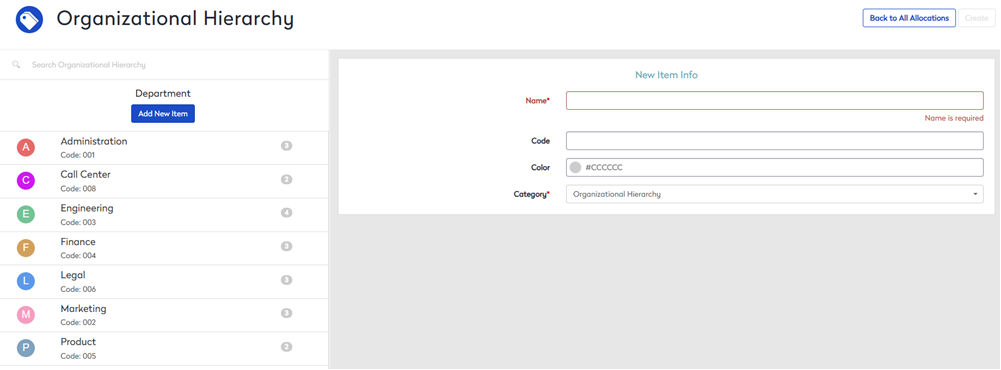
- In the Name field, enter the item's name. For example, Houston.
- Optional - In the Code field, enter the code for the Allocation.
- Optional - From the Color field, enter in the Hex code or click the Color picker and then select a color.
- Click the Create button.
- Repeat steps 1 to 5 to add more items.
- When you have finished, click the Back to All Allocations button.
Step 4. Assign the Users, Spaces, or Buildings to the Item
After the items are defined, you will need to assign either users, spaces, or buildings and this will depend on the usage of the Allocation.
Users
As an example, your users could be assigned to an Organization Hierarchy or Employee Type Allocation that defines their employment type.
You will need to manually assign the user to a different Allocation.
Spaces
As an example, your space could be assigned to a Flexible Space Amenities Allocation that defines what amenities are found in the space.
You will need to manually reassign the space to a different Allocation.
Buildings
As an example, your buildings could be assigned to a Region Hierarchy that defines the location of the building.
You will need to manually reassign the buildings to a different Allocation or remove the Allocation from the building.